Posts | Comments

Planet Arduino

Archive for the ‘espresso machine’ Category

If you think coffee people are opinionated, then you’ve never met an espresso person. There is a lot of art and science that goes into making the perfect little cup of espresso and a good barista will control every factor, from temperature to pressure to pour rate. It isn’t rocket science, but it isn’t far off. So the LanderShot Lunar Espresso Module, a CNC-machined high-tech espresso machine, has a fitting theme.

This is, at its core, a premium espresso machine that merges designer aesthetics with cutting-edge electronics. The founder of LanderShot, Ted Ciamillo, lives in the state of Washington, but is of Italian descent. He wanted to honor his Italian heritage — and the origin of espresso — so he turned to Arduino.

Temperature control is crucial when making espresso; heat the water too much and you’ll burn the coffee, but you’ll lose the flavor and strength if you heat it too little. For that reason, the Lunar Espresso Module utilizes PID (proportional-interval-derivative) control for the 1000-watt heater. That ensures that water comes up to temperature quickly without overshooting the target, helping it go from 20 °C to 100 °C in just 180 seconds. A pneumatic lever lets the user increase the pressure to the desired level, with each stroke adding one bar.
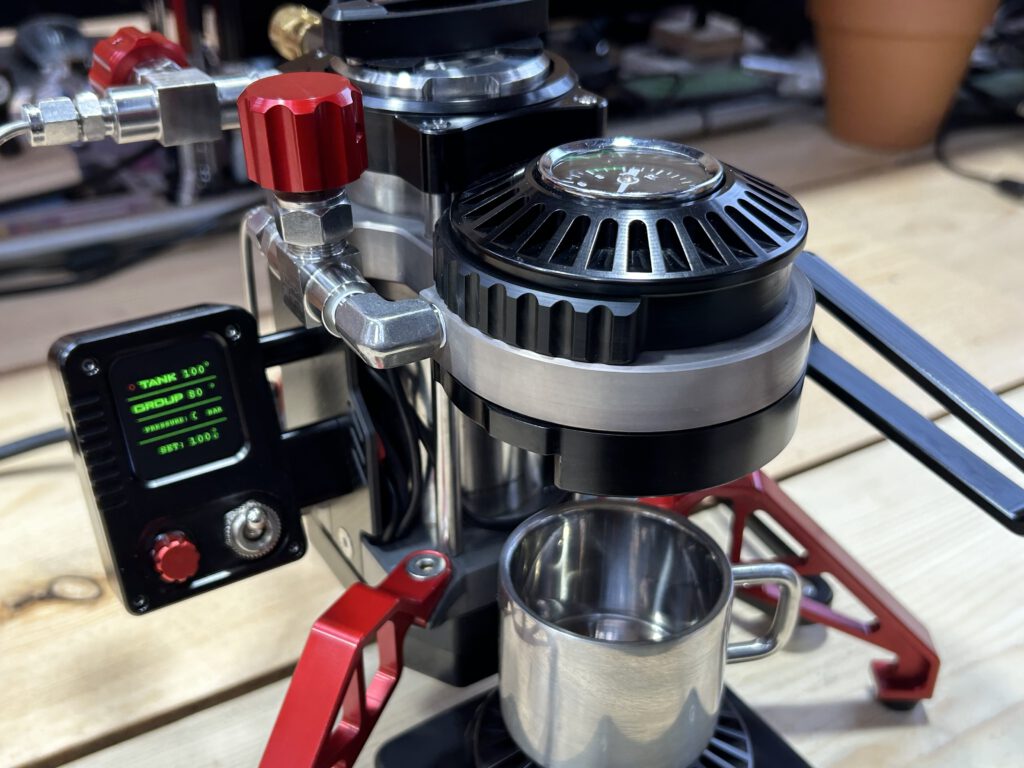
An Arduino Nano Every board controls the heat, monitors temperature and pressure, and displays the results on a small screen offset to the side. “The Nano Every is excellent at performing the several jobs in the machine. We chose it for its low-profile architecture, easy access to the pinouts, robustness and accessible price point. And, of course, we are pleased that the brains of our machine were designed in Italy,” Ciamillo says.

He adds that the greatest technical challenge was fitting all of the electronic components into the compact machine. While that may be true, we think that he’s selling himself short on the design and CNC work. The milled parts are stunning to look at, and we can only imagine that they’re even more pleasing to touch while pulling a shot.Ready to take your daily coffee to new heights? A limited number of LanderShot Lunar Espresso Module machines are available for pre-order and should ship out in June.

The post LanderShot is an out-of-this-world espresso machine appeared first on Arduino Blog.

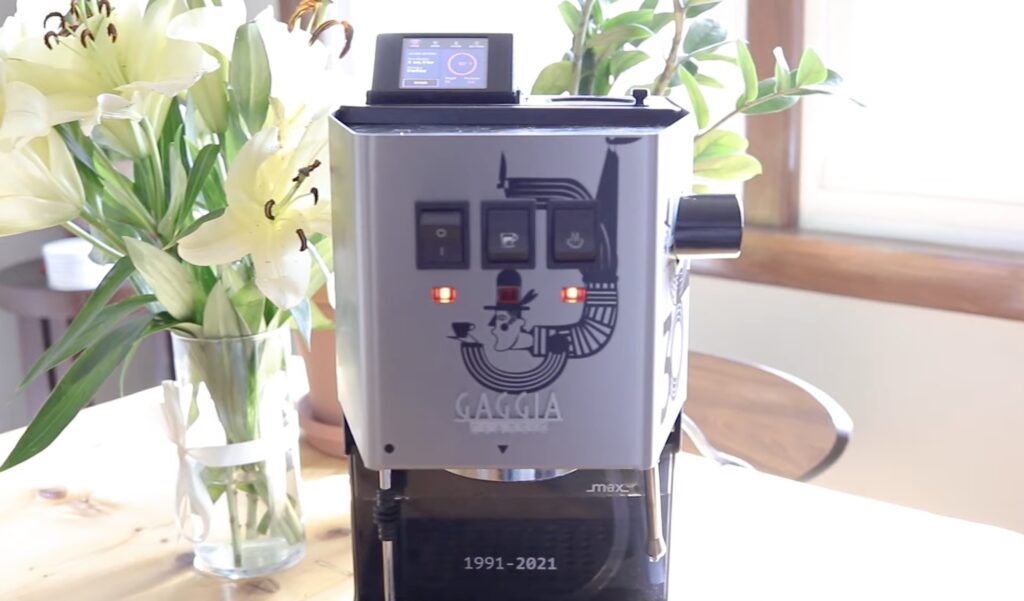
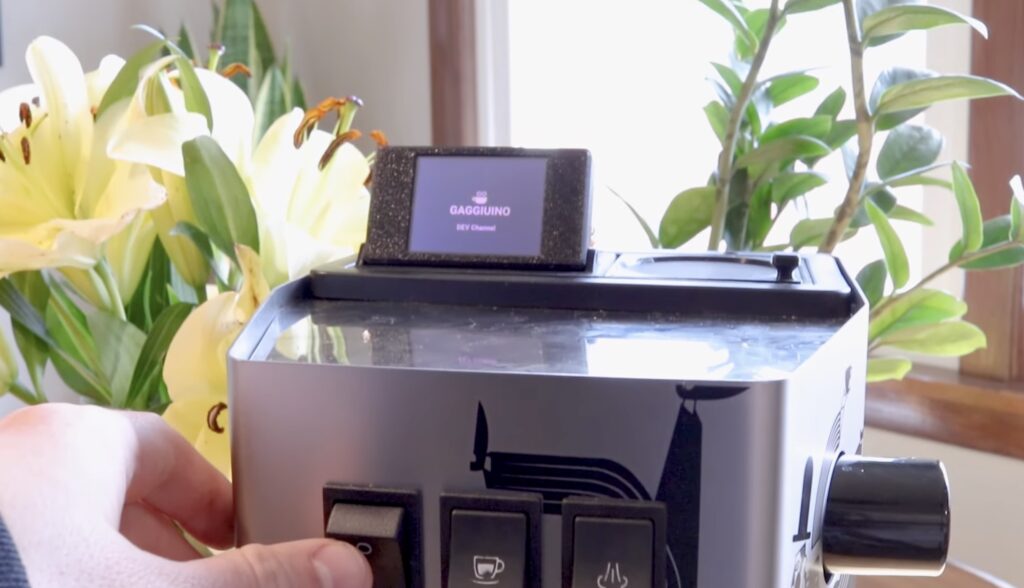
There are few beverages on this planet that enthusiasts take more seriously than espresso. Aficionados care about and tune everything from steam pressure to bean roasting temperature. But espresso machines that provide both accurate and precise adjustments are very expensive — easily several thousand dollars. Fortunately, you can tackle the Gaggiuino project to upgrade an affordable Gaggia espresso machine to something comparable to a high-end machine.

Gaggia espresso machines cost less than $500 and they’re quite good for that price point, but they aren’t a match for something like a $6,000 La Marzocco Linea Mini. However, the building blocks are there; Gaggia espresso machines have high-quality parts, they simply lack precision electronic control. Gaggiuino addresses that shortcoming with a handful of affordable components. For around $100 worth of hardware, you can dramatically upgrade your Gaggia Classic or Gaggia Classic Pro to create an exceptional machine.

The hardware required for the Gaggiuino upgrade includes an Arduino Nano board, a 2.4” Nextion touchscreen LCD, a thermocouple, a solid-state relay (SSR), a pressure sensor, and a dimmer module. A few 3D-printed enclosures and mounts help to secure those components. After performing this upgrade, you’ll get a ton of great features. Those include: steam control, sensor graphs, manual flow control, a descale cycle, an auto shot timer, user profiles, and a nice UI to access and configure everything. Thanks to the new hardware, those functions all operate with great accuracy and precision, so you can dial in your perfect brew and get the same results every morning. 

The post Enjoy the ultimate espresso machine on a budget with Gaggiuino appeared first on Arduino Blog.

This thing has what plants crave! No, not electrolytes exactly — just water, light, and moisture polling every 30 minutes. We think it’s fitting to take something that once manufactured liquid liveliness for humans and turn it into a smart garden that does the same thing for plants.

So let’s just get this out of the way: the espresso machine was abandoned because it was leaking water from a gasket. [The Plant Bot] cleaned it up, replaced the gasket, and got it brewing, and then it started leaking hot water again from the same gasket. We might have gone Office Space on this beautiful machine at that point, but not [The Plant Bot].

Down in the dirt, there’s a soil moisture sensor that’s polling every 30 minutes. If the moisture level falls below the threshold set appropriately at a life-sustaining 42%, the Arduino is triggered to water the plant through a relay board using the espresso machine’s original pump. If the plant is dry, the machine will pump water for two seconds every minute until the threshold is met. [The Plant Bot] tied it all together with a nice web interface that shows plant data and allows for changes over Bluetooth.

[The Plant Bot] started by disconnecting the heating element, because plants don’t tend to like hot steam. But if the cup warming tray along the top has a separate heating element, it might be neat to reuse it for something like growing mushrooms, or maintaining a sourdough starter if the temperature is right.

Via r/duino

[Rhys Goodwin] has a wonderful Italian espresso machine, a Brasilia ‘Lady’. But the electronics in it are a bit outdated. So he decided to give the entire thing an overhaul, while keeping it as original as possible!

As far as espresso machines go, this model is pretty simple. It uses a 300mL brass boiler with a 3-position solenoid valve. The thermostat is one of those simple bimetallic button thermostats which sadly, aren’t even that accurate — you couldn’t build a simpler machine, there’s not even a microcontroller in it. [Rhys] had his work cut out for him.

Arduino. PID controller. LCD display. New custom machined components, including a polished aluminum face plate for the LCD! He didn’t skimp out on this restoration. He even designed his own custom PCB to house the Arduino and provide the outputs for his new electronics, impressive!

His build log is more of a gallery then a real log, but is a pleasure to scroll through — he put some serious thought and time into this project.

It’s quite similar to this custom espresso machine build we saw a few years ago.


Filed under: Arduino Hacks, cooking hacks


  • Newsletter

    Sign up for the PlanetArduino Newsletter, which delivers the most popular articles via e-mail to your inbox every week. Just fill in the information below and submit.

  • Like Us on Facebook