Posts | Comments

Planet Arduino

Archive for the ‘capacitive sensor’ Category

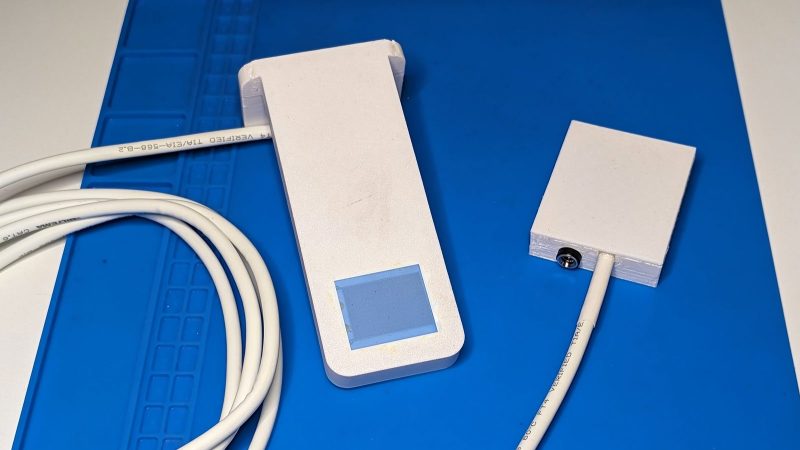
If you’ve got a smart home, or you just want to know how soaked your garden is getting in the winter, you might want to measure rainfall. There are a bunch of ways to go about it, and this capacitive rainmeter solution from [Magnus Thome] might just be the perfect solution you’re looking for.

Like many who came before, [Magnus] had experimented with traditional resistive-based sensors using copper traces to measure water levels. As the soil moisture measuring set learned as well, corrosion tends to promise a pretty short life for these designs. Capacitive sensors, on the other hand, can be isolated from the water itself, and thus sense the levels without being subject to such degradation.

[Magnus] pairs the off-the-shelf capacitive sensor with an ESP32 charged with reading it and reporting back to Home Assistant. It’s also outfitted with a heater to keep it at a constant temperature to avoid it freezing over during those cold and snowy Swedish winters.

It’s a tidy way to integrate a quality commercial sensor with a DIY smart home setup. If you’ve been whipping up your own neat sensor networks for your smart home, don’t hesitate to let us know. Video after the break.

As an avid fan of the show Dr Who, [Adam Sifounakis] saw a model for a laser-cut TARDIS that piqued his curiosity that eventually grew into a multi-week project involving multiple setbacks, missteps, revamps and — finally — gratification. Behold, his sound activated TARDIS.

First and foremost, assembling and painting the model was a fun puzzle — despite a few trips to the store — with a little backtracking on the painting due to impatience. Next, the creation of a pulsing soft white LED circuit timed with an audio clip to really sell the image of a mini-TARDIS proved to be a tedious ordeal, paying off in the end with a satisfying glow through the vellum-diffused windows on the model.

How to trigger the lights? [Sifounakis] initially wanted a capacitive sensor to trigger the sound effects, but that way lay dragons — and madness — so he went with snap-activated effect to activate the TARDIS like the Doctor himself. After struggling with building his own microphone setup, he switched to an electret mic with adjustable gain which worked like a charm. Setting up this TARDIS’ Adafruit Pro Trinket brain involved a snag or two, and after that it was smooth sailing!

Until he hit another hitch with the power circuit too, that is. Luckily enough, adding a capacitor to give the circuit a bit more juice on boot solved the issue. All that was left to do was dismantle and rebuild his circuit after all this troubleshooting and substitutions, and — finally — install it in his model.

With much satisfaction and a final rework of the LED pulsing effect, it was done. Check it out!

Be it in the shape of an infrasonic subwoofer, a motion-sensing alarm, or topping Christmas trees, the TARDIS never fails to amaze.


Filed under: Arduino Hacks, hardware

Strong is the Force, with this Padawan. To coincide with the latest installment of the continuing saga from a galaxy far, far away, [Rohit Gupta] built a Star-Wars themed interactive doormat. The doormat detects a footstep using capacitive sensing and plays a random Star Wars audio clip like the opening theme or the Imperial March or a famous phrase from the movie. Check out the video below the break.

The current setup is temporarily breadboarded, but we are sure it will be popular enough with his visitors to make him tidy it up. The hardware consists of an Arduino with an audio shield connected to a pair of speakers. A capacitive wire loop under the mat and a capacitive sensor tuned to the mat size wire take care of the sensing.

When Earth people step on the mat, the sensor triggers the Arduino to play a random audio clip from the SD card. The capacitive sensing is taken care by the TP223 1-key touch pad detector chip (PDF), which he mounted on a home etched board with SMD parts. The whole bundle is powered by a small “power bank” battery pack like the ones used to charge mobile phones.


Filed under: Arduino Hacks

IMG_2899-1024x768

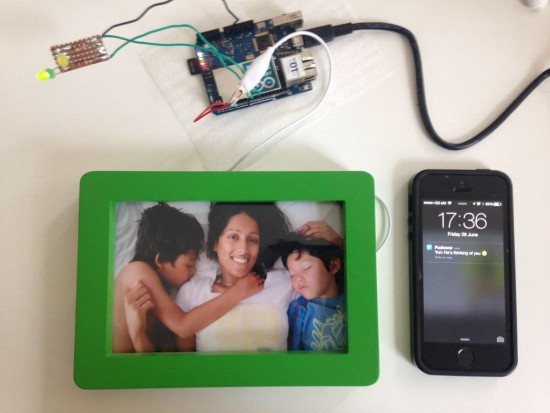
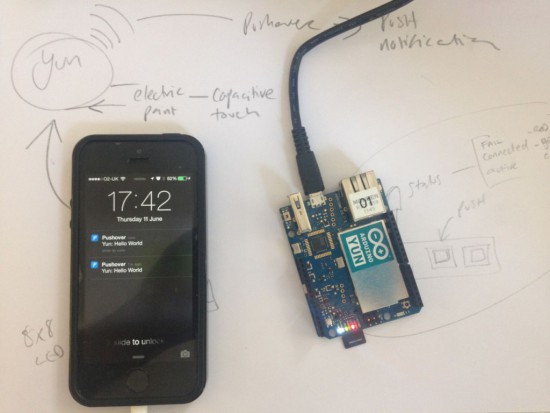
What happens when a creative technologist wants his family to know he’s thinking about them? He creates a project with Arduino Yún! IMissYou is a simple project transforming a picture in a connected object thanks to a capacitive layer made with Bareconductive Paint and inserted behind the photo. The ‘touch’ is detected by the Arduino through the glass of the frame by a spike in the values (with a basic Capsense library), sent to the internet via wi-fi and delivered to a phone with Pushover.

IMG_0146-1024x768

Martin Hollywood, the Arduino user who made  the project, wrote us:

Looking at the photograph of my family that I have on my desk one day, I missed them and wanted to be home. I touched the photo and realised that somewhere between those was the germ of the idea…

I wanted my family to know I was thinking of them, but I didn’t want to create two products; think GoodNight Lamp – I do love that project. In any case, there was no guarantee they would even notice a ‘blinking’ photo frame responding to my signal. Making the Receive a PUSH notification seemed like a no brainer, but the last time I developed for mobile was iOS 1! There are a number of service apps out there: Pusher, Pushingbox but I decided on Pushover. It had a 7 day trial period and good API support (I’ve since bought a license).

Take a look at his blog for more details and if you want to give him some tips to make it a real product.


  • Newsletter

    Sign up for the PlanetArduino Newsletter, which delivers the most popular articles via e-mail to your inbox every week. Just fill in the information below and submit.

  • Like Us on Facebook