Posts | Comments

Planet Arduino

Archive for the ‘soldering iron’ Category

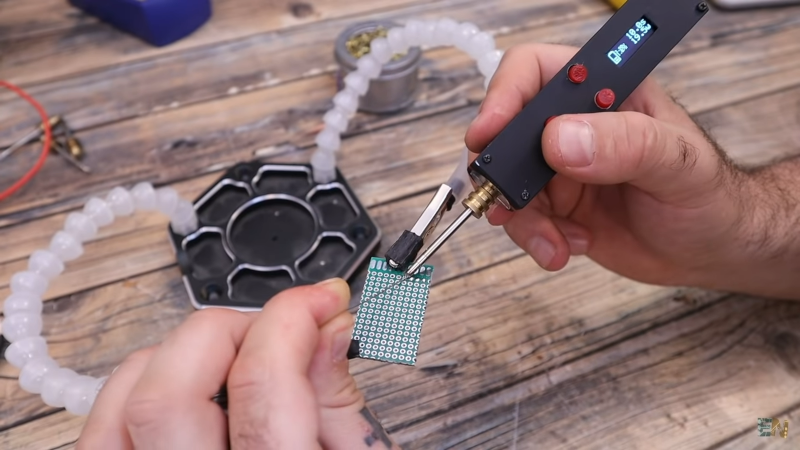
Small portable soldering irons are all the rage so [electronoobs] decided to build one on his own. While the design isn’t quite as sleek as a commercial unit, considering it holds its own batteries, it looks pretty good.

Of course, the question is: does it work? You can see in the video below that it does, melting solder in about ten seconds. The weight is about 100 g, so it should be very comfortable to use.

A small display shows operational parameters. We also liked the threaded mount for the tips. The tips need about 4 A from the battery which results in a 15 W iron. However, the tips don’t have a built-in thermocouple, so you can’t exactly temperature control the tip.

There was a bit of a problem with undervoltage detection, so you do need to be prepared to remove the battery manually if the voltage drops too low. This is somewhat painful, and we might have considered wiring a physical power switch to avoid having to open the 3D-printed case too often.

On the PCB is an Arduino, a MOSFET, and some instrumentation to monitor the battery current and the tip resistance. Naturally, you could do what you like with the firmware to make any number of customizations.

While the iron looks a little like a TS-100, that iron doesn’t contain batteries, so you have to carry an external supply or a battery. But there are commercial irons with batteries. Of course, there have been other similar projects, but we like the looks and expandability of this one.

A few months ago we brought word that [Electronoobs] was working on his own open source alternative to pocket-sized temperature controlled soldering irons like the TS100. Powered by the ATMega328p microcontroller and utilizing a 3D printed enclosure, his version could be built for as little as $15 USD depending on where you sourced your parts from. But by his own admission, the design was held back by the quality of the $5 replacement soldering iron tips he designed it around. As the saying goes, you get what you pay for.

But [Electronoobs] is back with the second version of his DIY portable soldering iron, and this time it’s using the vastly superior HAKKO T12 style tip. As this tip has the thermocouple and heating element in series it involved a fairly extensive redesign of the entire project, but in the end it’s worth it. After all, a soldering iron is really only as good as its tip to begin with.

This version of the iron deletes the MAX6675 used in V1, and replaces it with a LM358 operational amplifier to read the thermocouple in the T12 tip. [Electronoobs] then used an external thermocouple to compare the LM358’s output to the actual temperature at the tip. With this data he created a function which will return tip temperature from the analog voltage.

While the physical and electrical elements of the tip changed substantially, a lot of the design is still the same from the first version. In addition to the ATMega328p microcontroller, version 2.0 of the iron still uses the same 128×32 I2C OLED display, MOSFET, and 5V buck converter from the original iron. That said, [Electronoobs] is already considering a third revision that will make the iron even smaller by replacing the MOSFET and buck converter. It might be best to consider this an intermediate step before the DIY iron takes on its final form, which we’re very interested in seeing.

The first version of the DIY Arduino soldering iron garnered quite a bit of attention, so it seems there’s a decent number of you out there who aren’t content with just plunking down the cash for the TS100.

[Thanks to BaldPower for the tip.]

At this point you’ve almost certainly seen one of these low-cost portable soldering irons, perhaps best exemplified by the TS100, a pocket-sized temperature controlled iron that can be had for as little as $50 USD from the usual overseas suppliers. Whether or not you’re personally a fan of the portable irons compared to a soldering station, the fact remains that these small irons are becoming increasingly popular with hackers and makers that are operating on a budget or in a small workspace.

Believing that imitation is the most sincere form of flattery, [Electronoobs] has come up with a DIY portable soldering iron that the adventurous hacker can build themselves. Powered by an ATMega328p pulled out of an Arduino Nano, if offers the same software customization options of the TS100 but at a considerably lower price. Depending on where you source your components, you should be able to build one of these irons for as little as $15.

The iron features a custom PCB and MAX6675 thermocouple amplifier to measure tip temperature. A basic user interface is provided by two tactile buttons on the PCB as well as an 128×32 I2C OLED display. In a future version, [Electronoobs] says he will look into adding some kind of sensor to detect when the iron is actually being used and put it to sleep when inactive.

The tip is sourced from a cheap soldering station replacement iron, and according to [Electronoobs], is probably the weakest element of the entire build. He’s looking into using replacement TS100 tips, but says he’ll need to redesign his electronics to make it compatible. The case is a simple 3D printed affair, which looks solid enough, but seems likely to be streamlined in later versions.

We’ve seen a number of attempts at DIY soldering irons over the years, but we have to say, this one is probably the most professional we’ve ever seen. It will be interesting to see how future revisions improve on this already strong initial showing.

Soldering stations are probably one of the most important tools in the hacker’s arsenal. Problem is — good ones are expensive, and sometimes the only difference between being okay at soldering versus being great at it, is the quality of the tool you’re using! Which is why [Albert] and [Matthias] decided to make their very own home-made Weller clone.

Since the most important part of the soldering iron is a good tip, they’re using a needle from Weller — they just need to be able to control it. They designed a 3D printed housing (source files here) for a small 1.8″ LCD screen, an Arduino Pro Mini and a MOSFET shield, and the 12v 8A power supply they chose. There are only two controls — on/off, and a potentiometer for adjusting the temperature.

They spent a while prototyping it and the end result is a pretty slick product. They actually sold a few but realized they weren’t making any money, so they stopped offering it — instead, you can get all the source files yourself from their GitHub. There’s also more information on [Matthias’] blog.

For a cheaper build, you could use a regular iron with a thermocouple strapped to it… but we like this one better.

[Thanks for the tip Luis!]


Filed under: 3d Printer hacks, Arduino Hacks, tool hacks


  • Newsletter

    Sign up for the PlanetArduino Newsletter, which delivers the most popular articles via e-mail to your inbox every week. Just fill in the information below and submit.

  • Like Us on Facebook