
26
Exploring the TI MSP430 platform with Energia Arduino-compatible IDE
arduino, compatible, energia, i2c, IDE, instruments, launchpad, LCD, MSP430, MSP430G2231, MSP430G2452, MSP430G2553, review, test, texas, TI, tronixstuff, tutorial Comments Off on Exploring the TI MSP430 platform with Energia Arduino-compatible IDE
Introduction
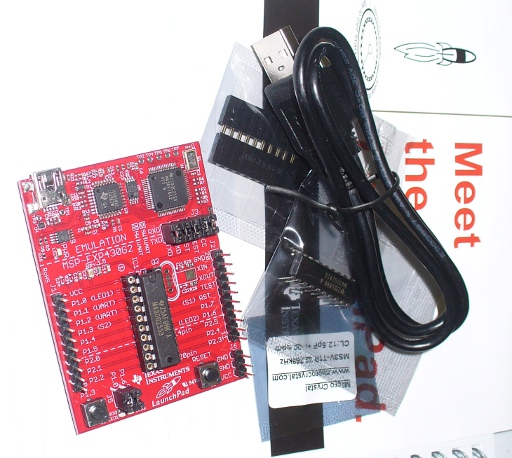
Over the last year or so Texas Instruments have been literally pushing their MSP430 development platform hard by offering an inexpensive development kit – their LaunchPad. For around ten dollars (not everyone could get it for $4.30) it includes a development board with flash emulation tool and USB interface, two of their microcontrollers, crystal, USB cable and some headers. It was (is?) a bargain and tens of thousands of LaunchPads were sold. Happy days.
However after the courier arrived and the parcel was opened, getting started with the LaunchPad was an issue for some people. Not everyone has been exposed to complex IDEs or university-level subjects on this topic. And to get started you needed to use a version of Code Composer Studio or IAR Embedded Workbench IDEs, which scared a few people off. So those LaunchPads went in the cupboard and gathered dust.
Well now it’s time to pull them out, as there’s a new way to program the MSP430 using a fork of the Arduino IDE – Energia. Put simply, it’s the Arduino IDE modified to compile and upload code to the LaunchPad, which makes this platform suddenly much more approachable.
Getting Started
You’ll need to download and install the appropriate USB drivers, then the IDE itself from here. To install the IDE you just download and extract it to your preferred location, in the same manner as the Arduino IDE. Then plug your LaunchPad into the USB. Finally, load the IDE. Everything is familiar to the Arduino user, except the only surprise is the colour (red as a nod to TI perhaps…):

Looking good so far. All the menu options are familiar, the files have the .ino extension, and the preferences dialogue box is how we expect it. Don’t forget to select the correct port using the Tools > Serial port… menu. You will also need to select the type of MSP430 in your LaunchPad. At the time of writing there is support for three types listed below (and the first two are included with the LaunchPad v1.5):
- MSP430G2553 - <=16 MHz, 16KB flash, 512b SRAM, 24 GPIO, two 16-bit timers, UART, SPI, I2C, 8 ADC channels at 10-bit, etc. Cost around Au$3.80 each**
- MSP430G2452 - <=16 MHz, 8KB flash, 256b SRAM, 16 GPIO, one 16-bit timer, UART, I2C, 8 ADC channels, etc. Cost around Au$2.48 each**
- MSP430G2231 - <=16 MHz, 2KB flash, 128b SRAM, 10 GPIO, one 16-bit timer, SPI, I2C, 8 ADC channels, etc. Cost around Au$3.36 each**
** One-off ex-GST pricing from element14 Australia. In some markets it would be cheaper to buy another LaunchPad. TI must really be keen to get these in use.
There are some hardware<>sketch differences you need to be aware of. For example, how to refer to the I/O pins in Energia? A map has been provided for each MSP430 at the Energia wiki, for example the G2553:
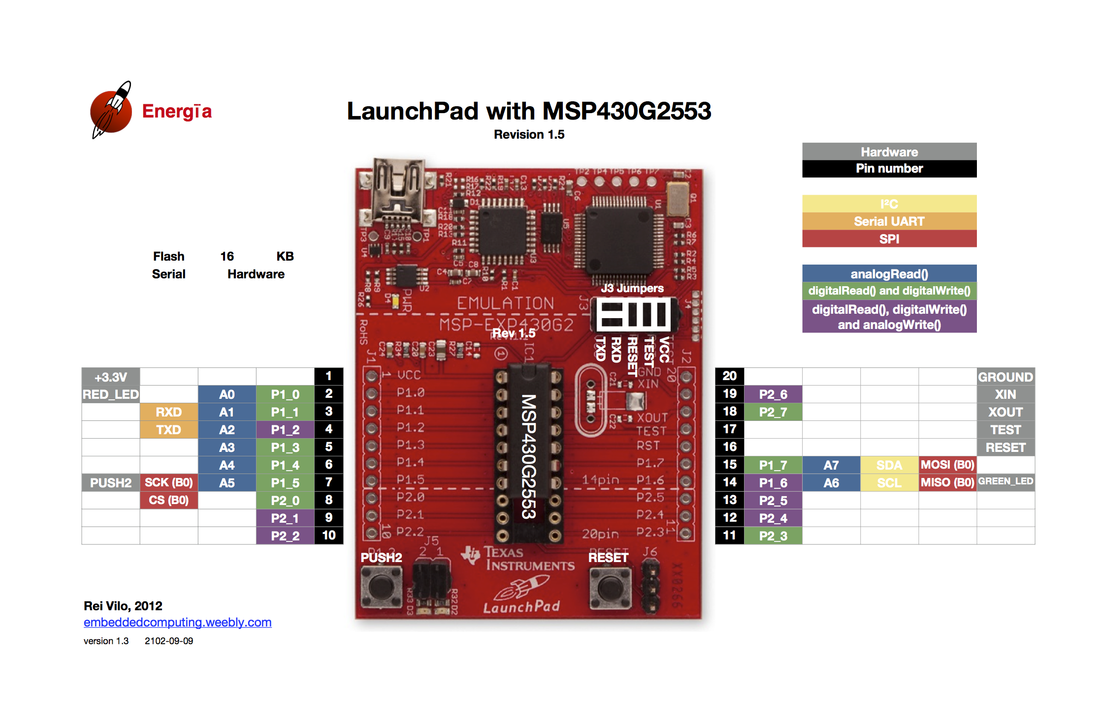
As you can imagine, MSP430s are different to an AVR, so a lot of hardware-specific code doesn’t port over from the world of Arduino. One of the first things to remember is that MSP430s are 3.3V devices. Code may or may not be interchangeable, so a little research will be needed to match up the I/O pins and rewrite the sketch accordingly. You can refer to pins using the hardware designator on the LaunchPad (e.g. P1_6) or the physical pin number. For example – consider the following sketch:
void setup() {
 // initialize the digital pins as an output.
 pinMode(P1_0, OUTPUT); // LED 1
 pinMode(P1_6, OUTPUT); // LED 2
}
void loop() {
 digitalWrite(P1_6, HIGH);
 digitalWrite(P1_0, HIGH);
 delay(100);
 digitalWrite(P1_6, LOW);
 digitalWrite(P1_0, LOW);
 delay(100);
}
You could have used 2 (for physical pin 2) instead of P1_0 and 14 (physical pin … 14!) instead of P1_6. It’s up to you. Another quick example is this one – when the button is pressed, the LEDs blink a few times:
const int redLED = P1_0;
const int greenLED = P1_6;
const int button = P1_3; // button S2 (on the left)
int a = 0;
void setup()
{
 pinMode(redLED, OUTPUT);
 pinMode(greenLED, OUTPUT);
 pinMode(button, INPUT_PULLUP); // note _PULLUP
 digitalWrite(redLED, LOW);
 digitalWrite(greenLED, LOW);
}
void loop()
{
 if (digitalRead(button)==LOW)
 {
 for (a=0; a<10; a++)
 {
 digitalWrite(redLED, HIGH);
 digitalWrite(greenLED, LOW);
 delay(200);
 digitalWrite(redLED, LOW);
 digitalWrite(greenLED, HIGH);
 delay(200);
 }
 digitalWrite(redLED, LOW);
 digitalWrite(greenLED, LOW);
 }
}
Due to the wiring of the LaunchPad, when you press the button, P1_3 is pulled LOW. For the non-believers, here it is in action:
So where to from here? There are many examples in the Energia IDE example menu, including some examples for the Energia libraries. At the time of writing there is: Servo, LiquidCrystal, IRremote, SPI, wire, MSPflash and Stepper. And as the Energia project moves forward more may become available. For help and discussion, head over to the 4-3-Oh forum and of course the Energia website. And of course there’s the TI MSP430 website.
Conclusion
Well that was interesting to say the least. If you have a project which needs to be low-cost, fits within the specifications of the MSP430, has a library, you’re not hung up on brand preference, and you just want to get it done – this is a viable option. Hopefully after time some of you will want to work at a deeper level, and explore the full IDEs and MSP430 hardware available from TI. But for the price, don’t take my word for it – try it yourself.

In the meanwhile have fun and keep checking into tronixstuff.com. Why not follow things on twitter, Google+, subscribe for email updates or RSS using the links on the right-hand column? And join our friendly Google Group – dedicated to the projects and related items on this website. Sign up – it’s free, helpful to each other – and we can all learn something.


