Posts | Comments

Planet Arduino

Archive for the ‘Star Tracker’ Category

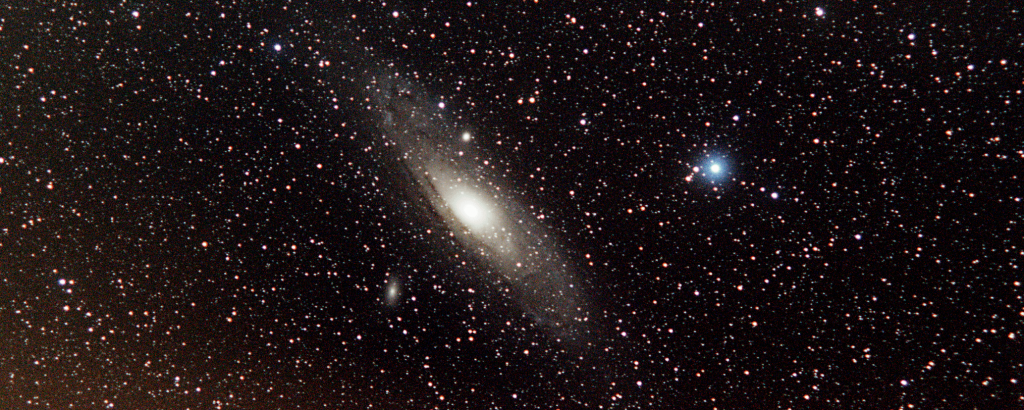
Most modern digital cameras are perfectly capable of capturing photos of the stars. But many of them have trouble collecting the small amount of light available in a short amount of time, which means that you need to leave the shutter open for 30 seconds or more to get a decent exposure. That presents a problem, because the Earth rotates. As it does, the light from the stars leaves trails in your long-exposure photo. To overcome that issue, Ondra Gejdos designed this 3D-printable star tracker.

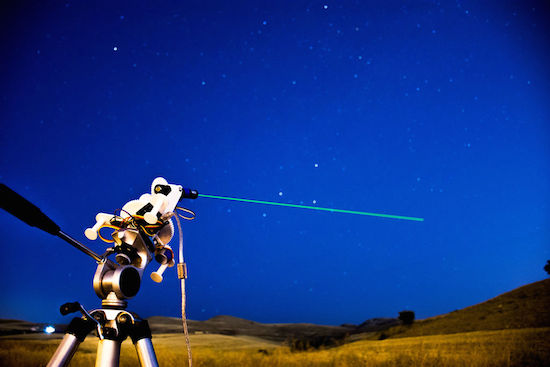
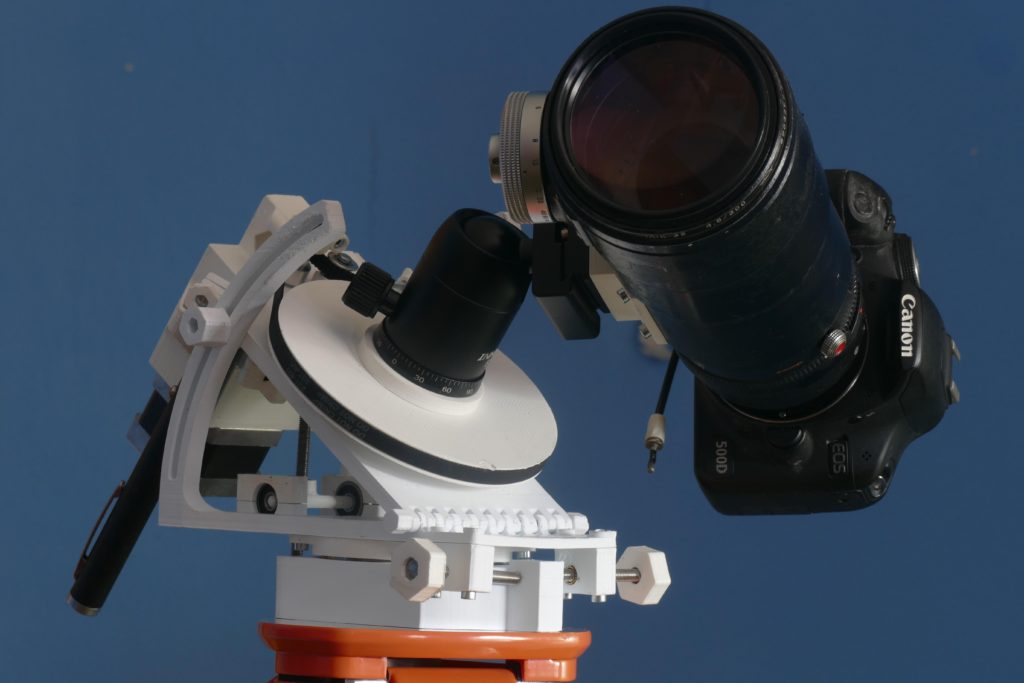
The purpose of a star tracker like this one is to move the camera in the opposite direction of the Earth’s spin in order to keep the stars still in the frame. That lets astrophotographers keep the shutter open as long as they need to to get proper exposure without star trails. The “OG-star-tracker” mounts to a standard tripod and the camera mounts to it. A single stepper provides rotation, and it is up to the user to set the angle properly for their position on the planet.

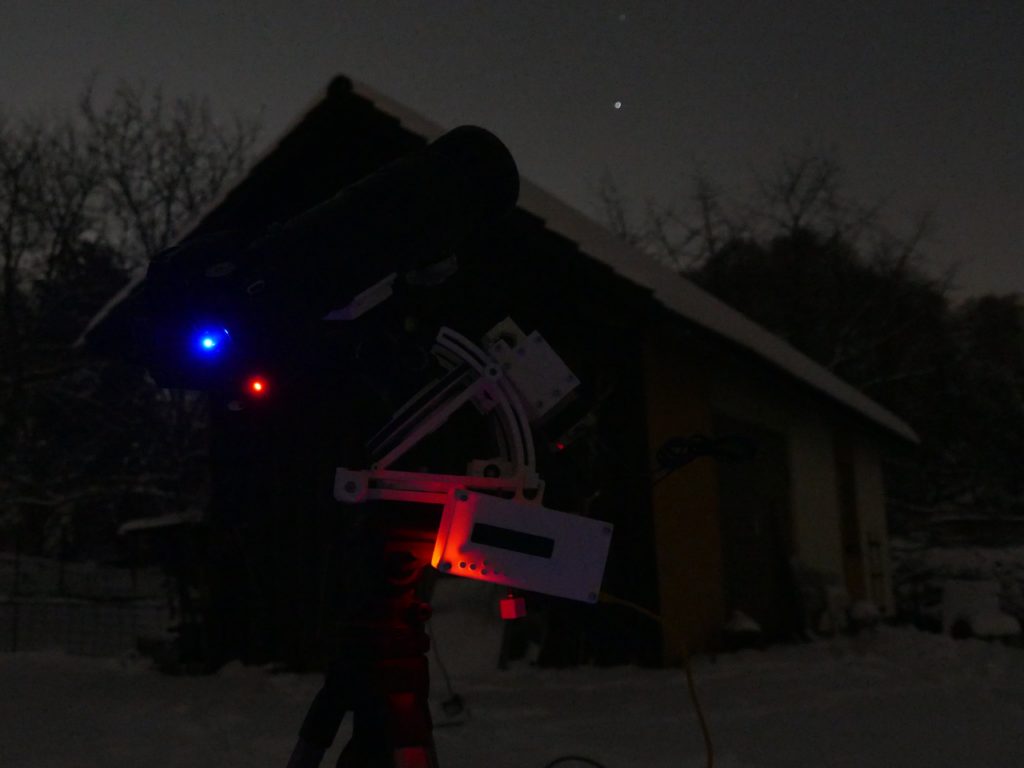
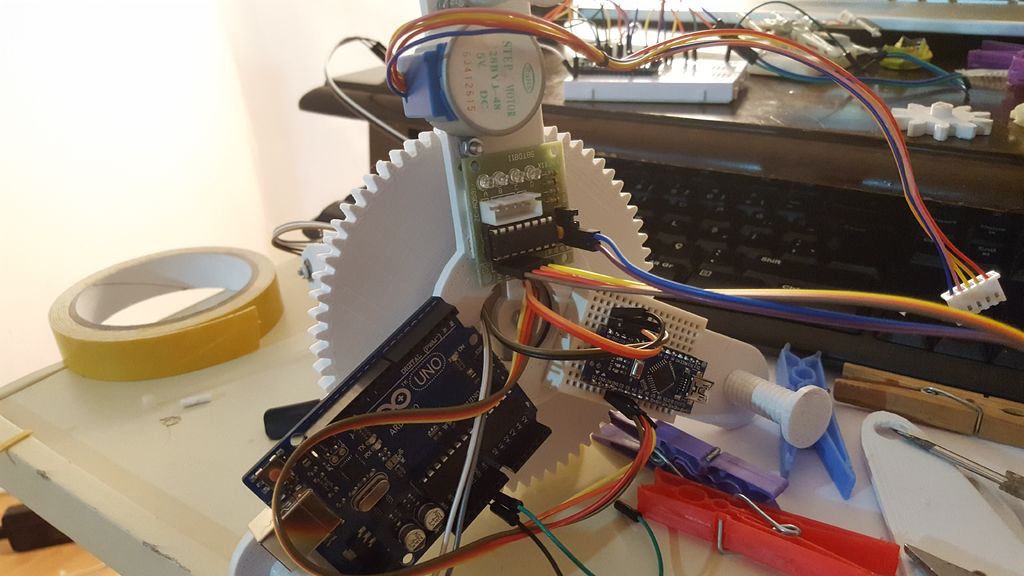
An Arduino Uno board controls the movement, though Gejdos also uploaded firmware for the Nano. It controls the stepper motor through a TMC2209 stepper driver. The 3D-printable design includes a gear box that dramatically reduces the stepper motor output, resulting in very smooth movement that shouldn’t create any blurriness in the photos.

The documentation is a little bit rough at the moment, but all of the files are on the GitHub page so you can build your own star tracker.

The post A 3D-printable, Arduino-controlled star tracker great for astrophotography appeared first on Arduino Blog.

If you want to take beautiful night sky pictures with your DSLR and you live between 15 degrees and 55 degrees north latitude you might want to check out OpenAstroTracker. If you have a 3D printer it will probably take about 60 hours of printing, but you’ll wind up with a pretty impressive setup for your camera. There’s an Arduino managing the tracking and also providing a “go to” capability.

The design is over on Thingiverse and you can find code on GitHub. There’s also a Reddit dedicated to the project. The tracker touts its ability to handle long or heavy lenses and to target 180 degrees in every direction.

Some of the parts you must print are specific to your latitude to within 5 degrees, so if you live at latitude 43 degrees, you could pick the 40-degree versions of the parts. So far though, you must be in the Northern hemisphere between 15 and 55 degrees.

What kind of images can you expect? The site says this image of Andromeda was taken over several nights using a Soligor 210mm f/4 lens with ISO 800 film.

Not bad at all! Certainly not the view from our $25 department store telescope.

If you’d rather skip the Arduino, try a cheap clock movement. Or you can replace the clock and the Arduino with yourself.

Maker and astronomy enthusiast Görkem Bozkurt has built a GoTo telescope mount-inspired system that points and tracks any object in the sky using its celestial coordinates. The aptly named Star Track sports a 3D-printed structure along with a pair of Arduinos (an Uno and Nano), a gyroscope, an RTC module, two low-cost 5V stepper motors, and a laser pointer.

Many computerized telescopes have a type of telescope mount and related software which can automatically point a telescope to astronomical objects that the user selects. Called GoTo mounts. Like a standard equatorial mount, equatorial GoTo mounts can track the night sky by driving the right-ascension axis. Since laser pointers are a perfect way to point stars, I thought a laser pointer with a GoTo mount would be a perfect tool for locating stars and to track them.

First I had to design a two-axis mount.

1. 360-degree rotating axis for RA
2. A up-down axis for DEC

After aligning the RA axis with the North Celestial Pole, an Arduino connected with an RTC should be able to calculate and track RA with sidereal time. And you can adjust the two axes to the user input from a computer via serial.

But first I had to find a way to precisely point the mount to given degrees. The main idea was to use step motors and give them a specific step to take. But after a few tests that was not totally accurate.

Instead, I used a gyroscope placed on the laser pointer to track the degrees on the two axes, this way I was able to send a command to the step motor to start and stop the movement if necessary.

Intrigued? Bozkurt provides a basic overview of positional astronomy on his project page, along with all of Star Track’s 3D files, code and assembly instructions.


  • Newsletter

    Sign up for the PlanetArduino Newsletter, which delivers the most popular articles via e-mail to your inbox every week. Just fill in the information below and submit.

  • Like Us on Facebook