Posts | Comments

Planet Arduino

Archive for the ‘keytar’ Category

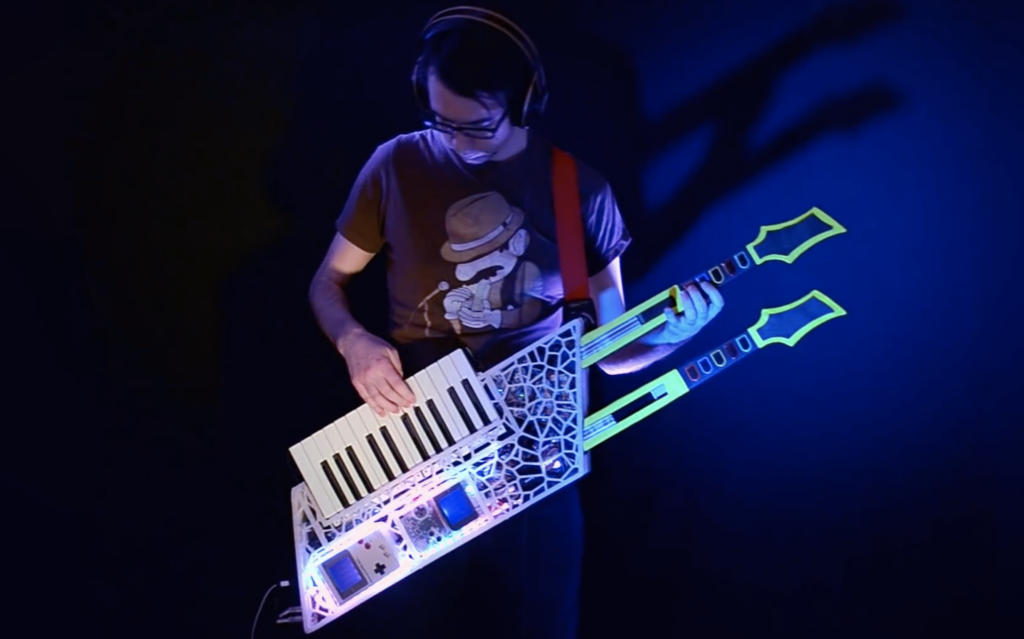
Keytars may have had their moment of popularity in the 1980s, but instruments of the day can’t hold a candle to “The Blade” by makers Sam Wray, Siddharth Vadgama, and Greig Stewart. 

The musical device feeds signals from a pair of Guitar Hero necks, along with a stripped down keytar from Rock Band, into an Arduino Mega. This data is then sent to a Raspberry Pi running PD Extended, and is used to control a pair of Game Boys to produce distinct 8-bit sounds. Audio output can be further modified with a Leap Motion sensor embedded in one of the two necks. 

What makes up The Blade?

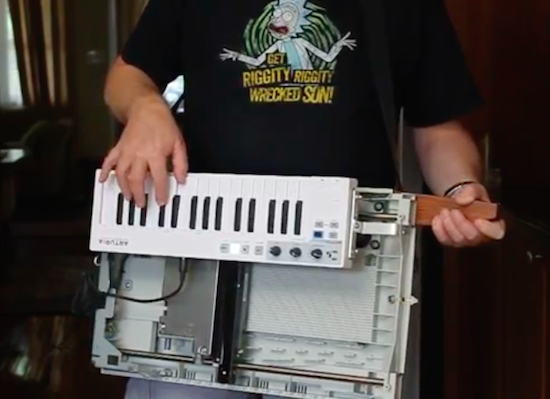
– 3D-printed housing

We custom modeled and printed a housing for the instrument to ensure it would be ergonomic to wield, hold together with all the components, and also look badass.

– Two Guitar Hero necks

The necks, hacked off a couple of old Guitar Hero controllers, were totally rewired to output the button presses to jumper cables.

– Arduino Mega

All the wiring from the Guitar Hero necks fed into the Mega, which then registered the button presses and output appropriate MIDI signals over USB serial into the Raspberry Pi.

– Rock Band keytar

We stripped this down to the bare keyboard and had the MIDI also going into the Pi.

Raspberry Pi

Taking in all the MIDI, and running PD Extended we got this to manage and re-map all the button presses we needed. This then output to a MIDI thru box.

– Arduino Boy

This fed the MIDI signals from the thru box into the Game Boy.

Game Boy

These were heart. With MIDI fed in from a multitude of sources, the Game Boy, running mGB, was the synthesizing the signals into sound, output via a standard 3.5mm jack. 

Leap Motion
The Leap Motion was used for further sound modulation.

The ‘80s may be long gone, but James Cochrane is bringing the keytar back with the help of an old HP Scanjet. For this, the Maker has taken an Arduino, a stepper motor shield, an optocoupler and an off-the-shelf MIDI keyboard for input, and integrated it into the flatbed scanner’s original features. The end result: the world’s first (and only) MIDI-controlled HP Scanjet keytar.

As he describes in his YouTube video:

This scanner had a hidden command set within the Scanner Control Language which allows you to send musical notes directly to the stepper motor. This is a tedious method where you have to enter the notes and durations manually into a text file (similar to G-code on a CNC machine). I have always used and will always use this method for my old school music videos; however, I wanted to try and build a MIDI-controlled stepper motor.

One day I had one of my HP Scanjets sitting on its side and for some reason it resembled a Roland SH-101 and that’s when I came up with the idea for the HP Scanjet Keytar. What a great way to merge both into a musical instrument.

Those wishing to relive the days of the classic yet quirky keytar are in luck. Cochrane has provided a detailed breakdown of the device in the video below, and has shared its code on GitHub.

Do any of you stay awake at night agonizing over how the keytar could get even cooler? The 80s are over, so we know none of us do. Yet here we are, [James Cochrane] has gone out and turned a HP ScanJet Keytar for no apparent reason other than he thought it’d be cool. Don’t bring the 80’s back [James], the world is still recovering from the last time.

Kidding aside (except for the part of not bringing the 80s back), the keytar build is simple, but pretty cool. [James] took an Arduino, a MIDI interface, and a stepper motor driver and integrated it into some of the scanner’s original features. The travel that used to run the optics back and forth now produce the sound; the case of the scanner provides the resonance. He uses a sensor to detect when he’s at the end of the scanner’s travel and it instantly reverses to avoid collision.

A off-the-shelf MIDI keyboard acts as the input for the instrument. As you can hear in the video after the break; it’s not the worst sounding instrument in this age of digital music. As a bonus, he has an additional tutorial on making any stepper motor a MIDI device at the end of the video.

If you don’t have an HP ScanJet lying around, but you are up to your ears in surplus Commodore 64s, we’ve got another build you should check out.


Filed under: Arduino Hacks, digital audio hacks, musical hacks


  • Newsletter

    Sign up for the PlanetArduino Newsletter, which delivers the most popular articles via e-mail to your inbox every week. Just fill in the information below and submit.

  • Like Us on Facebook