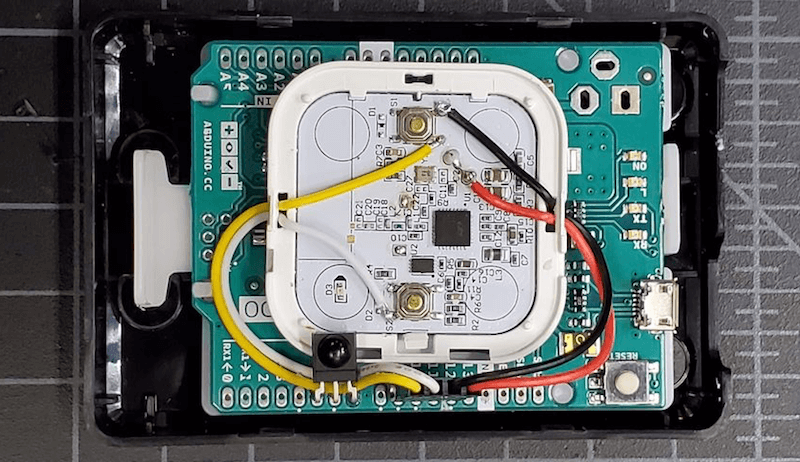
Hacker “replayreb” recently obtained some IKEA FYRTUR motorized blackout shades, but wasn’t satisfied with the stock remote control that comes with them. Instead he wanted to be able to open and close the blinds with the same remote that he uses for AV equipment.
Rather than attempting to go through a home automation gateway setup, he simply opened up the remote and wired an Arduino Leonardo to use its GPIO pins as a low-voltage relay. An IR receiver was added to the Arduino, allowing it to take these signals and translate them into simulated button presses as needed.
The Arduino platform is one of the most versatile microcontroller boards available, coming in a wide variety of shapes and sizes perfect for everything from blinking a few LEDs to robotics to entire home automation systems. One of its more subtle features is the ability to use its serial libraries to handle keyboard and mouse duties. While this can be used for basic HID implementations, [Nathalis] takes it a step further by using a series of Arduinos as a KVM switch; although admittedly without the video and mouse functionality yet.
To start, an Arduino Uno accepts inputs from a keyboard which handles the incoming serial signals from the keyboard. From there, two Arduino Pro Micros are attached in parallel and receive signals from the Uno to send to their respective computers. The scroll lock key, which doesn’t do much of anything in modern times except upset Excel spreadsheeting, is the toggle switch between the two outputs. Everything is standard USB HID, so it should be compatible with pretty much everything out there. All of the source code and schematics are available in the project’s repository for anyone who wants to play along at home.
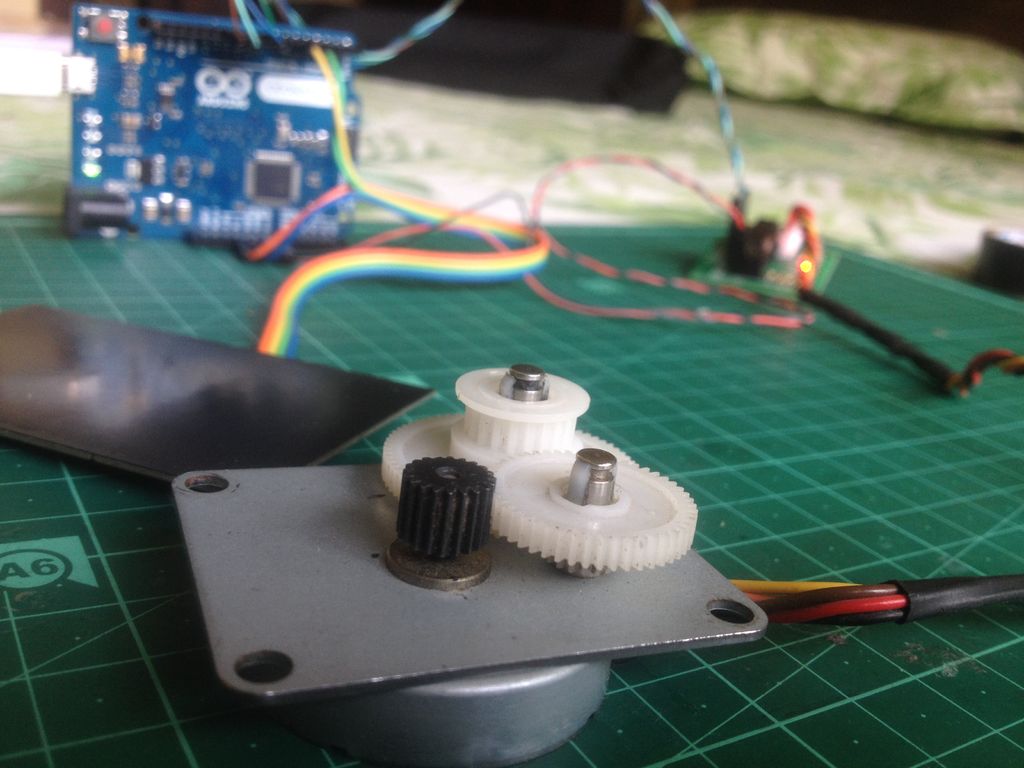
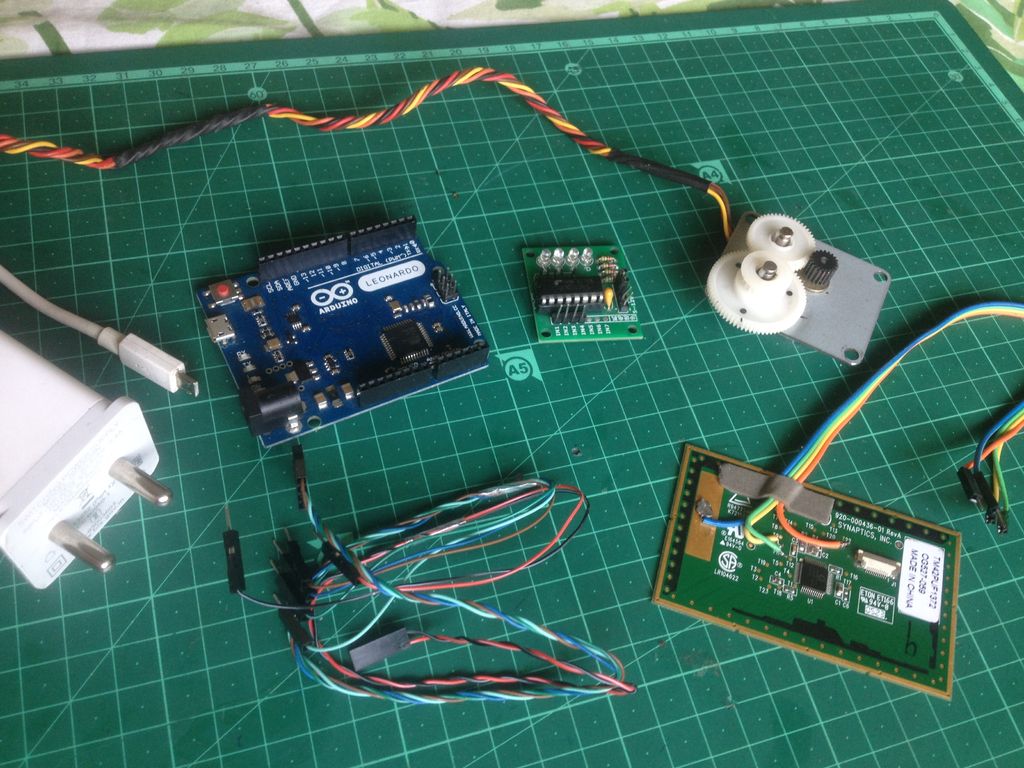
While laptops eventually become past their prime, many of the underlying bits and pieces are still functional and could be reused. If you’re wondering what to do with an old touchpad, especially one with a Synaptics chip, then this stepper motor control project should provide some inspiration.
Here the touchpad is read by an Arduino Leonardo using a PS/2 library, which translates these finger swipes into stepper signals via a driver board.
When the user scrolls forward or backward, the motor responds either with a nice natural acceleration/deceleration motion, or the ability to move to a certain set point with a tap.
When [gdarchen] wanted to read some NFC tags, he went through several iterations. First, he tried an Electron application, and then a client-server architecture. But his final iteration was to make a standalone reader with an Arduino and use WebUSB to connect to the application on the PC.
This sounds easy, but there were quite a few tricks required to make it work. He had to hack the board to get the NFC reader’s interrupt connected correctly because he was using a Leonardo board. But the biggest problem was enabling WebUSB support. There’s a library, but you have to change over your Arduino to use USB 2.1. It turns out that’s not hard, but there’s a caveat: Once you make this change you will need the WebUSB library in all your programs or Windows will refuse to recognize the Arduino and you won’t be able to easily reprogram it.
Once you fix those things, the rest is pretty easy. The PC side uses node.js. If you back up a level in the GitHub repository, you can see the earlier non-Arduino versions of the code, as well.
If you want to understand all the logic that went into the design, the author also included a slide show that discusses the three versions and their pros and cons. He did mention that he wanted a short-range solution so barcodes and QR codes were out. He also decided against RFID but didn’t really say why.
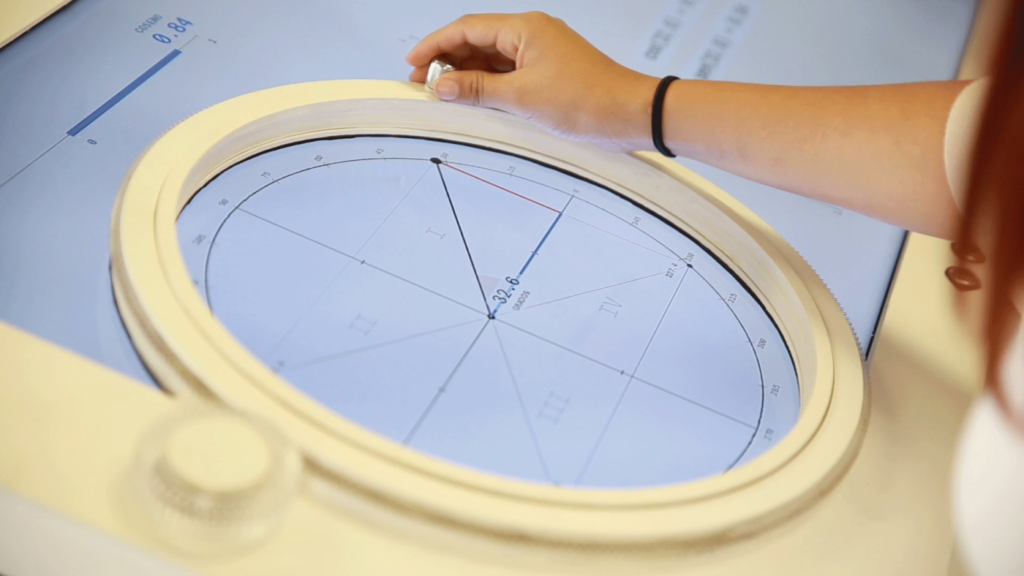
Trigonometry is a struggle for some students. Perhaps one of the reasons for this is that instruction can be something of a one-way street, and concepts can be hard to grasp until more technical building blocks are learned.
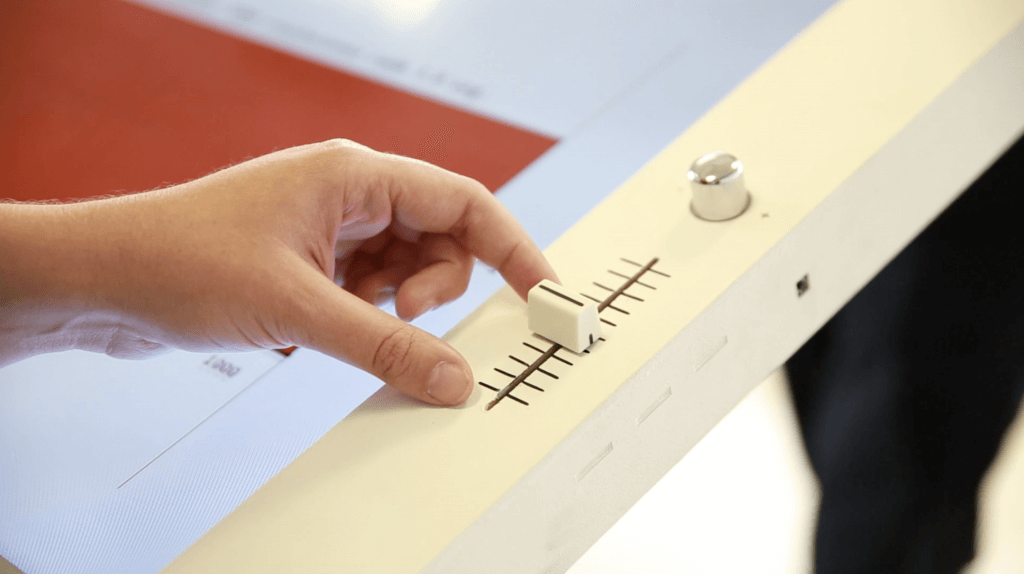
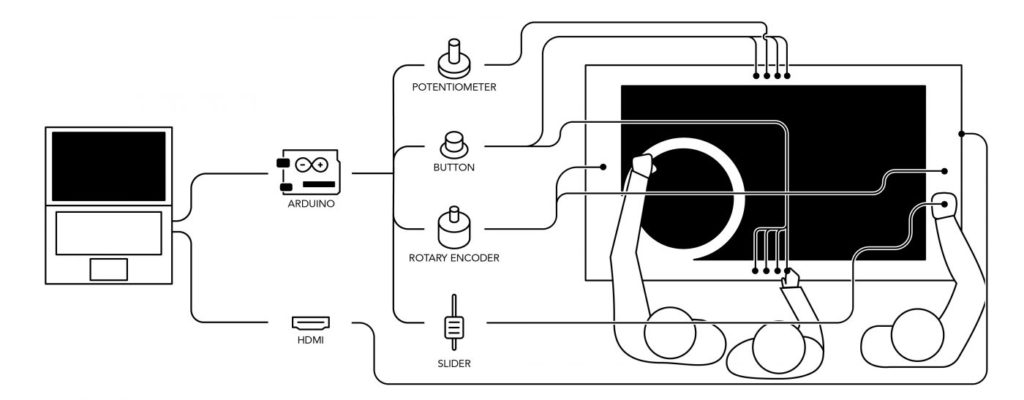
As seen here, researchers at the Universidad del Desarrollo in Chile aim to change that with an interactive trigonometry display called TAMI, or Tangible Mathematics Interface. This nearly horizontal screen shows mathematical relationships, while allowing students to engage with them using physical controls.
The most prominent controller here is a large rotary wheel. Students rotate this to modify the angle shown in the middle, and observe how concepts like sine and cosine react to this manipulation. An Arduino Leonardo takes input from this and other controls, and passes it along to a computer. This then handles on-screen info and even plays sounds as needed!
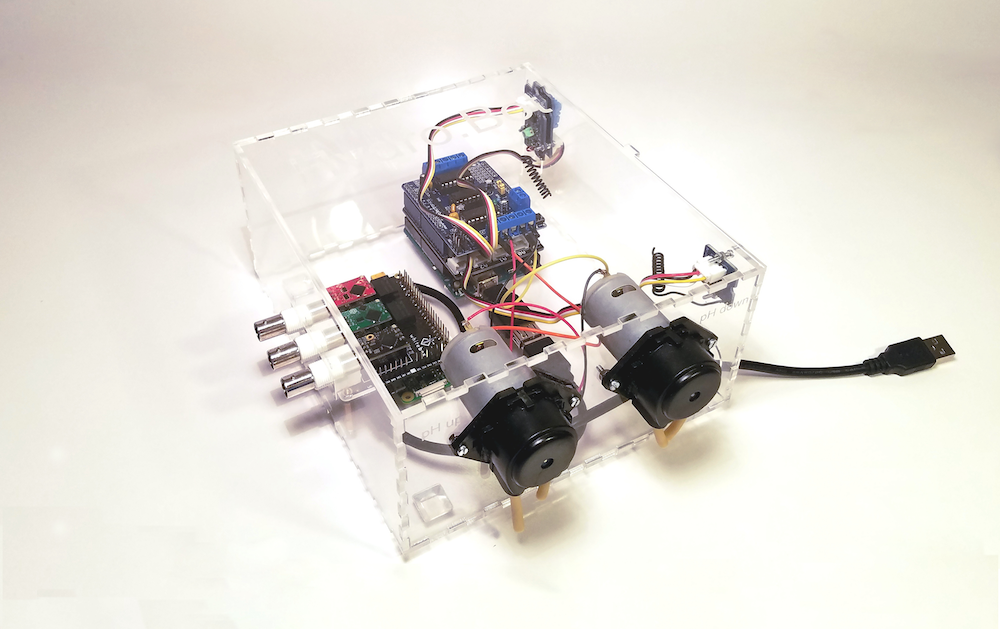
Hydroponics seems like a great way to get fresh vegetables at a cheap price, but as Scott Paterson and Max Knight found out, doing this type of gardening well can take a lot of work. To help take the guesswork and hassle out of the process, the duo has created HydroBot — an automated garden minder that uses an Arduino Leonardo along with a Raspberry Pi Zero for control.
HydroBot allows you to remotely monitor your setup, and automate tasks using wireless switching for lights and fans, as well as two pumps built into the apparatus’ housing to add nutrients to your grow-water.
The device is currently available on Kickstarter, and is also open source project, so you’ll be able to fix any bugs or even modify its behavior as needed!
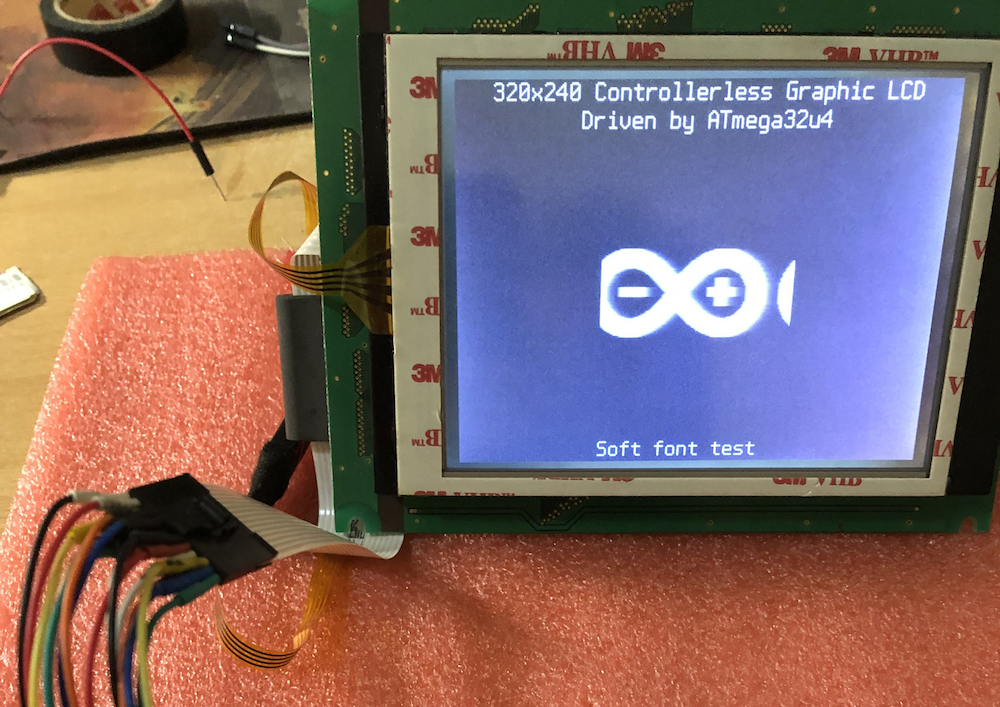
As hardware hackers, we’re always on the lookout for discarded components that can be re-purposed into something even more awesome. One such class of component that you may find is the controller-less graphics LCD modules, which can be found on old copiers, tape libraries, and the like.
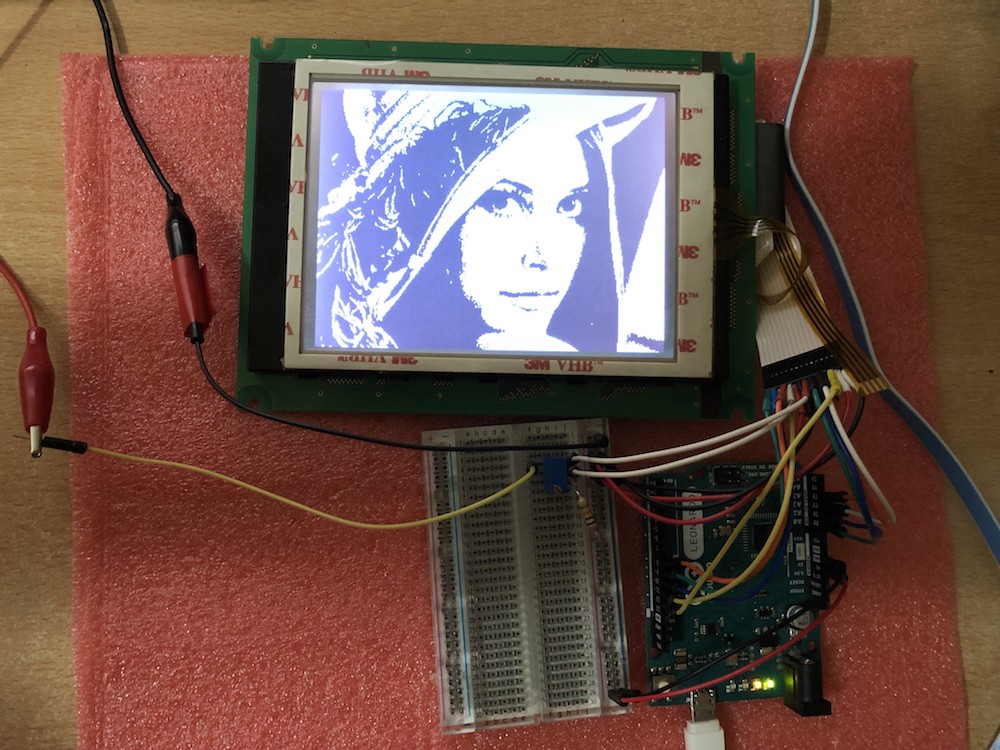
This project by Ivan Kostoski shows how to drive one of these displays with a 320×240 resolution. He’s tested his code using several types of Arduino board, such as the Uno and Leonardo, using minimal external components.
Summary Repository contains code samples for driving 4-bit parallel controllerless graphics LCD (CLGLCD) module with AVR MCU on an Arduino board, using minimal external components and staying within Arduino IDE.
4-bit Controllerless Graphics LCD modules Controllerless graphics LCD modules are antiques that can be salvaged from old copiers, tape libraries, etc… They commonly are missing, well, the controller chip, the one with the memory. Don’t go buying one of these, for Arduino usage, even if you find them on sale. They are usually industrial, have poor viewing angles, generally slow response time, and pain to work-with. There, I said my peace… But if you already have one, their size (i.e. 5.7in) or simplicity can have its uses and beauty.
I have tested this code with 320×240 STN LCD monochrome module marked as F-51543NFU-LW-ADN / PWB51543C-2-V0, salvaged some time ago from retired tape library, without the controller module (which it appears is based on FPGA and wouldn’t be of much use anyway).
The same type of interface (4-bit data) with various signal names is present on many industrial modules based on multiplexed column and common row LCD drivers, like LC79401/LC79431. Or this is what is behind the controller IC. They all have some variations like LCD drive voltage (positive or negative, depending on temperature and size of the module), backlight (LED/CCFL), some logic quirks (i.e. CL2 is ignored while CL1 is up, etc…), so maybe this code can be adapted to other controllerless modules. Module’s datasheet is necessity for the connector pinouts and timing requirements. Some modules may even generate LCD drive voltage internally, and outputting it on a pin so actual V0 driving voltage can be adjusted.
More info on the build/technique is found on GitHub, where you can also download project code and find more background on how interfacing with these devices works.
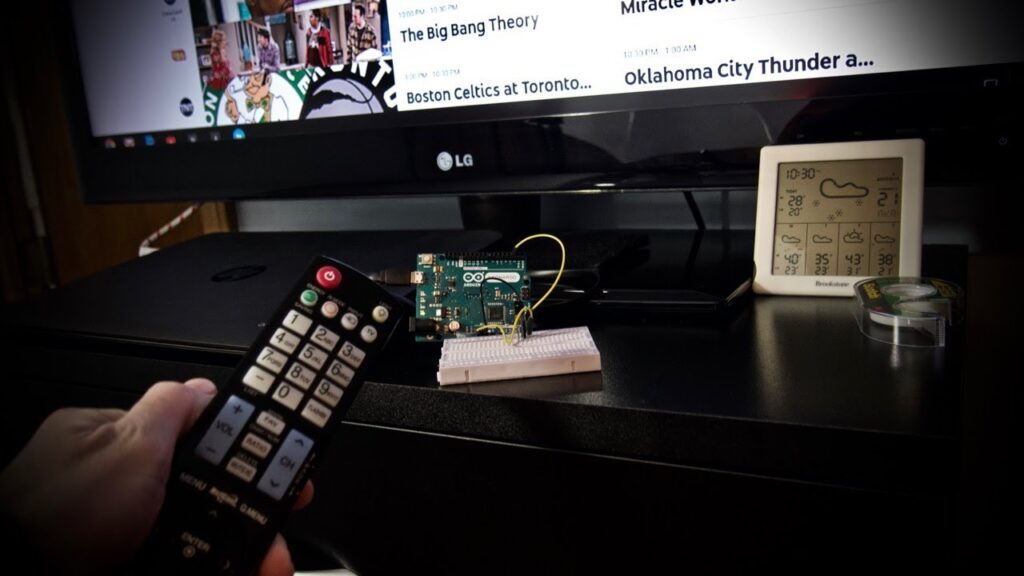
While channel surfing might increasingly seem to be a thing of the past, Kevin Darrah demonstrates that it’s possible to control your streaming computer with a traditional TV remote.
His simple solution reads IR signals with an IR detector module, which can then be passed along and translated into USB keypresses for computer control.
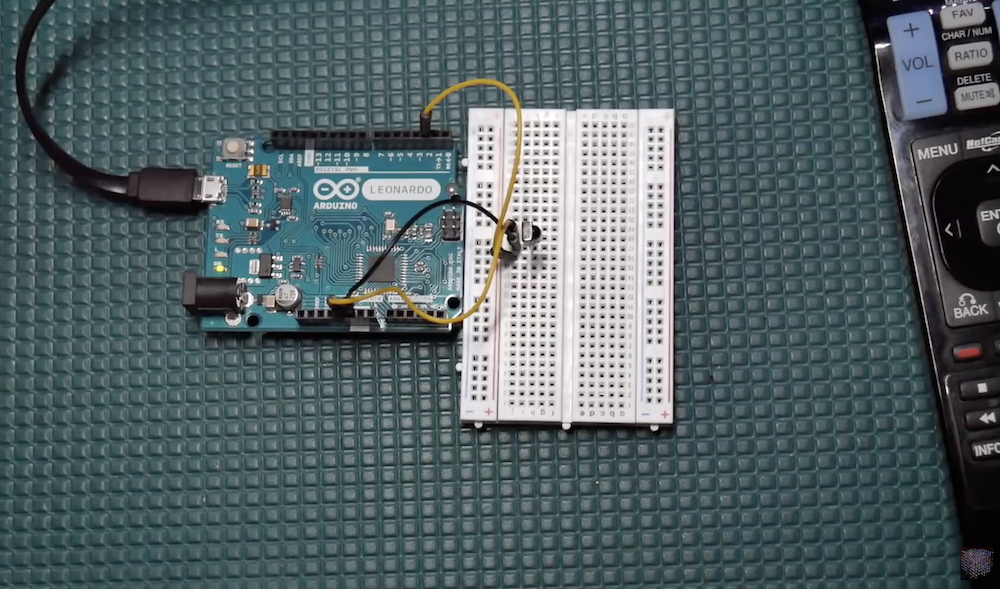
You can see his experimental Arduino Leonardo setup in the video below, which takes advantage of the board’s ATmega32U4 chip to emulate USD keyboard functions directly.
Fun project here that could have a lot of uses – basically a TV remote to USB translator, so could think of a lot of ways to use something like this. For me, I just wanted an easy way to channel surf using the same TV remote that came with the TV. For this, I just read in the IR codes form the remote, then map them to key-strokes to do different things. I could see the up/down left/right keys being used to drive the mouse around… lol, that might be my next project!
The bulk of the clip, however, is around a discussion on decoding IR signals and the programming involved (code available here), starting at about 6:00 in.
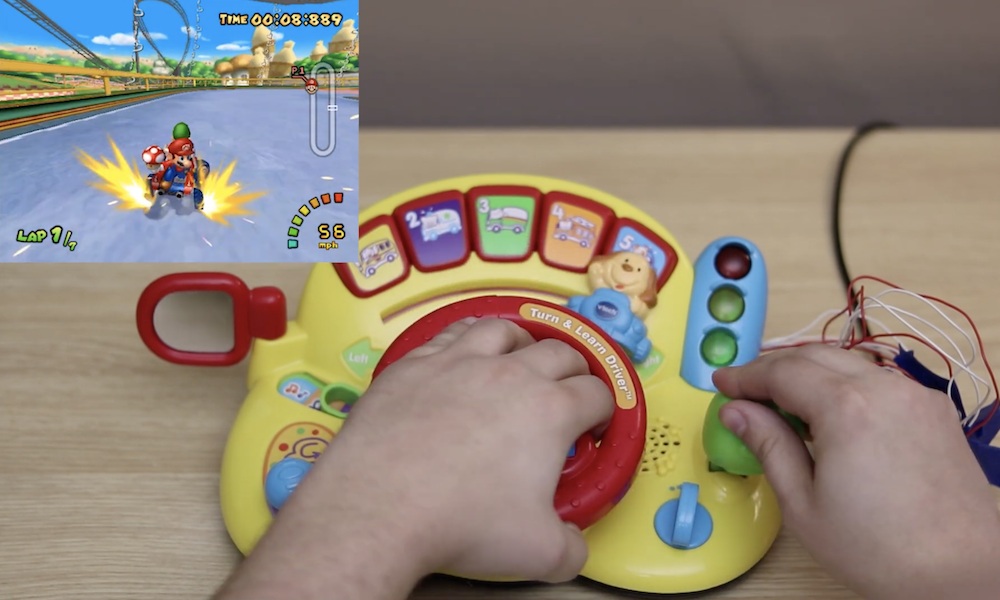
YouTuber “Insert Controller Here” has been creating gaming controllers out of a variety of objects, like bananas, mayonnaise, and meat. For his latest iteration, the YouTuber decided to convert a VTech Turn and Learn Driver into—what else?—a Mario Kart: Double Dash steering console.
As seen in the video below, the build consists of disassembling the toy, then soldering wires to the correct points to recreate steering wheel input, braking, and throttle. An Arduino Leonardo is used for the gaming interface, allowing Mario and Luigi to make it around the track by turning the wheel and applying brakes, while the accelerator is simply “shifted” into place.
Chris Lovett used a cheap remote plug to control his Christmas lights; however, when the fob’s A53G 12V battery died, he decided to go a different direction. Rather that just replace the battery, he hooked up an Arduino Leonardo for complete lighting automation.
For this hack, he bypassed the onboard IC and instead sent a simulated signal produced by the Leonardo through the wireless transmitter. The appropriate signals were decoded by a logic analyzer, then sent using one output pin to power the transmitter and a second to output the correct pulses. Full automation was accomplished via a Python Script running on a computer to activate the Leonardo at sunset and sunrise.
Planet Arduino is, or at the moment is wishing to become, an aggregation of public weblogs from around the world written by people who develop, play, think on Arduino platform and his son. The opinions expressed in those weblogs and hence this aggregation are those of the original authors. Entries on this page are owned by their authors. We do not edit, endorse or vouch for the contents of individual posts. For more information about Arduino please visit www.arduino.cc
You are currently browsing the archives for the leonardo category.