Posts | Comments

Planet Arduino

Archive for the ‘Coffee Roaster’ Category

Green (unroasted) coffee beans cost about half as much as their roasted counterparts. By purchasing green coffee beans, you can save quite a bit of money in the long term. Roasting your own coffee beans also gives you much greater control over the flavor profile and caffeine content of your coffee (caffeine content is a debatable topic, but light roasts seem to have more caffeine due to overall density). But buying a coffee roasting machine can drain your savings, which is why you might want to follow Eric Sorensen’s lead and build your own coffee roaster.

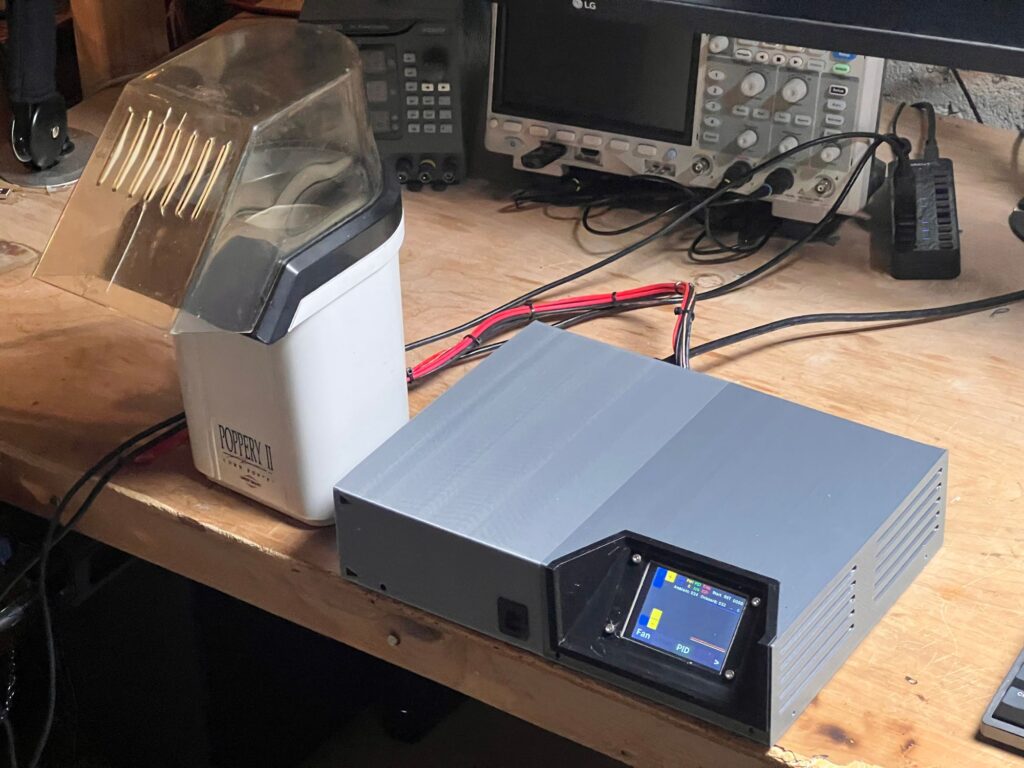
Roasting coffee beans is not a complex process. In theory, you could roast your wake-up beans in any old oven. But dedicated machines can roast the beans with more consistency to avoid burned or under-roasted individuals. Those machines are very similar to the air poppers used for popping popcorn. They contain a heating element and a motor that spins a fan and agitates the beans. But coffee bean roasting machines add precision temperature control, which increases their price dramatically. By adding your own temperature control to a cheap air popper, you can save a lot of money and still get great results.

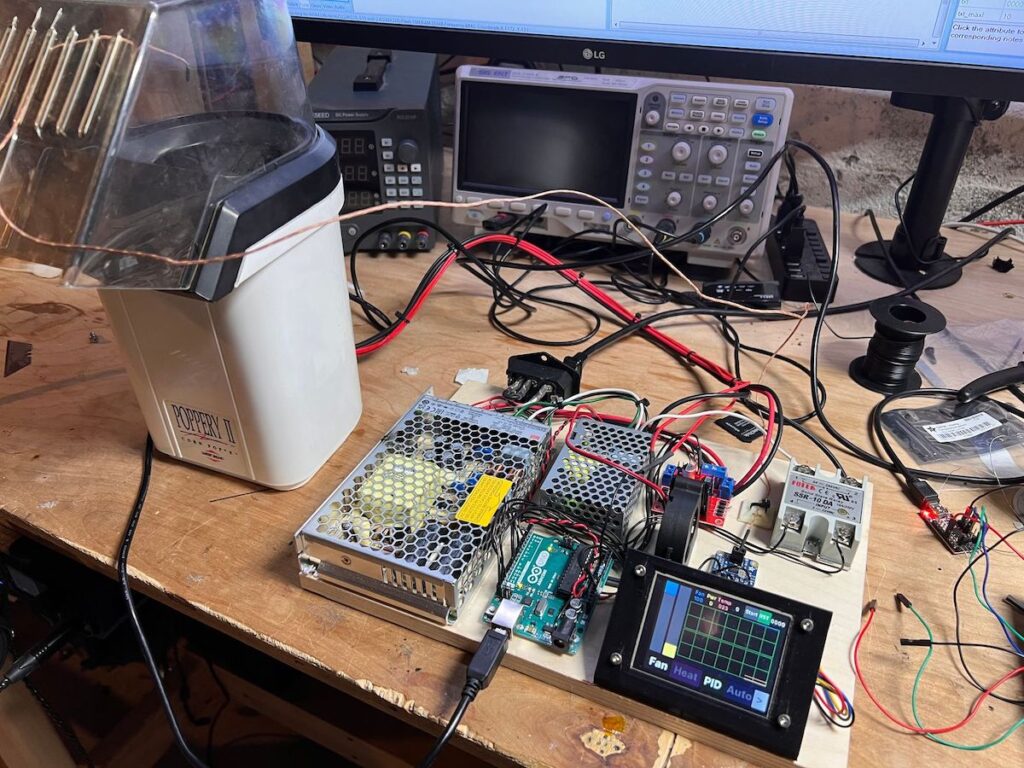
This project calls for a few components in addition to the air popper itself (which you can probably get for free at a thrift store). Those parts include an Arduino Uno board, a Nextion touchscreen LCD panel, an L298N motor driver, an Adafruit MCP9600 thermocouple breakout board, and a relay.

The Arduino controls the heating element through the relay with PID control, which means that it modulates power to retain a specified temperature. It monitors the temperature with the thermocouple through the breakout board. The motor driver controls the air popper’s fan, which blows air through the beans and helps to agitate them during roasting. The touchscreen provides an interface to select roasting temperature and time. The firmware written by Sorensen also supports roasting profiles, so you can easily select from preset parameters once you figure out which roasting settings work well. 

The post Build your own coffee roaster out of a hot air popcorn popper appeared first on Arduino Blog.

We’ve seen a lot of coffee roaster builds over the years. [Ben Eagan] started his with a hot-air popcorn maker. If you think it is as simple as putting beans in place of the popcorn, think again. You need to have good control of the heat, and that requires some temperature monitoring and a controller — in this case, an Arduino. [Ben’s] video below shows how it all goes together.

With the Arduino and the power supply strapped to the sides, it looks a bit like something out of a bad post-apocalypse movie. But it looks like it gets the job done.

In addition to the Arduino, a thermocouple measures the temperature and that takes a little circuitry in the form of a MAX31855. There’s also a relay to turn the heater on and off. There are other ways to control AC power, of course, and if a relay offends your sensibilities you can always opt for a solid state one.

The only other wrinkle was the addition of an extra power supply so the fan could operate without the heater. There might have been some other ways to manage that, but power supplies are cheap enough and at least the strapped on power supply counterbalances the strapped on Arduino on the other side of the popper.

We’ve seen popcorn poppers used like this before, of course. Thermocouples are a great way to measure high temperatures, but there are lots of other ways to measure that particular quantity.

Apparently not content with simply brewing his coffee to perfection, Alex Campbell can actually take control of the roast itself thanks to his beautiful fluid bed roasting rig.

His DIY device is constructed using a variety of stainless steel and aluminum components, along with a transparent roasting chamber. A spa blower is employed to suck waste out and agitate beans during the process.

The machine’s heating element is driven by a solid-state relay and a thermocouple provides feedback. An Arduino board is tasked with controlling the system, while user interface and higher-level control are handled via a laptop linked to it over serial. 

It’s an amazing design as seen in the two videos below — all to get that perfect cup!

After winning the South African National Barista Championship in 2009, Neil Maree decided to actually start a company to make coffee roasting equipment. Genio was the result, and after some work, his machines can now roast coffee to perfection using recipe input via an Android app.

Once instructions are transferred, a heavily modified Arduino Due controls the roaster depending on user preferences. Maree first tried an analog solution, then used a PLC before deciding that the Arduino was what he needed.

All of Genio’s roasters have a control panel with a variety of traditional switches and knobs, and then a not-so-traditional tablet mount. The app sends a “roast profile” to the roaster over a Bluetooth connection.

Perk your interest? You can take an inside look at the roasting machine factory on htxt.africa here.


  • Newsletter

    Sign up for the PlanetArduino Newsletter, which delivers the most popular articles via e-mail to your inbox every week. Just fill in the information below and submit.

  • Like Us on Facebook