Posts | Comments

Planet Arduino

Archive for the ‘Arduino Clock’ Category

Sometimes makers come across products that they’d love to buy, but which are too expensive to justify. When that happens, the natural inclination of the maker is to build a DIY version. Such projects often end up costing way more — in both time and literal currency — than the product would have. But when we get lucky, we can save some money. That’s the case with this spiral clock built by Kelton.

Kelton based this design on the Aspiral Clock. That product was quite expensive at $542 and the company that made it seems to be defunct now anyway. Kelton’s version looks similar and works in the same way, but only requires about $60 in materials.

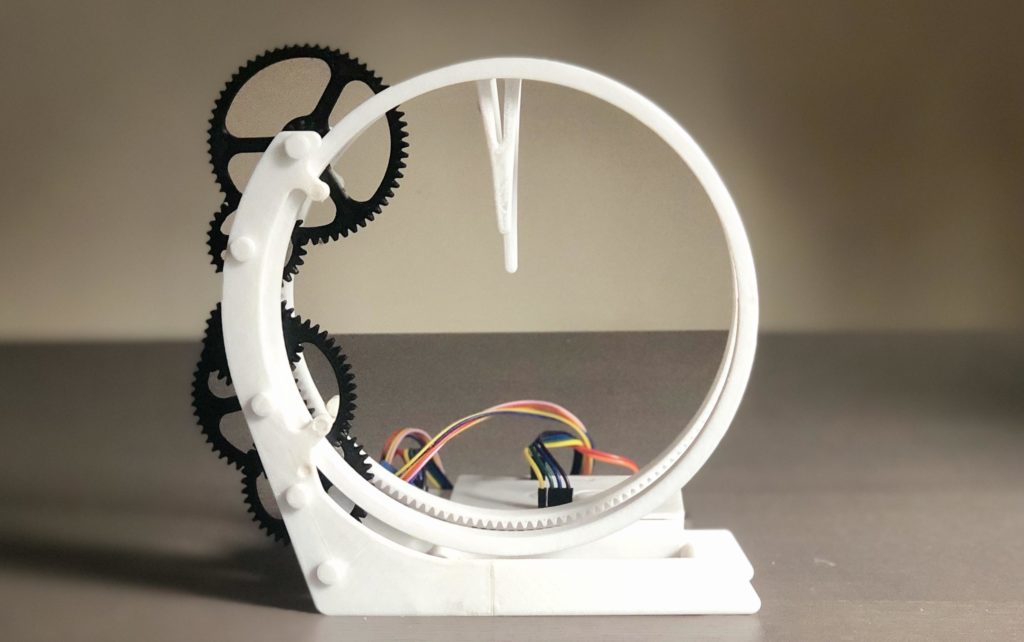
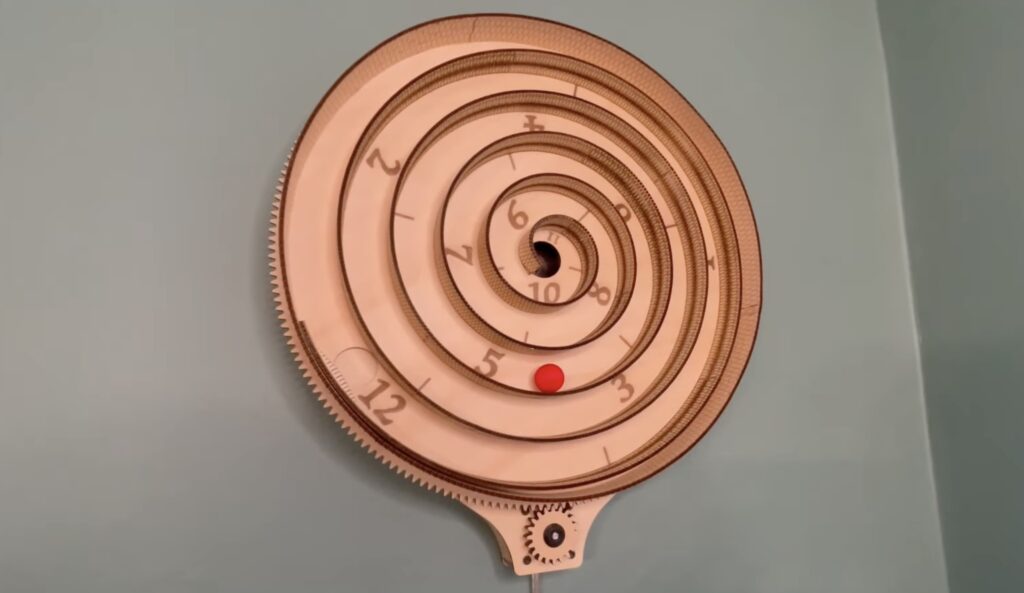
This clock is a giant spiral and indicates the time with a ball that rolls along the spiral. The entire spiral rotates at a constant speed, causing the ball to move towards the center. Numbers marked along the path show the time. When the ball reaches the center, it drops through a chute that puts it back at the beginning of the spiral. That repeats endlessly in 12-hour cycles.

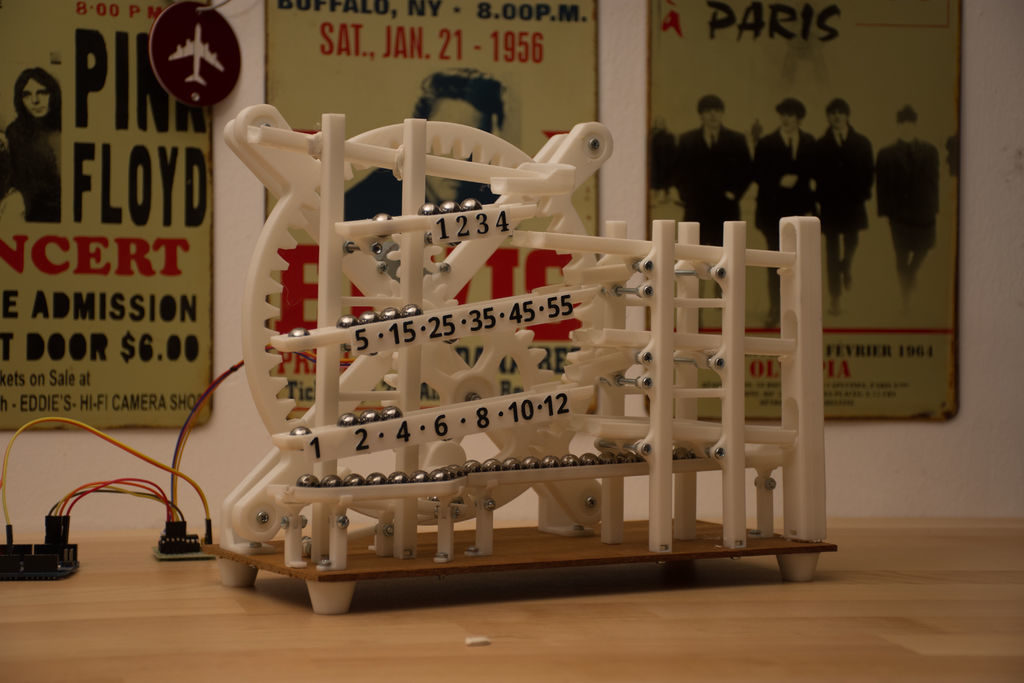
The electronics are very simple: an Arduino Nano ESP32 board tells a stepper motor to spin at the exact rate that Kelton calculated. That stepper motor turns the spiral, keeping the ball in motion. Because this development board has an ESP32, it would have been possible to connect it to a WiFi network to find the time and keep everything in sync. But Kelton didn’t think that was necessary, so the spiral just rotates at a constant rate.

The real trick with this clock was the woodworking. All of the parts are laser-cut plywood and Kelton made heavy use of kerf cuts. Those break up a length of wood into many segments, so the wood can easily bend. That technique was perfect for creating the smooth spiral path and the result looks fantastic.

The post This spinning spiral clock is hypnotizing appeared first on Arduino Blog.

When Arduino first hit the maker scene, the world of embedded electronics was largely unconnected and offline. But as the IoT, home automation, and smart technology advanced, Arduino kept up. Today, there are a variety of Arduino development boards that offer built-in networking capability and you can use the Arduino Cloud to take advantage of them. To demonstrate that, Doug Domke built this button-free alarm clock.

User interface design is a complex field that has to balance usability, simplicity, and practicality. Take a look at the radio alarm clocks of the 1990s to see how bad user interfaces can make device interaction frustrating. Domke’s alarm clock goes in the complete opposite direction and omits buttons altogether. It lets the user “set it and forget it” through a simple Arduino Cloud dashboard. The time automatically updates based on the configured time zone and daylight savings settings.

This requires very little hardware. Power comes in through USB to an Arduino Nano ESP32 board, with a connected piezo buzzer module and four-digit seven-segment display. Those fit inside a basic 3D-printed enclosure. All the magic happens through the Arduino Cloud and Domke explains how to set up an Arduino Cloud account, create a dashboard, and connect the Nano ESP32 to that dashboard.

If you want a dedicated alarm clock, this is a quick and easy project that will help you get acquainted with the Arduino Cloud for future IoT projects.

The post No need for buttons with this Arduino Cloud alarm clock appeared first on Arduino Blog.

The digital clock has existed in its current form for decades at this point, so it’s quite exciting to see when a new take on the classic design comes along. The Time Twister 5, created by Hans Andersson, is a fully 3D-printed electromechanical clock that twists certain blocks into place, which make up digits to display the current time.

Each block consists of five distinct layers, where each layer is a triangular prism with three outer faces. These faces come in a total of five different patterns and are arranged in such a way that any digit from zero up to nine can be represented by simply turning the correct layer(s) a certain amount. The internal electronics — including the Arduino Mega, DS3231 real-time clock module, sensor shield, and power circuitry — are all housed in the gold-colored base. Each layer is stacked upon three metal rods for support and contains a single micro servo that twists planetary gears to move the outside while keeping the inside stationary.

While watching Andersson’ demonstration video below, it is tough to not become entranced by the synchronous movements the digits all rotating into place within the timespan of a second. To read more about his project or to download the files to build one yourself, you can visit his website here.

The post A DIY digital clock with a twist appeared first on Arduino Blog.

Simply looking at a traditional analog clock sitting on a wall somewhere got pretty boring for one Instructables user who goes by saulemmetquinn, which is partially why they wanted to create a novel design instead. Their device uses almost entirely 3D-printed components that come together to form the “Holo Clock,” since it seems holographic with its floating minute and hour hands.

The Holo Clock project started with a surprisingly complex design in CAD software. There are two rings that are lined with teeth that sit stacked horizontally. The back ring is the minute hand, and because it is moved almost directly by the stepper motor, it spins more quickly. The hour hand is driven by a set of gears that reduce the output of the minute hand’s cogs by a factor of 60, thus making it turn at the correct rate. 

The electronics for the clock are extremely simple. It uses an Arduino Uno with a set of four output wires, along with power and ground, to control a ULN2003 stepper motor driver. This in turn outputs current to a generic 5V stepper motor that spins the first drive gear at a known, precise rate for consistent timing. Likewise, the code is also straightforward, as all it must do is step the motor a certain amount depending on how many steps are left within the loop. 

You can read more about the project in saulemmetquinn’s tutorial, which was recently recognized as a runner-up in the Instructables Arduino Contest.

The post Holo Clock is a novel 3D-printed clock that tells time using a pair of rings appeared first on Arduino Blog.

Kaleb Clark, like many of us, works with others from all around the globe. While he could view any number of websites or commercial options to see what time it is for these other people, he decided to make a world clock to get this info at a glance.

What he came up with uses a 3.5″ SPI TFT screen to show eight time zones in the device’s main section, plus a pair of 7-segment displays for two more “slots.” The unit runs on an Arduino Nano 33 IoT, which checks the time over WiFi via the Network Time Protocol, or NTP.

In theory, Clark will never have to set this clock, but user interface is provided by an encoder to select the times on display, and whether they are shown in a 12 or 24-hour format.

Whether for work or play, and now for various video/voice socials that have been set up, “chebe” spends most of the day at their desk — so much so that, in some instances they lose track of time. To address the issue, this maker dug out a vintage Arduino Duemilanove circa 2010 to create a unique new clock.

The build consists of other parts from chebe’s electronics stash as well, including a SparkFun RTC module and a 7-segment 4-digit display to show the hour and minutes. An LoLshield that was soldered up nine years ago was also implemented, producing an extra glowing effect through the unit’s translucent cover.

Impressively, the only component obtained specifically for the project was a Proto Shield for attaching things together.

Alarm clocks of old—and certainly many of those today—require several button pushes to set things up properly. Maker Michael Wessel, however, decided to implement his own take on a more intuitive clock, creating a device that features three separate eight-digit seven-segment LED panels. Eight buttons allow for direct manipulation of each of the digits, with their own dedicated LEDs.

The info on display includes time and date, as well as temperature, and it can even show how many days, hours, or minutes have passed since a special pre-programmed day. Up to seven audible alarms are available, which can be silenced by a loud noise (e.g. clapping your hands) via a sound sensor. 

The clock is controlled via an Arduino Mega, along with an RTC module to keep things accurate.

I remember I always had to set all digital clocks for my grandparents in the ’80s — these clocks and watches always required some complicated button juggling! So, here it is: a DIY LED alarm clock that my grandparents would have been able to set and use without my help! 

An Arduino-based LED clock with 7 individual alarms, highly intuitive user interface, temperature display, and display of days / hours / minutes passed since a special date, e.g., your birthday. An active / ringing alarm can be disabled by making a loud noise, e.g., by clapping your hands. Timer-based PWM sound output for alarm melodies. 

The Arduino’s EEPROM is being used to store the alarms of course, and the DS3231 RTC is battery backed up, so it survives a temporary power outage and you won’t be late for work the next morning. 

This was put together rather quickly, thanks to off the shelf components, Velcro and existing Arduino libraries for them! The clock can be built for about $30 – 40. 

While model skulls are generally relegated to Halloween, or biology class, this maker decided to construct a very unique clock out of one. 

The “hands” of the terrifying timepiece are represented by two eyes—right for hours, left for minutes—that are rotated about using a pair of 360-degree (but not continuous rotation) servos. If this wasn’t freaky enough, a third servo pulls the jawbone open with a thin cable, which then snaps shut with springs to “chime” the hour.

An Arduino is used for control of the assembly, along with a DS3232 RTC module to keep things accurate. A nice octagonal frame was built for it as well, giving this otherwise strange creation a classy home in which to reside. 

Code for the project can be found here and more pictures are up on Imgur.

Flament bulbs, commonly known as Edison bulbs, contain a variety of interesting LED lights. So interesting, in fact, that maker Andy Pugh decided to take these individual components up and turn them into a 7-segment display clock.

While making a clock isn’t an uncommon hacker pursuit, this Arduino-controlled device uses a series of wires to both power and support the clock’s four digits from a bent brass frame. This gives it a decidedly web-like appearance, so much so that Pugh notes it’s reminiscent of the cobweb writing in the book Charlotte’s Web. 

The clock also features the ability to sync the time via radio signals, though this functionality appears to still be in the experimental phase. 

Code for the build can be found here, and you can see it cycling through numbers in the video below.

Arduino boards and custom clock builds seem to be a great match, as illustrated by Görkem Bozkurt’s recent project. 

His 3D-printed marble clock uses a stepper-driven gear mechanism to lift 11mm steel spheres to the device’s top chute. The spheres then roll down to a five-minute rail, which empties when filled and transfers a single marble to another minute rail, graduated in five-minute increments up to 60. This then fills the hour rail in a similar process, letting you tell the time of day, or simply be mesmerized by its movement.

The main gear mechanism is powered by a small stepper motor, controlled by an Arduino Uno for timekeeping.

If you’d like to build your own, code is available on Bozkurt’s write-up, as well as the needed print files.


  • Newsletter

    Sign up for the PlanetArduino Newsletter, which delivers the most popular articles via e-mail to your inbox every week. Just fill in the information below and submit.

  • Like Us on Facebook