Posts | Comments

Planet Arduino

Archive for the ‘leds’ Category

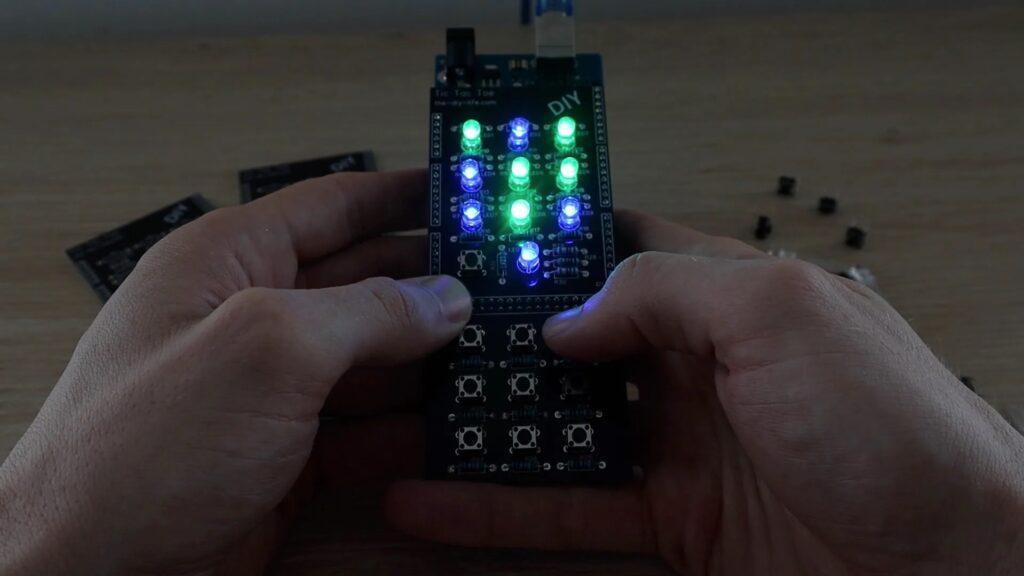
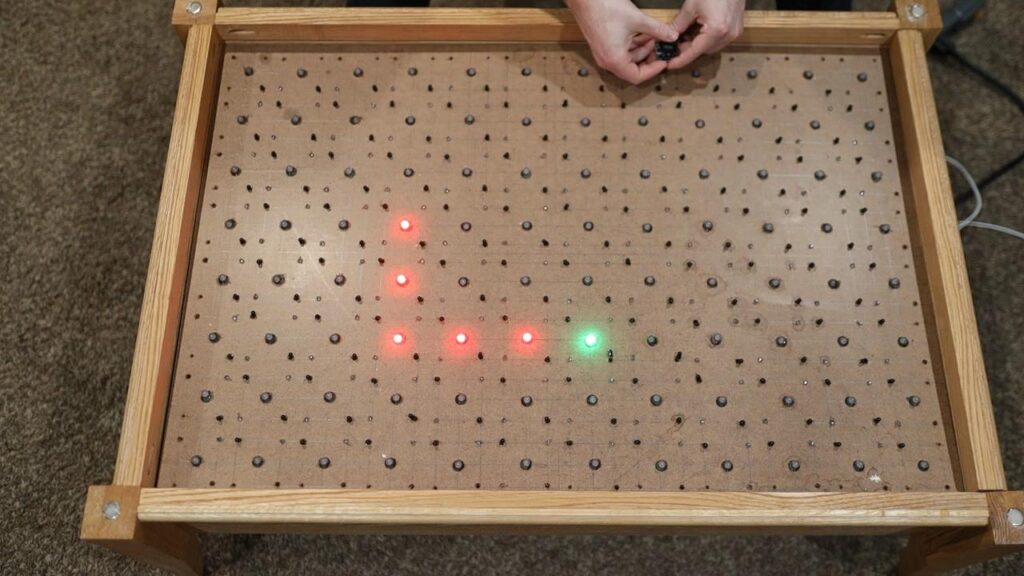
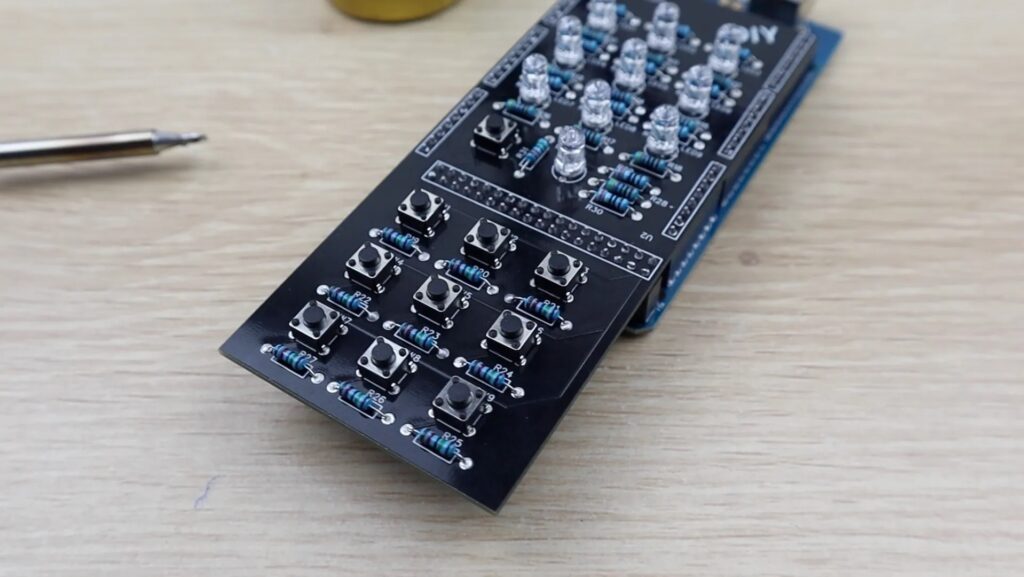
Tic-tac-toe is a nearly perfect time-wasting game as it’s quick to play, easy to learn, and has a very small set of rules, which makes it ideal for implementation on a microcontroller. Michael Klements wanted to take it a step further and add a simple AI that can effectively play against a human opponent while never losing a single match. The device he came up with is a shield that fits onto an Arduino Mega and features a grid of LEDs and corresponding tactile buttons. A player can then choose from one of three different modes: easy AI, expert AI, or a human opponent. 

If an AI mode is chosen and it goes first, the first spot on the board where a piece goes is the corner, which eliminates several orders of magnitude of choices, thus speeding up the time it takes to run through the recursive minimax algorithm. The easy mode will perform a couple of random moves in the beginning to give the player a chance to win. 

You can read more about how Michael created this AI tic-tac-toe device in his well-written blog post here and see it in action below.

The post This shield brings a tic-tac-toe game to your Arduino Mega, complete with an AI opponent appeared first on Arduino Blog.

We’ve all been there. Your current project has hit a wall, or the next step will take days to complete, and you need something to do in the meantime. So you start a project that you envision will fit nicely in the gap, and then, inevitably, it doesn’t. Maybe it even takes so long that the original project gets finished first. So what? There’s nothing wrong with that, especially when the filler project turns out as well as this drink temperature monitor disguised as a circuit sculpture (video, embedded below). Just put your mug on the coaster, and the weight of it activates a hidden switch, which causes the sculpture to display its secret LEDs.

[MakeFunStuff] wanted to make something that looked less like a circuit and more like art, while building a tool that could determine the relative hotness of a beverage. Such a a useful circuit sculpture sounds like a tall order to us, but [MakeFunStuff] pulled it off with finesse and style.

The circuit is based around this Sputnik-looking standalone IR temperature sensor which, as [MakeFunStuff] aptly describes, is “a single-pixel infrared camera that picks up everything in a 90° cone starting at the sensor.”

[MakeFunStuff] paired this easy-to-use sensor with an Arduino Nano and five LEDs that show how hot a beverage is on a scale from 1 to 5. The sensor is hidden in plain sight, suspended from the top of the brass rod sculpture and blending in perfectly. We love that the LEDs are hidden behind a thin layer of carefully-drilled wood and agree that a drill press would have been much easier.

The code is set up for just about every temperature scale from Celsius to Rømer, so that solves that argument. [MakeFunStuff] went with the Kelvin scale because science. Our favorite thing about this video is that [MakeFunStuff] shared their failures and fixes as they built their way toward answering the questions of how to suspend the sensor over the drink, and how best to display the heat level while hiding the electronics. Go grab a hot cup of something and check it out after the break while you let it cool off the normie way.

We admit that we would likely zone out while waiting for the LEDs to disappear. Here’s a smart coaster that uses an ESP8266 to send a message to Discord when your beverage has reached the perfect drinking temperature.

Thanks for the hot tip, [Perry]!

Ever since we saw the movie Big, we’ve wanted a floor piano. Still do, actually. We sometimes wonder how many floor pianos that movie has sold. It’s definitely launched some builds, too, but perhaps none as robust as this acrylic and wooden beauty by [FredTSL]. If you want more technical detail, check out the project on IO.

The best part is that this piano is modular and easily expands from 1 to 8 octaves. Each octave runs on an Arduino Mega, with the first octave set up as a primary and the others as secondaries. When [FredTSL] turns it on, the primary octave sends a message to find out how many octaves are out there, and then it assigns each one a number. Whenever a note is played via conductive fabric and sensor, the program fetches the key number and octave number and sends the message back to the primary Mega, which plays the note through a MIDI music shield.

We think this looks fantastic and super fun to dance around on. Be sure to check out the build log in photos, and stick around after the break, because you’d better believe they busted out some Heart and Soul on this baby. After all, it’s pretty much mandatory at this point.

Wish you could build a floor piano but don’t have the space or woodworking skills? Here’s a smaller, wireless version that was built in 24 hours.

Jeremy Cook recently constructed a workbench out of wood and plastic supports, and after several iterations, he’s enhanced it with LEDs to selectively shine light where he’s working. Initially, this meant a simple strip of 12V non-addressable lighting that turned on and off. He then augmented it further using an Arduino Nano, with a pair of buttons for PWM brightness control and a PIR sensor to activate the lights when presence is detected.

Not one to leave well enough alone, afterwards he supplemented this fixed color lighting with a strip of addressable LEDs mounted to a length of tubing. The lights are programmed to stay white – though other colors would be possible – and a total of three PIR sensors are utilized to light sections of the LEDs when motion is detected.

The post PIR sensors automatically light up workbench zones appeared first on Arduino Blog.

Snake is a classic game — more a genre of games — that dates all the way back to 1976 with the release of the Blockade arcade game. Many consoles and devices have received variations of Snake, putting it in the same league as Tetris and block breakers. Now Ty and Gig Builds have used an Arduino to construct a giant coffee table version of the game.

One of the reasons that so many variations of Snake exist is because it runs well on very low-resolution screens. That also made it perfect for this project, since an LED matrix makes for a great low-res display. Ty and Gig originally built that matrix for an interactive coffee table project and they were able to repurpose it for this game.

WS2811 individually-addressable RGB LEDs form that matrix. They shine through a holes drilled into a sheet of plywood mounted underneath the coffee table glass. An Arduino Mega controls those LEDs, but any Arduino board would work for the job. The only other hardware components are a 5V power supply and an analog joystick module.

The joystick is comprised of two potentiometers, so the Arduino simply checks those to determine which direction to move. Programming was a small challenge, because the 1D array of LEDs had to be translated to the 2D display. With that figured out, programming the game was straightforward. Players direct the LED snake to collect as many apples as possible without colliding with itself, like they have done for the past four decades.

The post Bringing Snake to your coffee table appeared first on Arduino Blog.

Geodesic domes, approximately spherical structures made from an arrangement of triangular faces, are fascinating in and of themselves. Add light and sound, as was done here by students at the University of Málaga in Spain, and you have something truly magical.

Their device is a derivation Jon Bumstead’s larger dome project, shrinking his 120-triangle design down to a more manageable 40. The frame was constructed out of wood and 3D-printed PLA, with triangle measurements calculated using this Desert Domes tool.

An Arduino Uno controls the system’s programmable LED and sound output, while IR sensors with 74LS151 multiplexers allow for interaction. The dome features several modes, which include creating colorful patterns at the touch of each triangle, producing music, and even playing the classic game of Simon. You can see it in action below!

Call us easily amused, but we think it’s pretty amazing what can be done with a microcontroller, some RGB LEDs, and a little bit of plastic. Case in point is [andrei.erdei]’s beautiful and quite approachable fiber optic LED lamp. It’s a desktop-friendly version of a similar piece [andrei] made that is roughly nine times the size of this one and hangs on the wall. The build may be simple, but the product is intricately lovely.

We really like the visual density of this lamp — it’s just the right amount of tubes and strikes a balance between being too sparse and too chaotic. As you might expect, there’s an Arduino and some RGB LED strips involved. But the key to this build is in the 16 pieces of side-glow plastic fiber optic tubing. Side-glow is designed to let light escape along the length of the tube as opposed to end-glow, which is made to minimize light loss from one end to the other like a data pipe. This allows for all sorts of fun effects, and you can watch [andrei.erdei] go slowly and soothingly through the different colors and modes in the demo video after the break. Make sure you watch long enough to see the tubes move like the old Windows 3D pipes screensaver

Already have too many knickknacks and wall hangings? You’re missing out on prime real estate — the ceiling. Check out this fiber optic ceiling installation that reacts to music.

Hackers and makers can sometimes feel like they’re getting the short end of the stick when it comes to gift giving. You’re out there making thoughtful, intricate circuit sculptures, helpful software, or face masks for people, and what do you get in return? Okay, yes, usually gift cards or tools or other things that feed your creativity in the first place. But darn it, it would be nice to receive a handmade gift once in a while, right?

So here’s what you do: make friends with enough other makers that you find your birthday twin, or close enough that you both feel the warmth of the personal holiday you share. Then you get them to agree to trade handmade birthday presents with you. That’s more or less what happened between [Becky Stern] and [Estefannie], who seem to have found each other through the magic of sharing projects on YouTube.

[Becky]’s gift to [Estefannie] is a busy intersection of maker elements including graphic design, embroidery, electronics, and 3D printing. [Becky] started with the embroidery, which was made possible thanks to a new open-source library for Processing called PEmbroider. Once that was done, she 3D printed the frame and added the electronics — candle flicker LEDs for the birthday cake, and a handful of songs that are accessible via touch contacts screwed into the side of the frame. [Becky] added a real-time clock module so it plays a few extra songs on [Estefannie]’s actual birthday.

The most thoughtful element here is personalization, and it’s amazing what can happen when you put 100% of yourself into something that is 100% about someone else. Every bit of the art is personal to [Estefannie], and every atom of the build is pure [Becky]. Check out the demo and build video and see what [Estefannie] made for [Becky] after the break.

[Becky]’s varied creativity has graced these pages many times before. See how she bid adieu to 2020, built a daily affirmation mirror, and gave a mask-making masterclass in the early stages of the pandemic.

If you live in a house with stairs and have to traipse up and down at night, it’s best to have some sort of light that guides you. Although a cell phone can work just fine, or you could likely activate bright overhead lighting, creator MagicManu devised an automatic and progressive solution to illuminate his path instead.

MagicManu’s system knows when someone is there using PIR sensors arranged at both ends, and only activates if it’s dark enough thanks to a photoresistor. The entire setup is controlled by an Arduino Nano, while two potentiometers adjust light sensitivity and duration of ignition.

As MagicManu walks up, a rainbow pattern emanates from the bottom to the top via addressable WS2812B LEDs, or vice versa if he’s descending.

Does this sound like a project you’d want to install in your home? Code and additional details are available in MagicManu’s write-up.

Practice “slow making” and mindfulness while needle-felting, then sew on a light to complete the magical experience

Read more on MAKE

The post LED Lit Felted Mushrooms appeared first on Make: DIY Projects and Ideas for Makers.


  • Newsletter

    Sign up for the PlanetArduino Newsletter, which delivers the most popular articles via e-mail to your inbox every week. Just fill in the information below and submit.

  • Like Us on Facebook