
04
The PC turbo button and LED clock speed display were common features on early personal computers. Wanting to add a little retro chic to his modern battle-station, [Matthew Frost] assembled a charming and functional homage to the turbo button control panel.
In days past, this automotive nomenclature implied a performance boost when activated. Instead, ‘turbo mode’ would clock your x86 processor at its rated speed. Disabling ‘turbo’ would throttle the CPU, often all the way down to 4.77MHz. Inherited from the original IBM PC, some early computer programs relied on this specific clock speed, and would otherwise run too fast (or not at all) on faster hardware. PC marketing teams and engineers alike stopped including the turbo button and glowing clock speed numbers around the Pentium era.
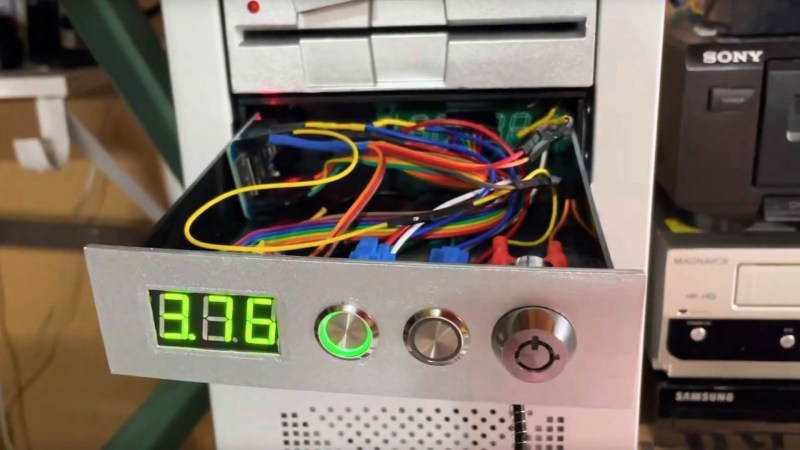
This modern re-imagining of the turbo button uses an Arduino microcontroller, seven-segment display and tactile switches to emulate the look and feel of the original hardware. Instead of directly adjusting the CPU clock speed, hitting turbo switches between balanced and high-performance Windows power plans. The seven-segment display measures this clock speed in GHz to two decimal places. We’ll admit that it’s pretty satisfying to see those numbers inch higher when switching to turbo.
The rightmost button switches between measuring CPU speed, GPU utilization, network load and memory utilization, which improves on its original inspiration. The tubular key lock, also a common sight on early PCs, enables and disables networking for the entire system, which is great for keeping the kids off the ‘net (at least until they figure out how to remove the 5.25″ drive bay from the system and hot-wire the network adapter with a paperclip).
There are more details on the GitHub page, in case you want to build your own. This project could look especially fetching in PC sleeper builds, where new components are ‘hidden’ in old case hardware. And if this has made you feel nostalgic at all, you may want to hear our thoughts on why it’s all about the Pentiums.


