Posts | Comments

Planet Arduino

Archive for the ‘toy hacks’ Category

Regular readers will know that Hackaday generally steers clear of active crowdfunding campaigns. But occasionally we do run across a project that’s unique enough that we feel compelled to dust off our stamp of approval. Especially if the campaign has already blasted past its funding goal, and we don’t have to feel bad about getting you fine folks excited over vaporware.

It’s with these caveats in mind that we present to you Computer Engineering for Babies, by [Chase Roberts]. The product of five years of research and development, this board book utilizes an internal microcontroller to help illustrate the functions of boolean logic operations like AND, OR, and XOR in an engaging way. Intended for toddlers but suitable for curious minds of all ages, the book has already surpassed 500% of its funding goal on Kickstarter at the time of this writing with no signs of slowing down.

The electronics as seen from the rear of the book.

Technical details are light on the Kickstarter page to keep things simple, but [Chase] was happy to talk specifics when we reached out to him. He explained that the original plan was to use discreet components, with early prototypes simply routing the button through the gates specified on the given page. This worked, but wasn’t quite as robust a solution as he’d like. So eventually the decision was made to move the book over to the low-power ATmega328PB microcontroller and leverage the MiniCore project so the books could be programmed with the Arduino IDE.

Obviously battery life was a major concern with the project, as a book that would go dead after sitting on the shelf for a couple weeks simply wouldn’t do. To that end, [Chase] says his code makes extensive use of the Arduino LowPower library. Essentially the firmware wakes up the ATmega every 15 ms to see if a button has been pressed or the page turned, and updates the LED state accordingly. If no changes have been observed after roughly two minutes, the chip will go into a deep sleep and won’t wake up again until an interrupt has been fired by the yellow button being pressed. He says there are some edge cases where this setup might misbehave, but in general, the book should be able to run for about a year on a coin cell.

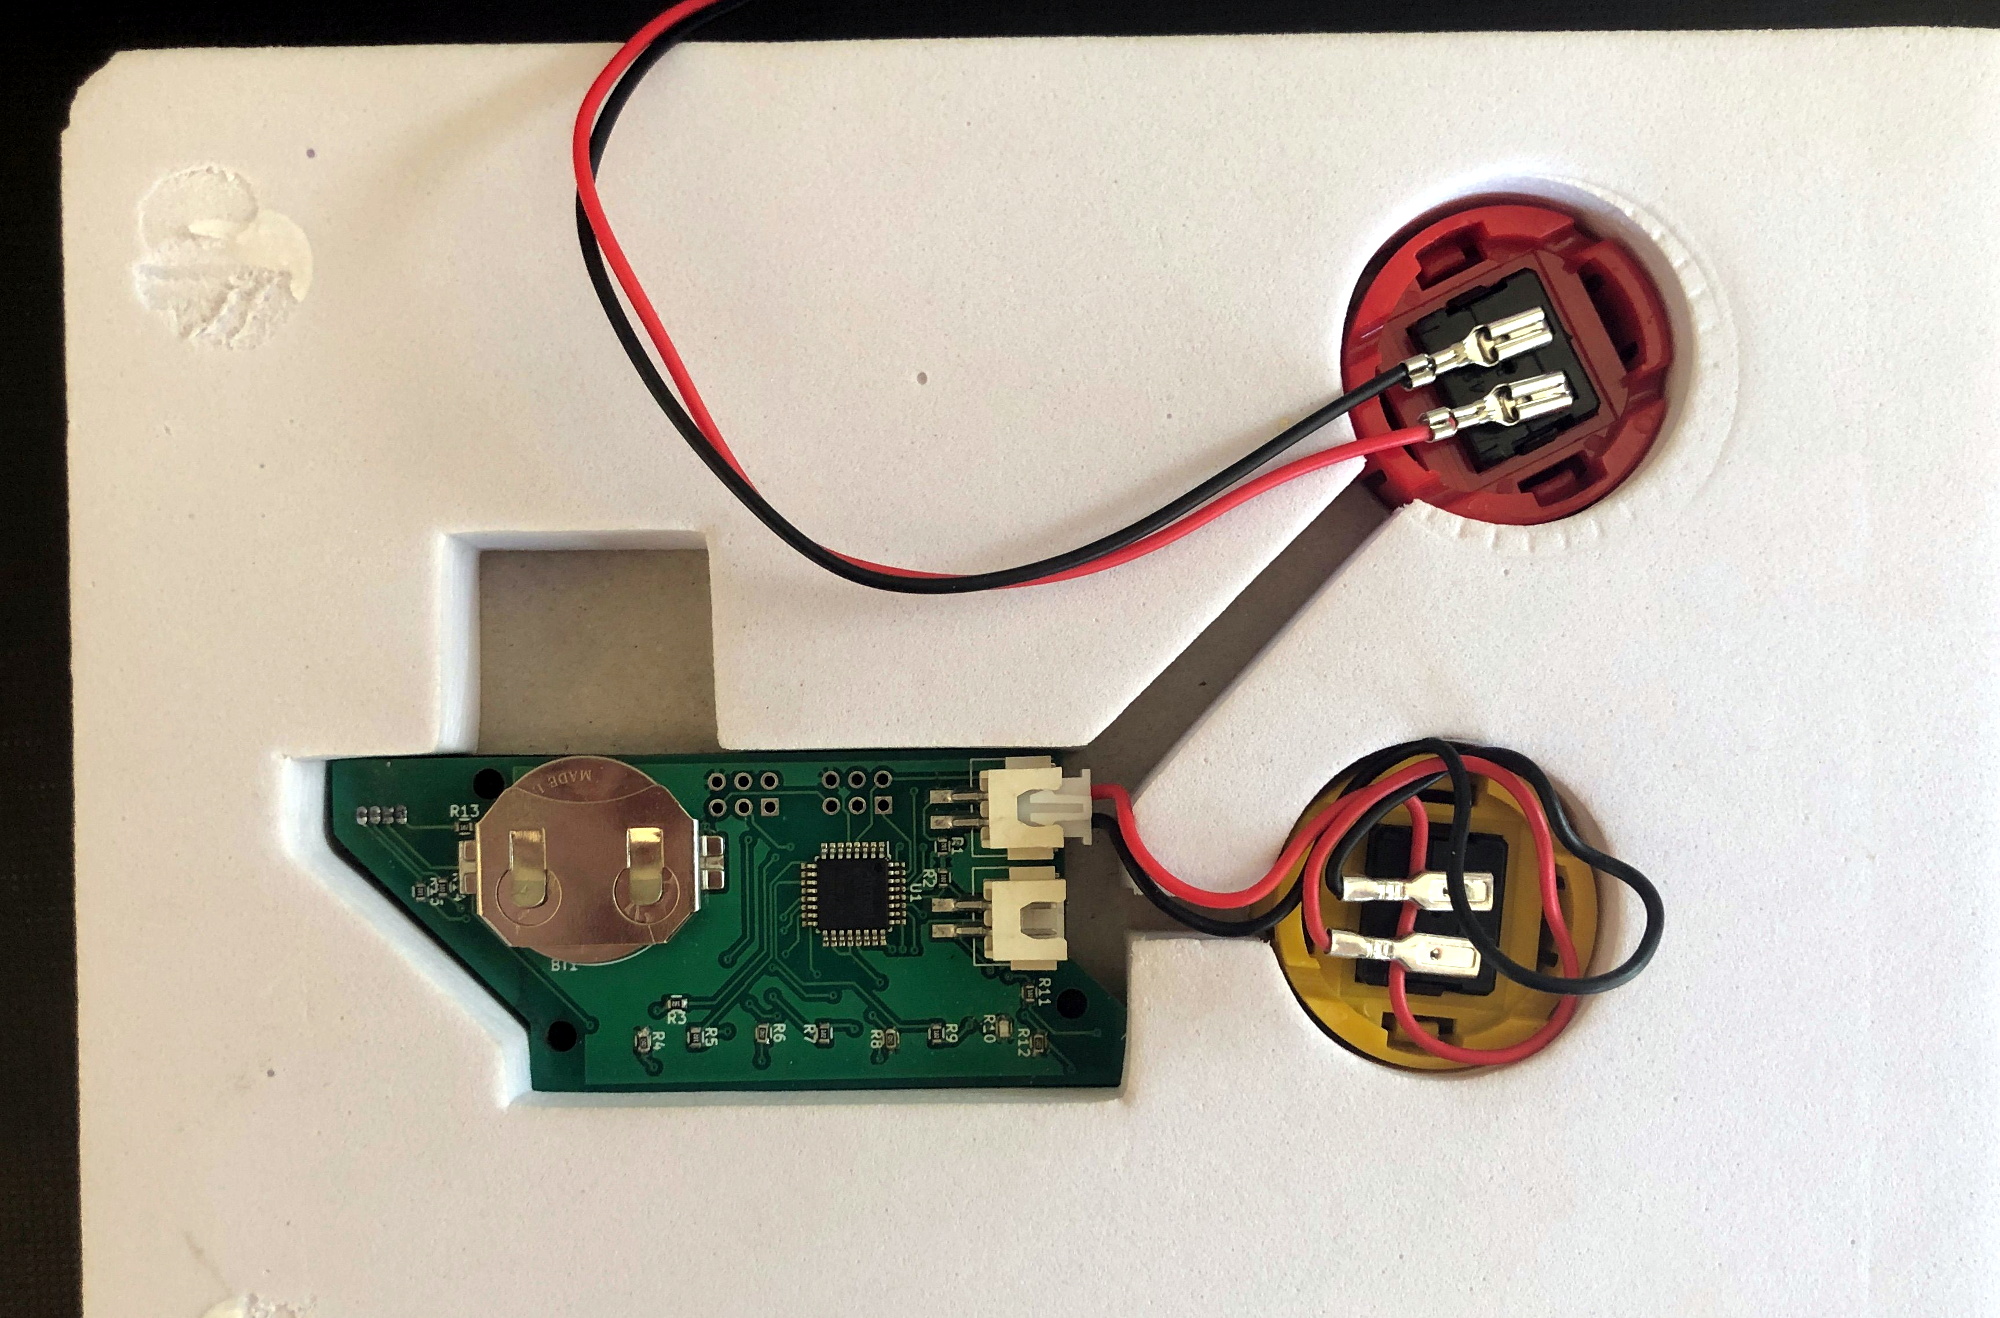
[Chase] tells us the biggest problem was finding a reliable way to determine which page the book was currently turned to. In fact, he expects to keep tinkering with this aspect of the design until the books actually ship. The current solution uses five phototransistors attached to the the MCU’s ADC pins, which receive progressively more light as fewer pages are laying on top of them. The first sensor is exposed when the second page of the book is opened, so for example, if three of the sensors are seeing elevated light levels the code would assume the user is on page four.

Opening to the last page exposes all five light sensors.

The books and PCBs are being manufactured separately, since as you might expect, finding a single company that had experience with both proved difficult. [Chase] plans on doing the final assembly and programming of each copy in-house with the help of family members; given how many have already been sold this early in the campaign, we hope he’s got a lot of cousins.

So what do you do with an Arduino-compatible book when Junior gets tired of it? That’s what we’re particularly interested in finding out. [Chase] says he’s open to releasing the firmware as an open source project after the dust settles from the Kickstarter campaign, which would give owners a base to build from should they want to roll their own custom firmware. Obviously the peripheral hardware of the book is fairly limited, but nothing is stopping you from hanging some sensors on the I2C bus or hijacking the unused GPIO pins.

If you end up teaching your copy of Computer Engineering for Babies some new tricks, we’ve love to hear about it.

At first glance, this might appear to be a Rube Goldberg machine made of toys. The truth isn’t far off — it’s a remote-control animatronic story machine driven by its spectators and their phones. [Niklas Roy] and a team of volunteers built it in just two weeks for Phaenomenale, a festival centered around art and digital culture that takes place every other year.

A view of the tubes without the toys.

A red ball travels through a network of clear acrylic tubes using 3D printed Venturi air movers, gravity, and toys to help it travel. Spectators can change the ball’s path with their phones via a local website with a big picture of the installation. The ball triggers animations along its path using break beam detection and weaves a different story each time depending on the toys it interacts with.

Here’s how it works: a Raspberry Pi 4 is responsible for releasing the ball at the beginning of the track and for controlling the track switches. The Pi also hosts a server for smartphones and the 25 Arduino Nanos that control the LEDs and servos of the animatronics. As a bonus animatronic, there’s a giant whiteboard that rotates and switches between displaying the kids’ drawings and the team’s plans and schematics. Take a brief but up-close tour after the break.

This awesome art project was a huge collaborative effort that involved the people of Wolfsburg, Germany — families in the community donated their used and abandoned toys, groups of elementary school kids were brought in to create stories for the toys, and several high school kids and other collaborators realized these drawings with animatronics.

Toys can teach valuable lessons, too. Take this body-positive sushi-snarfing Barbie for example, or this dollhouse of horrors designed to burn fire safety into children’s brains.

The prevalence of drones has made airborne photography much more widespread, especially among hobby photographers and videographers. However, drone photos aren’t without their problems. You have to deal with making the drone follow the shot which can be difficult unless you have a very expensive one. Worse, you can’t really fly a drone through heavily wooded or otherwise obstructed terrain.

[Makesome’s] friend faced these issues and wanted to buy a cable cam — a mount for the camera that could go back and forth on a cable strung between two trees or other structures. Instead of a design from scratch, they decided to cannibalize a cheap RC car along with an HP printer and the effect — as you can see in the video below — is pretty good.

Repurposing toys is an honored tradition and, after all, what do you need but a motor that goes forward and reverses? We can’t help but notice though that toy hacking is much easier now that you can 3D print custom widgets to connect everything together.

The video isn’t really a tutorial because you will likely start with a different car and have different needs. But there’s enough info there to give you some ideas. It looks like the car’s contribution was mostly the RF remote control portions. There’s also an Arduino and some drive electronics to take care of the motor donated by an old printer.

If you prefer to slide your camera on a rail, we’ve seen many setups for that. Or try a camera dolly on wheels.

[beshur]’s 2-year-old is obsessed with transportation, so he lifted a few DUPLO blocks from the bin and made this toy traffic light as a birthday present. Hey, might as well get him used to the realities of traffic, right? It also makes for a good early hacker lesson: why buy something when you can make it yourself?

The traffic pattern is determined by an Arduino Nano V3 situated inside the carved-out rear block. There’s a push button on the side in case there’s a spill and the lights need to go blinking red until the issue is dealt with. Instead of trying to solder everything in situ and risk melting the plastic, [beshur] dead-bugged the LEDs and resistors to the Nano with a helping hands and then worked everything into the case. The 5mm LEDs fit perfectly into the drilled-out posts of a second block and produce a nice, soft glow. Proceed with caution and check it out after the break.

Of course, plastic building blocks can do real work, too. This LEGO chocolate pantograph is pretty sweet.

If poetry is your thing, this hack might convince you that your brain is more advanced than the rest of us poor sots. [Roni Brandini] designed a system that prints lines of poetry when you concentrate. The Mind Poetry project uses an EEG headset from Mattel’s Mindflex toy and pipes your brain’s signals to an Arduino Mega 2560. The system then looks for patterns of brain waves that indicate concentration. As you maintain your concentration, the system continues to print lines of poetry to a small display.

Tapping into the mindflex

[Roni] follows the standard Mindflex hack process by tapping into the data transmission pin on the Mindflex board. Optoisolation is provided by a PC817 to make sure wall power can’t accidentally bleed over into your own wetware. You could get away with just using batteries, but isolation is still a best practice.

The Arduino Brain Library is used to decipher the signal. The Mindflex picks up brain waves from roughly 1 Hz to 50 Hz, which is enough bandwidth to approximately determine mental state. For example, Theta waves are in the 4 Hz to 7 Hz range and can indicate a relaxed, meditative state. Low Beta waves range from 13 Hz to 17 Hz and indicate an alert, focused mental state. The Mindflex system is also generous in that it provides derived meditation and attention scores, ranging from 0 to 100.

It’s difficult to get a high level of precision with this sensor and sampling system, so the code uses [Roni]’s custom recipe of meditation score, attention score, and Low Beta value. He finds it most effective to trigger actions based on a relationship of these scores instead of focusing on the readings themselves. For example, an uptick in both Low Beta waves and the attention score indicate concentration.

Mindflex Brainwave Chart

If the wearer is concentrating, the system prints lines of poetry to the display and charts the three values. As an added gamification, it’ll tell you how many times you broke concentration before you completed the poem. One can imagine a game that tries to break concentration by printing other phrases or even activating an array of mechanical distractions.

If poetry isn’t your thing, you’re in luck. The “Mind Poetry” project also makes some headway (pun intended) with processing the EEG headset’s signals and triggering actions This means you don’t have to be into the poetry scene to reap the benefits. You now have the bones of a hack that lets you control things with your brain muscles and without your muscle muscles.

For inspiration, check out some other Mindflex hacks that let you order drinks with your mind (recommended), shock the heck out of people (not recommended), or even move around your skirt (uh… you do you?).

What do you get when you combine an old optical drive, some empty soda bottles, and a microcontroller? Well…nothing, really. That’s still just a pile of rubbish. But if you add in a battery, an RC receiver, and some motors, you’re getting dangerously close to a fun little toy to kick around the pond as [Antonio Rizzo] recently demonstrated.

A couple of plastic bottles lashed together make up the hull of the boat, and [Antonio] has used the internal frame of an old optical drive bent at a 90 degree angle to hold the two small DC motors. In a particularly nice touch, the drive’s rubber anti-vibration bushings are reused as motor mounts, though he does admit it was just dumb luck that the motors were a perfect fit.

For the electronics, [Antonio] has paired a custom motor controller up with the uChip, a diminutive Arduino-compatible microcontroller in a narrow DIP-16 package. Wireless communication is provided by an off-the-shelf cPPM receiver such as you might see used in a small plane or quadcopter.

The whole build is powered by a common 18650 lithium-ion battery, which could also be easy enough to recover from the trash given how common they are in laptop batteries; though if you threw a new cell into this build we wouldn’t hold it against you. Everything is put into a high-tech plastic sandwich bag to provide minimum of waterproofing with the minimum of effort.

If using a commercial RC receiver and transmitter is a bit too mainstream for your tastes, you could always roll your own radio.

What kind of TV do you have? An older 720p model, or the now standard 1080p? Perhaps you’ve made the leap to the next generation, and are rocking a 4K display in the living room. All those are are fine and dandy if you just want to watch the local sportball contest, but where’s the challenge in that? With all the technology and modular components we have access to anymore, nowadays all the real hackers are making their own TVs.

Of course, when [Nikolai] built his very own LED TV, he did have to make a few concessions. For one thing, there’s no tuner on this model. Oh, and there’s the small issue of only having a 16×16 resolution. It might not be your idea of the perfect display, but it’s just perfect for his newborn son.

That’s right, [Nikolai] got his entry for the “Hacker Parent of the Year” award in early, and built an LED display for his son that he’s calling “BabyTV”.

Rather than the shows, trash, advertisements that they play on the kid channels, this TV only shows animated characters from retro games. We’ll concede that this project might be an elaborate Clockwork Orange style attempt at hypnotizing his son to instill an appreciation for classic gaming. But we’ll allow it.

To make his BabyTV go, [Nikolai] used a 16×16 WS2812B LED panel and an Arduino Nano. Two rotary encoders are used to allow adjusting brightness and change the character currently being shown on the screen. As a particularly clever hack, the Arduino has an IR sensor attached and is constantly watching for any signals. If an IR signal is detected, the BabyTV switches to the next image. So if Junior has a standard IR remote in his hands, any button he presses will cause the display to change to the next “channel”.

Historically speaking we haven’t seen much stuff for children here at Hackaday, but 2018 seems to be changing that. Recent projects like the incredible scratch built mini excavator and gorgeous AT-ST high chair would seem to indicate we’re currently witnessing a generation of hackers become parents. Don’t panic folks, but we might be getting old.

If you were a kid in the 1980s you might have been lucky enough to score a Big Trak — a robotic toy you could program using a membrane keyboard to do 16 different motions. [Howard] has one, but not wanting to live with a 16-step program, he gave it a brain transplant with an Arduino and brought it on [RetroManCave’s] video blog and you can see that below.

If you want to duplicate the feat and your mom already cleaned your room to make it a craft shop, you can score one on eBay or there’s even a new replica version available, although it isn’t inexpensive. The code you need is on GitHub.

The CPU isn’t the only upgrade, as the updated Big Trak has an OLED display. [Howard] plans to add either WiFi or Bluetooth and wire the keyboard up to the onboard Arduino. [Howard] shows the inside and there is a lot of room by today’s standards. Of course, we wanted to see the original PCB, but it was nowhere to be found. Luckily, we found an image of the single-sided PCB on Wikipedia, so if you are like us, you can see it below, under the video.

There’s no wiring diagram that we could see, but from the Arduino code you can back out what the connections are to the sonar, the OLED display, and the new motor drivers for the original motors.

Oddly enough, this isn’t the first Big Trak that has made it to the pages of Hackaday. Of course, we have no shortage of hacked toy robots.

Bigtrak PCB Image – [Sergio Calleja] CC BY-SA 2.0


[Dan], admirably rose to the occasion when his son wanted a new toy. Being a dedicated father — and instead of buying something new — he took the opportunity to abscond to his workbench to convert a Wiimote Nunchuck into a fully wireless controller for his son’s old r/c car — itself, gutted and rebuilt some years earlier.

Unpacking the nunchuck and corralling the I2C wires was simply done. From there, he combined a bit of code, an Arduino pro mini, and two 1K Ohm resistors to make use of an Aurel RTX-MID transceiver that had been lying around. Waste not, want not.

A TI Stellaris Launchpad is the smarts of the car itself, in concordance with a TB6612FNG motor controller. The two Solarbotics GM9 motors with some 3D printed gears give the car some much needed gusto.

In Dan’s own humble words: “nothing out of the ordinary, just a nice example of what one can do with parts mostly gathering dust around any hacker’s house.” If any new parents out there have a spare Wiimote stashed away, you can use the infrared LEDs to make a fairly effective baby monitor.


Filed under: Arduino Hacks, toy hacks

I’m sure many of us remember building toy car race tracks as kids, racing the cars, and then arguing over which car came in first and who cheated because they let go of their car too soon. Ah, good times. [Phil] wanted to create a drag strip race track for his son to introduce him to die-cast cars. The only commercial drag strip [Phil] could find didn’t have an electronic start gate or a timer, so he created his own with the help of an Arduino, a servo, and some light dependent resistors.

The Arduino controls everything, the button input, the lightrace2 
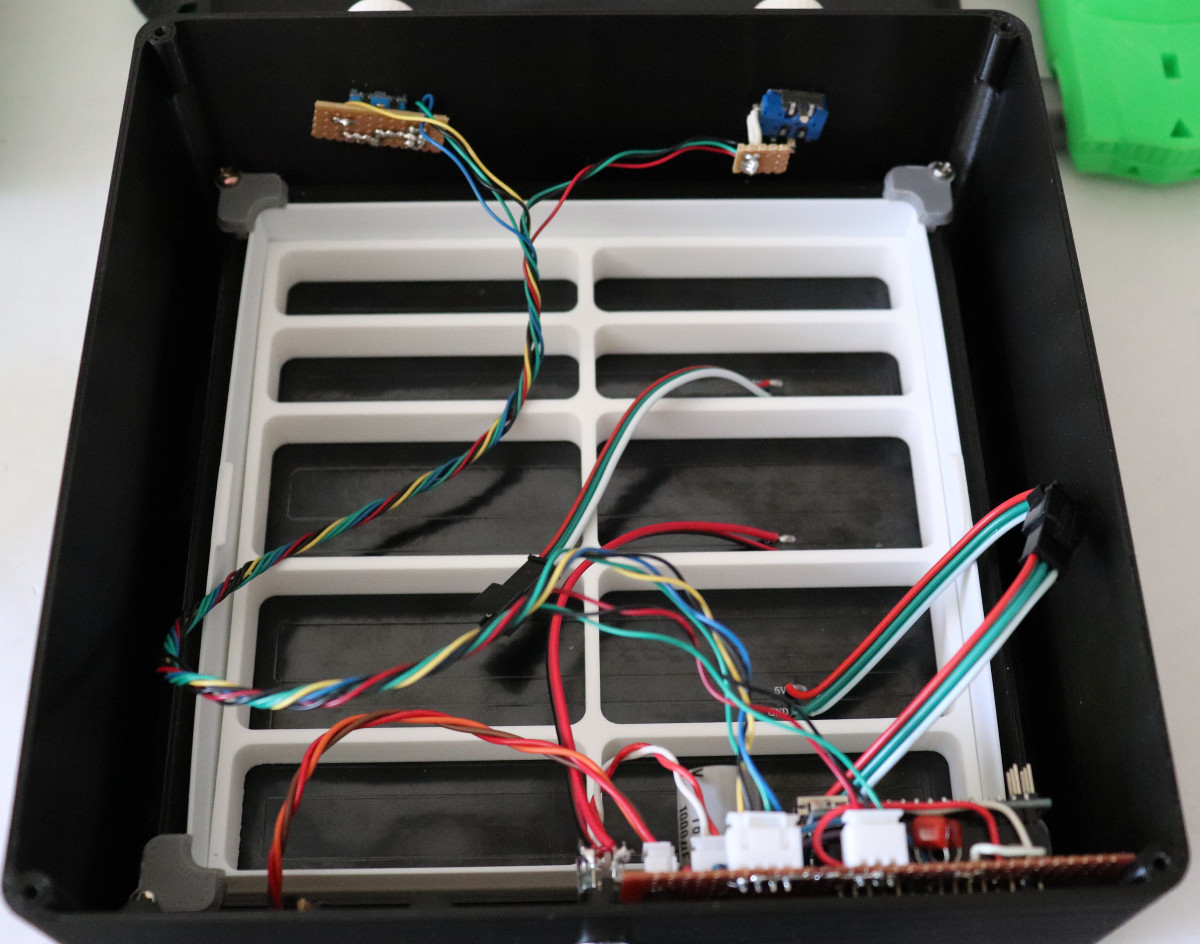
sensor input, and the servo. A button press tells the Arduino to start the race by pulling the start gate down and starting the timer. When the light sensor is covered, the timer for that lane stops. The time is shown for each lane using a different colored 4-digit 7-segment LED.

There were a couple of problems that had to be solved. The servo launching the cars was pulling too much power when activated so that the IR LEDs used at the finish line would dim enough to trigger before the race had even begun! [Phil]’s article goes over these issues and his design ideas as he built the track.

It’s a simple build that should provide hours of fun for [Phil]’s son and his friends over the years and will hopefully put to rest any arguments over who won. There are lots of photos in [Phil]’s article, as well as several videos showing off how things work and at the end of the article, he includes the code he used to control everything. This would be a great surprise for any nieces and nephews coming to visit over the holidays — you might want to wait for final assembly and include them in the fun!

If you like these kind of projects, we’ve seen a similar Hot Wheels timing system, and a different kind of race track based on a turntable system.


Filed under: Arduino Hacks, toy hacks


  • Newsletter

    Sign up for the PlanetArduino Newsletter, which delivers the most popular articles via e-mail to your inbox every week. Just fill in the information below and submit.

  • Like Us on Facebook