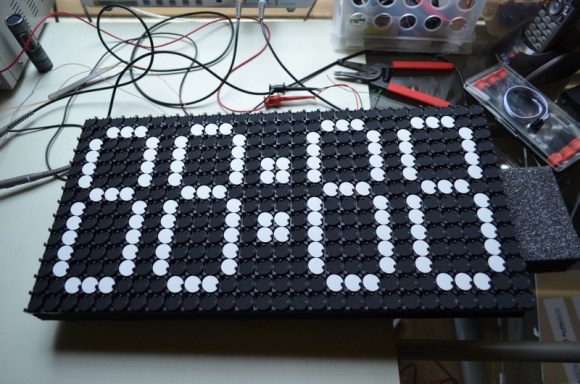
Posts | Comments

Planet Arduino

Archive for the ‘android hacks’ Category

A good robot is always welcome around here at Hackaday, and Hackaday.io user [igorfonseca83]’browser-controlled ‘bot s is no exception. Felines beware.

[igorfonseca83] — building on another project he’s involved in — used simple materials for the robot itself, but you could use just about anything. His goal for this build was to maximize accessibility in terms of components and construction using common tools.

An Arduino Uno gets two D/C motors a-driving using an H-bridge circuit — granting independent control the wheels — an ESP8266 enabling WiFi access, with power provided by a simple 5V USB power bank. [igorfonseca83] is using an Android smartphone to transmit audio and video data; though this was mostly for convenience on his part, a Raspberry Pi and camera module combo as another great option!

A few workarounds notwithstanding — considering some components in this particular configuration do not directly connect to each other — a bunch of code, set up of a website to act as a controller that accesses the IP address of the ESP8266, and an app installed on the audio/video streaming smartphone later, and you have a cat-stalking robot ready to rock. There are, of course, other uses for fpv robots, but with arguably less entertaining results.

[via Hackaday.io and Instructables]


Filed under: Android Hacks, Arduino Hacks, robots hacks

Fidget spinners — so hot right now!

[Ben Parnas], and co-conspirator in engineering inanity [Greg Daneault], brought to the recent Boston Stupid Hackathon in Cambridge, MA, their IoT-enabled Fidget Spinner…. spinner. A Spidget Finner. Yep, that’s correct: spin the smartphone, and the spinner follows suit. Stupid? Maybe, but for good reason.

Part satire on cloud tech, part learning experience, a curt eight hours of tinkering brought this grotesque, ESP32-based device to life. The ESP can the Arduino boot-loader, but you’ll want to use the ESP-IDF sdk, enabling broader use of the chip.

Creating an app that pulls data from the phone’s gyroscope, the duo set up the spinner-bot to access the WiFi and request packets of rotational data from the smartphone via a cloud-based server — the ‘spincloud.’ Both devices were enabled as clients to circumvent existing IoT services.

[Parnas] stipulates that — theoretically — you could control as many spinners as you can imagine with this setup, but one is quite enough of a silly idea for us. Ridiculous or not — if you learn something, then it’s probably worthwhile! So keep hacking away at those ideas and you might be able to justify it to all the people with concerned stares.

To start, you can tell them you’re in  good company.


Filed under: Android Hacks, Arduino Hacks

Who doesn’t love a good robot? If you don’t — how dare you! — then this charming little scamp might just bring the hint of a smile to your face.

SDDSbot — built out of an old Sony Dynamic Digital Sound system’s reel cover — can’t do much other than turn left, right, or walk forwards on four D/C motor-controlled legs, but it does so using the power of a Pixy camera and an Arduino. The Pixy reads colour combinations that denote stop and go commands from sheets of paper, attempting to keep it in the center of its field of view as it toddles along. Once the robot gets close enough to the ‘go’ colour code, the paper’s  orientation directs the robot to steer itself left or right — the goal being the capacity to navigate a maze. While not quite there yet, it’s certainly a handful as it is.

With the care of a maker, [Arno Munukka] takes us under the hood of his robot to show how he’s made clever use of the small space. He designed a duo of custom PCBs for the motors and stuck them near the robot’s top — you can see the resistors used to time the steps poking through the robot’s case, adding a functional cosmetic effect. The Arduino brain is stuck to the rear, the Pixy to the front, and the power boards are snug near the base. Three USB ports pepper the robot’s posterior — a charging port, one for programming the Arduino, and a third to access the Pixy camera.

What do you think — had a change of heart regarding our future overl– uh, silicon-based friends? Yes? Well here’s a beginner bot to will get you started.


Filed under: Android Hacks, Arduino Hacks, robots hacks

Take three NRF24L0+ radios, two Arduino Nanos, and a Raspberry Pi. Add a bored student and a dorm room at Rice University. What you get is the RRAD: Rice Ridiculously Automated Dorm. [Jordan Poles] built a modular system inspired by BRAD (the Berkeley Ridiculously Automated Dorm).

RRAD has three types of nodes:

  • Actuation nodes – Allows external actuators like relays or solenoids
  • Sensory nodes – Reports data from sensors (light, temperature, motion)
  • Hub nodes – Hosts control panel, records data, provides external data interfaces

The hub also allows [Jordan] to control things with his Android phone with Tasker. He has the Arduino and Raspberry Pi code on GitHub if you want to ridiculously automate something of your own. You’d probably want to adapt it to your dorm room, house, or RV, though.

[Jordan] continues to work on the project and promises to have voice recognition and other features, soon. We cover a lot of home automation projects including some others described as ridiculous. The video below shows BRAD, the inspiration for RRAD.


Filed under: Android Hacks, Arduino Hacks, home hacks, Raspberry Pi

Chromecasts are fantastic little products, they’re basically little HDMI sticks you can plug into any monitor or TV, and then stream content using your phone or computer as the controller. They are powered by a micro USB port in the back, and if you’re lucky, your TV has a port you can suck the juice off. But what if you want to turn it off while you use a different input on your TV? You might have to build a power switch.

Now in all honesty, the Chromecast gets hot but the amount of power it draws when not in use is still pretty negligible compared to the draw of your TV. Every watt counts, and [Ilias] took this as an opportunity to refine his skills and combine a system using an Arduino, Bluetooth, and Android to create a robust power switch solution for the Chromecast.

The setup is rather simple. An HC-05 Bluetooth module is connected to an Attiny85, with some transistors to control a 5V power output. The Arduino takes care of a bluetooth connection and uses a serial input to control the transistor output. Finally, this is all controlled by a Tasker plugin on the Android phone, which sends serial messages via Bluetooth.

All the information you’ll need to make one yourself is available at [Ilias’] GitHub repository. For more information on the Chromecast, why not check out our review from almost three years ago — it’s getting old!


Filed under: Android Hacks, Arduino Hacks, home entertainment hacks

Water conservation is on a lot of people’s mind, and with an older sprinkler system one may not have the finest control of when and where the lawn is getting its water. Faced with such a system [Felix] decided to hack into his, adding better computerized scheduling, and internet remote control.

The brains of the operation is handled by a Moteino, which is a Arduino compatible micro controller board with WiFi on board. In order to interface with the sprinkler system, an interface PCB is made. The interface has an on board buck power supply to regulate the 24 volt AC power of the sprinkler down to 5 volt DC for the micro and the 74HC595 shift registers.

The output from the shift registers connects to a pin header where the stock computer normally would have plugged in. With a little software and a phone app, the new micro-controller takes over the sprinkler’s TRIAC’s turning on and off zones with a push of the thumb.

Join us after the break for a quick demonstration video.


Filed under: Android Hacks, Arduino Hacks, home hacks

As hilariously outrageous as Pacific Rim was, it was still an awesome concept. Giant robot battle suits, duking it out with the aliens. Well, it looks as if it wasn’t quite as far-fetched as we first imagined. Maker [Danny Benedettelli] just released a video of his very own Lego exoskeleton suit that when worn can be used to control a desktop size Cyclops robot. You might remember [Danny] as the author of The Lego Mindstorms EV3 Library,

The Cyclops robot (also his design) was originally built four years ago using Lego Mindstorms NXT system with an Android phone running a custom app. Cyclops has been upgraded a bit for this demonstration. Now it communicates over Bluetooth with an Arduino to [Danny’s] telemetry suit.

Relatively speaking, the system is pretty simple. The Lego exoskeleton has potentiometers on each joint, which map to a degree of freedom for the robot. When one potentiometer spins, the associated robot joint mimics it. Simple, right?

He says it’s just a prototype, so we can probably expect an even more functional robot very soon — for more information, check out his personal site called Danny’s Lab.

[via Kotaku]


Filed under: Android Hacks, Arduino Hacks, robots hacks
Dec
22

We love forward thinking companies that take a risk and do something different. iRobot, the company behind the iconic Roomba, just released the newest version of their Roomba Create — a programmable Roomba (minus the vacuum) that can be hacked and programmed to do all sorts of things.

The company developed the Create with STEM students in mind — a robotics learning platform. It came out originally back in 2007, and we’ve covered many hacks that have made use of it. Many. Like, a lot. One of our favorites has got to be this data center monitoring robot that makes use of the platform!

Anyway, the newest version of the Create features the typical hardware upgrades you’d expect, and with some special emphasis on 3D printing. In fact, the CEO of iRobot [Colin Angle] thinks that 3D printing is going to make a big difference in a few years:

“Your Roomba could be a software file that you print at home,” he says. He says the Create’s new features are a way for the company to get ready for that day, while also providing a platform that educators and hobbyists can use to tinker.

Kudos to you guys, iRobot! We just wish people would stop giving Roomba’s knives…

[Thanks PSUbj21!]


Filed under: 3d Printer hacks, Android Hacks, Arduino Hacks

Android Flip Dot Display

There’s just something about electro-mechanical displays that enthralls most people when they see them; and while you’ll be hard pressed to find a split-flap display for cheap, you can still easily buy flip-disc displays! That’s what [Scott] did, and he’s been having a blast messing around with his and building a system to control it via his Android phone.

He picked up the display from a company called Alfa-Zeta in Poland, a company that’s been making electromagnetic displays since 1988. No mention of price, but it looks like some pretty awesome hardware. The beauty with electromagnetic displays is they don’t consume any electricity in idle state, making them far more efficient than almost any other display technology – not to mention perfect contrast in any lighting conditions!

They work by using permanent magnets, electromagnets, and a material that can retain magnetization. A short pulse to the electromagnet causes the disc to flip into the second position, which will then hold in place due to the permanent magnet — no more electromagnet needed.

The display comes with all the necessary hardware to drive the electromagnets and interface with a microcontroller. But, it uses the RS-485 standard, which isn’t natively supported by most other microcontrollers. [Scott's] using an Arduino which does have an RS-485 shield, but he decided he wanted to challenge himself and build a circuit to drive them himself!

All the info is on his blog if you’re looking to try something similar. Once he had it interfaced with the Arduino it was just a simple matter of writing an Android app to transmit controls over Bluetooth for the display. Take a look:

And some slow motion for you:

If split-discs aren’t mechanical enough for you, you can always try building your own split-flap display…


Filed under: Android Hacks, Arduino Hacks
Mar
09

A Cocktail Shaker With Android And Arduino

Android, android hacks, arduino, arduino hacks, cocktail Comments Off on A Cocktail Shaker With Android And Arduino 

drinks

The most rewarding part of any project must be sitting down to see the fruits of your labors set in action for the first time and relaxing with a nice drink. [Tony DiCola] is really showing off his ability to think ahead, because his smart cocktail shaker takes care of the post-build celebration, measuring out drinks with exacting precision.

The build measures out precise amounts of any liquid with the help of a small electronic scale [Tony] picked up from Harbor Freight. Instead of trying to interface with the electronics in the scale, he instead connected a INA125 instrument amplifier to the load cell. An Arduino micro measures the weight on the load cell, and with the known densities of gin, vermouth, and Kahlua, [Tony] can get a very good idea of how much liquid is in the cocktail shaker.

The really neat part of this build is the interface: [Tony] wrote an Android app for his tablet that talks to the Arduino with an Adafruit Bluefruit Bluetooth adapter. The app receives the current weight on the load cell, displays the current amount of liquor in the cocktail shaker, and provides step-by-step instructions for making any cocktail.

It’s a handy little device to keep around the liquor cabinet, and with an absurd amount of pumps and valves could easily become the basis for a very cool cocktail bot.


Filed under: Android Hacks, Arduino Hacks


  • Newsletter

    Sign up for the PlanetArduino Newsletter, which delivers the most popular articles via e-mail to your inbox every week. Just fill in the information below and submit.

  • Like Us on Facebook