Posts | Comments

Planet Arduino

Archive for the ‘tank treads’ Category

Part of [Gelstronic]’s house has a glass roof. While he enjoys the natural light and warmth, he doesn’t like getting up on a ladder to clean it every time a bird makes a deposit or the rainwater stains build up. He’s tried to make a cleaning robot in the past, but the 25% slope of the roof complicates things a bit. Now, with the addition of stepper motors and grippy tank treads, [Gelstronic] can tell this version of GRawler exactly how far to go, or to stay in one place to clean a spot that’s extra dirty.

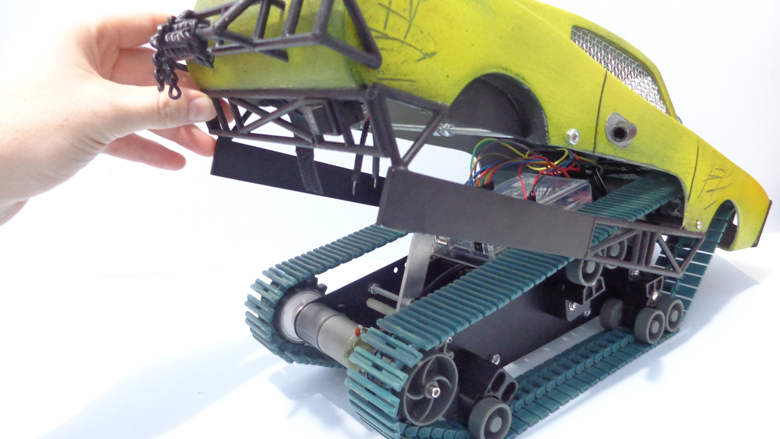
GRawler is designed to clean on its way up the roof, and squeegee on the way back down. It’s driven by an Arduino Pro Micro and built from lightweight aluminium and many parts printed in PLA. GRawler also uses commonly-available things, which is always a bonus: the brush is the kind used to clean behind appliances, and the squeegee blade is from a truck-sized wiper. [Gelstronic] can control GRawler’s motors, the brush’s spin, and raise/lower the wiper blade over Bluetooth using an app called Joystick BT Commander. Squeak past the break to see it in action.

As far as we can tell, [Gelstronic] will still have to break out the ladder to place GRawler and move him between panels. Maybe the next version could be tethered, like Scrobby the solar panel-cleaning robot.

[Dickel] always liked tracked vehicles. Taking inspiration from the ‘Peacemaker’ tracked vehicle in Mad Max: Fury Road, he replicated it as the Mad Mech. The vehicle is remote-controlled and the tank treads are partly from a VEX robotics tank tread kit. Control is via a DIY wireless controller using an Arduino and NRF24L01 modules. The vehicle itself uses an Arduino UNO with an L298N motor driver. Power is from three Li-Po cells.

The real artistic work is in the body. [Dickel] used a papercraft tool called Pepakura (non-free software, but this Blender plugin is an alternative free approach) for the design to make the body out of thin cardboard. The cardboard design was then modified to make it match the body of the Peacemaker as much as possible. It was coated in fiberglass for strength, then the rest of the work was done with body filler and sanding for a smooth finish. After a few more details and a good paint job, it was ready to roll.

There’s a lot of great effort that went into this build, and [Dickel] shows his work and process on his project page and in the videos embedded below. The first video shows the finished Mad Mech being taken for some test drives. The second is a montage showing key parts of the build process.

Paper and cardboard are very versatile and accessible materials for making things. It’s what was used to do some target practice with this working paper and cardboard gun. With the right techniques foam core can be worked into an astonishing variety of shapes, and we also made a case for the value of a desktop vinyl cutter on any well-equipped hacker’s workbench.


  • Newsletter

    Sign up for the PlanetArduino Newsletter, which delivers the most popular articles via e-mail to your inbox every week. Just fill in the information below and submit.

  • Like Us on Facebook