Posts | Comments

Planet Arduino

Archive for the ‘Image(s)’ Category

Normally the 10-50 gigapixels of a DSLR are good enough for nearly any photo you can imagine, but if you need more—and don’t want to spend many thousands of dollars—then this clever setup by Jon Bumstead may be just the thing.

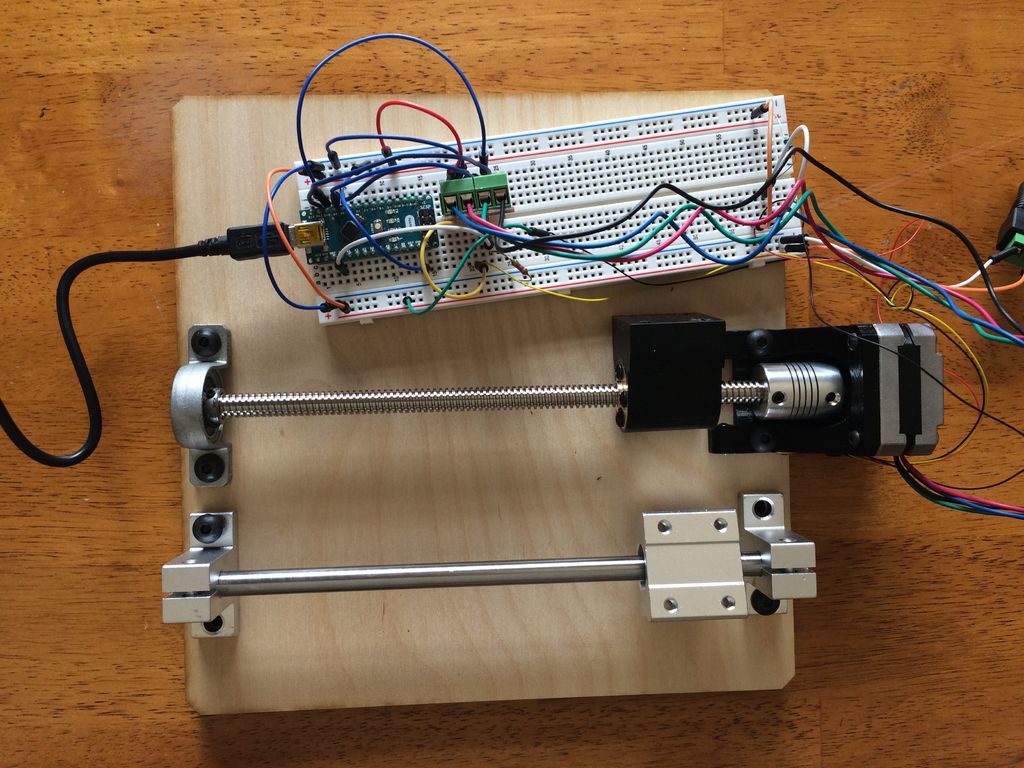
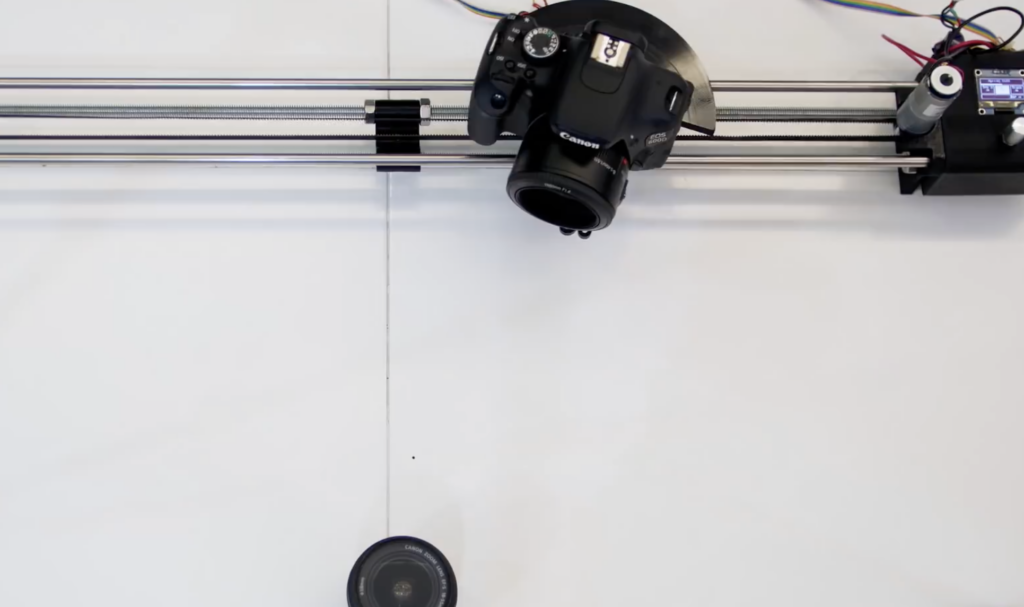
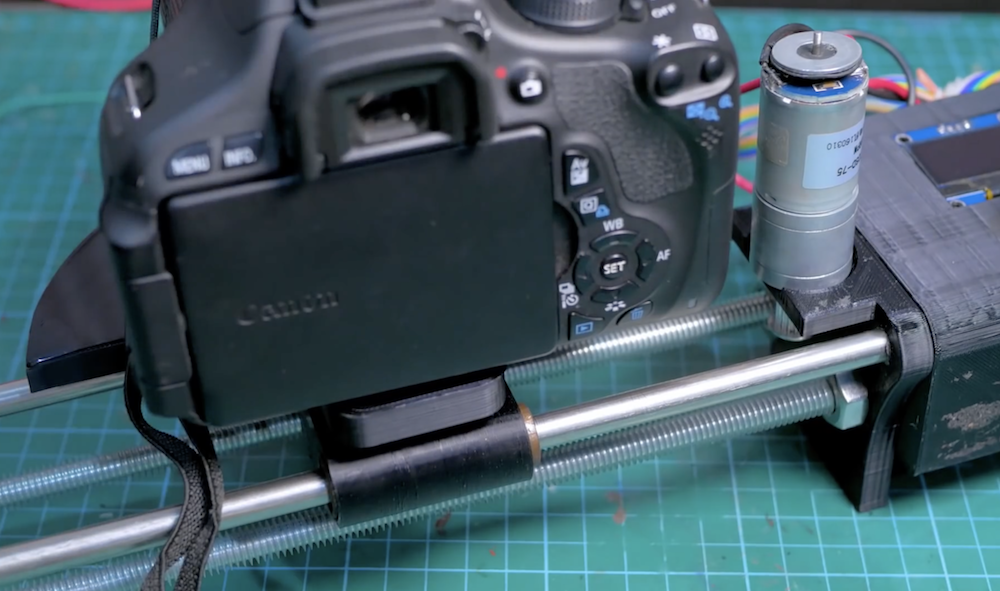
His contraption uses a Nikon D5000 camera situated above a small photographic subject, which progressively moves in front of the lens using an X/Y stage setup. Motion is handled by pair of stepper motors, under the control of an Arduino Nano and two L9110 driver boards. The Nano also commands the camera to snap a picture when the subject in position, producing an array of photos that can be stitched together to form an image with extreme detail.

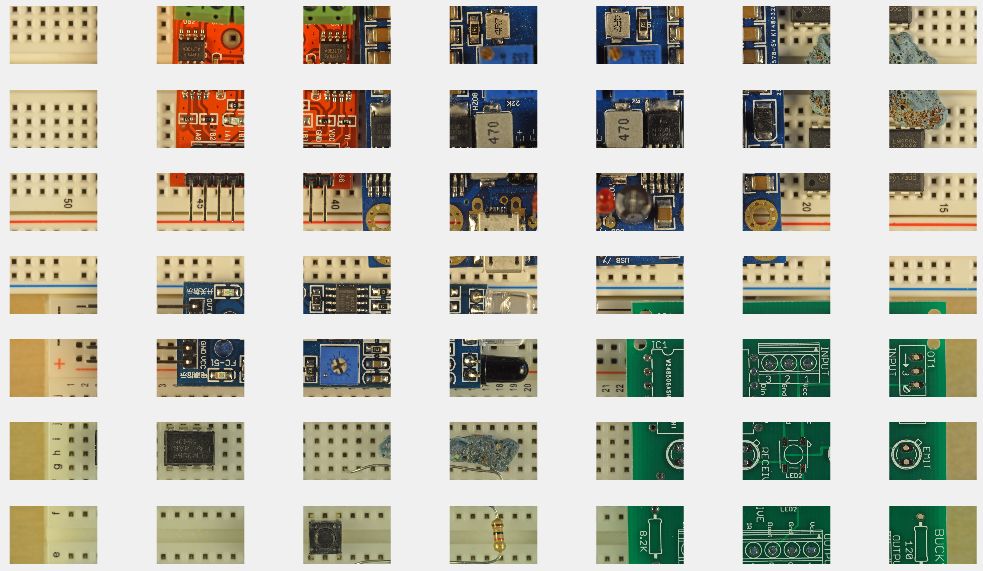
In optical microscopes, there is a fundamental trade-off between field-of-view and resolution: the finer the detail, the smaller the region imaged by the microscope. One way to overcome this limitation is to translate the sample and acquire images over a larger field-of-view. The basic idea is to stitch together many high resolution images to form a large FOV. In these images, you get to see both the full sample, as well as fine detail in any portion of the sample. The result is an image consisting of about a billion pixels, much larger in comparison to the pictures taken by a DSLR or smartphone, which typically have around 10 to 50 million pixels.

In this Instructable, I will go over how to build a microscope capable of imaging a 90mm x 60mm field-of-view with pixels corresponding to 2 micrometer at the sample (although, I think the resolution is probably closer to 15 micrometer). The system uses camera lenses, but the same concept can be applied using microscope objectives to get even finer resolution.

When filming your projects—or day-to-day life—static shots can be fun, but having a moving perspective often looks even better. The challenge is keeping the camera pointed at your subject, which maker Saral Tayal addresses with his automated slider.

This Arduino Uno-controlled slider is powered by a pair of brushed DC motors with encoders attached for feedback. One pulls the camera along a pair of rails on a set of linear bearings, while the other adjusts the camera’s horizontal angle using trigonometry to keep a particular object in-frame. 

Code and print files are available in Tayal’s write-up, and some beautiful resulting shots with an explanation of the project can be seen in the video below. 

May
25

Pimp up your camera with Arduino timelapse video tutorial – auch auf Deutsch

arduino, Image(s), tutorial, tutorials, video Comments Off on Pimp up your camera with Arduino timelapse video tutorial – auch auf Deutsch 

timelapse videotutorial


Last month we launched the first of a series of tutorials hosted on our Youtube Channel and created by Max of MaxTechTV in german language.

Today we are publishing the second video called “Pimp-up your camera with an Arduino timelapse“. The video explains how to connect an Arduino UNO with you camera and shoot pictures, for example, every 1, 5, 10 seconds to create wonderful videos of slow processes that would normally appear subtle to the human eye.

Enjoy the tutorial below and share with us the results of your experimentations!

————————————————-

Letzten Monat haben wir das erste einer Reihe von Video-Tutorials auf unserem YouTube Kanal veröffentlicht. Erstellt werden die Tutorials von Max von MaxTechTV für all diejenigen von euch, die Deutsch sprechen.

Heute veröffentlichen wir das zweite Video mit dem Titel “Erstelle tolle Zeitrafferaufnahmen mit deiner Kamera & Arduino”. Das Video erklärt wie man einen Arduino UNO mit einer Kamera verbindet um mit dieser in bestimmten Abständen, wie z.B. 1, 5 oder 10 Sekunden, ein Bild aufzunehmen. So kann man beeindruckende Videos von langsamen Prozessen erstellen, die dem menschlichen Augen sonst verborgen bleiben würden.Viel Spaß mit dem Tutorial und teilt mit uns die Ergebnisse eurer Experimente!


Apr
24

Arduino’s cameo appearence in The Following

arduino, device, Image(s), kevin bacon, series, thefollowing, Tv Comments Off on Arduino’s cameo appearence in The Following 

Arduino cameo in the  theFollowing


The Following is an american TV Series which premiered last january and telling the story of

 former FBI agent Ryan Hardy (Kevin Bacon) and his attempts to recapture serial killer Joe Carroll following the latter’s escape from prison

On the 9th of April Season 1, chapter 12  aired and some of you noticed the unexpected!

An Arduino Uno spotted for the first time in a TV series at 17m 40s: Kevin Bacon jumps over an ArduinoUno-activated device … the red led blinking seems pretty dangerous!

But what kind of device is it exactly?
Nov
05

Arduino Due VGA Signal Out

arduino, arduino due, DUE, Hardware, Image(s), inspiration, VGA, Visualising Data Comments Off on Arduino Due VGA Signal Out 

Photo credit: [Stimmer] on the Arduino Forum

[Stimmer] on the Arduino Forum hardcoded a way to display 160×240 (320×240 after some posts) VGA signal.

After working out how to do a timer interrupt I’ve had a go at making a VGA framebuffer. It is rather low-res at present(160×240) and fuzzy but I hope to be able to improve that. It has 8-bit colour (RRRGGGBB).
I cannot get Eagle to run right now so will have to describe the schematic in text:
Due pin 2 -> VGA pin 13 (HSync)
Due pin 3 -> VGA pin 14 (VSync)

Due pin 25 -> 820R resistor -> VGA pin 3 (blue)
Due pin 26 -> 390R resistor -> VGA pin 3 (blue)

Due pin 27 -> 2k2 resistor -> VGA pin 2 (green)
Due pin 28 -> 1k resistor -> VGA pin 2 (green)
Due pin 14 -> 470R resistor -> VGA pin 2 (green)

Due pin 15 -> 2k2 resistor -> VGA pin 1 (red)
Due pin 29 -> 1k resistor -> VGA pin 1 (red)
Due pin 11 -> 470R resistor -> VGA pin 1(red)

Due pin GND -> VGA pins 5,6,7,8,10

Via [Arduino Forum]


  • Newsletter

    Sign up for the PlanetArduino Newsletter, which delivers the most popular articles via e-mail to your inbox every week. Just fill in the information below and submit.

  • Like Us on Facebook