Posts | Comments

Planet Arduino

Archive for the ‘Firmata’ Category

Inspired by the creative genius of Martin Molin of Wintergatan fame, [iSax] set out to create a robotic MIDI-controlled trombone. It takes years for humans to develop the control and technique required to play the trombone well as the tone produced into the mouthpiece (embouchure) is a tricky combination of air pressure, lip tension, airflow, resonance in the mouth, and other sources of complex pressure.

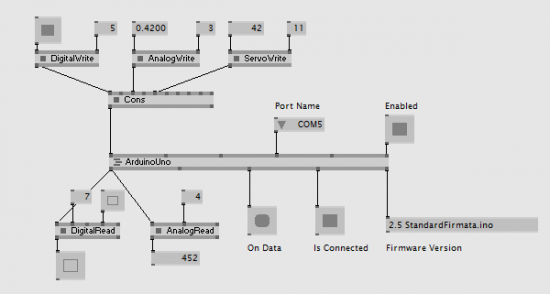
[iSax] gives a thorough walkthrough of the machine, which is powered by two separate sources of air, one for the position of the slide and the other for producing sound. A potentiometer provides feedback on the position of the slide and a servo controls the flow rate into the silicone resonance chamber. The chamber can be tuned via a stepper motor that applies pressure, slightly altering the chamber’s frequency and pressure. An Arduino with Firmata allows the device to controlled easily from any host computer. A detailed writeup in PDF form is on the Hackday.io project page.

As you can imagine, simulating a human mouth is a daunting task and the number of variables meant that [iSax] ended up with something only vaguely trombone-like. While ultimately it didn’t turn out to be the astounding music machine that [iSax] hoped, it did end up being a fun feat of engineering we can appreciate and admire. Progress towards automatic brass instruments seems to be coming slowly as we saw similar results with this robotic trumpet. Maybe someday we’ll have robot brass sections, but not today.

Thanks [iSax] for sending this one in!

vvvv-Firmata-Arduino3

VVVV is an open-source software toolkit supporting interaction designers and artists handling of large media environments with physical interfaces, real-time motion graphics, audio and video that can interact with many users simultaneously.

The cool thing is that you can control Arduino and Genuino boards with VVVV by uploading a Firmata sketch and then start playing with the input and output pins.

What’s more, the team recently released a brand new set of nodes able to talk to your Arduinos. With this implementation you can:

  • Just plug a DigitalWrite (Firmata), AnalogWrite (Firmata) or ServoWrite (Firmata) node to the Arduino node (or concatenate them together) to set the pins of the Board.
  • Connect DigitalRead (Firmata) and AnalogRead (Firmata) nodes to get the values from the Board’s pins.
  • Use the Sysex Messages output to receive different ‘Sysex Messages’ sent back by the Arduino Board. Some Sysex decoders are already there (see StringDecoder (Firmata), CapabilityDecoder (Firmata)). Sending custom ‘Sysex Messages’ is easy as well.
  • Your board is not listed in the NodeBrowser? The Arduino nodes are easily adaptable for other controllers running Firmata. Hello teensy…

Easier than ever before:

  • no need to supply a spread for all 20 pins and then SetSlice some of them to particular values.
  • no need to define the ‘PinMode’ for each pin.
  • no need to define which pins should report their values back.

Intrigued? Take a look at the details and discussion on VVVV blog!

vvvv-Firmata-Arduino_0

HappyD_Staedtische_gallery_Bremen

Happy Days is an installation inspired by the work of the Irish avant-garde novelist Samuel Beckett who wrote the namesake play in two acts in the 60s. Designer and visual artist Irena Kukric created it in collaboration with Canny Sutanto and the aim of exploring narrative in the form of an installation. The five-minute play is staged using ten servo motors and a DC motor with an Arduino Mega and VVVV live programming environment:

We were beginners with Arduino and motors so we started out pretty basic, trying to move several motors at once. We decided to use VVVV platform in addition when we realized we needed a timeline for our script for the play. With this timeline, it was easier to deal with details such as when we want to move which motor under which angle and such. For beginners with coding, this visual programming environment is very approachable and the entrance level is much lower.

It is easier and faster to get to your desired outcome. What is great about VVVV and Arduino is that there is the Firmata library that enables you to work with both platforms in conjunction so even artists and designers with lower level coding skills are able to go from concept to realization quite easy. We used Arduino Mega which was very convenient considering the number of our motors and the pins that Mega has to offer. After we had our final order of cables and pins, we even made our own shield for it.

The play was staged without human actors or conventional (verbal) dialogue  as performing a ritual in the play overshadows the performer, the object of the ritual can survive on its own. Therefore, they used these objects or rather props from the play and made them actors, animating them with motors, as you can see in the video below:


May
11

Scratch extension for Arduino (experimental release)

arduino, education, Featured, Firmata, Kids, Scracth, scratch Comments Off on Scratch extension for Arduino (experimental release) 

arduino-scratch-extension

With the new (experimental) Arduino extension for Scratch, you can create visual programs to control sensors and actuators connected to Arduino boards. Try it on the new ScratchX site.

Scratch allows kids (and everyone) to create their own games, interactive stories, and animations using a visual programming environment. Scratch is made by the Lifelong Kindergarten (LLK) group at the MIT Media Lab. The ScratchX.org site is a place for trying out new, experimental extensions to Scratch — e.g. for connecting to hardware or web services. As a member of both Arduino and LLK, I’m especially excited about this possibility to combine Scratch with Arduino.

This Scratch extension, created by Kreg Hanning and me (mostly Kreg), communicates with the Firmata firmware on an Arduino board. This allows you to send the Arduino commands using special Scratch blocks. To start, we have blocks for working with LEDs, servo motors, buttons, rotation knobs (potentiometers), light sensors, and temperature sensors. There are also more general (and Arduino-like) blocks for doing analog and digital input and output. For more information, see the documentation.

If you have any trouble using the Arduino extension or have any suggestions, please open an issue on the extension repository.

Of course, this isn’t the first attempt to connect Scratch and Arduino. For other approaches, see S4A, s2a_fm, and Catenary. For even more options, see SparkFun’s discussion of alternative programming interfaces for Arduino.

Jun
03

Controlling lights and sensors with Arduino Yún, Node js server and firmata

arduino, Arduino Yún, Firmata, node.js, Yun Comments Off on Controlling lights and sensors with Arduino Yún, Node js server and firmata 

Arduino-nodejs

Arduino user DavidMJBos sent us a project using Node js server on the Arduino Yún to control the lights, heating and some other sensors in the office of Appsaloon, the company where he’s doing an internship.

They already use Node.js for a lot of things and some of them are pretty cool with it.
That’s how they did it:


First of all you need to expand your flash, because there is not enough flash (16 MB) on the Arduino Yún. Sounds reasonable right? Not when you got the Yún for the first time in your hands. Luckily someone wrote this tutorial.

To start with you need to be on the same network to reach the Arduino :-) .
Open your terminal

ssh root@arduino.local

It will ask for a password, which will by default be: ‘arduino’:

Now you can install Node.js on the Yún type :

opkg update
opkg install node

When the install is finished verify it by :

 node -v

It should give you something like this v0.10.28 (it may vary in the future)

Next you have to install the node-serialport package. This is necessary because the Atheros AR9331 needs to communicate with the ATmega32u4.

opkg update
opkg install node-serialport

After this you will need firmata for Node.js. This will control the inputs and outputs of the ATmega32u4.

Normally you would install firmata like this:

npm install firmata

But because the Arduino Yún does not have enough RAM this is ‘not possible’.

Keep reading it on their blog and fork it on Github!

Sep
21

Control your Arduino over the web

arduino, Firmata, internet, javascript, Web Comments Off on Control your Arduino over the web 

Breakout – [via]

Breakout is a prototyping tool for exploring the intersection of the web and the physical world. The popularArduino platform and the Firmata protocol are leveraged to enable users to access physical input and output purely from javascript. This makes it easy for anyone familiar with javascript and basic web development to explore the possibilities of using physical I/O in their web applications. Furthermore, the Breakout framework includes a growing library of hardware abstractions such as buttons, leds, servo motors, accelerometers, gyros, etc enabling the user to easily interface with a range of sensors and actuators using just a few lines of javascript code.

Breakout grew out of a need for a simple platform to enable designers to prototype functional web-based interfaces to the physical world. It is based largely on the Funnel toolkit and informed by the experiences of the developers of both Funnel and Breakout as designers, technologists and educators.

Control your Arduino over the web - [Link]


  • Newsletter

    Sign up for the PlanetArduino Newsletter, which delivers the most popular articles via e-mail to your inbox every week. Just fill in the information below and submit.

  • Like Us on Facebook