Posts | Comments

Planet Arduino

Archive for the ‘Digispark’ Category

Controlling your computer with a wave of the hand seems like something from science fiction, and for good reason. From Minority Report to Iron Man, we’ve seen plenty of famous actors controlling their high-tech computer systems by wildly gesticulating in the air. Meanwhile, we’re all stuck using keyboards and mice like a bunch of chumps.

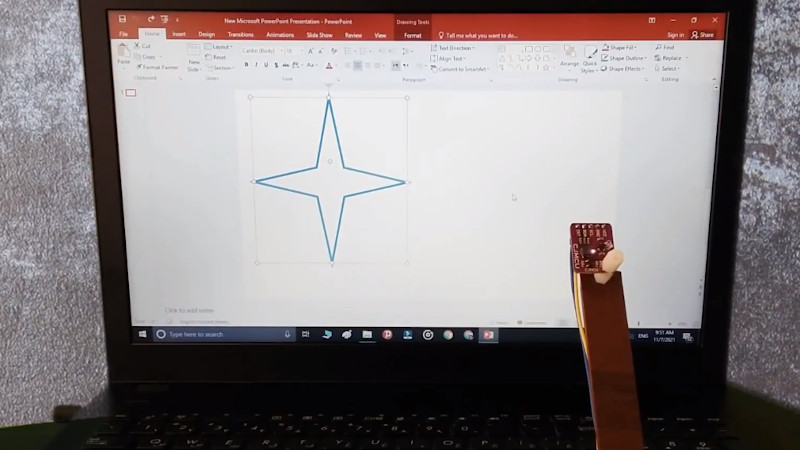
But it doesn’t have to be that way. As [Norbert Zare] demonstrates in his latest project, you can actually achieve some fairly impressive gesture control on your computer using a $10 USD PAJ7620U2 sensor. Well not just the sensor, of course. You need some way to convert the output from the I2C-enabled sensor into something your computer will understand, which is where the microcontroller comes in.
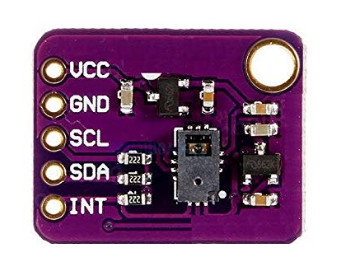
Looking through the provided source code, you can see just how easy it is to talk to the PAJ7620U2. With nothing more exotic than a switch case statement, [Norbert] is able to pick up on the gesture flags coming from the sensor. From there, it’s just a matter of using the Arduino Keyboard library to fire off the appropriate keycodes. If you’re looking to recreate this we’d go with a microcontroller that supports native USB, but technically this could be done on pretty much any Arduino. In fact, in this case he’s actually using the ATtiny85-based Digispark.

This actually isn’t the first time we’ve seen somebody use a similar sensor to pull off low-cost gesture control, but so far, none of these projects have really taken off. It seems like it works well enough in the video after the break, but looks can be deceiving. Have any Hackaday readers actually tried to use one of these modules for their day-to-day futuristic computing?

If you buy expensive computer speakers, they often have a volume knob you can mount somewhere on your desk so you aren’t dependent on the onboard volume control. [Kris S] decided to build his own version of the remote volume control. Not surprisingly, it uses an Arduino-compatible Digispark board and a rotary controller. The Digispark (that [Kris S] bought for $2) is compatible with the Adafruit Trinket. This is key because the Trinket libraries are what make it easy to send media keys over the USB (using the HID interface) to control the volume.

Really, though, the best part of the build is the good looking knob made out of a pill bottle (see the video below). The micro Digispark is small enough to fit in the lid of the pill bottle, and some wax and pellets add some heft to the volume control.

The standard Arduino library has trouble sending multimedia keys, but in a previous post I built a gesture-based volume control that managed to pull it off.  We’ve also covered a similar volume control in the past. That one is also very good looking, but was a more complicated build than what [Kris S] pulled off here.


Filed under: Arduino Hacks, peripherals hacks
Jul
14

digistump featured image sizeDigistump has recently announced a partnership with Particle over cloud infrastructure that may well be a signal that the diasporan expansion in microcontroller market may be coming to an end.

Read more on MAKE

The post Digistump Announces Partnership with Particle’s IoT Cloud appeared first on Make: DIY Projects, How-Tos, Electronics, Crafts and Ideas for Makers.

May
02

Digispark Pro – tiny, Arduino ready, mobile & usb dev board!

arduino, Digispark, Digispark Pro, i2c, SPI, uart, USB Comments Off on Digispark Pro – tiny, Arduino ready, mobile & usb dev board! 

Digispark Pro - The tiny Arduino IDE ready, usb and mobile dev board and ecosystem – cheap enough to leave in any project! Wi-fi, BLE, and 25+ shields!

Serial over USB debugging, USB programmable, 14 i/o, SPI, I2C, UART, USB Device Emulation, Mobile Development Ready, Optional BT, BLE, Mesh, and Wi-Fi.

The super small, dirt cheap, always open source, Arduino compatible, USB (and Mobile and Wireless!) development (and production) platform, and follow-up to the original Digispark.

Easier to use, more pins, more program space, more features, more reliable – supporting the entire existing Digispark ecosystem of 25+ shields and adding Wi-Fi, Bluetooth, BLE shields and more! Ready for all your projects – including mobile hardware development! All still super affordable!

The Digispark Pro Ecosystem is the cheapest, Arduino compatible development platform for Mobile and Wireless hardware development.

Digispark Pro – tiny, Arduino ready, mobile & usb dev board! - [Link]

Jan
22

Body of a Trinket, Soul of a Digispark

adafruit, arduino, arduino hacks, bootloader, Digispark, digiStump, Firmware, News, Trinket Comments Off on Body of a Trinket, Soul of a Digispark 

TrinketDigispark

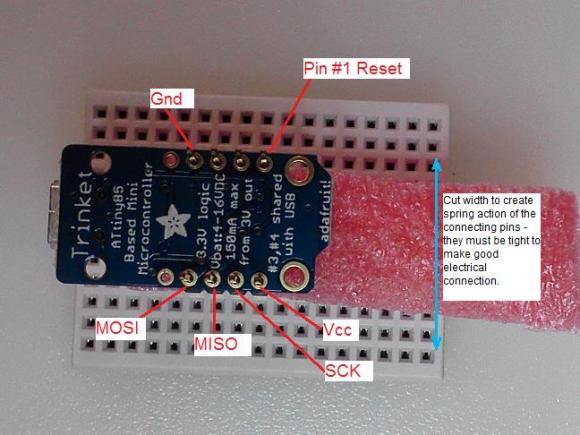
Adafruit’s Trinket and digiStump’s Digispark board are rather close cousins. Both use an ATtiny85 microcontroller, both have USB functionality, and both play nice with the Arduino IDE. [Ray] is a fan of both boards, but he likes the Trinket hardware a bit better. He also prefers the Digispark libraries and ecosystem. As such, he did the only logical thing: he turned his Trinket into a Digispark. Step 1 was to get rid of that pesky reset button. Trinket uses Pin 1/PB5 for reset, while Digispark retains it as an I/O pin. [Ray] removed and gutted the reset button, but elected to leave its metal shell on the board.

The next step was where things can get a bit dicey: flashing the Trinket with the Digispark firmware and fuses. [Ray] is quick to note that once flashed to Digispark firmware, the Trinket can’t restore itself back to stock. A high voltage programmer (aka device programmer) will be needed. The flashing process itself is quite a bit easier than a standard Trinket firmware flash. [Ray] uses the firmware upload tool from the Micronucleus project. Micronucleus has a 60 second polling period, which any Trinket veteran will tell you is a wonderful thing. No more pressing the button and hoping you start the download before everything times out! Once the Trinket is running Digispark firmware, it’s now open to a whole new set of libraries and software.


Filed under: Arduino Hacks, news
Oct
08

halloweenDoorHack

If you’re new to hacking, Halloween is a great excuse to get started, and [Chuck] has put together an inexpensive animated Halloween decoration that you can show off on your front door. After scoring a $5 plastic Halloween doorknocker from Wal-Mart, [Chuck] gathered together a small pile of components and then set about breathing some life (death?) into its scary but motionless face.

Though he opted to use a Digispark, you should be able to use any Arduino that is small enough to stuff inside the plastic head. [Chuck] cut some holes in the eyeballs and glued in two RGB LEDs, then cobbled together a quick-and-dirty mount in the mouth area to hold a small servo. The lights and the servo are wired to the Digispark, which turns the lights on and instructs the servo to slam the ring against the door. It’s is battery powered and currently has only two settings: on or off. This should be good enough to scare the kids for this year, but [Chuck] has plans to add a much-needed motion sensor and sound via a Bluetooth connection. 

As simple as this build is, it could be just the thing to get you in the holiday spirit, or to introduce the young hacker in your home to the world of electronics and coding. Check out the short video of the doorknocker after the break, then swing by [Chuck's] website for detailed build instructions and his Github for the source code. If you’re having trouble finding this doorknocker at Wal-Mart, [Chuck] recommends a similar one on Amazon. Don’t stop now! Make some Flickering Pumpkins too, or if you want a challenge, hack together your very own Pepper’s Ghost illusion.


Filed under: Arduino Hacks, Holiday Hacks, led hacks
The Arduino YúnOver the last few months there have been a sudden rush of new micro-controller boards onto the market. A lot of that is down to Kickstarter and the appearance of a number slightly tweaked Arduino clones. A lot of them feature some sort of mesh networking, or other wireless capability. Here's ten new boards that have just arrived, or are coming to market real soon, that you should maybe think about for your next project.

Read more on MAKE

Sep
08

Digispark – The tiny, Arduino enabled, usb dev board!

arduino, board, Digispark, i2c, IDE, SPI, USB Comments Off on Digispark – The tiny, Arduino enabled, usb dev board! 

The micro-sized, Arduino enabled, usb development board – cheap enough to leave in any project! Erik Kettenburg writes:

The Story: We set out to build a little brother to the wonderful Arduino line of development boards – we were tired of leaving our valuable Arduino’s behind in projects, or worse, ripping apart old projects to build new ones! We also felt the Arduino was too big and powerful for many projects where we only needed a few pins, or an SPI or I2C bus. And so the Digispark was born! To us, the best things about the Arduino is the community, the easy of use, and the IDE – by making the Digispark an Arduino compatible development board all of those remain common. Plug it in, power your project with USB or external sources, program it with the Arduino IDE, and easily use existing Arduino code! But with its small size and low cost you can feel free to leave it in your project, give one to a friend, and use them everywhere!

Digispark – The tiny, Arduino enabled, usb dev board! - [Link]


  • Newsletter

    Sign up for the PlanetArduino Newsletter, which delivers the most popular articles via e-mail to your inbox every week. Just fill in the information below and submit.

  • Like Us on Facebook