Posts | Comments

Planet Arduino

Archive for the ‘frequency counter’ Category

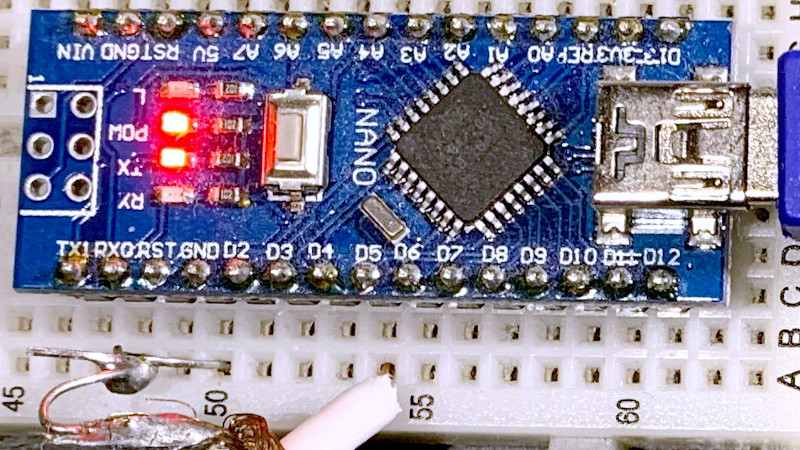
Making a microcontroller perform as a frequency counter is a relatively straightforward task involving the measurement of the time period during which a number of pulses are counted. The maximum frequency is however limited to a fraction of the microcontroller’s clock speed and the accuracy of the resulting instrument depends on that of the clock crystal so it will hardly result in the best of frequency counters. It’s something [FrankBuss] has approached with an Arduino-based counter that offloads the timing question to a host PC, and thus claims atomic accuracy due to its clock being tied to a master source via NTP. The Rust code PC-side provides continuous readings whose accuracy increases the longer it is left counting the source. The example shown reaches 20 parts per billion after several hours reading a 1 MHz source.

It’s clear that this is hardly the most convenient of frequency counters, however we can see that it could find a use for anyone intent on monitoring the long-term stability of a source, and could even be used with some kind of feedback to discipline an RF source against the NTP clock with the use of an appropriate prescaler. Its true calling might come though not in measurement but in calibration of another instrument which can be adjusted to match its reading once it has settled down. There’s surely no cheaper way to satisfy your inner frequency standard nut.

We were struck by how attractive [mircemk’s] Arduino-based frequency counter looks. It also is a reasonably simple build. It can count up to 6.5 MHz which isn’t that much, but there’s a lot you can do even with that limitation.

The LED display is decidedly retro. Inside a very modern Arduino Nano does most of the work. There is a simple shaping circuit to improve the response to irregular-shaped input waveforms. We’d have probably used a single op-amp as a zero-crossing detector. Admittedly, that’s a bit more complex, but not much more and it should give better results.

There was a time when a display like this would have meant some time wiring, but with cheap Max 7219 board available, it is easy to add a display like this to nearly anything. An SPI interface takes a few wires and all the hard work and wiring is done on the module.

The code is short and sweet. There are fewer than 30 lines of code thanks to LED drivers and a frequency counter component borrowed from GitHub.

If you add a bit more hardware, 100 MHz is an easy target. There are at least three methods commonly used to measure frequency. Each has its pros and cons.

Counting frequency is one of those tasks that seems simple on the face of it, but actually has quite a bit of nuance. There are two obvious methods, of which the first is to count zero crossings for some period. If that period is one second you are done, otherwise it’s a simple enough case of doing the math. That is, if you count for half a second, multiply the result by 2, or if you count for 10 seconds, divide by 10. The other obvious method is to measure the period of a single cycle as accurately as you can. Then there’s this third method.from [WilkoL], which simultaneously counts a known reference clock alongside the frequency to be measured.  You can see the result in the video, below.

The first method is easy but the lower the frequency you want to measure, the longer you have to count to get any real resolution. Also, you need the time base to be exact. For the second method, you need to be able to make a highly precise measurement. The reason [WikolL] chose the third method is that it doesn’t require a very precise time base — a moderately accurate reference oscillator will do. The instrument gets good resolution quickly at both high and low frequencies. 

The key to making the measurement is a clever way of connecting a D flip flop in such a way that it counts the high frequency reference clock and the lower frequency of interest for a fixed period of time. The fixed period doesn’t have to be very accurate. You wind up with two counts: How many input clocks you saw over the period and how many reference clocks. Since you know the frequency of the reference clock, the rest is simple math.

The real danger to projects like this is you can quickly get obsessed with measuring frequency and time. Of course, we’ve seen plenty of gated counter designs.


There’s little question that an oscilloscope is pretty much a must-have piece of equipment for the electronics hacker. It’s a critical piece of gear for reverse engineering devices and protocols, and luckily for us they’re as cheap as they’ve ever been. Even a fairly feature rich four channel scope such as the Rigol DS1054Z only costs about as much as a mid-range smartphone. But if that’s still a little too rich for your taste, and you’re willing to skimp on the features a bit, you can get a functional digital oscilloscope for little more than pocket change.

While there are a number of very cheap pocket digital storage oscilloscopes (DSOs) on the market, [Peter Balch] decided he’d rather spin up his own version using off-the-shelf components. Not only was it an excuse to deep dive on some interesting engineering challenges, but it ended up bringing the price even lower than turn-key models. Consisting of little more than an Arduino Nano and a OLED display, the cost comes out to less than $10 USD for a decent DSO that’s about the size of a matchbox.

But not a great one. [Peter] is very upfront about the limitations of this DIY pocket scope: it can’t hit very high sample rates, and the display isn’t really big enough to convey anything more than the basics. But if you’re doing some quick and dirty diagnostics in the field, that might be all you need. Especially since there’s a good chance you can build the thing out of parts from the junk bin.

Even if you’re not looking to build your own version of the Arduino-powered scope [Peter] describes, his write-up is still full of fascinating details and theory. He explains how his software approach is to disable all interrupts, and put the microcontroller into a tight polling loop to read data from the ADC as quickly as possible. It took some experimentation to find the proper prescaler value for the Atmega’s 16MHz clock, but in the end found he could get a usable (if somewhat noisy) output with a 1uS sample rate.

Unfortunately, the Arduino’s ADC leaves something to be desired in terms of input range. But with the addition of an LM358 dual op-amp, the Arduino scope gains some amplification so it can pick up signals down into the mV range. For completion’s sake, [Peter] included some useful features in the device’s firmware, such as a frequency counter, square wave signal source, and even a voltmeter. With the addition of a 3D printed case, this little gadget could be very handy to have in your mobile tool kit.

If you’d rather go the commercial route, Hackaday’s very own [Jenny List] has been reviewing a number of very affordable models such as the DSO Nano 3 and the JYE Tech DSO150 build-it-yourself kit.

[Thanks to BaldPower for the tip.]


  • Newsletter

    Sign up for the PlanetArduino Newsletter, which delivers the most popular articles via e-mail to your inbox every week. Just fill in the information below and submit.

  • Like Us on Facebook