Posts | Comments

Planet Arduino

Archive for the ‘OLED display’ Category

[Adam Welch] has built macro pads in the past out of pre-fab key matrices and handfuls of Cherry MX clones. But all the stickers and custom keycaps in the world wouldn’t make those macro pads as versatile as a stream deck — those visual shortcut panels with tiny touchscreens for each button that some streamers use to change A/V settings or switch between applications.

Let’s face it, stream decks are expensive. But 0.96″ OLED displays are not, and neither are SMD tactile buttons. Why not imitate a screen deck on the cheap by making it so the screens actuate buttons behind them? [Adam] based this baby on the clever design of [Kilian Gosewisch]’s FreeDeck, and they ended up working together to improve it with a dedicated PCB.

The brains of the operation is an Arduino Pro Micro, which addresses each screen individually via two 74HC4051 mux ICs. Thanks to an SD card module, there’s no need to flash the ‘duino every time you want to change a shortcut or its picture. Even if this deck doesn’t hold up forever, it won’t break the bank to build another one. Poke past the break for the build video, which has all the links you’d need to make your own, including a handy configurator.

There’s more than one way to do a visual macro pad. Here’s one that uses a single screen and splits it Brady Bunch style to match the matrix.

Thanks for the tip, [arturo182]!

We’ve all been there. You’re manning the battle station, deep in the sim-racing or some other n00b-pwning zone and suddenly some loudmouth blows out your eardrums over Discord. It’s insulting to have to stop what you’re doing to find the right Windows volume slider. So why do that? Build [T3knomanzer]’s simple yet elegant multi-volume knob and stay zen in the zone.

It’s easy, just turn the knob to cycle through your programs until Discord comes up on the little screen, and then push down to change it into a volume knob. If you need to change another volume, just click it again. Since there’s no Alt+Tabbing out to the desktop, no checkered flags should ever slip through your fingers.

Inside the well-designed case you’ll find the usual suspects — Arduino Nano, rotary encoder, an OLED display, and an LED ring, each with their own place carved out.

This completely open-source knob looks great, and we love that it’s been made incredibly easy to replicate by standing up a site with foolproof, well-depicted, step-by-step instructions. Watch them take it for a spin after the break.

Want more than volume at your fingertips? Here’s a DIY USB knob that does shortcuts, too.

Does your drill go as fast as the manufacturer says it will? Well, you’d need a tachometer to figure that out. They’re not that expensive to buy, but as [Elite Worm] shows, they’re not that expensive to make, either — about $10 total if you get your parts from the right places. Lucky for you, he has links to everything.

Really, the links are just the tip of the iceberg here as far as the gifts that [Elite Worm] bestows upon those who choose to undertake this project. The build video (after the break, as usual; our favor to you) is fantastic, and would be perfect for a beginner because of the entrancing speed at which he builds it. The video is straight up relaxing to watch, whether you want to build one or not.

It’s a fairly simple circuit — just push the momentary switch, and the laser diode and sensor pair count the revolutions over one second. The Arduino Nano multiplies this number by 60 and displays the RPM on the OLED screen. What we absolutely love about this build is the care that taken in designing the case. There’s a designated spot for each component, and the ones without their own special holder are kept in place with printed crossbar pieces. [Elite Worm] says this has a higher refresh rate than his store-bought tacho, and we say it looks way cooler, too.

Still don’t want to make one yourself? Well, okay. Before you buy one, try using your phone to calculate RPM.

Via r/duino

Those familiar with the Dragon Ball Z franchise will recognize the head-mounted Scouter computer often seen adorning character faces. As part of his Goku costume, Marcin Poblocki made an impressive replica of this device, featuring a see-through lens that shows the “strength” of the person he’s looking at, based on a distance measurement taken using a VL53L0X sensor. 

An Arduino Nano provides processing power for the headset, and light from a small OLED display is reflected on the lens for AR-style viewing.

It’s not exactly perfect copy but it’s actually working device. Inspired by Google virtual glasses I made virtual distance sensor.

I used Arduino Nano, OLED screen and laser distance sensor. Laser sensor takes readings (not calibrated yet) and displays number on OLED screen. Perspex mirror reflects the image (45 degrees) to the the lens (used from cheap Google Cardboard virtual glasses) and then it’s projected on clear Perspex screen.

So you will still see everything but in the clear Perspex you will also see distance to the object you looking at. On OLED screen I typed ‘Power’ instead distance because that’s what this device suppose to measure in DBZ. 😀

Print files as well as code and the circuit diagram needed to hook this head-mounted device up  are available on Thingiverse. For those that don’t have a DBZ costume in their immediate future, the concept could be expanded to a wide variety of other sci-fi and real world applications.

[ChrisN219] has an antique Coke machine that used to hold glass bottles. Now it holds around 30 tall boy cans of his favorite post-work suds. The only problem is that [Chris] has no idea how many cans are in it without opening up the door or keeping tally on a nearby slate board. Enter the Arduino.

He wanted to make something completely non-invasive to the machine (phew!) while using as many parts he already had as possible. The result is a simple circuit that uses an ultrasonic sensor mounted inside the machine to ping the depths, and a Nano in a nifty 3D printed box up top to do some math and display the number of cans remaining as a simple bar graph. The sensor reads one bay, and the code multiplies by two to get the total. It was touch and go there for a minute as he wasn’t sure that the HC-SR04s would get a good response from the cylindrical cans. Not only did they give a good reading, the first test was quite accurate.

[Chris] recently finished Mk. II, which replaces the momentary (and the Coke logo) with a second HC-SR04. The first version required the push of a button to do inventory, but now he simply walks up to the machine and knows at a glance if it’s time to make a beer run.

Okay, so maybe you don’t have cool old Coke machine problems. But surely you can find something that needs pinging, like an inconvenient rain barrel.

Someone left this organ out in the rain, but [Tinkartank] rescued it and has given it a new life as a SID controller. What’s a SID, you ask? That’s the sound chip Commodore used in the C64, a remarkable chip revered among retro gamers that was way ahead of its time.

He threw out everything but the keyboard assembly for the build. Each key press now drives a momentary button, and those are all wired up to an Arduino Mega through some I/O expansion boards left over from another project. The Mega drives the MOS6581 SID chip which generates those sweet chiptunes. There are four CV outs for expanding the organ’s horizons with Eurorack modules.

Our favorite part is the re-use of the stop knobs — particularly that they are actuated the same way as before. The knobs still technically control the sound, but in a new way — now they turn pots that change the arpeggio, frequency, or whatever he wants ’em to do.

The plans for the future revolve around switching to a Teensy to help out with memory issues. Although it’s a work in progress, this organ already has a ton of features. Be sure to check them out after the break.

Once you dive down the chiptunes rabbit hole, you might want to take them everywhere.  When you get to that point, here’s a portable SID player. A SIDman, if you will.


Filed under: Arduino Hacks, Musical Hacks

[Ash] built Moo-Bot, a robot cow scarecrow to enter the competition at a local scarecrow festival. We’re not sure if Moo-bot will win the competition, but it sure is a winning hack for us. [Ash]’s blog is peppered with delightful prose and tons of pictures, making this an easy to build project for anyone with access to basic carpentry and electronics tools. One of the festival’s theme was “Out of this World” for space and sci-fi scarecrows. When [Ash] heard his 3-year old son sing “hey diddle diddle, the cat and the fiddle…”, he immediately thought of building a cow jumping over the moon scarecrow. And since he had not seen any interactive scarecrows at earlier festivals, he decided to give his jumping cow a lively character.

Construction of the Moo-Bot is broken up in to three parts. The skeleton is built from lumber slabs and planks. The insides are then gutted with all of the electronics. Finally, the whole cow is skinned using sheet metal and finished off with greebles to add detailing such as ears, legs, spots and nostrils. And since it is installed in the open, its skin also doubles up to help Moo-bot stay dry on the insides when it rains. To make Moo-Bot easy to transport from barn to launchpad, it’s broken up in to three modules — the body, the head and the mounting post with the moon.

Moo-Bot has an Arduino brain which wakes up when the push button on its mouth is pressed. Its two OLED screen eyes open up, and the MP3 player sends bovine sounding audio clips to a large sound box. The Arduino also triggers some lights around the Moon. Juice for running the whole show comes from a bank of eight, large type “D” cells wired to provide 6 V — enough to keep Moo-Bot fed for at least a couple of months.

Check out the video after the break to hear Moo-bot tell some cow jokes – it’s pretty funny. We’re rooting for it to win the competition — Go Moo-bot.

If you’re hungry for more scarecrows, this isn’t the first we’ve seen.


Filed under: Arduino Hacks, robots hacks
May
31

Arduino Serial Display: Introducing the GLO-216 2×16 Multifont Serial OLED Display

arduino, code, OLED, OLED display, sketch Comments Off on Arduino Serial Display: Introducing the GLO-216 2×16 Multifont Serial OLED Display 

GLO216 Serial OLED DisplayThe GLO-216 2×16 Multifont Serial OLED allows you to translate 9600bps serial data into bright, high-contrast text on a compact screen. This low cost, low power serial display comes in two font colors (yellow and green) and is made and sold by seetron.com, owned by Scott Edwards of Electronics Now and Nuts & Volts fame.

Think of the GLO-216 as a “mini terminal” that displays text and custom characters and responds to control characters such as tabs, linefeeds, carriage returns, backspace, etc. It is compatible with RS-232, Stamps, PICs and Arduino; pretty much any serial out, really.

The display uses less than 50mA, so it can be connected straight to the Arduino‘s power supply.

The GLO-216 can store startup text and custom characters in EEPROM and there are instructions to save and recall this information. The simple sketch created to test the display creates and saves a new heart shaped custom character, then displays it on the screen along with some text.

Seetron.com has set up a special offer for tinkerhobby.com readers: you can save 20% off a GLO-216 if you use promo code “HOBBYIST” upon check out. For more information and to purchase, see the GLO-216 product page.

Here’s the GLO-216G just out of the box:
GLO216 OLED display front
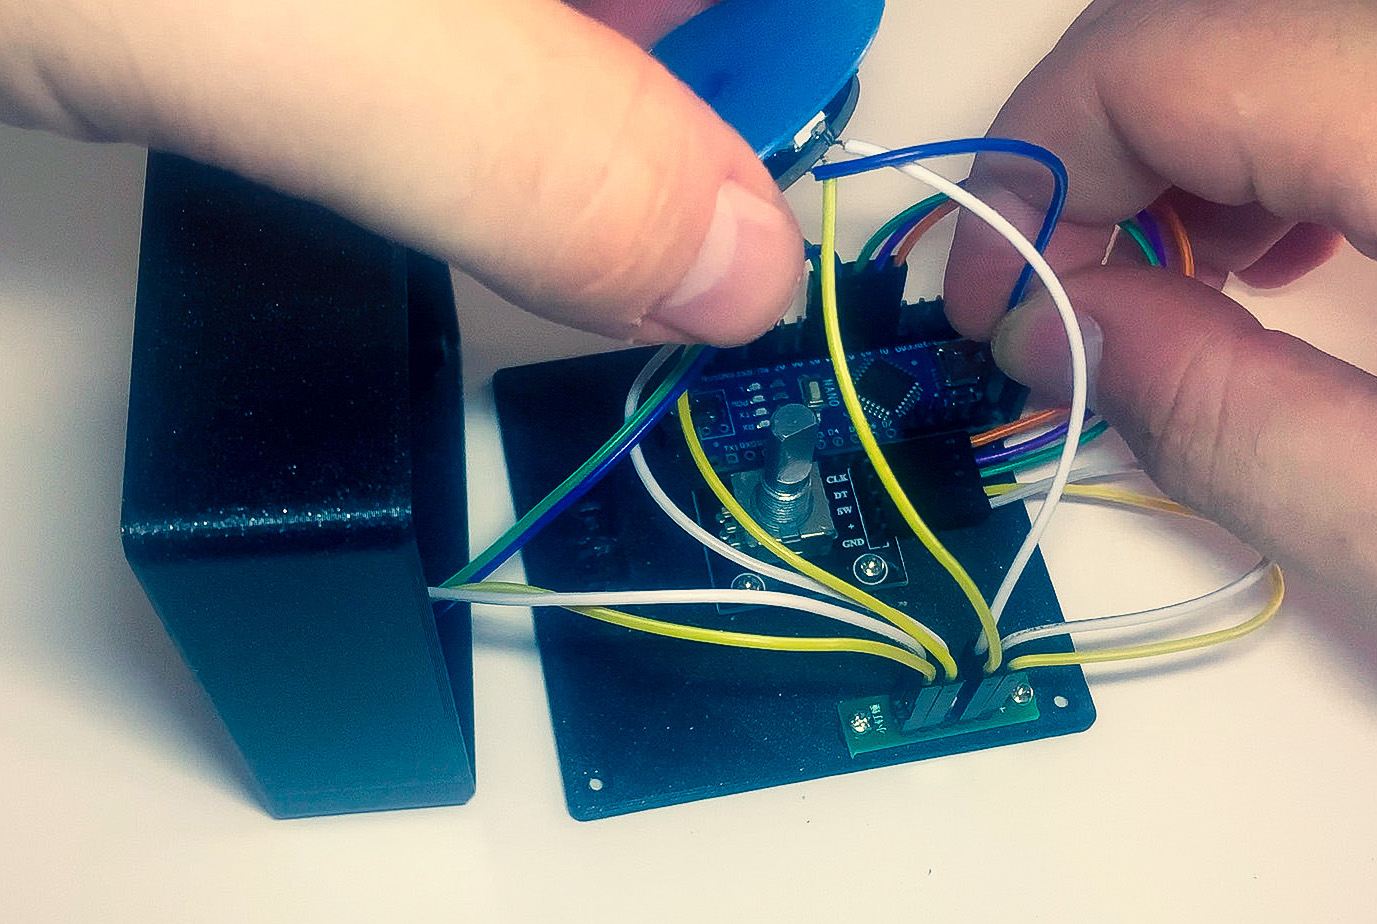
And here’s the view from the back, notice the small board that brings out the pins nicely to a 5-pin header and saves you some soldering work:
GLO216 OLED display back
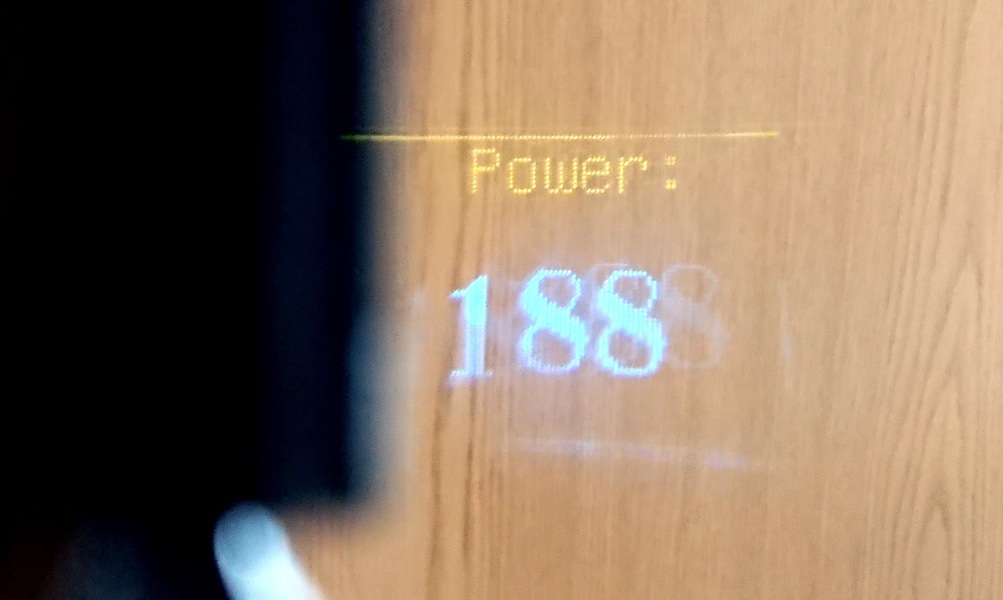
This is what it looks like when you first power it on:
GLO216 Serial OLED Display by seetron
And here’s the result of running the sketch I included in this post, that defines and prints a custom character:
GLO216 Serial OLED Display custom character

The sketch to drive the display uses the “newsoftserial” library, which can be found here: http://arduiniana.org/libraries/newsoftserial

A few nice features of the newsoftserial library compared to the original softserial are more accurate timing, smaller code size, but best of all the ability to output “inverted” serial (the Arduino documentation states that their serial output is not RS-232 compatible, but newsoftserial permits the Arduino to output inverted serial).

Sketch:

// Test of the GLO-216G serial OLED display
// Natalia Fargasch Norman @ tinkerhobby.com

// GLO-216Y/G information: http://www.seetron.com/glo216.html
// Programming reference: http://seetron.com/glo216/glo216prog.html

#include <SoftwareSerial.h>
#include <GLO216.h>

#define rxPin 255
#define txPin 3
#define NULL 0x00

int inverted = 1;

SoftwareSerial mySerial = SoftwareSerial(rxPin, txPin, inverted);

void setup() {
  pinMode(txPin, OUTPUT);
  digitalWrite(txPin, LOW);
  mySerial.begin(9600);
  delay(10);

  // clears the screen and select font size and style
  char instr1[] = {
    clearScreen(),
    defaultSize(),
    selectSize(), // tall
    selectSize(), // wide
    selectSize(), // big
    textStyle(),
    NULL
  };
  const char message[] = "Hi GLO!";
  mySerial.print(instr1);
  // print message according to prior instructions
  mySerial.print(message);

  // defines a new custom heart shaped character
  char instr2[] = {
    // escape sequence to receive new custom character
    escape(),'D','0',
    // heart pattern using tool at http://seetron.com/apps/app_cceditor.html
    0x80,0x8A,0x95,0x91,0x8A,0x84,0x80,0x80,
    NULL
  };
  // print character 0x80, the newly defined heart
  const char msg[] = {0x80, NULL};
  mySerial.print(instr2);
  // print message according to prior instructions
  mySerial.print(msg);

/*  delay(3000);

  char instr3[] = {
    clearScreen(),
    NULL
  };
  mySerial.print(instr3);*/
}

void loop() {
  // ...
}

GLO216 functions:

// GLO-216G serial OLED display
// Natalia Fargasch Norman @ tinkerhobby.com

// GLO-216Y/G information: http://www.seetron.com/glo216.html
// Programming reference: http://seetron.com/glo216/glo216prog.html

/*
Parameters for setPosition and rightAlign instructions:
setPosition: position + 0x40
rightAlign: '0'-'7'
*/

/*
Parameters for escape instructions:
Define lower custom character: 'D', '0'-'7'
Define upper custom character: 'd', '0'-'7'
Recall saved text: 'E', '0'
Restore custom character set: 'e', '0'
Save text since last clearScreen: 'X', '0'
Store custom character set: 'x', '0'
*/

// Moves printing position to the first character of top line
char homeCursor() {
  return 0x01;
}

// Cycles the font size: normal -> tall -> wide -> big -> normal -> ...
char selectSize() {
  return 0x02;
}

// Sets font size to default of small on two lines of 16 characters
char defaultSize() {
  return 0x03;
}

// Behaves like the backspace key
char backspace() {
  return 0x08;
}

// Moves printing position to the next multiple of 4 location
char tab() {
  return 0x09;
}

// Moves the printing position down a line
char linefeed() {
  return 0x0A;
}

// Moves the printing position up a line
char verticalTab() {
  return 0x0B;
}

// Clears the screen and moves printing position to 0
char clearScreen() {
  return 0x0C;
}

// Moves to the first printing position of the next line
char carriageReturn() {
  return 0x0D;
}

// Turns on the OLED driver circuitry when it has been previously turned off
char turnOn() {
  return 0x0E;
}

// Turns off the OLED driver circuitry to save power
char turnOff() {
  return 0x0F;
}

// Sets the printing position according to value of next byte
char setPosition() {
  return 0x10;
}

// Prints text at the righthand end of a field of defined size from 2-8
char rightAlign() {
  return 0x12;
}

// Sets seven segment style font for large characters
char sevenSeg() {
  return 0x13;
}

// Sets text style font for large characters
char textStyle() {
  return 0x14;
}

// Begin multi-part instruction
char escape() {
  return 0x1B;
}

// See http://seetron.com/glo216/bpigloupgg.html
char bpkInstr() {
  return 0xFE;
}

Header file:

// GLO-216G serial OLED display
// Natalia Fargasch Norman @ tinkerhobby.com

// GLO-216Y/G information: http://www.seetron.com/glo216.html
// Programming reference: http://seetron.com/glo216/glo216prog.html

#ifndef GLO216_h
#define GLO216_h

// Moves printing position to the first character of top line
char homeCursor();

// Cycles the font size: normal -> tall -> wide -> big -> normal -> ...
char selectSize();

// Sets font size to default of small on two lines of 16 characters
char defaultSize();

// Behaves like the backspace key
char backspace();

// Moves printing position to the next multiple of 4 location
char tab();

// Moves the printing position down a line
char linefeed();

// Moves the printing position up a line
char verticalTab();

// Clears the screen and moves printing position to 0
char clearScreen();

// Moves to the first printing position of the next line
char carriageReturn();

// Turns on the OLED driver circuitry when it has been previously turned off
char turnOn();

// Turns off the OLED driver circuitry to save power
char turnOff();

// Sets the printing position according to value of next byte
char setPosition();

// Prints text at the righthand end of a field of defined size from 2-8
char rightAlign();

// Sets seven segment style font for large characters
char sevenSeg();

// Sets text style font for large characters
char textStyle();

// Begin multi-part instruction
char escape();

// See http://seetron.com/glo216/bpigloupgg.html
char bpkInstr();

#endif

Keywords file:

#######################################
# Syntax Coloring Map for GLO216
#######################################

#######################################
# Datatypes (KEYWORD1)
#######################################

GLO216	KEYWORD1

#######################################
# Methods and Functions (KEYWORD2)
#######################################

homeCursor	KEYWORD2
selectSize	KEYWORD2
defaultSize	KEYWORD2
backspace	KEYWORD2
tab	KEYWORD2
linefeed	KEYWORD2
verticalTab	KEYWORD2
clearScreen	KEYWORD2
carriageReturn	KEYWORD2
turnOn	KEYWORD2
turnOff	KEYWORD2
setPosition	KEYWORD2
rightAlign	KEYWORD2
sevenSeg	KEYWORD2
textStyle	KEYWORD2
escape	KEYWORD2
bpkInstr	KEYWORD2

#######################################
# Constants (LITERAL1)
#######################################

Download these four files in an archive here: GLO216.zip

Arduino Serial Display: Introducing the GLO-216 2×16 Multifont Serial OLED Display originally appeared on Tinker Hobby on May 31, 2011.


  • Newsletter

    Sign up for the PlanetArduino Newsletter, which delivers the most popular articles via e-mail to your inbox every week. Just fill in the information below and submit.

  • Like Us on Facebook