Posts | Comments

Planet Arduino

Archive for the ‘Embroidery Machine’ Category

With a CNC (computer numerical control) embroidery machine, you can sew any custom patterns you want: text, logos, or goofy pictures. But commercial CNC embroidery equipment is expensive and consumer versions often leave a lot to be desired, which is why you might want to check out this write-up by SpaceForOne that explains how to upgrade a regular sewing machine for personalized CNC embroidery.

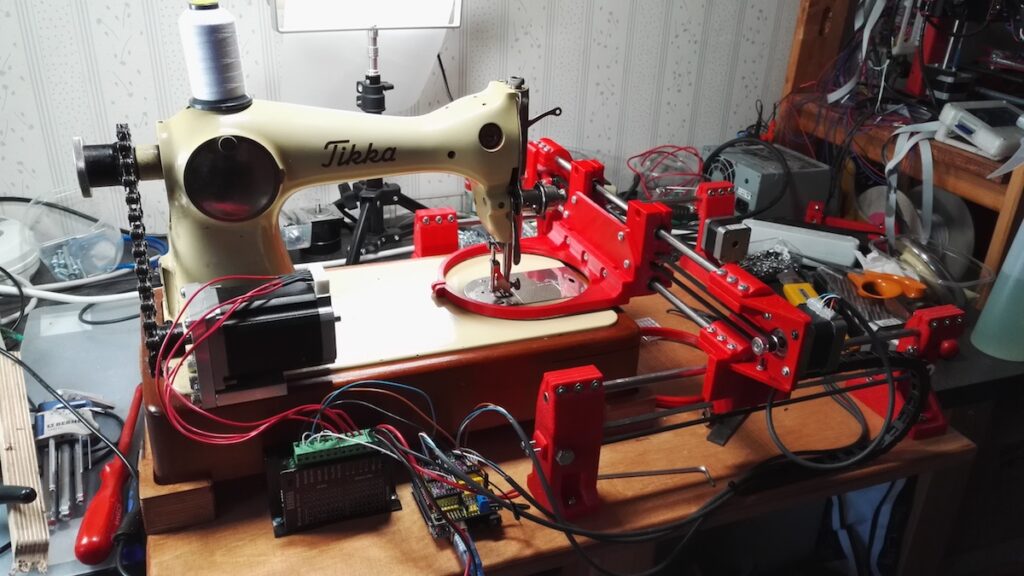
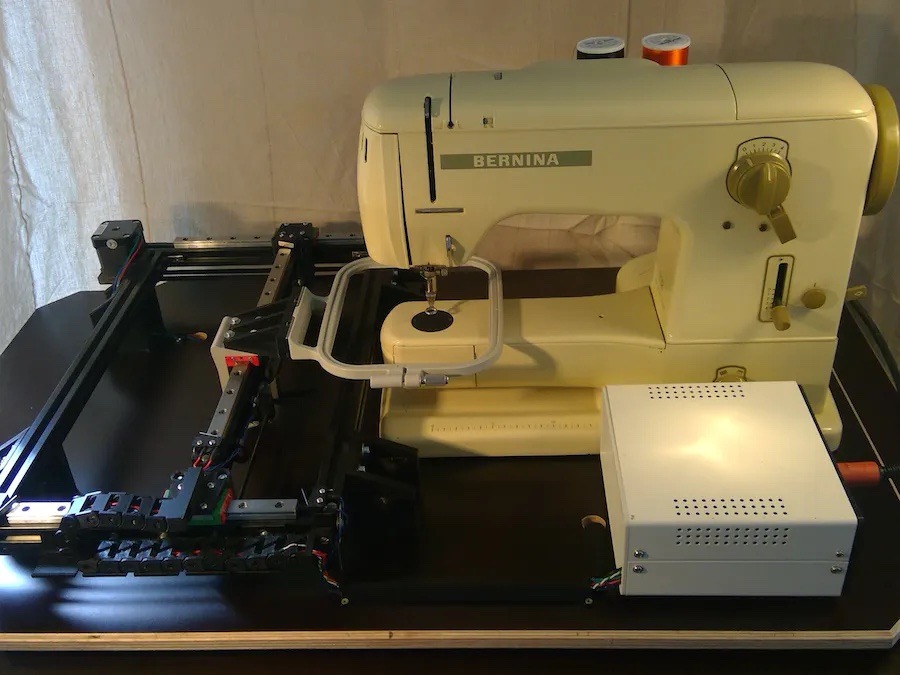
For this to work, the machine needs to be able to move an embroidery hoop in two axes on a plane perpendicular to the sewing needle. To do that, SpaceForOne used hardware similar to what you’d see on a 3D printer. The structure is aluminum extrusion and the axes ride on linear rails. Stepper motors move the axes and an Arduino Uno board controls those using a GRBL-compatible CNC shield that accepts standard G-code created in whatever software the user prefers.

You could simply start the G-code file while running the machine, but it would be really hard to avoid snags or putting lines where travel moves should be. That’s why SpaceForOne also interfaced with the sewing machine. The CNC shield controls the machine’s motor, while an optical sensor monitors the drive shaft speed and a break beam sensor detects when the needle is in the top position. Those let the Arduino control the operation of the sewing machine according to basic G-code commands.

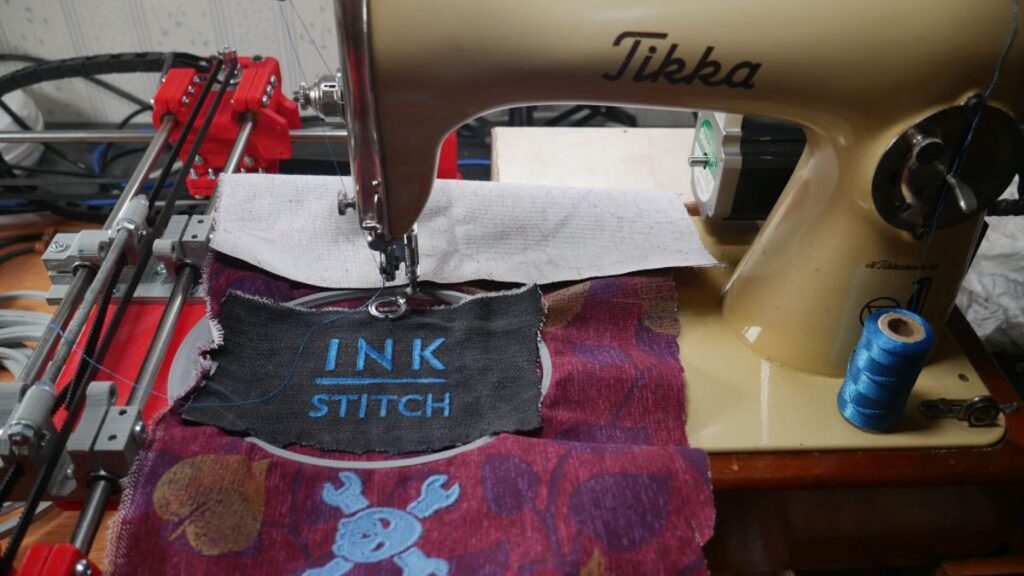
There are many software options, but SpaceForOne used the InkStitch plugin for Inkscape. With that, the user can easily turn text or an image into G-code.

The post Upgrade your sewing machine for CNC embroidery appeared first on Arduino Blog.

Hackers and makers can sometimes feel like they’re getting the short end of the stick when it comes to gift giving. You’re out there making thoughtful, intricate circuit sculptures, helpful software, or face masks for people, and what do you get in return? Okay, yes, usually gift cards or tools or other things that feed your creativity in the first place. But darn it, it would be nice to receive a handmade gift once in a while, right?

So here’s what you do: make friends with enough other makers that you find your birthday twin, or close enough that you both feel the warmth of the personal holiday you share. Then you get them to agree to trade handmade birthday presents with you. That’s more or less what happened between [Becky Stern] and [Estefannie], who seem to have found each other through the magic of sharing projects on YouTube.

[Becky]’s gift to [Estefannie] is a busy intersection of maker elements including graphic design, embroidery, electronics, and 3D printing. [Becky] started with the embroidery, which was made possible thanks to a new open-source library for Processing called PEmbroider. Once that was done, she 3D printed the frame and added the electronics — candle flicker LEDs for the birthday cake, and a handful of songs that are accessible via touch contacts screwed into the side of the frame. [Becky] added a real-time clock module so it plays a few extra songs on [Estefannie]’s actual birthday.

The most thoughtful element here is personalization, and it’s amazing what can happen when you put 100% of yourself into something that is 100% about someone else. Every bit of the art is personal to [Estefannie], and every atom of the build is pure [Becky]. Check out the demo and build video and see what [Estefannie] made for [Becky] after the break.

[Becky]’s varied creativity has graced these pages many times before. See how she bid adieu to 2020, built a daily affirmation mirror, and gave a mask-making masterclass in the early stages of the pandemic.

A needle and thread is extremely useful if you need to fasten a few pieces of fabric or sew on a button, and a sewing machine takes things up several notches in speed an accuracy. This venerable machine, however, can now be enhanced with a trio of stepper motors under Arduino Uno GRBL control to take things to an entirely new level.

The “Self-Made Embroidery Machine” employs a setup very similar to a 3D printer or CNC router. Two steppers move the fabric around, while a third actuates the needle. This allows the user to program in decorative shapes and patterns as shown in the video below, and the build process is well documented if you’d like to create your own!

Sewing machine part is any old or new sewing machine. Only change for original is stepper motor with synchronised pulley system (chain/belt drive) and more embroidery friendly presser foot. It is recommended to use older sewing machine, way more convenient to mount stepper motor to cast iron and prices are relatively cheap.

XY movement consists mainly 3D printed parts, 12 pcs and similar parts known from self build 3D printers. Both axes use GT2 belts, NEMA 17 steppers and both directions are fully scalable.

Synchronous movement comes from Arduino powered GRBL G-code interpreter, it is mouthful, but basically machine moves using G-code send to Arduino. It is not that complicated and it is only carrier like any other one when going from system to another one.

Now we have movement and code, but how to make nice shapes and export to G-code. It is nothing to do with medieval sorcery, it is a matter of downloading Inkscape and extension called Inkstitch.

Help and examples how to use Inkstitch extension can be found address above. End result should be really close to hobby level embroidery machines, just slower speed. After all, embroidery machine is nothing more than overgrown sewing machine.


  • Newsletter

    Sign up for the PlanetArduino Newsletter, which delivers the most popular articles via e-mail to your inbox every week. Just fill in the information below and submit.

  • Like Us on Facebook