Posts | Comments

Planet Arduino

Archive for the ‘model train’ Category

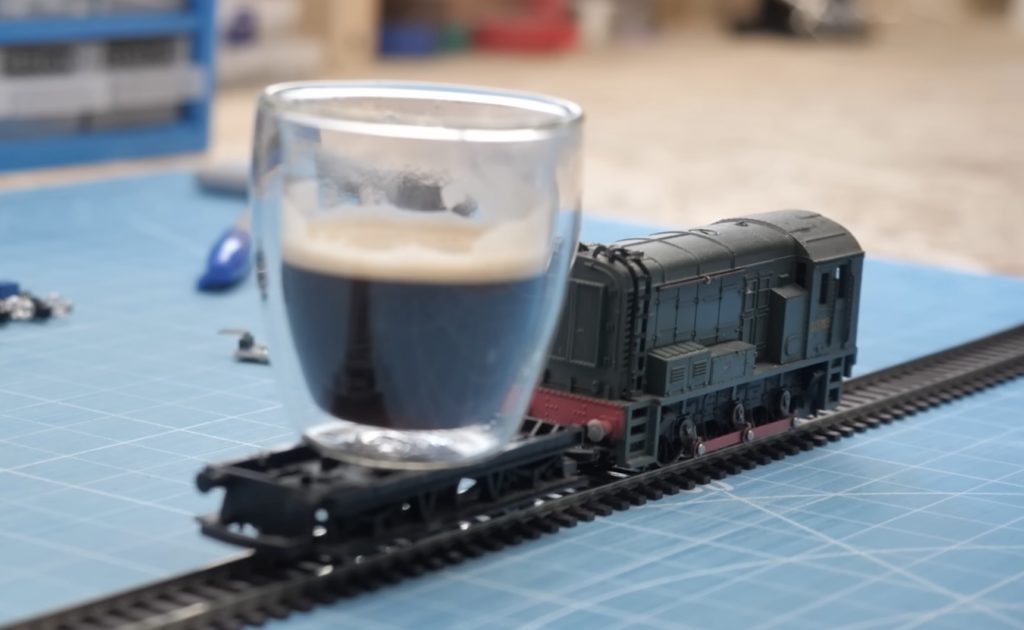
These days, everyone seems to turn to robots for automating tasks in the physical world. But robots are often clumsy and unreliable — not to mention expensive. Trains, on the other hand, are famous for their reliability. With that in mind, YouTuber James Whomsley designed a model train railway to bring coffee from his kitchen to his desk.

Whomsley’s home office is downstairs, but his coffee machine is upstairs in his kitchen. He didn’t want to make that trek every time he needed caffeine, so he constructed a model railroad track that traverses the distance. When he wants a coffee, he activates the train. It leaves his desk carrying an empthy mug on a car, goes to the kitchen, stops at the coffee machine, starts the brewing process, waits until the mug is full, then returns to the desk. That is simple in theory: an Arduino Uno board at each end detects the train and controls power to the rails. But the stairs posed a real challenge.

Model trains receive their power through the tracks, which means that those tracks must make a complete electrical circuit. To move the train on an elevator up and down the stairs, Whomsley had to find a way to break the circuit and then reconnect it. Once again, an Arduino detects the presence of the train. When it does, it activates a motor in a LEGO elevator lift mechanism. That starts moving the elevator platform either up or down, which breaks the circuit. When the lift reaches the top or bottom, it touches contacts to complete the circuit, which restores power and lets the train continue on its journey to deliver bean juice.

The post All aboard the java train! appeared first on Arduino Blog.

Certain hobbies come in clusters. It isn’t uncommon to see, for example, ham radio operators that are private pilots. Programmers who are musicians. Electronics people who build model trains. This last seems like a great fit since you can do lots of interesting things with simple electronics and small-scale trains. [Jimmy] at the aptly-named DIY and Digital Railroad channel has several videos on integrating railroad setups with Arduino. These range from building a DCC system for about $45 (see below) to a crossing signal.

There are actually quite a few basic Arduino videos on the channel, although most of them are aimed at beginners. However, the DCC — Digital Command and Control — might be new to you if you are a train neophyte. DCC is a standard defined by the National Model Railroad Association.

Model trains pick up electrical power from the rails. DCC allows digital messages to also ride the rail. The signal shifts from positive to negative to indicate marks and spaces. By diode switching the electrical signal, the train or other equipment can get a constant supply of current. However, equipment monitoring the line ahead of the diodes can read the data and interpret it as commands.

To accommodate old equipment, you can stretch the high or low values to make the average voltage either positive (forward) or negative (reverse). This can heat up DC motors, though, so it may shorten the life of the legacy equipment.

The build uses an available Arduino library, so if you want to get into the protocol you’ll have to work through that code. We had to wonder if there were other places where passing power and data on the same lines might be useful. There are other ways to do that, of course, but this would be a reasonable place to start if you needed that capability.

If you want to use an mBed system instead of an Arduino, there’s a great tutorial for that. Either way, it is just the thing for your next coffee table.


  • Newsletter

    Sign up for the PlanetArduino Newsletter, which delivers the most popular articles via e-mail to your inbox every week. Just fill in the information below and submit.

  • Like Us on Facebook