You’ll find dartboards in just about every dive bar in the world, like cheaper and pokier alternatives to pool. But that doesn’t mean that darts is a casual game to everyone. It takes a lot of skill to play on a competitive level and many of us struggle to perform well. Niklas Bommersbach decided that years of practice was too much of a commitment, so he built this robot that can dominate dart games.
This robot can, essentially, throw a dart perfectly every time to hit the desired target on the board. If you’re unfamiliar with the game, you might think that a bullseye is always best. But that isn’t true — especially for certain rulesets. To play strategically, Bommersbach needed his robot to nail the desired space on the board on-demand.
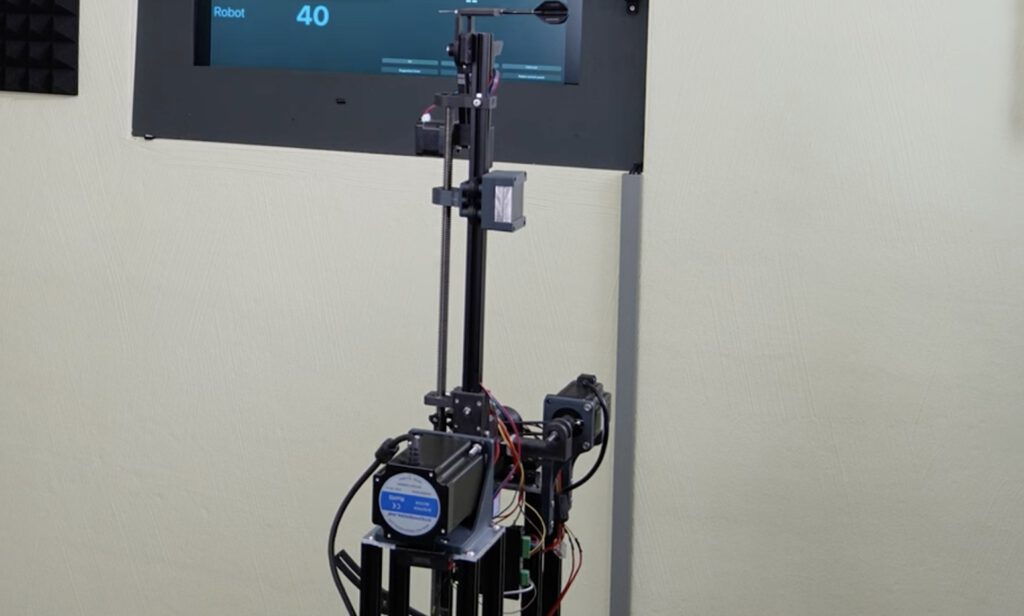
His first step was to make throws repeatable and predictable. His robot has a balanced arm that spins up to a precise rotational speed. At the set angle, it releases the dart. By monitoring many throws with computer vision, Bommersbach was able to dial in the speed and angle variables until the result became very predictable. An Arduino UNO Rev3 board controls the arm speed and calculates the release. But Bommersbach struggled to get the timing of the release exactly right, as the Arduino was running its code sequentially and so there was a small variance — just enough to throw off the throw.
His solution was to add a second Arduino, which has the sole responsibility of releasing the dart using a stepper-actuated mechanism. That allowed for very precise timing and repeatable throws. The timing influences the dart’s vertical position on the board, while a linear motion system controls its horizontal position.
In test matches, Bommersbach’s robot was able to trounce human opponents with ease.
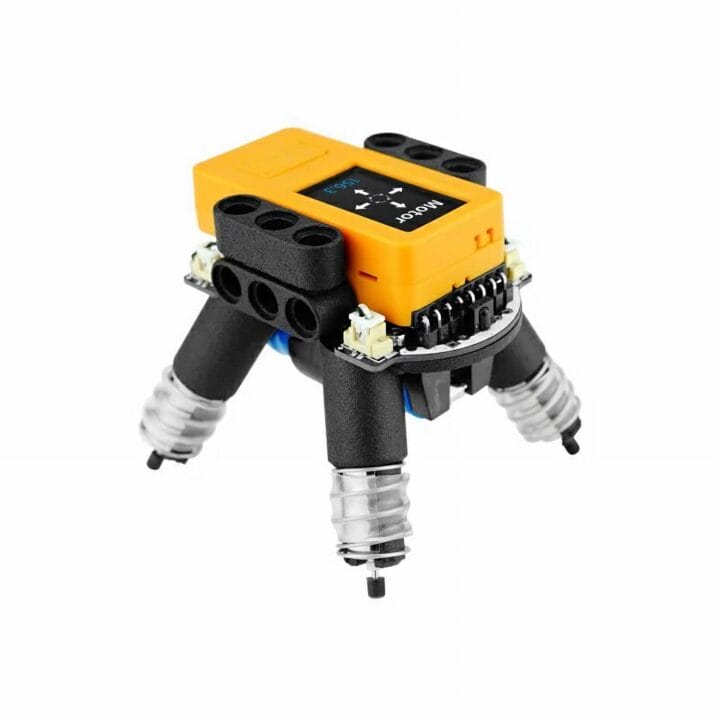
Modular IoT hardware developer, M5Stack, has released a new programmable robot base based on the STM32F030F4 microcontroller with LEGO and Arduino compatibility. The M5Stack BugC2 is “compatible with the M5StickC series controllers,” and includes the ESP32-powered M5StickC Plus2 development kit in the package. It features an L9110S four-way motor driver for all-directional operation, two programmable RGB LEDs, an infrared encoder, and a 16340 rechargeable Li-ion battery holder. It also comes with a USB Type-C port for charging the battery and supports onboard reverse charging protection and voltage detection. Listed applications for the M5Stack BugC2 programmable robot base include remote motor control, robot control, and an intelligent toy. M5Stack BugC2 specifications: Microcontroller – STMicroelectronics STM32F030F4 microcontroller, with Arm 32-bit Cortex-M0 CPU @ 48 MHz, and with up to 256KB of flash memory Motor driver – L9110S Infrared receiver – SL0038GD IR detection distance (StickC Plus2) Infrared emission distance (linear distance) at [...]
When you think of automation, what’s the first image that comes to mind?
For many of us, it’s a robot. From the blocky, square-headed characters of sci-fi comic fame to household more complex creations like the Replicants of Blade Runner — robots have captured our collective imagination for a long time.
It’s no surprise, then, that lots of Arduino users eventually set out to build a robot of their own.
In this article, we’ll look at how to build your own robot with Arduino and share some project examples from other makers.
What exactly is a robot?
The term “robot” can cover a lot of potential meanings, so let’s agree on a definition.
Here’s what the Oxford Dictionary says:
“(especially in science fiction) a machine resembling a human being and able to replicate certain human movements and functions automatically.”
It’s a good start, but do all robots resemble humans? Here’s Oxford’s second definition:
“a machine capable of carrying out a complex series of actions automatically, especially one programmable by a computer.”
This seems more accurate since it encompasses things like construction robots, robotic pets, and robotic vehicles.
Humans have been attempting to build robots for centuries, although most of our success has taken place within the last few decades. Today, thanks to advancements in hardware and automation technology, almost anyone can build their own robots at home.
What do you need to build a robot?
Building your own robot might seem like an unimaginably complex task. After all, aren’t robots the stuff of sci-fi movies and leaked military prototypes?
The good news is that building a robot doesn’t have to be a monumental undertaking, and can in fact be done with some fairly simple and easily obtained components.
Here’s what you’ll need:
Some simple components like wheels, sensors, and switches (this will vary greatly depending on the type of robot you’re planning to build)
Some basic coding and automation skills (you don’t need to be a coding wizard)
This is, of course, just a starting point. You can build a fairly simple robot, or you can ramp up the complexity and sophistication as much as you like — the sky really is the limit here. For beginners, though, you can find everything you need at the hardware store.
Explore Arduino robots
With Arduino’s products and other components, it’s possible to build your own robots more easily than ever before.
We need to look no further than the Arduino Project Hub to find a ton of inspiring ideas. Let’s explore a few.
Line-following robot
Robots don’t have to be ultra-complex humanoid feats of engineering.
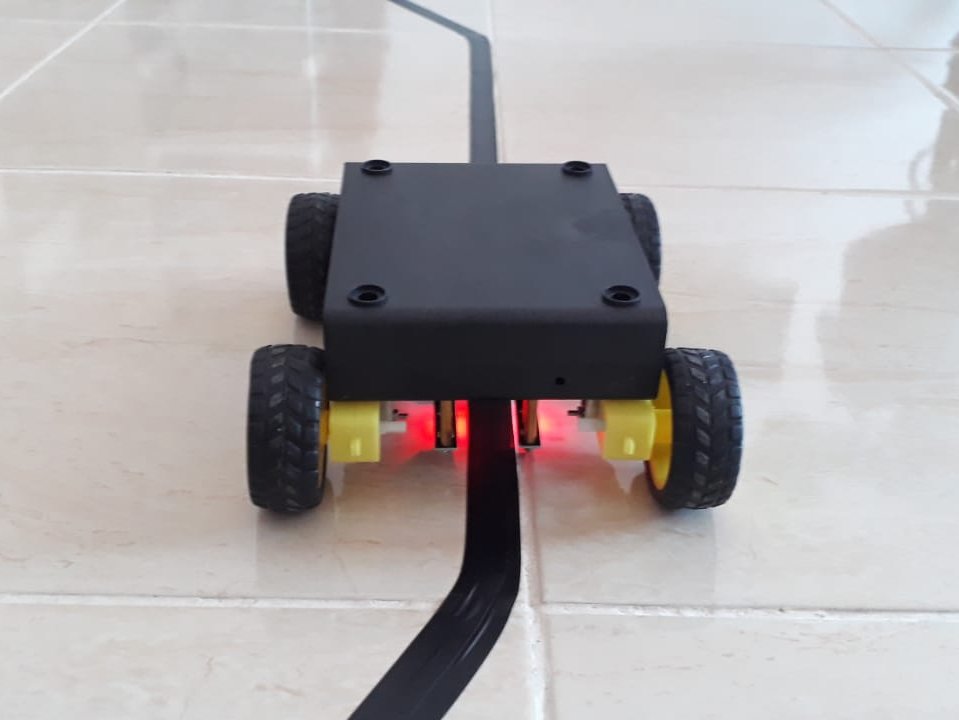
In fact, if you’re just getting started with robotics, it helps to keep things simple. Check out this great example — it’s a simple, car-shaped robot designed to follow a colored line on the floor.
The robot constantly monitors data from its infrared sensors in real time and adjusts movement based on feedback, ensuring it never strays from the line.
If this kind of project interests you, you’ll love the upcoming Arduino Alvik, which will have a line-follower functionality. Alvik’s user-friendly interface makes MicroPython coding and robotics project development easier than ever, making learning and creating a breeze.
Alvik is also equipped with a range of sensors including a ToF distance sensor, line follower array, color sensor, and more. It’s especially impressive when it comes to swiftly detecting and navigating obstacles and colors.
Did you think playing music was a uniquely human trait?
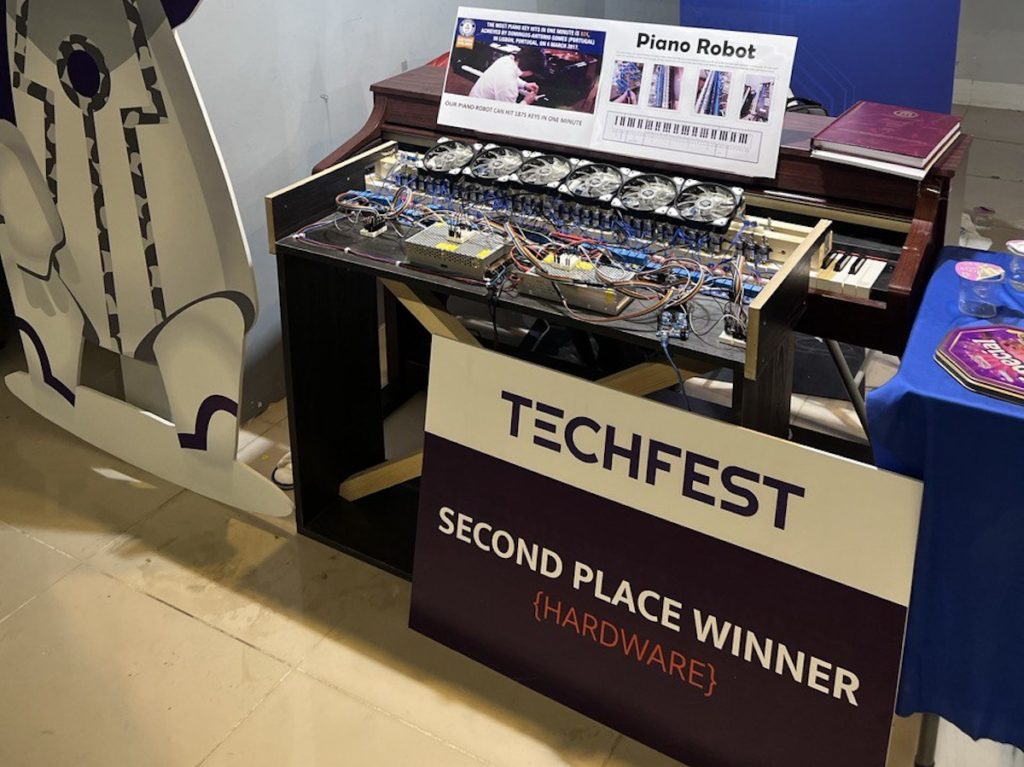
Well… think again — this musically-inclined robot is capable of controlling piano keys automatically. The device was able to play piano keys 1,875 times in the space of a minute, beating the human world record by a significant margin.
The project used a range of tools including solenoids and a custom-designed Java software interface.
A chess-playing robot arm
Robots have been giving us humans a run for our money in the world of chess for quite some time.
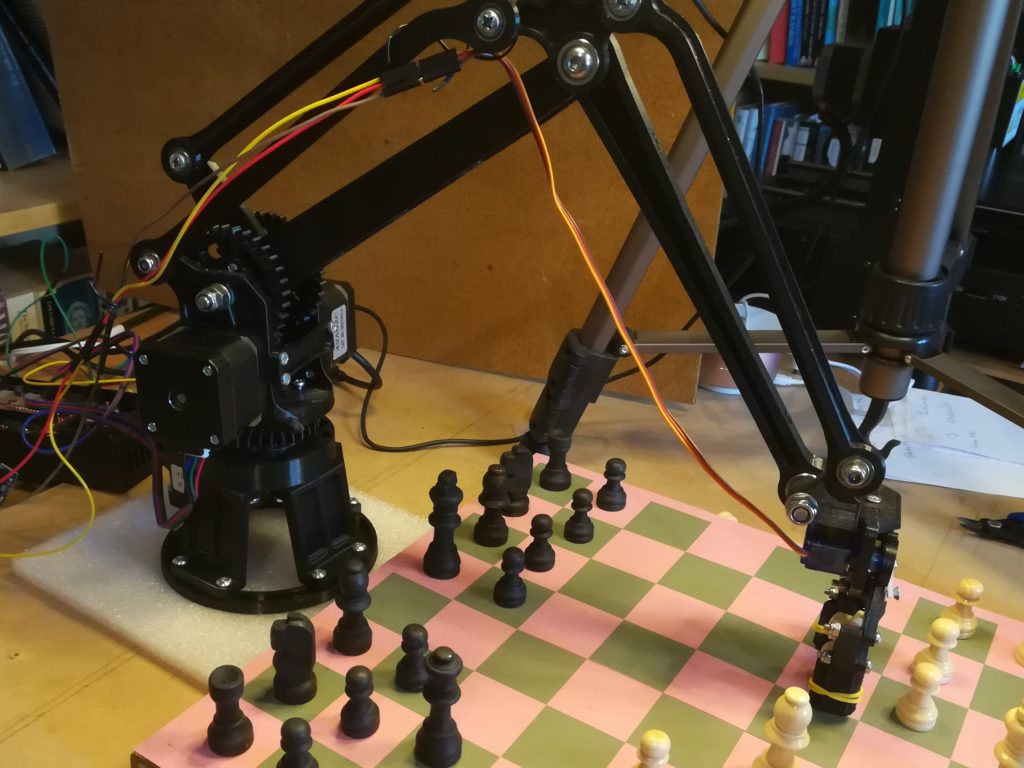
For a new spin on the machines vs. humans saga, take a look at this robotic arm capable of physically moving the chess pieces.
The arm was created using a 3D printer and works by using a visual recognition system to watch the opponent’s move and then formulate a response.
One of the most interesting things about this robot is the code used for move recognition. Because the robot uses visual recognition to follow the human’s moves, there’s no need for additional complex hardware like reed switches to be built into the chessboard, unlike other chess-playing robots.
Stay tuned for Robotics Week!
If you have a passion for building robots or just want to learn more about this topic, you’ll love Robotics Week, which takes place this year from April 6th-13th.
It’s a full week of events — many of which are virtual — all centered around robotics and STEM.
In the meantime, visit our Project Hub for more inspiration — where you can search by category and difficulty level. And don’t forget to share your own projects with our community!
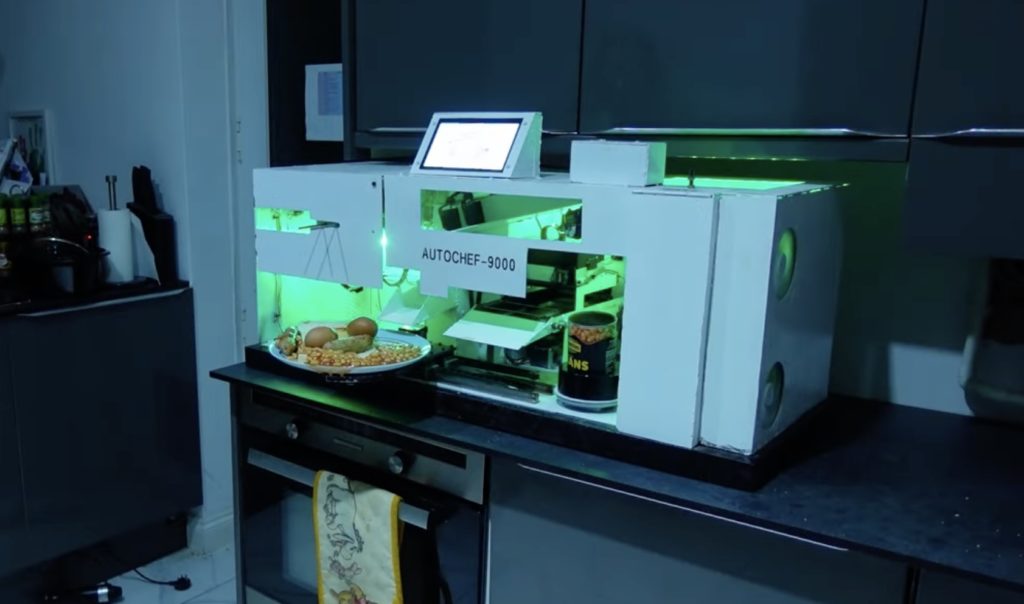
Fans off Wallace and Gromit will all remember two things about the franchise: the sort of creepy — but mostly delightful — stop-motion animation and Wallace’s Rube Goldberg-esque inventions. YouTuber Gregulations was inspired by Wallace’s Autochef breakfast-cooking contraption and decided to build his own robot to prepare morning meals.
Gregulations wanted his Autochef-9000 to churn out traditional full British breakfasts consisted of buttered toast, eggs, beans, and sausage. That was an ambitious goal, because each of those foods requires several steps to prepare. Gregulations’ solution was to, essentially, create one large machine that contains several smaller CNC machines. Each one is distinct and tailored to suit a particular food. In total — if you add up all of the different sections — this is a 12-axis CNC machine.
The Autochef-9000’s central controller is an Arduino Mega 2560 board. But even with the power and number of pins available, that wouldn’t have been able to handle everything. So it divvies out some tasks to Arduino UNO Rev3 boards.
As you would expect, this takes quite a lot of heat to cook everything. That’s why the Autochef-9000 contains several electric heating elements, which the Arduinos control via relays.
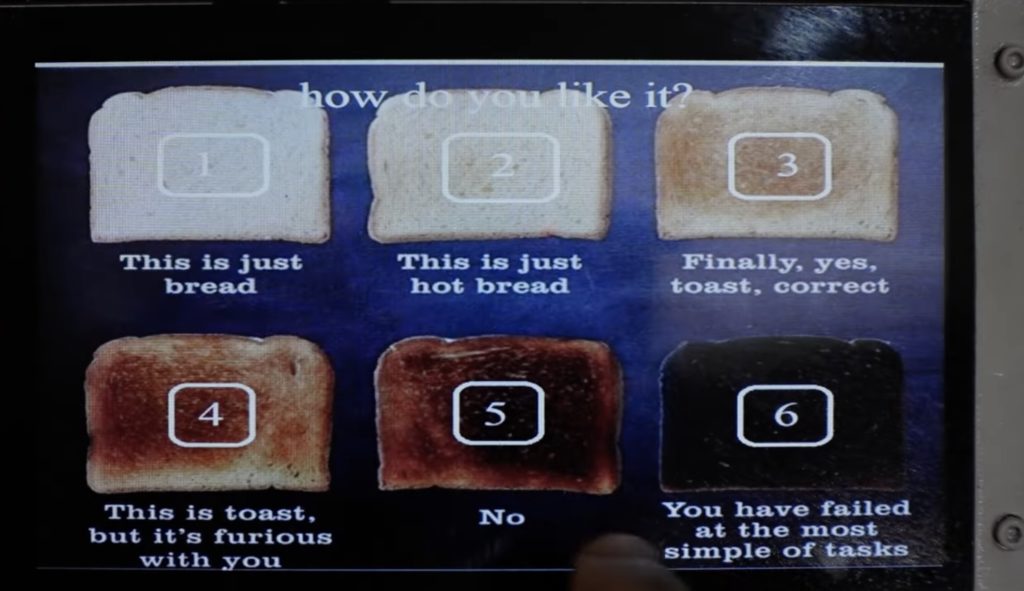
Users can order food using a touchscreen menu system or a smartphone interface. Autochef-9000 will then whir to life. It will open and heat a tin of beans, grab and heat a sausage, hard boil an egg, and toast and then butter bread fed from a magazine. Finally, it will deposit all of those items onto a plate.
There is a lot going on inside of this machine and Gregulations breezes past a lot of the technical details, but it is a joy to see in action. And unlike Wallace’s inventions, this one hasn’t caused any serious disasters (yet).
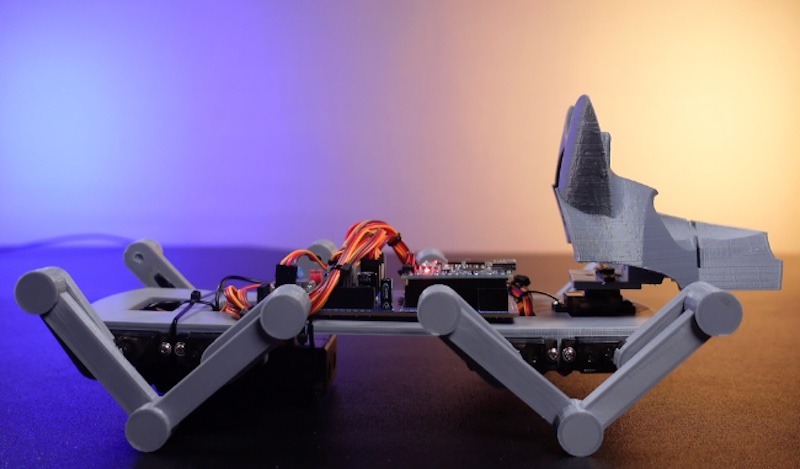
If you have an interest in robotics, it can be really difficult to know where to start. There are so many designs and kits out there that it becomes overwhelming. But it is best to start with the basics and then expand from there after you learn the ropes. One way to do that is by building MertArduino’s adorable app-controlled robot dog.
This is a little more complex than a typical line-following rover kit, but it is still approachable for beginners. It uses eight inexpensive MG90S hobby servo motors to walk on four legs, plus one more servo to rotate the head. The tutorial explains how to create a smartphone app for controlling the robot and there is an ultrasonic sensor hidden in the dog’s eyes to help it detect obstacles.
To construct this robot, you will first need to 3D print the body, legs, and head. Those parts are small enough to print on almost any model of 3D printer. You’ll then need the custom PCB, onto which all of the electronic components attach. You can order that from any PCB fabrication service. Using basic through-hole soldering techniques, you can populate that PCB with an Arduino Nano board, an HC-05 Bluetooth module (for communication with a smartphone), and various miscellaneous components like resistors and a voltage regulator. Power comes from a pair of 18650 lithium battery cells.
After assembly, you can begin controlling the robot using the provided app. Or you can follow the instructions to make your own app with the help of MIT’s handy block-based Scratch programming tool.
If you want to dip your toes into the world of robotics, this seems to be a fun way to do it.
The Zumo Robot is an Arduino-based tracked robot that is less than 10 cm × 10 cm, which qualifies it for mini sumo competitions. Power is provided by two micro metal gearbox motors, and it features a stainless steel bulldozer-like blade for pushing around the competition. It has six infrared sensors for line following or edge detection, an accelerometer, a magnetometer, gyroscope, and a buzzer, allowing you to play your favourite victory song. No soldering required – just add four AA batteries and an Arduino, and you’ll be all set for some robotic sumo wrestling.
They rate the Zumo 9 out of 10, saying “A clean looking bot.”
Most people with an interest in robotics probably dream of building android-style humanoid robots. But when they dip their toes into the field, they quickly learn the reality that such robots are incredibly complex and expensive. However, everyone needs to start somewhere. If you want to begin that journey, you can follow these instructions to assemble your own talking humanoid robot.
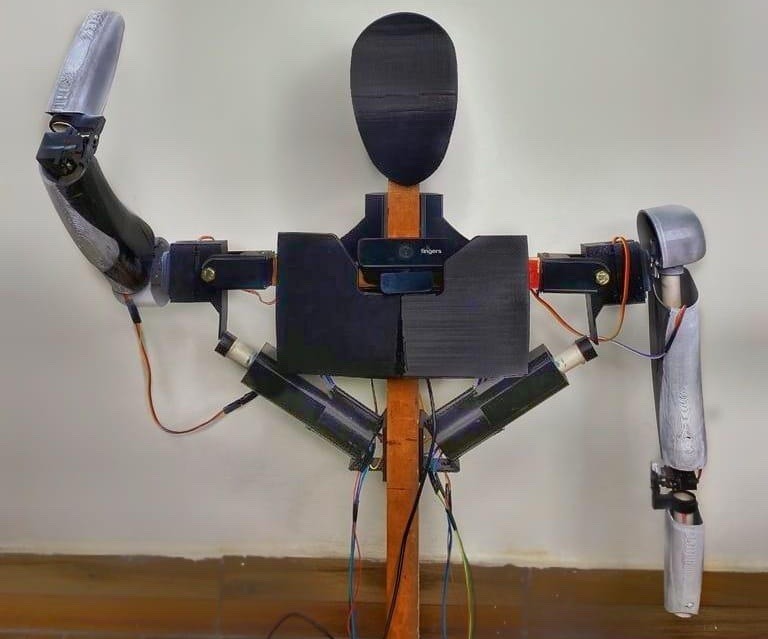
This robot, dubbed “CHAD,” is a humanoid torso with moving arms, face tracking, and some voice assistant capabilities. It can understand certain voice commands, provide spoken responses, and even hold chat bot-style conversations. The arms weren’t designed to lift anything, but they are capable of movement similar to human arms up to the wrists and that gives CHAD the ability to gesture. It can also move its head to follow a face that it sees.
CHAD achieves that on a remarkably small budget of just ?5000 (about $60 USD) with a handful of components: two Arduino UNO R3 boards, several hobby servo motors, simple L298N motor drivers, and a PC power supply. One Arduino board controls most of the servo movement, while the second focuses on the face tracking movement.
The Arduino boards don’t handle the processing, which is instead outsourced to a PC running Python scripts. Those do the heavy lifting of face recognition, voice recognition, and voice synthesis. The PC then passes movement commands to the Arduino boards through serial.
CHAD’s body and most of its mechanical components are 3D-printable, with two lengths of wood acting as the primary structure. That helps to keep the cost down, giving everyone the chance to create a humanoid robot.
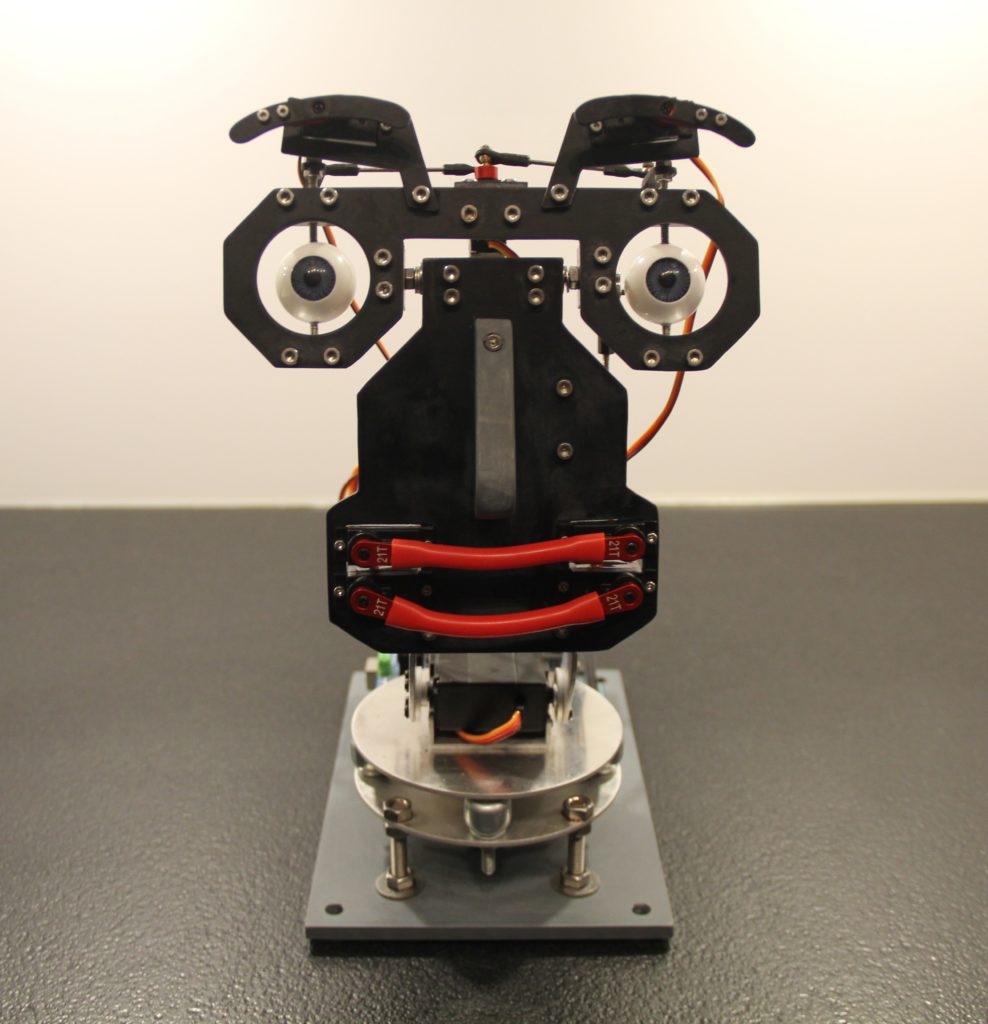
There are many theories that attempt to explain the uncanny valley, which is a range of humanoid realness that is very disconcerting to people. When something looks almost human, we find it disturbing. That often applies to robots with faces — or robots that are faces, as is the case with the TAST-E robot that has a sense of taste and smell.
The TAST-E robot created by M. Bindhammer looks a bit like a human face, sans skin. Servo motors let it pan and tilt, flap its lips, move its unsettlingly realistic eyeballs, and waggle its eyebrows. It can even speak thanks to a Parallax Emic 2 text-to-speech module connected to an Arduino Mega 2560 board.
But TAST-E is most intriguing because of its sense of taste and smell, which let it identify specific compounds and molecules.
Our own tongues can only detect five distinct tastes: saltiness, sweetness, bitterness, sourness, and umami (savoriness). TAST-E can do the same by recognizing the compounds that stimulate those receptors on our tongues. It does so with colorimeters, which detect the color produced when certain reagents mix with those compounds. This is similar to how a woman might look for a blue or pink line on a pregnancy test. TASTE-E has custom colorimeters that look for the reagent colors associated with those taste compounds.
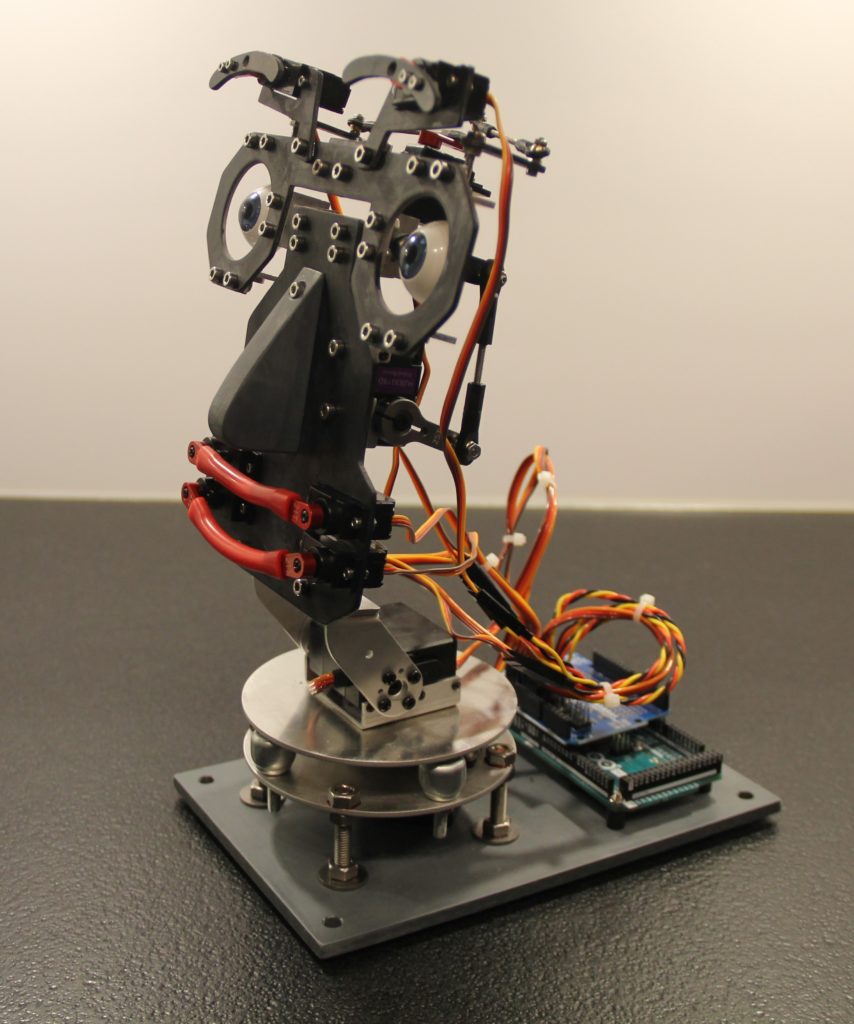
TASTE-E’s sense of smell is a bit more straightforward, but also less analogous to human smell. Its electronic nose uses a Grove gas sensor breakout with four modules: a GM-102B for NO2, a GM-302B for ethanol, a GM-502B for VOCs, and a GM-702B for CO/H2. Those let it analyze the concentration of those compounds in an air sample.
It isn’t clear what M. Bindhammer intends for TAST-E, but this robot is as impressive as it is chilling.
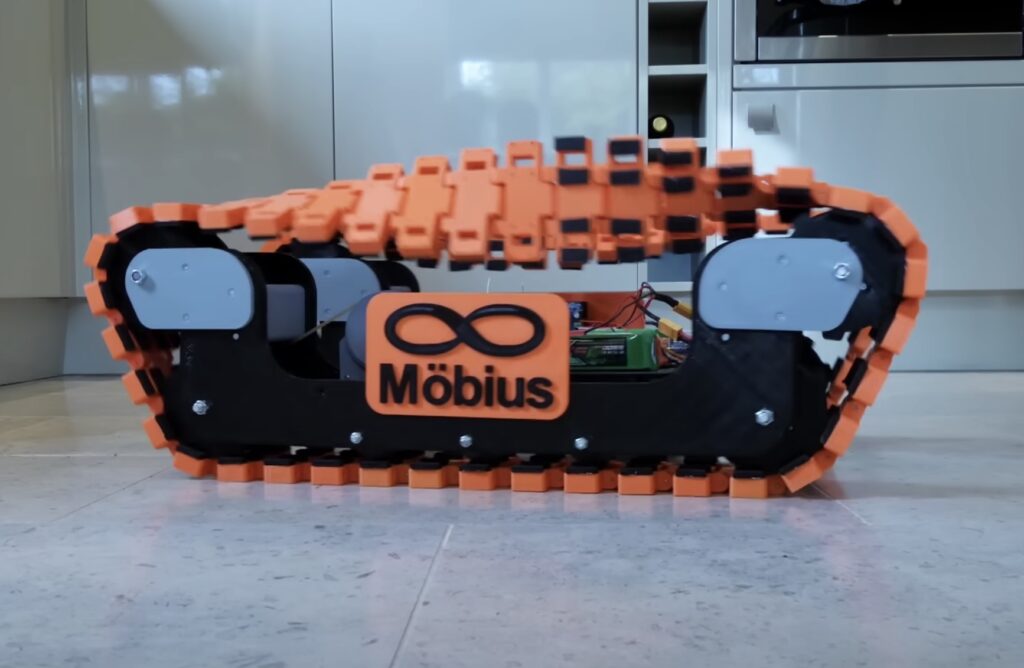
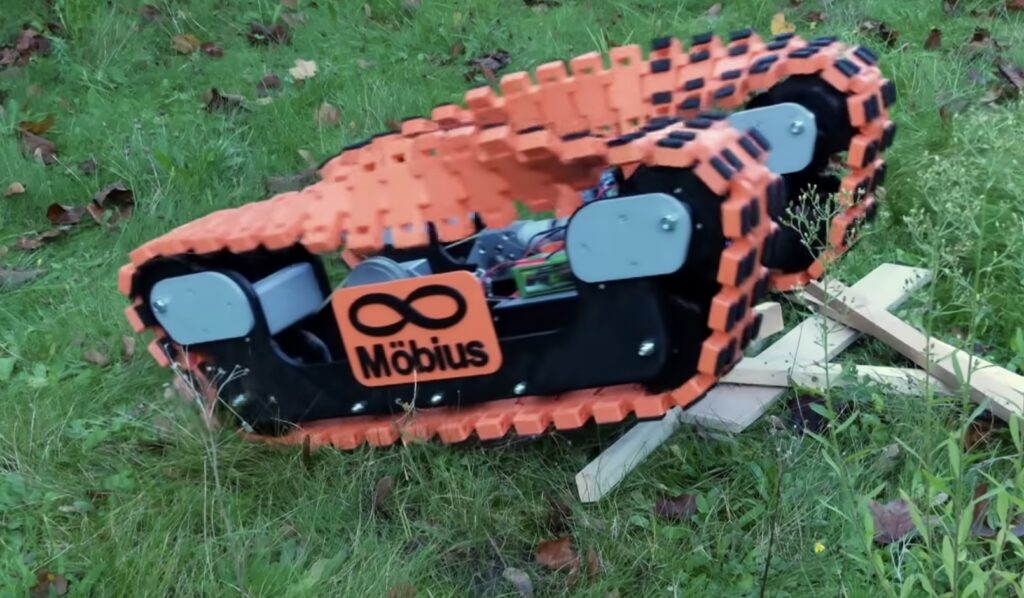
Möbius strips are often used to symbolize infinity, because they are continuous loops with only a single surface. They can’t exist in real life, because every solid object in reality has thickness—even if it is very thin, like a piece of paper. But we can construct similar objects that loop and twist over on themselves. James Bruton demonstrated that concept by building an RC tank with Möbius strip tracks.
This project doesn’t seem to have any real purpose beyond curiosity. Bruton wanted to see how Möbius strip tracks would work and so he constructed this tank to find out. The treads and most of the rest of the tank were 3D-printed, with the tread links getting a special design that lets them pivot relative to each other. They pivot just enough that the each track was able to make a half-twist over the course of 8 or 9 links. That half-twist is what makes the tracks similar to a Möbiusstrip, because the “outer” surface continues endlessly and transitions to being the “inner” surface and then repeats forever.
As is the case for many of Bruton’s creations, this tank has an Arduino Mega 2560 for control. It receives commands from Bruton’s universal remote through an OrangeRX DSM2 radio receiver. A DC gear motor drives each track, providing plenty of torque.
In testing, this tank performed similarly to a standard RC tank—though there is, presumably, more friction to overcome. When the tracks are bare plastic, they slip on hard surfaces a lot. When Bruton added grippy pads, they didn’t slip quite enough. But interestingly, the unique geometry of the tracks means that one “side” can be grippy and the other slick. The track will then alternate between the two, even though that doesn’t seem to provide any real benefit.
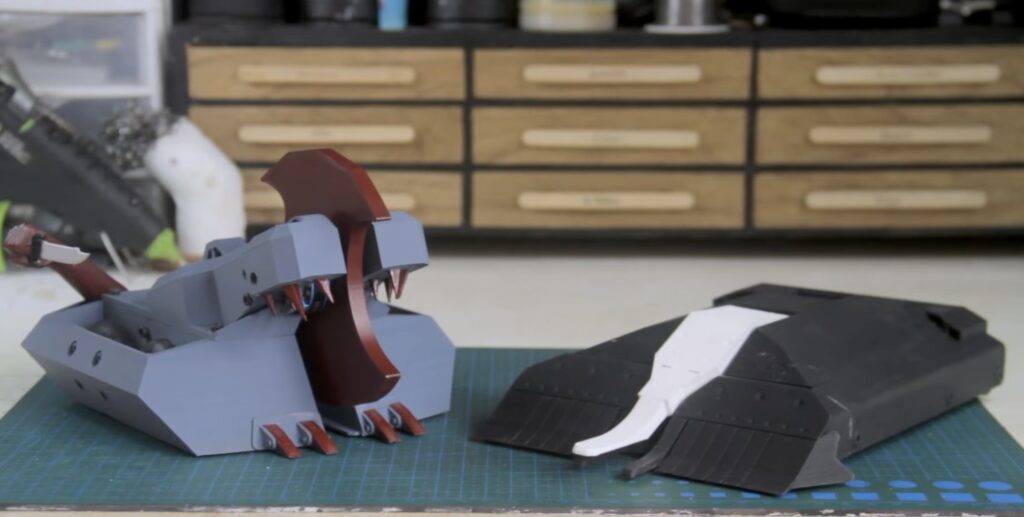
When the BattleBots TV show first hit the airwaves in 2000, it felt like we were finally living in the future. Engineers and enterprising hobbyists from around the world would compete to build the most destructive robots, which then entered into televised mortal combat within an arena. The original series had many notable robots, but two of those most iconic were Death Roll and Hydra. Max Imagination replicated those on a small scale for mini living room battles.
BattleBots competitors could win their matches by either damaging their opponents to the point where they could no longer operate, or by making them unable to move. The most popular way to achieve that second goal was by flipping over the opposing robot and that is the tactic used by both Death Roll and Hydra. Death Roll did so with a spinning disc that catches on its opponents body, while Hydra used a hydraulic arm like a pancake spatula to flip opponents.
Max Imagination wanted to create faithful reproductions of both bots, but at a size small enough to be 3D-printed. Because hydraulics are difficult at this scale, Hydra’s flipping arm is spring-actuated and cocked with a motor-driven gear mechanism. Otherwise, both replicas work in the same way as their bigger ancestors.
Each robot takes advantage of the new Arduino UNO R4 WiFi board for control. Max Imagination programmed those with self-hosted web interfaces, so users can pilot the bots through smartphones. The bodies were designed in Autodesk Fusion 360 to be entirely 3D-printable and Max Imagination is even selling those models for anyone who wants to construct their own fighting robots.
Planet Arduino is, or at the moment is wishing to become, an aggregation of public weblogs from around the world written by people who develop, play, think on Arduino platform and his son. The opinions expressed in those weblogs and hence this aggregation are those of the original authors. Entries on this page are owned by their authors. We do not edit, endorse or vouch for the contents of individual posts. For more information about Arduino please visit www.arduino.cc
You are currently browsing the archives for the Robotics category.