Posts | Comments

Planet Arduino

Archive for the ‘Parts’ Category

In retrocomputing circles, it’s often the case that the weirder and rarer the machine, the more likely it is to attract attention. And machines don’t get much weirder than the DEC Rainbow 100-B, sporting as it does both Z80 and 8088 microprocessors and usable as either a VT100 terminal or as a PC with either CP/M or MS-DOS. But hey — at least it got the plain beige box look right.

Weird or not, all computers have at least a few things in common, a fact which helped [Dr. Joshua Reichard] home in on the problem with a Rainbow that was dead on arrival. After a full recapping — a prudent move given the four decades since the machine was manufactured — the machine failed to show any signs of life. The usual low-hanging diagnostic fruit didn’t provide much help, as both the Z80 and 8088 CPUs seemed to be fine. It was then that [Joshua] decided to look at the heartbeat of the machine — the 24-ish MHz clock shared between the two processors — and found that it was flatlined.

Unwilling to wait for a replacement, [Joshua] cobbled together a temporary clock from an Arduino Uno and an Si5351 clock generator. He connected the output of the card to the main board, whipped up a little code to generate the right frequency, and the nearly departed machine sprang back to life. [Dr. Reichard] characterizes this as a “defibrillation” of the Rainbow, and while one hates to argue with a doctor — OK, that’s a lie; we push back on doctors all the time — we’d say the closer medical analogy is that of fitting a temporary pacemaker while waiting for a suitable donor for a transplant.

This is the second recent appearance of the Rainbow on these pages — [David] over at Usagi Electric has been working on the graphics on his Rainbow lately.

Even with more and more devices making the leap to USB-C, the Arduino Uno still proudly sports a comparatively ancient Type-B port. It wouldn’t be a stretch to say that many Hackaday readers only keep one of these cables around because they’ve still got an Uno or two they need to plug in occasionally.

Looking to at least move things in the right direction, [sjm4306] recently set out to create a simple board that would let him mount a micro USB connector in place of the Uno’s original Type-B. Naturally there are no components on the PCB, it simply adapts the original through-hole footprint to the tight grouping of surface mount pads necessary to mount a female micro USB port.

Making castellated holes on the cheap.

The design is simple enough, but as [sjm4306] explains in the video below, there’s actually a bit more to the story than you might think. Looking to avoid the premium he’d pay to have the board house do castellated holes, he cheated the system a bit by having the board outline go right through the center of the standard pads.

Under a microscope, you can see the downside of this approach. Some of the holes got pretty tore up as the bit routed out the edges of the board, with a few of them so bad [sjm4306] mentions there might not be enough of the pad left to actually use. But while they may not be terribly attractive, most of them were serviceable. To be safe, he says anyone looking to use his trick with their own designs should order more boards than they think they’ll actually need.

Of course you could go all the way and retrofit the Uno with a USB-C port, as we’ve seen done with devices in the past. But the latest-and-greatest USB interface can be a bit fiddly, especially with DIY gadgets, so we can’t blame him for going with the more reliable approach.

We know, we know. Generally speaking, you should try and switch your household devices over to rechargeable cells rather than using disposable alkaline batteries. But while they might seem increasingly quaint in the lithium-ion era, features such as a long shelf life make it worth keeping a pack of disposables around. So which ones should you buy? That’s what [Moragor] wanted to find out with his personal battery analyzer.

Designed as a shield for the Arduino Mega 2560, the analyzer combines a small programmable electronic load with a INA219 current sensor, OLED display, and SD card reader. The user selects the cutoff voltage and discharge rate before the test begins, and once it’s running, data is collected every second and saved to the SD card for later analysis. Once the battery voltage reaches the predetermined value, the test is over and you’re ready to put a new cell through its paces.

After testing 27 different brands of batteries, [Moragor] tabulated all the data and produced some helpful charts to illustrate the results. With few exceptions, the performance level for most of the batteries was remarkably similar. If anything, the test seemed to show that higher tier batteries from companies like Duracell and Energizer actually performed slightly worse than the mid-range offerings. Perhaps the biggest surprise is that, when the per-cell cost was factored in, the local cheapo batteries provided a better value than anything else in the test.

While the selection of battery brands may be different from where you live, the data [Moragor] collected is still a fascinating even if you don’t recognize some of the names on the chart. Of particular note is the confirmation that lithium batteries handily outperformed any of the Alkaline cells tested when it came to high-drain applications. We’d still rather they came in rechargeable form, but at least it’s a step in the right direction.

It’s a common enough situation, that when an older piece of equipment dies, and nobody wants to spend the money to repair it. Why fix the old one, when the newer version with all the latest bells and whistles isn’t much more expensive? We all understand the decision from a business standpoint, but as hackers, it always feels a bit wrong.

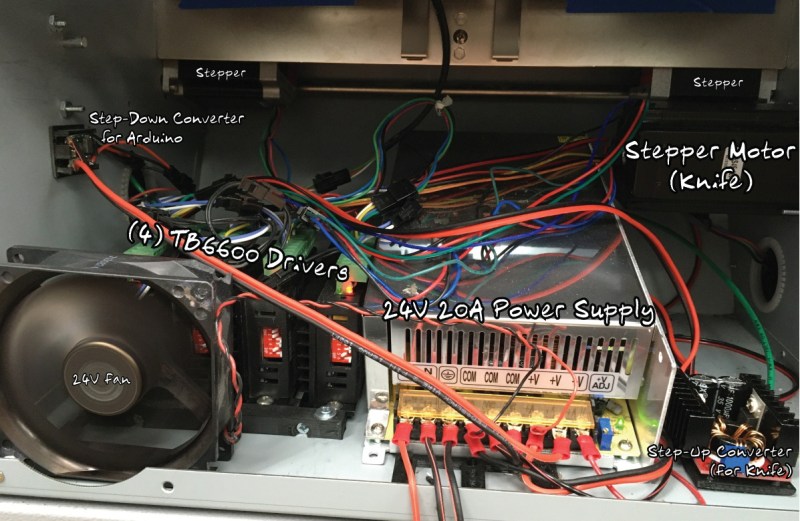
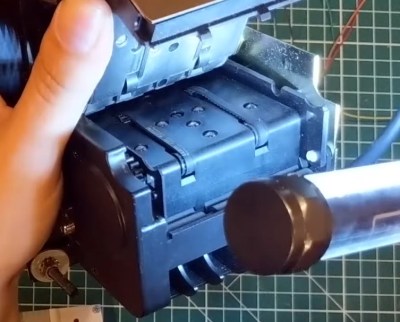
Which is exactly why [tommycoolman] decided to rebuild the office’s recently deceased Duplo CC-330 heavy duty business card cutter. It sounds like nobody really knows what happened to the machine in the first place, but since the majority of the internals were cooked, some kind of power surge seems likely. Whatever the reason, almost none of the original electronics were reused. From the buttons on the front panel to the motor drivers, everything has been implemented from scratch.

An Arduino Mega 2560 clone is used to control four TB6600 stepper motor drivers, with a common OLED display module installed where the original display went. The keypad next to the screen has been replaced with 10 arcade-style buttons soldered to a scrap of perfboard, though in the end [tommycoolman] covers them with a very professional looking printed vinyl sheet. There’s also a 24 V power supply onboard, with the expected assortment of step up and step down converters necessary to feed the various electronics their intended voltages.

In the end, [tommycoolman] estimates it took about $200 and 30 hours of work to get the card cutter up and running again. The argument could be made that the value of his time needs to be factored into the repair bill as well, but even still, it sounds like a bargain to us; these machines have a four-figure price tag on them when new.

Stories like this one are important reminders of the all wondrous things you can find hiding in the trash. Any time a machine like this can be rescued from the junkyard, it’s an accomplishment worthy of praise in our book.

It isn’t hard to imagine a scenario where you are stuck at home all day with nothing to do and certain items are in short supply. Sure, bathroom tissue gets all the press, but try buying some flour or a freezer and see how far you get. Plus online shopping has given up on next day delivery for the duration. Not hard to imagine at all. Now suppose your latest self-quarantine project needs a rotary shaft encoder. Not having one, what do you do? If you are [Tech Build] you go all MacGyver on an old printer and pull out a stepper motor.

How does a stepper motor turn into an encoder? Well, that’s the MacGyver part. We are not big fans of the physical circuit diagrams, but it looks like [Tech Build] borrowed (with credit) from an earlier post and that one has a proper schematic.

Looking at [Andriyf1’s] schematic, you can see each coil connects to an op-amp wired as a positive feedback comparator. The result should be a fairly clean square wave from a noisy input. The real trick is how to connect the coils, which depends on how the stepper is wired. If you have a stepper motor of unknown providence, grab your ohmmeter and read how to sort the wires out.

The initial version was on a breadboard, but the final was on a prototyping board. Of course, an Arduino reads the pulses. We love using things for unintended purposes. Speakers and microphones are often interchangeable. Generators and motors, too. Then there’s the paperclip.

We’ve all seen, and occasionally wrestled with, bill acceptors like the one [Another Maker] recently liberated from an arcade machine. But have you ever had one apart to see how it works? If not, the video after the break is an interesting peak into how this ubiquitous piece of hardware tells the difference between a real bill and a piece of paper.

But [Another Maker] goes a bit farther than just showing the internals of the device. He also went through the trouble of figuring out how to talk to it with an Arduino, which makes all sorts of money-grabbing projects possible. Even if collecting paper money isn’t your kind of thing, it’s still interesting to see how this gadget works on a hardware and software level.

As explained in the video, a set of belts are used to pull the bill past an array of IR LEDs. The hardware uses these to scan the bill and perform some dark magic to determine if it’s a genuine piece of currency. [Another Maker] notes that these readers actually need to receive occasional firmware updates to take into account new bill designs. In fact, the particular unit he has is so out of date that it won’t accept modern $5 bills; which may explain how he got it for free in the first place.

Years ago we saw one of these bill acceptors used to make a DIY Bitcoin ATM. Of course back then, a few bucks would get you a semi-reasonable amount of BTC. These days you would skip the paper currency and do it all digitally.

Many of the projects we feature on Hackaday are motivated by pure greed. Not on the part of the hacker, mind you; but rather the company that’s charging such an outrageous price for a mass produced item that somebody decides they can do the same thing cheaper as a one-off project. Which is precisely how [Bryan Kevan] ended up building his own carbon fiber tube wrapping machine. Not only do the finished tubes look fantastic, but they cost him a fraction of what even the “cheap” commercial ones cost.

The principle behind producing the tubes is really pretty simple: carbon fiber ribbon (or “tow”, in the official parlance) gets wrapped around a rotating mandrel, ideally in interesting patterns, and epoxy is added to bind it all together. When it’s hardened up, you slide the new carbon fiber tube off the mandrel and away you go building a bike frame or whatever it is you needed light and strong tubes for. You could even do it by hand, if you had enough patience.

[Bryan] had done it by hand before, but was looking for a way to not only automate the process but make the final product a bit more uniform-looking. His idea was to rotate a horizontal PVC pipe as his mandrel, and move a “car” carrying the carbon fiber ribbon back and forth along its length. The PVC pipe just needs to rotate along its axis so he figured that would be easy enough; and using a GT2 belt and some pulleys, getting the carbon-laying car moving back and forth didn’t seem like much of a challenge either.

The frame of the winder is built from the hacker’s favorite: 20/20 aluminum extrusion. Add to that an Arduino Uno, two stepper motors with their appropriate drivers, and the usual assortment of 3D printed odds and ends. [Bryan] says getting the math figured out for generating interesting wrap patterns was a bit tricky and took a fair amount of trial and error, but wasn’t a showstopper. Though we’d suggest following his example and using party ribbon during testing rather than the carbon stuff, as producing a few bird nests at the onset seems almost a guarantee.

One of the trickiest parts of the project ended up being removing the carbon fiber tubes from the PVC mandrel once they were done. [Bryan] eventually settled on a process which involved spraying the PVC with WD-40, wrapping it in parchment paper, and then using a strip of 3M blue painter’s tape to keep the parchment paper from moving. If you can toss the whole mandrel in the freezer after wrapping to shrink it down a bit, even better.

So was all this work worth it in the end? [Bryan] says he was originally looking at spending up to $70 USD per foot for the carbon fiber tubes he needed for his bike frame, but by buying the raw materials and winding them himself, he ended up producing his tubes for closer to $3 per foot. Some might question the strength and consistency of these DIY tubes, but for a ~95% price reduction, we’d be willing to give it a shot.

Years ago we covered a Kickstarter campaign for a very similar carbon winder. Probably due to the relatively limited uses of such a gadget, the winder didn’t hit the funding goal. But just like the current wave of very impressive homebrew laser cutters, the best results might come from just building the thing yourself.


  • Newsletter

    Sign up for the PlanetArduino Newsletter, which delivers the most popular articles via e-mail to your inbox every week. Just fill in the information below and submit.

  • Like Us on Facebook