Posts | Comments

Planet Arduino

Archive for the ‘IoT Cloud’ Category

Welcome to the next chapter of our ‘Better, with You’ journey! Now it is time to present the latest updates to the IoT Remote app. These new features are all about making your time with your IoT projects smoother, more fun and right at your fingertips. Let’s dive in!

If you haven’t caught up on our journey so far, make sure to check out our first blog post of the series, where we reveal a brand new UI on the Arduino Cloud.

Push notifications for real-time alerts

As your list of projects grows and time becomes a rare commodity, checking the status of all your projects on a regular basis is nearly impossible. That’s why having a heads-up for anything significant happening in your deployments is an absolute game-changer. A few months ago, we introduced Triggers and Notifications, a feature that allows you to configure conditions in the Arduino Cloud that trigger email notifications.

Now, with the new IoT Remote app version, you can customize and receive alerts directly on your mobile device. Because we know how life can sometimes get crazy and convenient it is to get notified directly on your phone. 

Remember, to unlock this feature, you’ll need the Maker plan ($5.99/month). Make sure you upgrade your plan to use it.

How to use the notifications in your phone

The process is quite straightforward:

  • Configure your Triggers and Notifications in the Arduino Cloud
  • Enable notifications in the IoT Remote app

Configure your Triggers and Notifications in the Arduino Cloud

To configure a notification you just have to

  • Go to https://app.arduino.cc/triggers
  • Click on CREATE TRIGGER to start the creation of the Trigger.
  • Configure your condition selecting your variable.
  • Configure your desired action: In this case select “Send Push Notification.” Note that you can additionally configure email notifications as well for the same trigger.
  • Define the fields of your notification: Title and Body.

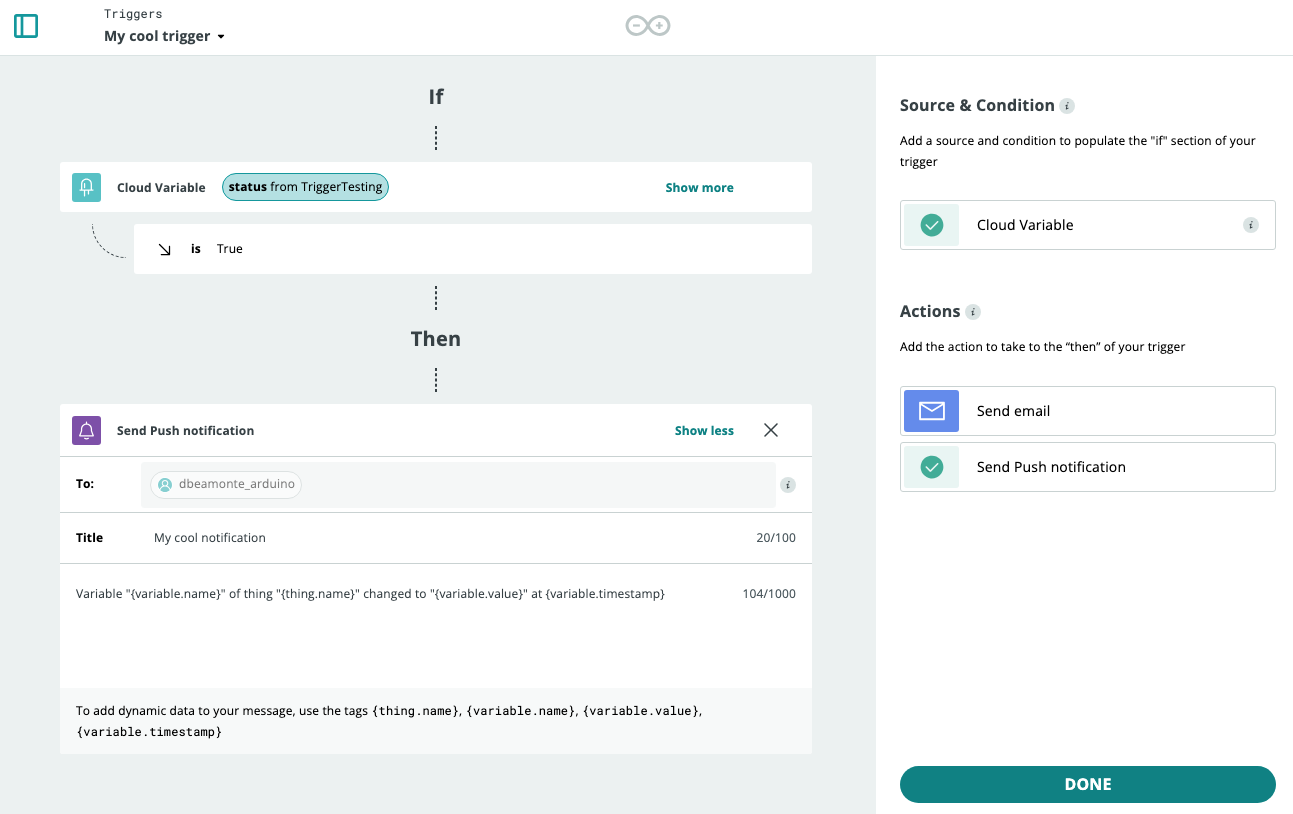
Triggers set up process in Arduino Cloud

And that’s it. You are ready to configure notifications on your mobile phone.

Enable notifications on the mobile phone

When you open the app with the new version for the first time, you are prompted to allow the app to send you notifications. If you accept, you are ready to go and you will receive instant alerts.

You can change your settings at any time in the “Manage push notifications” menu to enable or disable the notifications behavior.

Learn more about the full configuration process in the documentation article

Improved app UI

Activity monitor

Explore the history of your project’s alerts with the Activity tab. It is the ideal companion to push notifications, providing you with a comprehensive overview of your notifications activity. 

Activity tab in the Arduino IoT remote app

Dark mode

Finally, the long-awaited Dark Mode is here! You can now experience a more comfortable and elegant interface by simply enabling Dark Mode in the IoT Remote app. For a quick guide, refer to the documentation article.

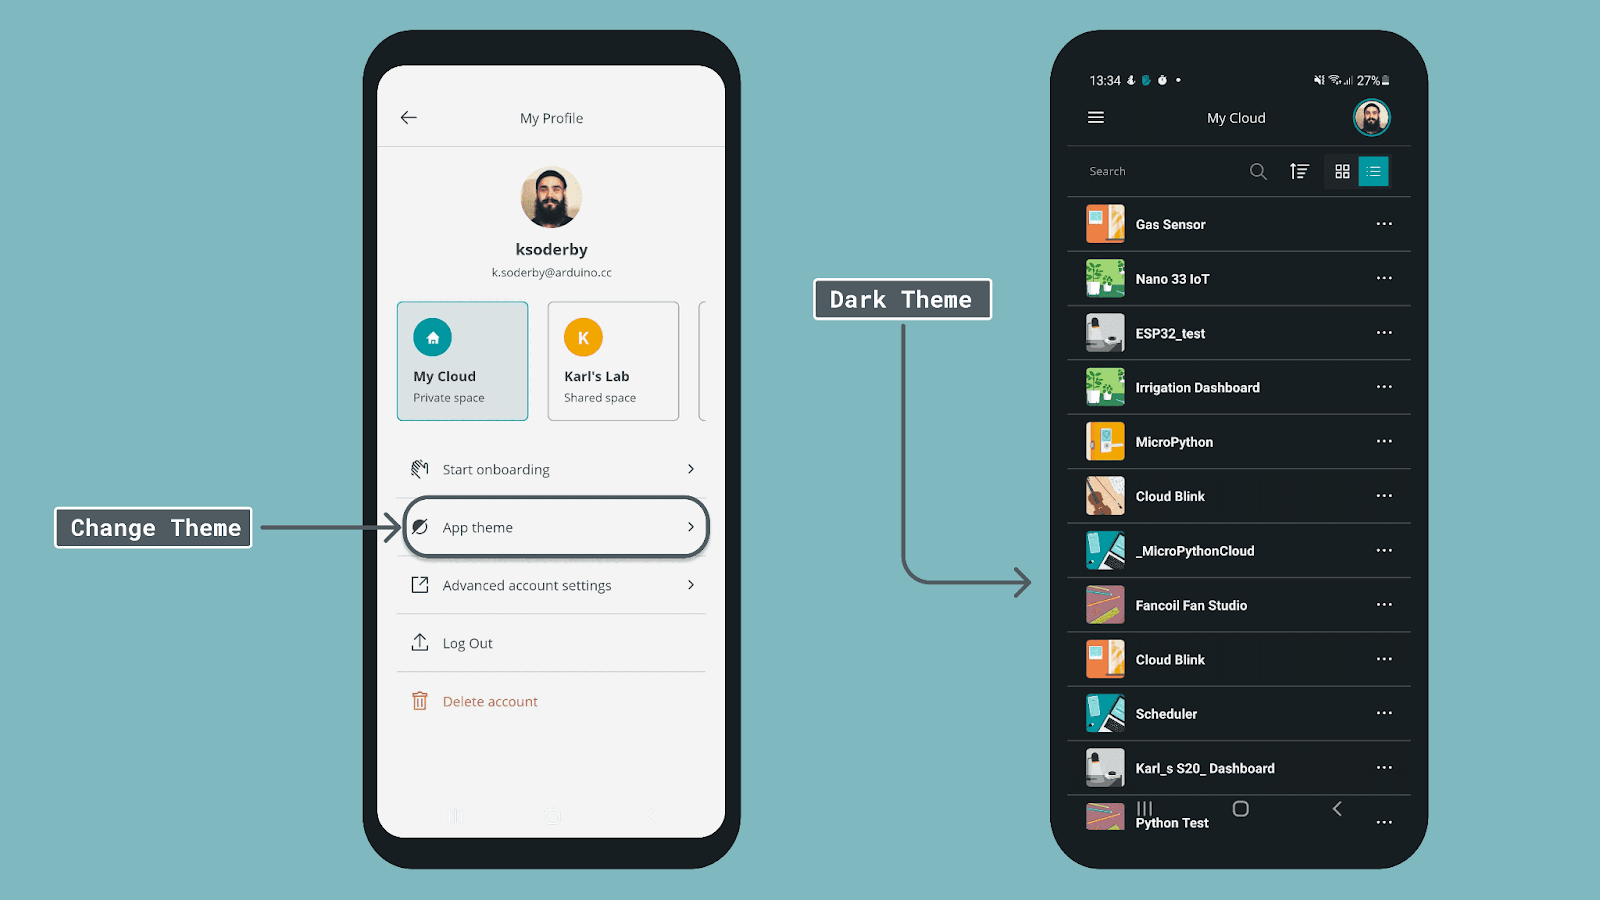
Change theme (light/dark)

New bottom navigation bar

The new bottom tab bar enhances your user experience simplifying the app navigation. This update is part of the major UX improvements implemented on the Cloud. You can seamlessly switch between sections and enjoy a more intuitive journey within the app.

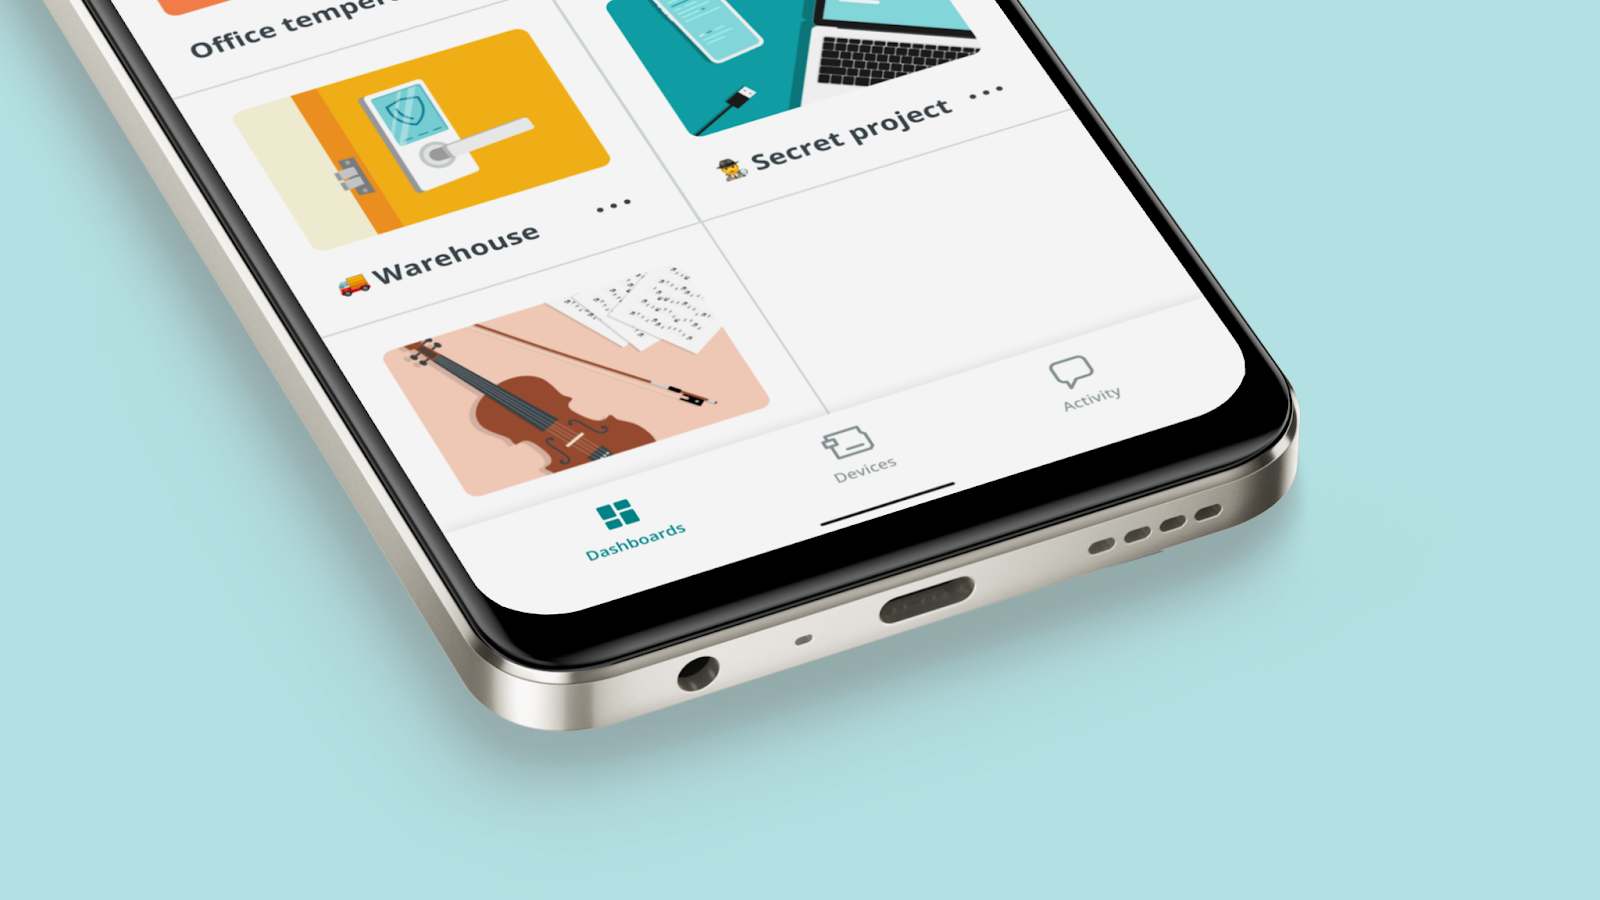
New UI with enhanced navigation bar in the Arduino IoT Remote app
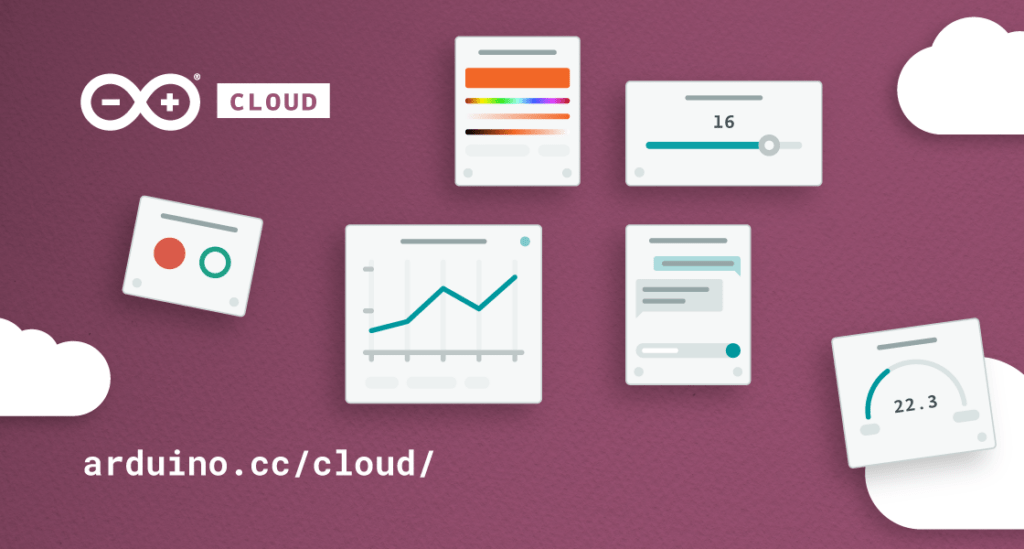
Redesigned widgets

Widgets have been redesigned to provide a clearer and refined data visualization. These improvements are also part of the major UX enhancements implemented on the Cloud.

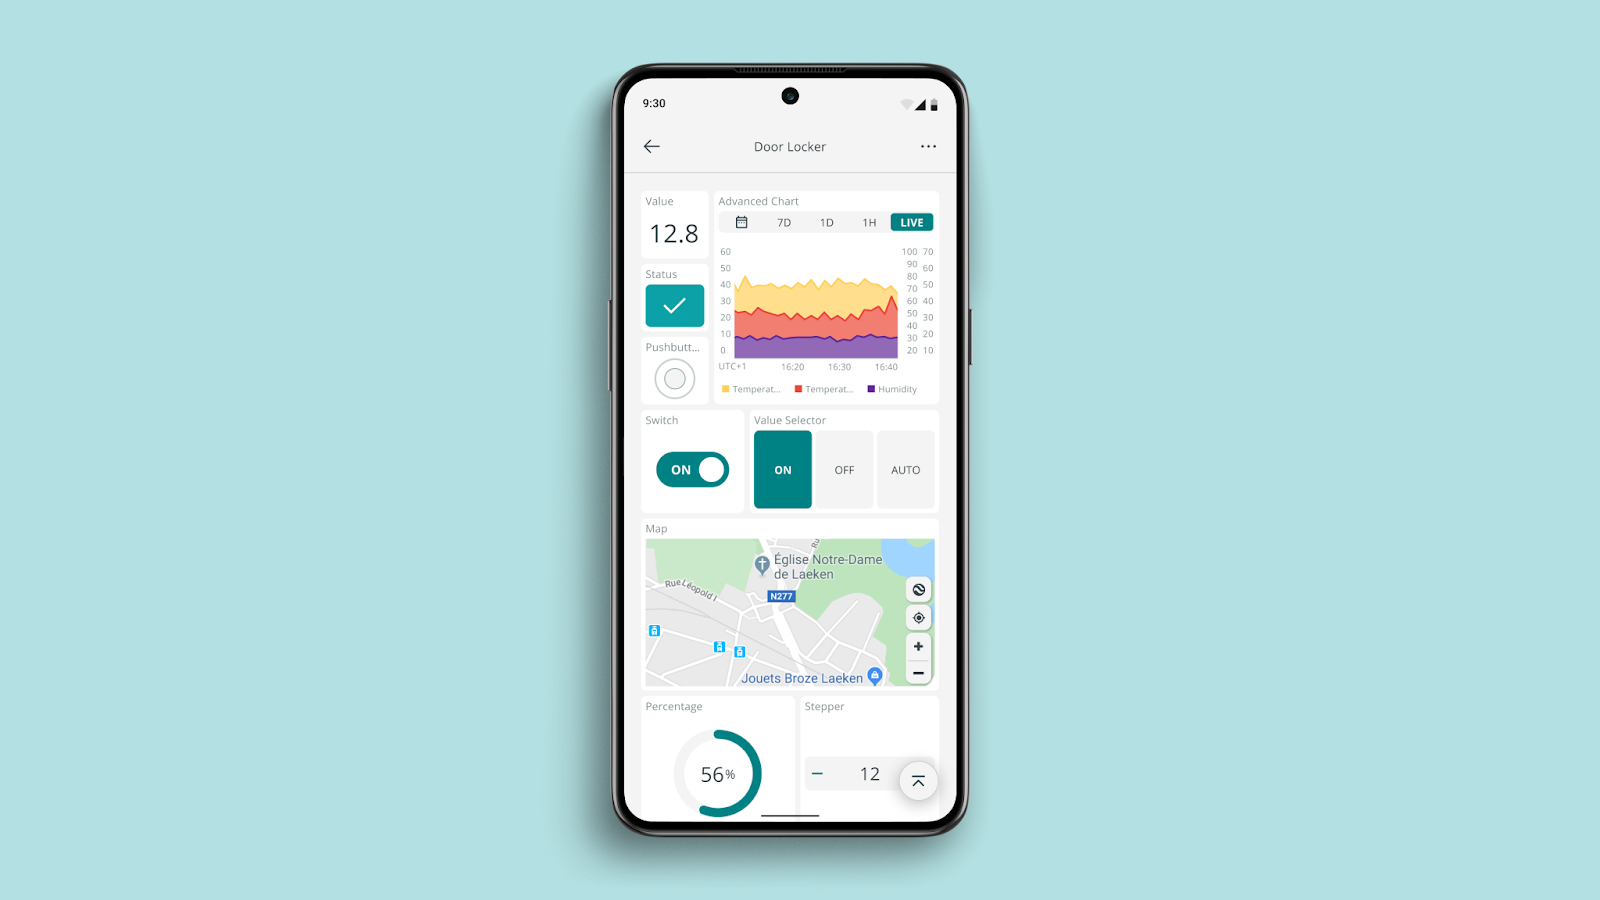
Enhanced widgets in the Arduino IoT Remote app

Devices list

We understand the importance of simplifying device monitoring. Check the status of your devices and their associated things directly from the IoT Remote app. It’s about bringing convenience to your fingertips, contributing to better IoT project management.

What is Arduino Cloud?

In case you’re new to this whole concept of the Arduino Cloud, we didn’t want to miss the opportunity to remind you of it here. The Arduino Cloud is the next exciting journey for IoT enthusiasts to bring their projects to life quickly. It is an all-in-one intuitive IoT platform, supporting a wide range of hardware and backed by the vibrant Arduino community. The Arduino Cloud removes complexity to empower users from all levels of expertise to create from anywhere, and control and share their projects with amazing dashboards that can be accessible with the IoT Remote app.

The following video provides a comprehensive quick tour of the new UI.

Download the IoT Remote app

Ready to try alerts in your phone and explore the new look and feel? Learn more about the new IoT Remote app features, download the IoT Remote app (available for Android and iOS), and create a new account to get started with the Arduino Cloud. 

And stay tuned for more news. We are creating a better cloud, with you! 

The post Real-time notifications and much more in the new Arduino IoT Cloud Remote app appeared first on Arduino Blog.

Hospitality professionals are constantly looking for ways to offer guests an enhanced experience while improving operational efficiency and optimizing energy management. To achieve this, they require cost-effective solutions that are easy to install and maintain while also providing the scalability of future-ready systems – such as automating hotel rooms or B&B rentals to increase safety, comfort, and energy savings. 

Indeed, automation can be integrated seamlessly in various aspects including climate control, lighting, security, and entertainment. Upgrading these functions allows guests to enjoy customization and convenience throughout their stay, and staff to efficiently manage room settings remotely. Moreover, hoteliers can achieve substantial energy savings through optimized control and scheduling, contributing to sustainability goals.

Long-term scalability and future-proofing of automation systems, however, can be an issue. As hotels and rental properties undergo renovations or expansions, the ideal solution should accommodate changes without requiring substantial modifications or replacements. Adopting open and standardized protocols, as well as selecting flexible and modular automation projects, can help mitigate these challenges and provide a foundation for future enhancements.

Our solution

A comprehensive IoT automation solution can address these challenges effectively by aggregating sensor and user data and then intelligently managing lighting, cooling/heating and more – for a smart, connected experience. The elements required to achieve this kind of outcome are environmental sensors, a programmable logic controller (PLC), a human-machine interface (HMI), and cloud connectivity. 

Programmable logic controller (PLC)

PLC-based automation systems are widely used due to their reliability, flexibility, and ability to handle complex tasks. Arduino Pro’s Opta microPLC can serve as the central control unit for hotel room automation by connecting and monitoring various devices and subsystems such as HVAC (heating, ventilation, and air conditioning), lighting and door locks. The microPLC receives data from sensors and users and processes them to trigger appropriate actions or adjustments in the room.

Human-machine interface (HMI)

A touchscreen panel through which guests and staff can control various room parameters – such as lighting status, fan status, and door lock status – provides a user-friendly and intuitive interface to interact with the automation system. This HMI also communicates data to the microPLC for execution.

The Modbus communication protocol

The HMI and Opta PLC communicate via Modbus RTU over RS-485. Modbus RTU communication protocol is widely adopted in industrial applications due to its reliability, provided by the physical layer strength and by the cyclic redundancy check included in the data packets. It allows for multiple devices to be connected to the same bus, forming a multidrop network where each device has a unique address, used to identify the recipient of the transmitted data. The Arduino Opta can communicate with other Modbus devices, such as sensors, actuators, or traditional PLCs, by addressing them individually.

IoT Cloud solution

Cloud connectivity enables seamless communication between the hotel room or rental property’s automation system and the central management system. The Opta and HMI connect to the cloud infrastructure, allowing remote access, monitoring, and control of multiple locations. The solution also enables data logging and analytics for better energy management, predictive maintenance, and guest experience personalization.

Solving it with Arduino Pro

Let’s get into the details of how this solution can be put into action, and identify the hardware and software resources needed for deployment. Arduino Opta is a great option for deploying building automation solutions, as it offers simple integration with current systems, real-time control capabilities, support for Over-The-Air (OTA) firmware updates, and Hardware-To-Cloud data security. The Arduino Pro ecosystem allows users to benefit from easy integration, along with a range of scalable, secure, and professionally supported services.

Hardware requirements

  • Arduino Opta WiFi
  • Human-machine interface (HMI) – ePaper display
  • Temperature and humidity sensor
  • Light and motion (PIR) sensors
  • Electronic lock
  • Enclosure
  • Electrical outlets
  • 12 V power supply (for the electronic lock)
  • 5 V power supply (for the HMI and sensors)

Software requirements

The Arduino IDE 2.0 can be used to program Opta using C/C++. Opta acts as the main controller, communicating with the HMI via the Modbus RTU protocol. The HMI gathers data from various sensors – including light, temperature and humidity, and PIR (movement sensor) – as well as user inputs from its interface buttons related to room climate, lights, and door lock status. It then forwards this data to Opta, which controls the relay outputs that will activate the lights, thermostat or door lock.

Opta also sends this data via Wi-Fi® to the Arduino IoT Cloud. After connecting it to the Arduino Cloud using the Arduino Create Agent, cloud variables corresponding to the sensor data being monitored can be defined.

Arduino Pro’s Opta microPLC offers an ideal solution for the automation of hotel rooms and B&Bs or rental properties. By leveraging standard communication protocols, easy integration, real-time control capabilities, secure hardware-to-cloud data exchange and remote access to multiple rooms from a centralized location, Opta provides the cornerstone of a comprehensive platform for smart hospitality.

The post Smart accommodation: Hotel room and rental property automation with Arduino Opta appeared first on Arduino Blog.

In today’s modern world, smart technology is revolutionizing the way we interact with our surroundings. From managing our home’s energy consumption to controlling appliances remotely — such as washing machines, fans, coffee makers, and even air conditioners. Smart devices offer us a level of convenience and control that was once unimaginable. However, dealing with multiple apps for various systems can be cumbersome and inefficient. This is where an integrated platform like the Arduino Cloud comes into play, offering a unified dashboard to control all your smart devices. Moreover, if you’re an Arduino enthusiast, you’ll be excited to learn how Node-RED can bridge the gap between commercial products and the Arduino Cloud. Last, but not least, you can integrate this project with the rest of your Arduino Cloud projects automating your appliance control using other devices’ data.

In this blog post, we’ll delve into a fascinating project that demonstrates how you can harness the power of Arduino Cloud and Node-RED to control TP-Link smart plugs, giving you the ability to manage and monitor your appliances from a centralized hub.

TP-Link smart plugs and Kasa

TP-Link smart Wi-Fi plugs are intelligent devices that transform everyday appliances into smart ones, enabling remote control via your Wi-Fi network. These plugs are part of TP-Link’s smart home ecosystem, designed to offer enhanced convenience and control over your home appliances. To manage and control these smart devices, TP-Link has developed the Kasa Smart platform. Through the Kasa Smart app, you can easily schedule, automate, and control your connected devices, making your home even smarter. Importantly, Kasa Smart provides an API that facilitates seamless integration with other platforms.

Arduino Cloud: Simplifying IoT development

The Arduino Cloud is a versatile platform that simplifies the creation, deployment, and management of IoT devices. It supports a range of hardware, including Arduino boards, ESP32/ESP8266-based boards and devices programmed with Python, JavaScript or Node-RED. This platform is a boon for makers, IoT enthusiasts, and professionals, as it enables them to build connected projects without needing extensive coding skills. Arduino Cloud lets you manage and monitor connected devices through customizable dashboards, offering real-time visualizations of device data. These dashboards can be accessed remotely using your favourite browser or via the Arduino IoT Cloud Remote mobile app, available for both Android and iOS devices, ensuring that you’re in control no matter where you are.

Node-RED: Bridging the gap

Node-RED is an open-source visual programming tool designed to facilitate the connection and automation of devices, services, and APIs. Its browser-based flow editor enables users to effortlessly create workflows by dragging and dropping nodes onto a canvas and connecting them. Each node represents a specific functionality or service, such as data input/output, data transformation, or communication with external systems. Popular in the Internet of Things (IoT) realm, Node-RED simplifies the integration of sensors, devices, and cloud services, empowering users to craft sophisticated IoT applications and automation systems without traditional coding. In this blog post we will see how Node-RED can act as a middleware between TP-Link smart plugs and the Arduino Cloud.

Project setup: Getting started

To embark on this exciting journey of controlling TP-Link smart plugs with the Arduino Cloud and Node-RED, you’ll need a few prerequisites:

  • A TP-Link smart Wi-Fi plug (such as HS100)
  • The Kasa app installed on your mobile phone
  • An Arduino Cloud account
  • An instance of Node-RED (running locally or in the cloud)

No Arduino, ESP32, or ESP8266 devices are required for this project.

Step-by-step implementation

Here’s a concise overview of the steps you’ll undertake to bring your project to life:

  • Configure your TP-Link smart plug: Begin by adding your TP-Link smart plug to the Kasa app on your mobile device. This process connects your plug to both your Wi-Fi network and the internet, enabling remote control.
  • Create the device in the Arduino Cloud: In the Devices section of Arduino IoT Cloud, create a new device. This process involves selecting “Any Device” and following the instructions in the wizard. Don’t forget to save your Device ID and Secret Key.
  • Create the Node-RED flow: Access your Node-RED instance and import the provided code. This code configures the integration between the TP-Link smart plug, Arduino Cloud, and Node-RED.
  • Configure the Kasa and Arduino Cloud nodes: Within Node-RED, you’ll need to input the IP address of your TP-Link smart switch and configure the connection to Arduino Cloud using the API key you generated.
  • Create the Arduino Cloud dashboard: Navigate to the Dashboards section of the Arduino Cloud and create your dashboard. Customize it to your liking for easy monitoring and control.
  • Test the System: With everything set up, it’s time to test your creation. Access your Arduino Cloud dashboard to observe the status of your smart plug and control it using the provided button.

Try it now!

Experience the future of home control now. Discover how Arduino Cloud and Node-RED combine to command TP-Link smart plugs. Create your Arduino Cloud account and dive in at the Project Hub project page and transform your home today!

The post Controlling home appliances with Arduino Cloud and TP-Link smart plugs appeared first on Arduino Blog.

Today, Arduino officially announced its partnership with Amazon Web Services (AWS), offering a new path for the future of edge hardware and cloud services. The new partnership will provide Arduino products and Arduino Cloud customers more options to integrate AWS into IoT projects.

One big Cloud for all

It might be news to learn that Arduino Cloud has run on AWS infrastructure from the beginning three years ago. Since that launch, Arduino has increased its investment in the product, growing the team, adding new features, and creating versions for Business and Education. It turned out to be the right decision, as we hear from our customers about how much the progress has helped them achieve both personally and professionally. 

Speaking of achievements, it is incredible to report that Arduino Cloud has crossed a milestone. Our cloud now process 4 billion device messages each month! This astonishing accomplishment marks us as one of the more significant IoT SaaS platforms deployed on AWS. Thank you to all of our customers and contributors!

Businesses <3 Arduino Cloud, too

Our Cloud for Business solution is one of the areas in which we are heavily investing and growing the fastest. We have received great feedback on how quick commercial customers can realize value from the core features and our integrations with Edge Impulse and Foundaries.io. 

For example, one of our customers, ABM Vapor Monitoring, built a connected contamination monitoring product for commercial buildings using the Arduino Pro Opta PLC. After evaluating different cloud options, they picked Arduino Cloud, and the feedback was great. 

“Choosing Arduino Cloud for our [regulated air quality] application slashed product development time by six months and saved us over $250,000 in engineering services. Arduino Cloud has been an instrumental partner in our journey to introduce new products to the market.”

What this partnership means

Considering our professional customers was the driving motivation behind this partnership announcement with AWS. We continue to hear from businesses how they appreciate our device management, particularly the automatic industrial-grade secure connection and over-the-air firmware updates. 

As these customers’ business grows and their product offerings evolve, it is easy to understand how some of the excellent cloud services from AWS could benefit their applications. As a company, Arduino wants to support everyone with an open ecosystem, and from that perspective, this partnership with AWS began. 

Officially, Arduino joined the AWS ISV program. It is a program designed for SaaS providers built on AWS, like Arduino Cloud, to work with AWS in supporting medium to large customers with architecting custom solutions. Joining this program also provides access to a vast network of over 100,000 AWS Partners worldwide. This means both existing AWS and Arduino customers will experience streamlined support for integrating each cloud with one another.

In addition, Arduino currently has 12 devices in the process of achieving AWS Device Qualification status. This means our devices will officially be recognized by AWS and provide customers architectural documentation to help simplify the complexity of developing an end-to-end solution. 

Just the beginning

We hope this article helped convey that this collaboration between Arduino and AWS is not just another partnership; it is a strategic effort that aims to simplify and accelerate the deployment of commercial IoT and cloud-based solutions. It’s an important step forward in connecting the capabilities of edge hardware with the immense potential of cloud computing.

The future for IoT and cloud computing looks promising, and we are eager to see what innovations this partnership will unlock for our customers.

The post Arduino and AWS team up to bridge hardware and cloud for business appeared first on Arduino Blog.

In a world where energy bills are climbing and the environment is on our minds, keeping tabs on how we use energy at home has become a smart move. Every gadget we plug in impacts our wallets and the planet. That’s where home energy monitoring comes in – giving us real-time info on how we’re using energy, so we can save money and do our bit for the Earth.

This post delves into home energy monitoring, spotlighting how to track your energy consumption using the Arduino Cloud and a Tuya-compatible energy meter with Node-RED acting as a middleware.

What’s the deal with home energy monitoring?

Home energy monitoring is all about watching how much energy we’re using at home. It’s not just about paying the bills; it’s about knowing what’s eating up energy, so we can be smarter about it.

Why does it matter? Well, first off, it helps us be more aware. When we can see which devices are energy hogs (looking at you, always-on TV), we can take action. And with energy costs going up, finding ways to save money is a no-brainer. Plus, with everyone talking about being green these days, knowing where your energy goes is like a badge of honor for doing your part.

The ingredients

The key component in this setup is an energy meter designed to monitor both real-time and cumulative power consumption, along with metrics such as voltage and current. This meter is installed within your home’s electrical distribution board. Tuya-compatible devices have gained widespread popularity due to their affordability, user-friendliness, and seamless management through the SmartLife application. Moreover, these devices can also be seamlessly integrated into alternative platforms through the utilization of the Tuya API.

The Arduino Cloud stands out as a versatile and user-friendly IoT platform, supporting a wide range of hardware. It’s not only customizable and adaptable to suit different purposes and use cases, but it also streamlines the incorporation of multiple devices, facilitating smooth information exchange among them. It is a perfect tool to monitor your energy consumption, being informed when outstanding events happen and perform actions on other devices based on the energy information acquired.

While direct connection of Tuya-compatible devices to the Arduino Cloud isn’t possible, the process becomes really straightforward with the intervention of Node-RED. This intermediary acts as a bridge between the energy meter and the Arduino Cloud, ensuring seamless communication between the two. With Node-RED you can integrate almost anything with the Arduino Cloud.

The project

The following project shows how to integrate all those elements to easily build your own energy monitoring system. 

Before getting started, you’ll require:

  • A Tuya/Smartlife-compatible energy meter
  • The SmartLife or Tuya app installed on your iOS/Android device
  • The Energy Meter added to the Tuya Smart app
  • An Arduino Cloud account (https://cloud.arduino.cc)
  • An instance of Node-RED running locally or on a cloud machine (installation guide found here)

The process is really straightforward:

  • Install the energy meter within your electric board.
  • Obtain your Tuya device API key.
  • Create the Device and Thing within the Arduino Cloud.
  • Develop the Node-RED flow to manage data traffic.
  • Fashion the Arduino Cloud Dashboard.

Build your own energy meter from the ground up

Monitoring energy consumption with Arduino Cloud doesn’t solely rely on Tuya-compatible energy meters. If you’re inclined to build your own solution from the ground up, consider exploring the Arduino IoT-based energy meter hosted on the Project Hub. There is additional detailed documentation available and a ready-to-use template to deploy your solution with one click.  

By engaging with this project, you’ll not only gain insight into your energy consumption monitoring but also experience the simplicity of crafting practical projects that interface Arduino boards with external components such as the Modbus energy meter. All this will be seamlessly managed and monitored by the Arduino Cloud.

Ready to Get Started? Take Control of Your Energy!

The path to smarter energy consumption begins with your curiosity and action. Now armed with the knowledge of the Arduino Cloud’s potential, it’s time to embark on your own energy monitoring journey. Don’t wait – seize the opportunity to optimize your energy usage, save on bills, and contribute to a more sustainable planet. With the Arduino Cloud as your ally, you can monitor, manage, and make a positive impact starting from your own home. Create your account, dive in, tinker for free, and start your energy-saving adventure today. Your future of empowered energy management is just a click away!

The post Save money with a Tuya/SmartLife energy meter monitored on Arduino Cloud via Node-RED appeared first on Arduino Blog.

In today’s fast-paced world, the convenience and comfort of a smart home have become paramount. Monitoring systems offer us a way to streamline daily tasks, optimize energy usage, and ultimately lead to more comfortable and cost-effective living. One of the key areas where smart systems shine is in heating control, allowing us to optimize temperature levels while keeping energy consumption in check and our bill under control.

In this blog post, we will delve into the benefits of using monitoring systems at home, with a particular focus on how integrating the Honeywell Evohome system, the Arduino Cloud, and Node-RED can revolutionize the way you control your heating, ensuring optimum temperature, enhanced comfort, and significant savings.

Optimizing temperature and comfort with Honeywell Evohome

The Honeywell Evohome system is a cutting-edge smart heating solution designed to provide individual room-by-room temperature control. Unlike traditional thermostats, which often focus on a single temperature setting for the entire house, Evohome empowers users to customize heating schedules for each room, tailoring comfort according to specific preferences and occupancy patterns. This level of personalized control ensures that every family member enjoys their ideal climate, enhancing overall comfort at home while also offering significant cost savings.

Moreover, the precise and responsive nature of the Evohome system enables it to adapt quickly to changing conditions. By utilizing multiple wireless radiator controllers and a central hub, the system ensures that the desired temperatures are maintained accurately, even in large or multi-story houses. This optimized heating control not only provides enhanced comfort but also contributes to reduced energy consumption, leading to valuable savings on heating bills.

Cloud platforms are a must-have for smart heating

Cloud integration is a big deal for modern smart systems. It lets you access and control your devices remotely from anywhere in the world. But here’s the thing: with so many smart home gadgets from different brands, each having its own way of doing things, it can get pretty chaotic. That’s where the Arduino Cloud comes to the rescue! The Arduino Cloud is an all-in-one intuitive IoT platform, supporting a wide range of hardware and backed by the trusted Arduino community. The Arduino Cloud removes complexity to empower users from all levels of expertise to create from anywhere, and control and share their projects with stunning dashboards. It’s a super reliable cloud service that connects all your devices to the internet and makes remote control a breeze. 

Empowering integration with Node-RED

Node-RED, an open-source automation tool, acts as a middleware between different smart systems. It enables seamless integration and communication between devices and services, making it an ideal platform to tie together various IoT components. Through Node-RED, you can create sophisticated automation flows that trigger actions based on specific events or data received from different sources.

With the help of Node-RED, you can integrate almost everything into the Arduino Cloud. The set of Node-RED nodes allow you to inject or retrieve data from the Arduino Cloud emulating a device. The best part? You don’t have to juggle multiple apps or interfaces anymore! Every system that is supported by Node-RED can be integrated with the Arduino Cloud. Furthermore, thanks to the Arduino Cloud device-to-device feature, you can use the data from all these systems in any other device that is connected to the Arduino Cloud.

Integrate Honeywell Evohome and Arduino Cloud with  Node-RED

The following project shows how simple it is to integrate your Honeywell Evohome system with the Arduino Cloud using Node-RED as a middleware. The only thing you need is a spare PC or Raspberry Pi where you can run Node-RED. 

With the Arduino Cloud dashboard, you can monitor the evolution of the temperature and set points in all the zones of your home, establish the set points and turn the heating system on and off.

The process is really straightforward:

  • Get your Honeywell getconnected credentials 
  • Create the Device and Thing in the Arduino Cloud 
  • Install Node-RED in a machine and import the Node-RED flow 
  • Create the Arduino Cloud dashboard 
  • Test everything and enjoy!

You can learn more about the project on the Arduino Project Hub or access the code directly on GitHub.

Conclusion

By embracing the power of smart home monitoring systems, such as Honeywell Evohome, and combining it with cloud platforms like the Arduino Cloud and the flexible integration capabilities of Node-RED, you can create an ecosystem that optimizes temperature, enhances comfort, and significantly reduces energy consumption. This convergence of technology empowers you to take control of your heating system like never before, ultimately leading to a more comfortable, efficient, and sustainable home. So, why wait? Embrace the future of smart heating today!

The post Save money with your Honeywell heating system: Control it on Arduino Cloud via Node-RED appeared first on Arduino Blog.

Artificial intelligence (AI) and natural language processing (NLP) are changing the way we interact with technology. With advancements in machine learning and data processing, we now have AI-powered virtual assistants, chatbots, and voice recognition systems that can understand and respond to our queries in a natural, human-like way. One such technology is ChatGPT, a large language model developed by OpenAI based on the GPT-3.5 architecture. ChatGPT has the ability to generate coherent, context-aware responses to a wide range of questions, making it an ideal tool for communication.

Integrating ChatGPT and Arduino Cloud for IoT projects

Integrating ChatGPT and the Arduino Cloud, a platform that allows you to develop, deploy and manage IoT devices in the easiest way, opens up a brand new world of possibilities for IoT applications. By combining ChatGPT’s natural language processing capabilities with the Arduino Cloud’s IoT platform, we can create intelligent devices that can understand and respond to natural language queries, making the user experience more seamless and intuitive. For example, imagine a smart home system that can be controlled using voice commands, or a chatbot that can provide instant technical support for IoT devices.

Chat with ChatGPT through Arduino IoT Cloud dashboards

This project is a simple demonstration of an Arduino IoT Cloud-compatible device, such as an Arduino Nano RP2040 Connect or any ESP32/ESP8266 device, acting as a middleware between the IoT Cloud and OpenAI’s GPT-3.5 language model. The device acts as a bridge by receiving prompts (questions) from the IoT Cloud and forwarding them to the OpenAI API. Once the model processes the prompts, the device receives and parses the replies and sends them back to the IoT Cloud, which displays the response to the user.

To embark on this project, you will need to create an OpenAI account, create an API key, and have enough credits. Then, you can create your device on the IoT Cloud, program it, and set up the dashboard on the IoT Cloud. The dashboard serves as a user interface, allowing you to write questions (prompts) and receive ChatGPT’s replies.

Check out the project on Arduino’s Project Hub and get more information about how to build the system yourself.

As you get into the project, you can explore variable tweaking, defining the maximum number of tokens that ChatGPT will use in generating a response, and keeping in mind the limits on OpenAI API usage. Overall, this project presents a unique opportunity to integrate the cutting-edge capabilities of OpenAI’s language model with the versatile Arduino IoT Cloud, enabling you to create more intelligent and intuitive IoT applications.

Connect to ChatGPT using MicroPython

If you are interested in an alternative approach of connecting to ChatGPT, you can do so by using a MicroPython script. If you are familiar with making HTTP requests using Python, this is a great approach.

To authenticate and successfully make requests with ChatGPT, you will need to first get your API key from OpenAI, and construct a POST request. We will be using the urequests and ujson modules, where we will simply ask a question to ChatGPT, and get a response. 

The response is printed on a 128×64 OLED display, and that’s pretty much it. It is a minimal example, but a fun one, and easy to get started with.

To get started with MicroPython and ChatGPT, visit this repository which has the code and instructions to get started. 

This type of integration paves the way for many cool projects. You can for example ask ChatGPT to evaluate recently recorded data, or a companion-bot that knows everything that the Internet knows..

Introducing the Arduino Cloud

The Arduino Cloud is a platform that simplifies the process of developing, deploying, and managing IoT devices. It supports various hardware, including Arduino boards, ESP32, and ESP8266 based boards, and makes it easy for makers, IoT enthusiasts, and professionals to build connected projects without coding expertise. What makes Arduino Cloud stand out is its intuitive interface that abstracts complex tasks, making it accessible to all users. With its low-code approach and extensive collection of examples and templates, Arduino Cloud offers a simple way for users to get started. 

The platform’s IoT Cloud tool allows for easy management and monitoring of connected devices through customizable dashboards, which provide real-time visualisations of the device’s data. Furthermore, the IoT Cloud can be accessed remotely through the mobile app Arduino IoT Cloud Remote, which is available for both Android and iOS devices, enabling users to manage their devices from anywhere.

Build your own

The integration of ChatGPT and Arduino Cloud has opened up a new world of opportunities for IoT applications. These projects are just some examples of how these technologies can be used to create intelligent devices that can understand and respond to natural language queries. 

If you have been inspired by these projects and want to share your own creation with the community, we encourage you to publish your project on Arduino Project Hub. By doing so, you can showcase your project and share your knowledge with others. Arduino Project Hub is a platform where users can share their Arduino-based projects and find inspiration for new ones. With a global community of makers and enthusiasts, the hub is the perfect place to collaborate, learn and explore the endless possibilities of IoT. So, whether you are a seasoned maker or just starting, we invite you to join our community and share your project with the world!

Ready to start?

Ready to unleash the potential of IoT devices and ChatGPT integration? Visit the Arduino IoT Cloud website to access official documentation and resources for the Arduino IoT Cloud. Create an account and start building your own projects today!

The post Creating intelligent IoT devices with ChatGPT and Arduino Cloud: A journey into natural language interaction appeared first on Arduino Blog.

Phyton and Javascript integration

The Internet of Things (IoT) has become a ubiquitous term, encompassing a vast array of applications ranging from small-scale embedded systems to complex networked devices. Traditionally, IoT development has been synonymous with programming in languages like C and C++. However, the landscape is rapidly evolving, with modern languages like Python and JavaScript gaining traction in the IoT space for devices running Linux or other OS, and also with MicroPython for lower resources devices.

In an exciting development, we are thrilled to announce the creation of a workflow on the platform that enables users to seamlessly connect their devices based on these languages with the Arduino Cloud, empowering users to harness their full potential in creating IoT solutions.

The new Manual setup workflow

Traditionally, Arduino Cloud allowed the creation of devices based on Arduino or ESP32/ESP8266 hardware, with automatic sketch creation in C/C++ using the Arduino IoT Cloud library. This workflow featured automatic board provisioning and configuration within the platform. However, we have expanded the device creation process to introduce a new workflow, accommodating applications programmed in Python, MicroPython, or JavaScript, and so offering the ability to create a new breed of applications and devices that can be connected to the Arduino Cloud.

This new workflow, known as “Manual Setup for Any Device” provides users with credentials that can be utilized within their Python, MicroPython, or JavaScript applications. This enables users to keep developing and programming their devices using their preferred environment. Integration with the Arduino Cloud can be achieved using libraries developed in any of the supported languages. Comprehensive documentation, along with a wide array of examples, supports users throughout the implementation process.

Example on how to connect Python, MicroPython or JavaScript to Arduino Cloud

By offering this flexible workflow, Arduino Cloud acknowledges the diverse requirements and preferences of developers. Whether you prefer the convenience of automatic provisioning or the flexibility of manual configuration, the choice is now in your hands.

What can you actually do?

Python – The choice for AI

Python is a versatile and widely-used programming language that offers significant benefits for IoT device development. Its simplicity, readability, and extensive library ecosystem make it an ideal choice for both beginners and experienced developers. Python’s vast library ecosystem provides access to a wide range of pre-built modules and functions, allowing developers to leverage existing code and accelerate development. Additionally, Python’s active and supportive community offers a wealth of knowledge and resources, making it easier to troubleshoot issues, seek advice, and learn from others’ experiences.

Python is not only a versatile language for IoT device development but also the de facto standard language and environment for AI programming. Its extensive library ecosystem, including popular libraries such as TensorFlow, PyTorch, and scikit-learn, makes Python the language of choice for implementing machine learning and deep learning algorithms. The availability of these libraries, along with Python’s intuitive syntax and flexibility, enables developers to build and deploy sophisticated AI models and integrate them seamlessly into IoT applications. Python’s dominance in the AI landscape further adds to its value for IoT device development, as it allows developers to leverage AI capabilities and unlock advanced functionalities in their IoT solutions.

Learn more about how to connect your Python applications to the IoT Cloud.

Micropython – The power of Python on tiny processors

MicroPython is a popular platform for IoT development due to its simplicity, efficiency, and versatility. It supports various microcontroller platforms, including Arduino, ESP32, and Raspberry Pi Pico, offering cross-platform compatibility. With its familiar Python syntax, MicroPython is easy to learn and use, making rapid prototyping and development accessible. It optimizes memory usage and runtime performance, even on resource-constrained devices. MicroPython benefits from an extensive library ecosystem, enabling quick integration of functionalities and interoperability with other IoT platforms. Its active community provides abundant resources, support, and a vibrant ecosystem for IoT innovation. Overall, MicroPython is a powerful tool for building efficient and feature-rich IoT devices.

If you want to learn more about how to connect to the IoT Cloud using MicroPython, check this getting started article and the full tutorial

Javascript – Event driven applications across multiple platforms

JavaScript has found its place in IoT device development across various platforms. Node.js, a server-side runtime environment, offers JavaScript’s event-driven and non-blocking nature for efficient handling of IoT tasks. Espruino, a JavaScript platform for microcontrollers, enables direct coding on resource-constrained devices. Johnny-Five, a JavaScript robotics and IoT framework, allows control and interaction with hardware platforms using JavaScript. JavaScript’s versatility, reuse of web development skills, and extensive libraries make it an accessible choice for IoT development. Its event-driven nature aligns well with IoT requirements, and the availability of frameworks and community support fosters rapid development and integration with web-based services.

Check this article to learn more about how to connect your Javascript applications to the IoT Cloud.

But what is Arduino Cloud?

Arduino Cloud is a platform that simplifies the process of developing, deploying, and managing IoT devices. It supports various hardware, including Arduino boards, ESP32, and ESP8266 based boards, and makes it easy for makers, IoT enthusiasts, and professionals to build connected projects without coding expertise. What makes Arduino Cloud stand out is its intuitive interface that abstracts complex tasks, making it accessible to all users. With its low-code approach, based on auto generated code,  and the extensive collection of examples and templates, Arduino Cloud offers a simple way for users to get started and enables them to put the focus on their application code. 

The platform’s IoT Cloud tool allows for easy management and monitoring of connected devices through customizable dashboards, which provide real-time visualisations of the device’s data. Furthermore, the IoT Cloud can be accessed remotely through the mobile app Arduino IoT Cloud Remote, which is available for both Android and iOS devices, allowing users to manage their devices from anywhere.

Ready to start?

Visit the Arduino Cloud website to access official documentation and resources for the Arduino IoT Cloud, where you will find extensive documentation to get started with the new Manual device setup workflow. Create an account and start building your own projects today!

As the IoT landscape continues to evolve, Arduino Cloud remains at the forefront, embracing the flexibility and power of Python and JavaScript. We invite you to explore this new feature, unlock your creativity, and share your innovative projects with the Arduino community. Publish your projects on the Arduino Project Hub (PH), where like-minded enthusiasts can discover, learn, and collaborate on IoT solutions that push. 

Additionally, engaging in community discussions and project sharing is encouraged in the forum, providing a platform for exchanging ideas, seeking advice, and fostering collaboration among fellow IoT enthusiasts. Together, let’s shape the future of IoT and create a vibrant ecosystem of innovation and knowledge-sharing.

The post Arduino Cloud Embraces Python and JavaScript for new IoT projects appeared first on Arduino Blog.

We’re excited to announce the release of two new widgets to the Arduino IoT Cloud: the Value Selector and Value Dropdown Widgets.

In this blog post, we’ll be exploring the benefits of the new widgets, how to use them, and how you can take advantage of this latest feature.

The Arduino IoT Cloud dashboards

The Arduino Cloud is an all-in-one platform that streamlines the development, deployment, and management of IoT devices. The platform supports various hardware, such as Arduino boards, ESP32, and ESP8266-based boards, which makes it easy for makers, IoT enthusiasts, and professionals to build connected projects without much hassle.

What makes Arduino Cloud stand out is its user-friendly and intuitive interface. This simplifies complex tasks and ensures that even those with little coding experience can use the platform. Moreover, the platform offers a low-code approach and a comprehensive catalogue of templates and examples that enable users to get started quickly.

The IoT Cloud application of the Arduino Cloud platform allows easy management and monitoring of connected devices via customizable dashboards. This feature provides real-time data visualizations of the device’s data, making it easy for users to monitor and keep track of their devices. Plus, with the mobile app Arduino IoT Cloud Remote — available for Android and iOS — users can manage their devices remotely from anywhere.

The Arduino Cloud platform also offers a range of widgets, including switches, buttons, color selectors, status, gauges, maps, and a chart widget that allows users to plot the temporal evolution of one variable of one device. This rich palette of widgets makes it easy for users to build dashboards that suit their needs.

The new widgets

The new Value Selector and Value Dropdown Widgets simplify the task of creating a map between variable values and their real-world representations, providing users with greater flexibility and ease of use. With them, you can decouple the internal values of the variables in the sketch from the representation on the dashboard. This simplifies the code and prevents developers from updating the code if a change on the visible value is needed.

The Value Selector Widget offers a more visual way of representing values and choices, making it easier for users to understand and work with their data. This feature simplifies the code and allows for greater flexibility in representing data.

The value selector widget can be used to switch between predetermined values through available buttons. Supported variable types are int and String.

The Value Dropdown Widget is a compact and organized way of presenting a list of options to users. This feature is particularly useful when designing for smaller screens or when there are many options to choose from. Dropdown menus allow for clear categorization and organization of options, making it easier for users to find what they are looking for.

The value dropdown widget works similarly to value selector, and is be used to switch between predetermined values through a dropdown menu. Supported variable types are int and String.

Both of these new features are incredibly convenient for predefining a list of values that the user can choose from. The meaningful names and values assigned to each option simplify the process of selecting data, making it more intuitive and accessible to users.

In summary, the Value Selector and Dropdown Widgets are powerful new features that provide users with greater flexibility, ease of use, and clarity when working with their data. We are excited to see how these new tools will enhance the user experience and improve the way users work with their data. These new widgets add up to the recently announced improvement of the percentage widget and the new advance chart widget. You can read the full story in the blog post

Try the now widgets today

Ready to take your IoT projects to the next level? Check out the official Arduino Cloud website for more information on the Arduino IoT Cloud and all the resources available to you. You can also explore the documentation to learn more about the exciting new widgets that are available.Dive in and try out the new Arduino IoT Cloud widgets for yourself!  We’d love to hear your feedback, so don’t forget to share your thoughts and experiences with us on the forum.

The post Introducing the new Value Selector and Dropdown Widgets for Arduino IoT Cloud dashboards appeared first on Arduino Blog.

As a part of his new raised garden bed project, Shawn Murphy was looking for ways to improve his backyard even further with intelligent IoT systems. Apart from the existing 1800W solar panel array, he also wanted a device that could report current weather and soil conditions in real-time and even perform some watering tasks without the need for human intervention.

Initially, Murphy had researched constructing a pump that could take water from a pair of rain storing barrels and deliver it to the garden bed. However, this would have been costly to build and maintain, so he instead went with a gravity-fed setup. In this configuration, gravity would move water down-slope to a solenoid valve attached to the Arduino IoT Explorer Kit’s 24V relay pin. Once wired together, he added a soil moisture sensor for measuring the water content of the soil, along with a 12V battery pack and solar charge controller for off-grid power.

The resulting hardware was then loaded with a sketch that would continually read the moisture content of the soil, activate the solenoid valve if necessary, and even turn on a small fan if the enclosure were to get too hot. Best of all, the WiFi connectivity of the IoT Explorer Kit allowed Murphy to send the values remotely to an Arduino Cloud dashboard, complete with toggle switches for manually overriding the solenoid valve if necessary.

For more information about this project, watch Murphy’s videos below and read his write-up on Hackster.io.

The post Automatically monitor and irrigate your raised garden bed with the Arduino Cloud appeared first on Arduino Blog.


  • Newsletter

    Sign up for the PlanetArduino Newsletter, which delivers the most popular articles via e-mail to your inbox every week. Just fill in the information below and submit.

  • Like Us on Facebook