Being able to design your own custom smart home device is a great way to both have fun experimenting with various hardware/software and to escape the walled IoT device ecosystems that so many users find themselves trapped within. One maker who goes by mrdesha came up with a smart heater solution that utilizes the new Arduino Oplà IoT Kit to provide voice functionality to their room heater.
In terms of hardware, mrdesha’s project is quite simple as it just needs a few parts to function. The main component is the MKR IoT Carrier board from the Oplà Kit, along with the MKR WiFi 1010 that fits into it. Because the Oplà has two relays onboard, a pair of buttons on the heater’s remote were connected to the common (COM) and normally closed (NC) terminals, allowing for a single GPIO pin to digitally “press” each button.
Over in the Arduino Cloud, three variables were created that control various aspects of the heater, including on/off, set high-power mode, and set low-power mode. These variables are also all compatible with the Alexa integration, meaning that a user can simply tell their smart home speaker to adjust the heater automatically.
There are dozens, if not hundreds of amazing Arduino Cloud features. So it’s perfectly understandable if you’ve missed some of them.
So we’ve put together a list of our favorite Arduino Cloud features that you might not know existed.
1) Auto-generate Sketches
We’ve talked elsewhere about getting an understanding of what cloud computing really is, and how it’s not just the domain of experts. The cloud is how total beginners can get started much more easily. There’s no better demonstration of that than our first top Arduino Cloud feature; auto-generated sketches.
When you create a new “Thing” in your Arduino Cloud, you add various bits of info to it. Wi-Fi connection credentials, and any variables you want to control or monitor. The Cloud automatically generates a starting sketch from this info. That sketch can then be sent to your boards, so all your initial configuration is taken care of, without a single line of code.
2) Device-to-Device Communication
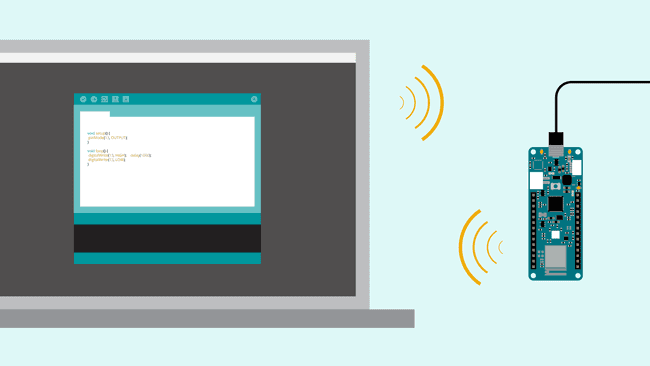
There’s simply no easier way to make two microcontroller boards talk to each other than Arduino Cloud. We’ve covered in detail how easy it is to wirelessly connect your boards.
This isn’t just for Arduino devices either. If you want any combination of Arduino, ESP32 and ESP8266 devices to work together, this is how you do it.
3) Over-the-Air Updates
Working through your Arduino Cloud means you don’t have to disconnect any Arduino boards when updating them. If you want to edit or add a new sketch, it can all be done wirelessly, over-the-air.
Anyone who’s had to dismantle a project or device to get to a board’s USB socket will appreciate the simple, vital value of this feature. It’s one of those things that you’ll wonder how you ever lived without.
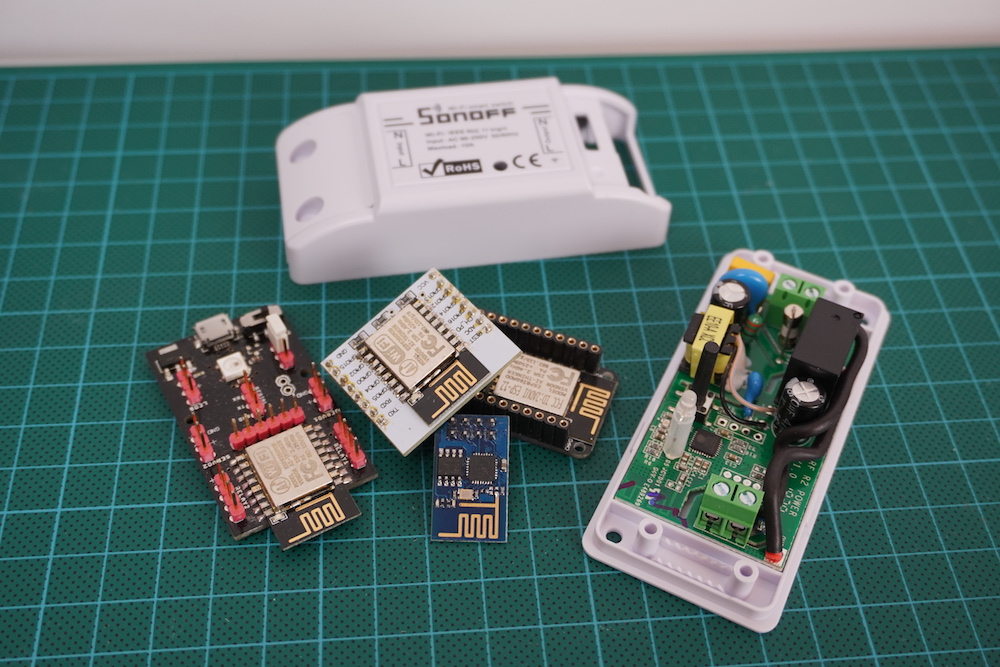
4) Support for ESP Boards
There’s a reason we call it the Arduino IoT Cloud. This is an all-encompassing platform for Internet of things, home automation, and electronics project control and management. So first we added support for ESP8266 devices. More recently, experimental support for ESP32 boards became available.
So even if your project doesn’t actually have any Arduino products in there, the Cloud is just as useful. Secure, private, and accessible to all kinds of IoT and maker devices.
5) Trigger Actions on Cloud Events
Arduino Cloud makes it super easy to do things that you might normally need the IDE for. But it’s also got lots of exclusive features that you only get in the Cloud.
For example, there are actions that can be triggered based on your board’s interactions with your Arduino Cloud. You can include actions within your sketches when a Cloud connection is successful, and when the Cloud has synced with a device. Or perhaps most useful of all, trigger an action if Cloud connectivity is lost. Getting an indication that a project has disconnected could be incredibly useful!
Dashboards are control panels within your Arduino Cloud. It’s one of the most powerful Arduino Cloud features, and essential to making full use of Cloud control. But what’s often overlooked is that you can share dashboards with anyone you want.
For example, let’s say you’re using Arduino Cloud to control your home automation. You can set up a dashboard for a tablet in the living room that the whole family can use, but doesn’t have sensitive admin controls in there. And then another for people to use on their phones.
All Cloud plans include unlimited dashboards. And anyone can have a free Cloud account. So you can create as many dashboards as you like, and share them with literally anyone, anywhere.
7) Alexa Integration
Natural language voice control is genuine Star Trek stuff. So it’s no wonder people love the functionality of Alexa. Did you know it’s incredibly easy to connect your Arduino Cloud to Alexa? And once you have, it effectively adds voice control to every board, and every project. Nothing else needed.
There’s literally no easier way to make an Alexa-controlled device or project than with your Arduino Cloud. You’ll never look back, and you’ll always have someone to talk to.
8) Full API Integration
For the engineers, coders, developers and those among you who’ve been using Arduino for a long time, API integration is the powerhouse secret feature you’ve been looking for.
The API can be called with any HTTP client, or with languages like Javascript, Python, Golang and more. It’s what you need to incorporate the power of Arduino Cloud features into your systems, platforms and projects.
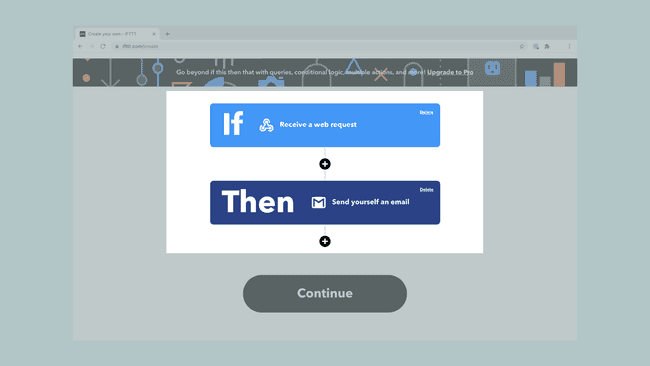
9) Use IFTT, Zapier and More with Webhooks
There are lots of reasons you might want to include control platforms outside of your Arduino Cloud. Like sending an email or a Tweet when you press a button on a Nano, or a device disconnects from the Cloud (see above).
That’s what webhooks are for, and they give you a universal way to send commands out of Arduino Cloud, and into… well, anything!
IFTTT and Zapier are great examples of services that can do almost anything from a webhook. Get to know this feature, and connected projects suddenly have easy access to the whole web.
10) Easy Firmware Updates
When you connect a new Arduino board, your Arduino Cloud automatically checks its firmware version. If there’s an update available, it offers you the option of applying that update.
Very easy, and you don’t have to worry about finding the correct/latest firmware version yourself. This simple, background function makes sure your boards and projects always have the latest features, security updates and bug fixes.
For people who use a lot of Arduino devices, it’s worth adding them to the Cloud for this feature alone.
11) Full Dashboard Customization
We’ve already talked about unlimited dashboards in your Arduino Cloud. Creating them is easy, but did you know you can customize them too?
Anyone who’s dipped their toe in the home automation waters knows how essential dashboard editing is. Some platforms work great, but offer very little when it comes to controlling your dashboard layout. For many people, that’s a deal breaker.
Your Arduino Cloud widgets can easily be added, edited, removed, repositioned and resized in any configuration you want. It’s as simple as drawing and resizing boxes, but the result makes your Cloud projects infinitely more useable.
12) Watchdog Timer
The Arduino Cloud automatically runs a watchdog timer that will reset your board, hardware or project if it crashes. This is a small feature, but a powerful one that can keep your projects running while unattended.
It means you never have to manually reset it when you eventually realize it’s not been running all day. You can have devices running remotely (very remotely, with SIM or LoRa connectivity) and be sure they’re robust enough to keep on ticking.
It’s included and running automatically, but can easily be disabled if you don’t need it.
13) Node-RED Integration
Arduino provides a super easy way to use Node-RED for IoT automations. This is a powerful, but very easy-to-use visual programming platform specifically designed for IoT projects.
Complex automations using advanced triggers like sunrise or sunset, presence detection, combined actions or sensor readings and so much more. The possibilities are endless, and learning Node-Red is incredibly easy. Get to grips with this feature, and you’ll be creating IoT automations that would otherwise need an experienced coder.
13A) Fully Functional Free Account
One of the best kept secrets of the Arduino Cloud is that if you’re registered on the Arduino website or forum, you already have a free Cloud waiting for you. Simply head on over to the Cloud site and get started with unlimited dashboards and unlimited sketches. The free tier of Arduino Cloud is fully functional, and it’s ready and waiting for you to give it a try.
In fact, it’s the perfect option especially if you haven’t used Arduino before! Give it a shot and let us know what you think. No credit card required; just your creativity and a passion for connected projects.
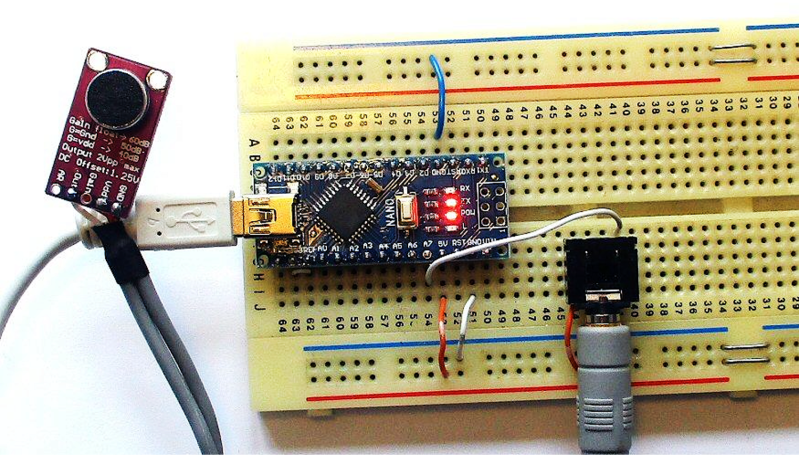
Like most of us, [Peter] had a bit of extra time on his hands during quarantine and decided to take a look back at speech recognition technology in the 1970s. Quickly, he started thinking to himself, “Hmm…I wonder if I could do this with an Arduino Nano?” We’ve all probably had similar thoughts, but [Peter] really put his theory to the test.
The hardware itself is pretty straightforward. There is an Arduino Nano to run the speech recognition algorithm and a MAX9814 microphone amplifier to capture the voice commands. However, the beauty of [Peter’s] approach, lies in his software implementation. [Peter] has a bit of an interplay between a custom PC program he wrote and the Arduino Nano. The learning aspect of his algorithm is done on a PC, but the implementation is done in real-time on the Arduino Nano, a typical approach for really any machine learning algorithm deployed on a microcontroller. To capture sample audio commands, or utterances, [Peter] first had to optimize the Nano’s ADC so he could get sufficient sample rates for speech processing. Doing a bit of low-level programming, he achieved a sample rate of 9ksps, which is plenty fast for audio processing.
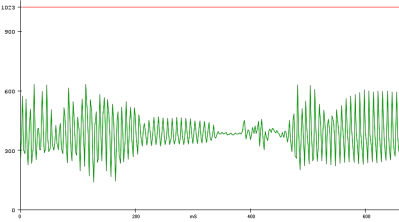
To analyze the utterances, he first divided each sample utterance into 50 ms segments. Think of dividing a single spoken word into its different syllables. Like analyzing the “se-” in “seven” separate from the “-ven.” 50 ms might be too long or too short to capture each syllable cleanly, but hopefully, that gives you a good mental picture of what [Peter’s] program is doing. He then calculated the energy of 5 different frequency bands, for every segment of every utterance. Normally that’s done using a Fourier transform, but the Nano doesn’t have enough processing power to compute the Fourier transform in real-time, so Peter tried a different approach. Instead, he implemented 5 sets of digital bandpass filters, allowing him to more easily compute the energy of the signal in each frequency band.
The energy of each frequency band for every segment is then sent to a PC where a custom-written program creates “templates” based on the sample utterances he generates. The crux of his algorithm is comparing how closely the energy of each frequency band for each utterance (and for each segment) is to the template. The PC program produces a .h file that can be compiled directly on the Nano. He uses the example of being able to recognize the numbers 0-9, but you could change those commands to “start” or “stop,” for example, if you would like to.
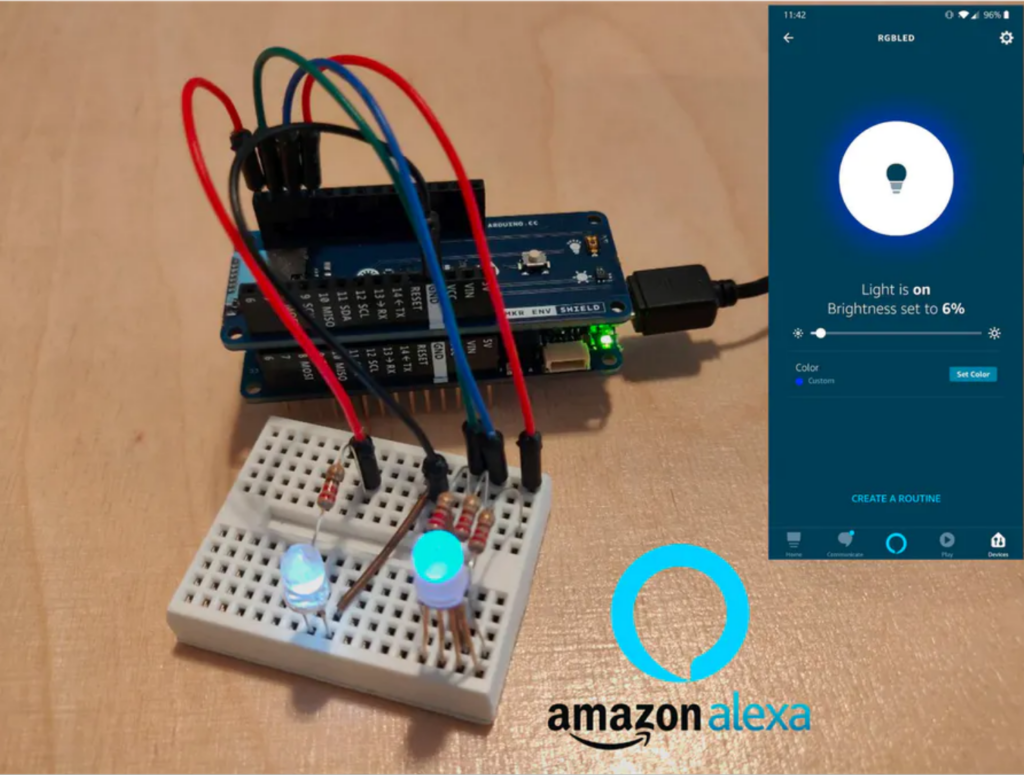
Like many of us, [Michael] needed a way to let the family know whether pants are required to enter the room — in other words, whenever a videoconference is in progress. Sure he could hang a do not disturb sign, but those are easy to forget. There’s no need to worry about forgetting to change status because this beautiful wall-mounted sign can be controlled with Alexa.
Inside the gorgeous box made from walnut, curly maple, and oak is an ESP32, some RGB LEDs, and three MOSFETs. [Michael] is using the fauxmoESP library to interface the ESP32 with Alexa, which emulates a Phillips Hue bulb for the sake of using a protocol she already knows. [Michael] can change the color and brightness percentage with voice commands.
The sign is set up as four different devices — one default, and one for each color. Since talking to Alexa isn’t always appropriate, [Michael] can also change the color of the LEDs using sliders on a website that’s served up by the ESP. Check out the full build video after the break.
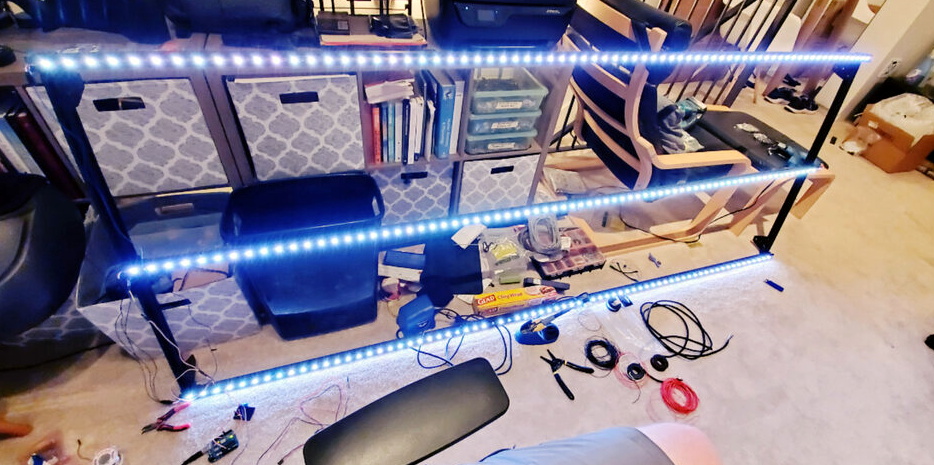
When we see RGB LEDs used in a project, they’re often used more for aesthetic purposes than as a practical source of light. It’s an easy way to throw some color around, but certainly not the sort of thing you’d try to light up anything larger than a desk with. Apparently nobody explained the rules to [Brian Harms] before he built Light[s]well.
Believe it or not, this supersized light installation doesn’t use any exotic hardware you aren’t already familiar with. Fundamentally, what we’re looking at is a WiFi enabled Arduino MKR1000 driving strips of NeoPixel LEDs. It’s just on a far larger scale than we’re used to, with a massive 4 x 8 aluminum extrusion frame suspended over the living room.
Onto that frame, [Brian] has mounted an undulating diffuser made of 74 pieces of laser-cut cardstock. Invoking ideas of waves or clouds, the light looks like its of natural or even biological origin while at the same time having a distinctively otherworldly quality to it.
The effect is even more pronounced when the RGB LEDs kick in, thanks to the smooth transitions between colors. In the video after the break, you can see Light[s]well work its way from bright white to an animated rainbow. As an added touch, he added Alexa voice control through Arduino’s IoT Cloud service.
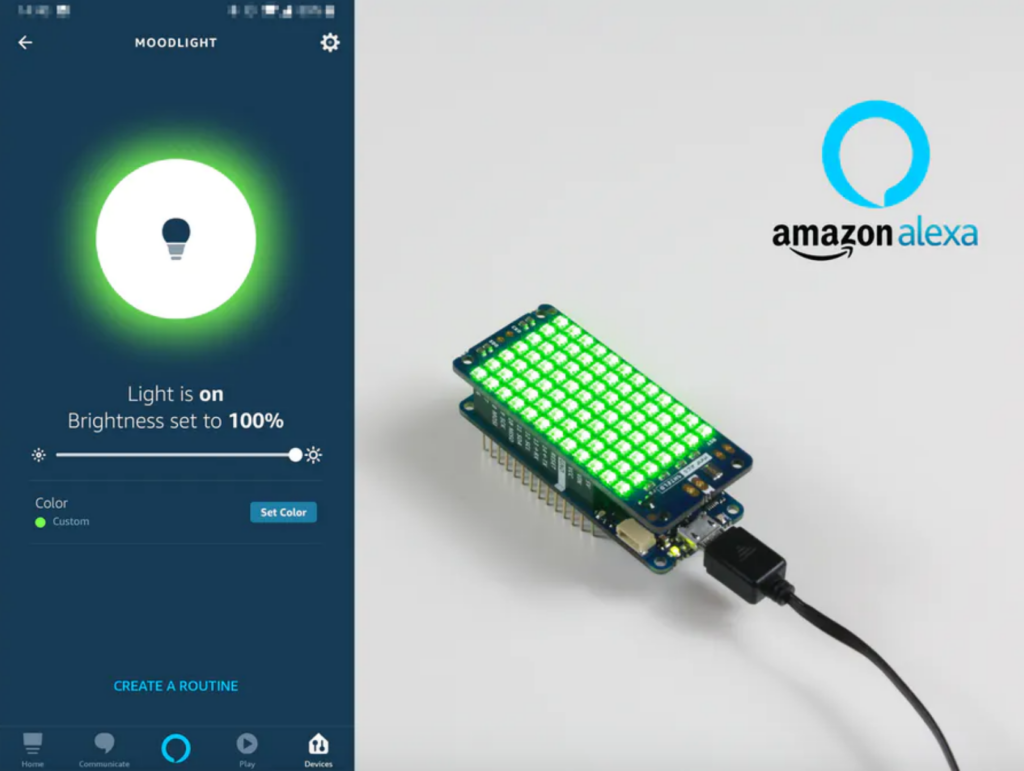
We’ll certainly remember this year, with many of us learning how to adapt and live a safe life-style under the pandemic. As many countries begin to initiate a relaxation of restrictions and we are starting to be able to leave our houses, arrange shifts to get into work (still observing safety measures), we might find ourselves with different needs.
Perhaps we got used to having the TV on more often than usual, letting the voices of shows we don’t really watch keep us company in the background while home alone… working. Maybe we just like to have a corner light up with colors which soothe our moods, or give a fancy background tint to a remote disco party as we dress with big shades and wigs.
Many of these things can easily be automated using Alexa and Arduino IoT Cloud, so when we (finally) leave the house and are not sure if the TV is still on, or if our living room corner is still purple! we can simply ask “Alexa, turn the TV off” or “Alexa, turn the living room off” and a series of smart devices and software will take care of it for us.
Let’s give it a shot…
Getting the Alexa skill: Learn how to use Arduino IoT Cloud and Amazon Alexa to interact with your sensors.
[Harrison] has been busy finding the sweeter side of quarantine by building a voice-controlled, face-tracking M&M launcher. Not only does this carefully-designed candy launcher have control over the angle, direction, and velocity of its ammunition, it also locates and locks on to targets by itself.
Here comes the science: [Harrison] tricked Alexa into thinking the Raspberry Pi inside the machine is a smart TV named [Chocolate]. He just tells an Echo to increase the volume by however many candy-colored projectiles he wants launched at his face. Simply knowing the secret language isn’t enough, though. Thanks to a little face-based security, you pretty much have to be [Harrison] or his doppelgänger to get any candy.
The Pi takes a picture, looks for faces, and rotates the turret base in that direction using three servos driven by Arduino Nanos. Then the Pi does facial landmark detection to find the target’s mouth hole before calculating the perfect parabola and firing. As [Harrison] notes in the excellent build video below, this machine uses a flywheel driven by a DC motor instead of being spring-loaded. M&Ms travel a short distance from the chute and hit a flexible, spinning disc that flings them like a pitching machine.
It’s a system that initially sounds cumbersome, but through smart design, is actually quite streamlined. Users can talk to the system, which uses an Amazon Alexa device for natural language voice recognition. This enables HeyTeddy to respond to questions like “how do I use a flex sensor?” as well as direct commands, such as “Set pin 10 to 250”.
The demo video does a great job of demonstrating the system. While the system is not suited to professional development tasks, its has value as an educational tool for beginners. The system is able to guide users through both hardware setup on a breadboard, as well as guide them through tests when things don’t work. Once their experience level builds, code can be exported to the Arduino IDE for direct editing.
It’s a great tool that has plenty of promise to bring many more users into the hardware hacking fold. It’s out of the workshop of [MAKInteract], whose work we’ve seen before. Video after the break.
Hackers seem intent on making sure the world doesn’t forget that, for a brief shining moment, everyone thought Big Mouth Billy Bass was a pretty neat idea. Every so often we see a project that takes this classic piece of home decor and manages to shoehorn in some new features or capabilities, and with the rise of voice controlled home automation products from the likes of Amazon and Google, they’ve found a new ingredient du jour when preparing stuffed bass.
[Ben Eagan] has recently completed his entry into the Pantheon of animatronic fish projects, and while we’ll stop short of saying the world needed another Alexa-enabled fish on the wall, we’ve got to admit that he’s done a slick job of it. Rather than trying to convince Billy’s original electronics to play nice with others, he decided to just rip it all out and start from scratch. The end result is arguably one of the most capable Billy Bass updates we’ve come across, if you’re willing to consider flapping around on the wall an actual capability in the first place.
The build process is well detailed in the write-up, and [Ben] provides many pictures so the reader can easily follow along with the modification. The short version of the story is that he cuts out the original control board and wires the three motors up to an Arduino Motor Driver Shield, and when combined with the appropriate code, this gives him full control over Billy’s mouth and body movements. This saved him the trouble of figuring out how to interface with the original electronics, which is probably for the better since they looked rather crusty anyway.
From there, he just needed to give the fish something to get excited about. [Ben] decided to connect the 3.5 mm audio jack of an second generation Echo Dot to one of the analog pins of the Arduino, and wrote some code that can tell him if Amazon’s illuminated hockey puck is currently yammering on about something or not. He even added a LM386 audio amplifier module in there to help drive Billy’s original speaker, since that will now be the audio output of the Dot.
Planet Arduino is, or at the moment is wishing to become, an aggregation of public weblogs from around the world written by people who develop, play, think on Arduino platform and his son. The opinions expressed in those weblogs and hence this aggregation are those of the original authors. Entries on this page are owned by their authors. We do not edit, endorse or vouch for the contents of individual posts. For more information about Arduino please visit www.arduino.cc
You are currently browsing the archives for the alexa category.