Posts | Comments

Planet Arduino

Archive for the ‘Arduino micro’ Category

Like so many of us, [EducatedAce] has been quelling the quarantine blues by resurrecting old projects and finding new challenges to fill the days. He’s just finished building this blocky macro keypad to hold a bunch of shortcuts for Photoshop, thus continuing and compounding the creative spree.
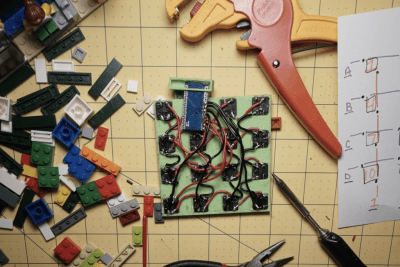
[EducatedAce] already had everything on hand except the Arduino Micro. Instead of standard key switches, this macro block uses 16 of the loudest, crunchiest tactile buttons out there — those big ones with the yellow stems that sound like small staplers.

And don’t worry — no LEGO or LEGO accessories were harmed in the making of this macro pad — the base plate and switch plate are 3D printed. [EducatedAce] has the STL files posted along with great build instructions if you want to wire one up for yourself.

This is a great project because it’s sturdy, it gets the job done without a lot of expense, and still looks like something you’d want on your desk. [EducatedAce] plans to rebuild it with uniformly colored bricks, but we think it looks great as-is, especially with those vented 1×2 pieces. If it were ours, we might use a different color for each row or column to help keep the shortcuts straight.

What? You’ve never printed your own interlocking building blocks before? Well, don’t limit yourself to 1:1 scale, otherwise the minifigs have won. Build a go-kart big enough for humans!

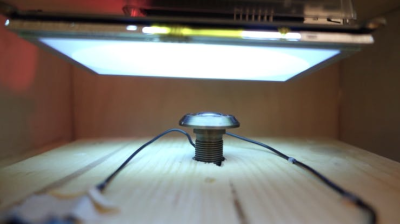
It probably doesn’t surprise you to hear there are tens of thousands of web-connected cameras all over the world that are set to take the default credentials. Actually, there are probably more than that out there, but we can assure you that at least 70,000 or so are only a click away. With this project, [carolinebuttet] proves that it’s quite possible to make art from our rickety, ridiculous surveillance state — and it begins with a peephole perspective.

The peephole in your own front door grants you the inalienable right to police your porch, stoop, or patch of carpet in the apartment building’s hallway while going mostly undetected. In Virtual Peephole, the peephole becomes a voyeuristic virtual view of various corners of the world.

Slide aside the cover, and an LDR connected to an Arduino Micro detects the change in light level. This change makes the Micro send a key press to a Raspberry Pi, which fetches a new camera at random and displays it on a screen inside the box. You can peep a brief demo after the break, followed by a couple of short build/walk-through videos.

If you’re a peephole people watcher, put a camera in there and watch from anywhere.

Via Adafruit

Do you long for a more pronounced way to rage quit video games? Smashing buttons comes naturally, of course, but this hurts the controller or keyboard. You can quit your longing, because [Insert Controller Here] has an elegant solution that’s worth its salt.

The Salty Rage Quit Controller is simple. The cup is filled with distilled water. When you pour salt in it, the two bolt terminals tell the Arduino Micro that the resistance in the water has decreased. The Micro sends whatever keystrokes you want, so you could call out your deadbeat medic before quitting, or just plain leave. [Insert Controller Here] has example code on his site to get you started. Click calmly past the break to watch the demo and build videos, or we’ll have to ban you for aggro.

With the right tools, you can turn anything into a game controller. Check out this car controller that uses Python and CAN bus sniffing.

Build video:

Thanks for the tip, [foamyguy]!

IT professional (and Arduino cap fan) John Milner had a minor problem. While his retro gaming setup could emulate a wide variety of systems and games, it was still missing the tactile feedback of the original controllers. Rather than “submit” to playing with only an Xbox 360 controller, he developed the Multijoy Retro Gaming System that can change gamepads with the turn of a knob using an Arduino Micro.

The resulting system lets him not only choose the original controller for each game, but if you want to mix things up and see how Super Mario Bros. would feel on a PlayStation 1, or even a Genesis controller, you can do that too! It also features shortcut buttons on the new console.

The Arduino presents itself as two joypads with native plug-and-play support for Microsoft Windows 7+ and Linux/RetroPie. The selector is simply a ring of LEDs with a potentiometer in the center, using the knob will move the lit LED to the desired controller pictured in that position, a simple system with an unexpected bonus of being a little retro in its appearance.

You can check it out in the video below, and see more of the project on his blog and on GitHub.

Old laptops are easy to find and many have a trackpad with a PS/2 interface hardwired into the guts of the laptop. [Build It] wanted one of those trackpads for use in the DIY Raspberry Pi laptop he’s working on. But the Raspberry Pi has no PS/2 input, and he read that a PS/2 to USB adapter wouldn’t be reliable enough. His solution? Wire the trackpad to an Arduino and have the Arduino convert the trackpad’s PS/2 to USB.

After removing a few screws, he had the trackpad free of the laptop. Looking up the trackpad’s part number online he found the solder pads for data, clock and five volts. He soldered his own wires to them, as well as to the trackpad’s ground plane, and from there to his Arduino Pro Micro. After installing the Arduino PS/2 mouse and the Mouse and Keyboard libraries he wrote some code (see his Instructables page). The finishing touch was to use generous helpings of hot glue to secure all the wires, as well as the Arduino, to the back to the trackpad. By plugging a USB cable into the Arduino, he now had a trackpad that could plug in anywhere as a USB trackpad. Watch [Build It] put it all together step-by-step in the video below.

Want something else to do with a trackpad. How about combining sixteen of them into an awesome MIDI controller like [Scott] did?


Filed under: Arduino Hacks

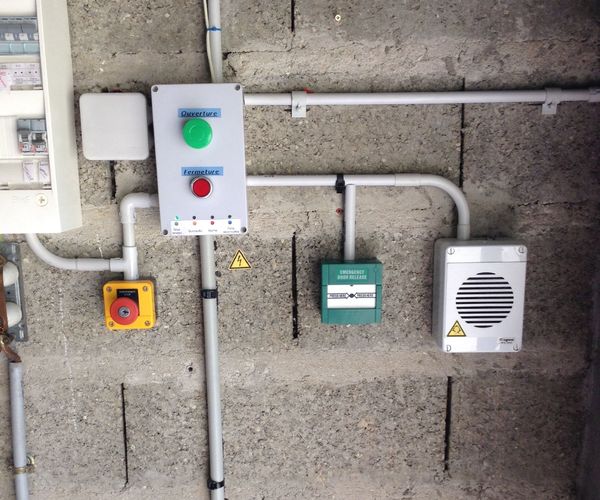
Using an Arduino Micro for control, French teenager “Joebarteam” came up with a way to biometrically secure his garage.

If you need to get into your locked garage, what could be better than using your fingerprint? To this end, Joe’ came up with a system that unlocks his door using a fingerprint scanner, and a bistable relay to disable communication between the scanner and the Arduino if there’s a problem.

It’s a really professional-looking build, and the locking mechanism is especially interesting. Two rack-and-pinion devices plunge shafts into the ground, making the door impossible to open (it has to pull out before going up). If there is an issue with the system, the pins can be physically unlocked and disabled as needed.

You can find more details on the project’s Instructables page here.

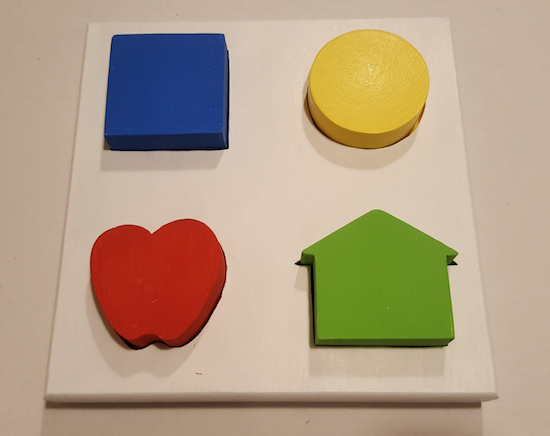
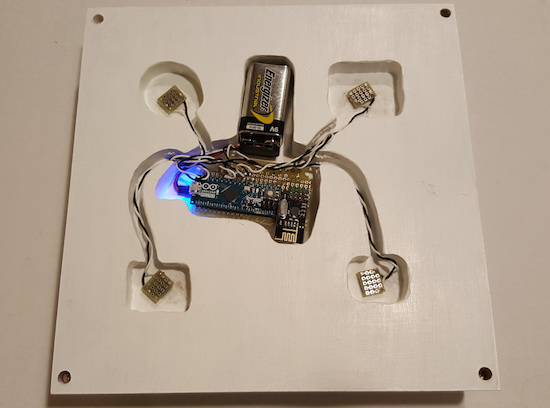
Using two Arduino Micros, these parents created a unique Lea shapes puzzle for their daughter Rebecca.

Because of a medical condition, Rebecca will need to have her vision assessed at the age of two or younger. This means that she’ll have to be tested without yet knowing her alphabet, and instead need to be familiar with Lea shapes which can act as a substitute for letters in a vision test. Unfortunately, her hearing is also impaired, meaning that a non-visual type of stimulus is needed to encourage a correct response.

To accomplish this, her parents came up with an excellent puzzle system, where when one of these shapes is dropped into the correct slot, the smart lights in the room change to the corresponding color. It’s an interesting project that will hopefully help with a pressing need.

In terms of hardware, a Raspberry Pi 3 is used as a central hub along with a Hue smart lights bridge, which is paired with a couple of Arduinos and 2.4GHz radio modules that handle the wireless communication between the two devices.

You can see more about this build on their blog here and more background on their lighting system here.

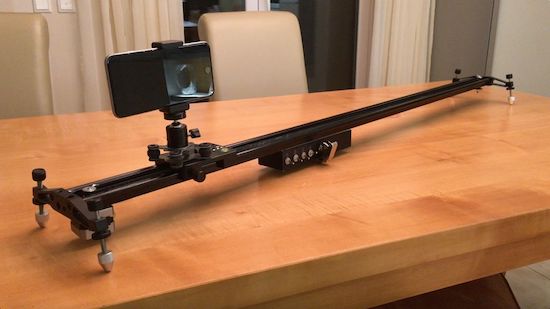
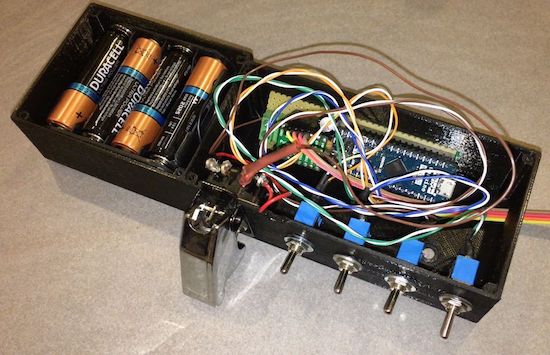
Using a stepper motor, an Arduino Micro, and various mechanical bits, “Max Maker” shows us how to motorize a camera slider.

According to his video below, “There are many cheap sliders available, but none that are motorized.” On the other hand, in this project he demonstrates that with a little bit of work, and an excellent attention to detail, you can make the conversion yourself.

Even if you’re not interested in this kind of application, the video reveals some interesting tricks, such as transferring a hole pattern using tape at 0:30, and using nail polish/recessed lettering to label switches at 3:55. The slider can be set to slide down the rail between 10 seconds and 8 hours depending on your video or photography needs. Video results, seen around 5:00 in, are really amazing!

You can find more details on how to create a slider like this on the project’s Instructables page.

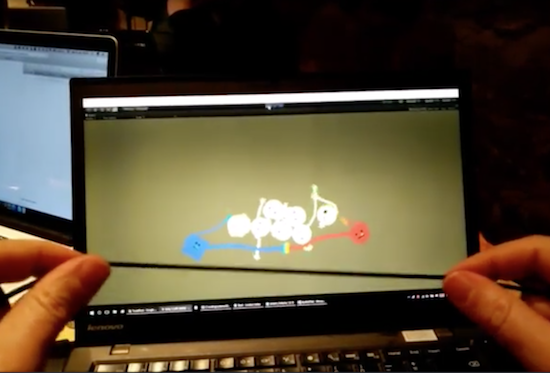
RubberArms is an experimental rubber band game, created by Robin Baumgarten at the Global Game Jam 2017 in Yverdon-les-Bains, Switzerland.

The controller uses a conductive rubber cord from Adafruit that changes resistance as it’s stretched. This resistance is measured by an Arduino Micro/Leonardo (or a Teensy 3.2), which acts as a USB joystick sending signals to Unity3D. (The game is coded in Unity3D using Spring Joints and Line Renderers.)

At this point, the game is a simple prototype where you control the distance of two characters whose arms stretch whenever you stretch the rubber band, throwing little ‘Bleps’ around. You can read more about RubberArms on Baumgarten’s page, as well as his earlier project “Line Wobbler” here.

3D-printed appendages are, as one might suspect, generally meant for those that are missing a limb. Moreover, there are many other people that might retain partial functionality of a hand, but could still use assistance.

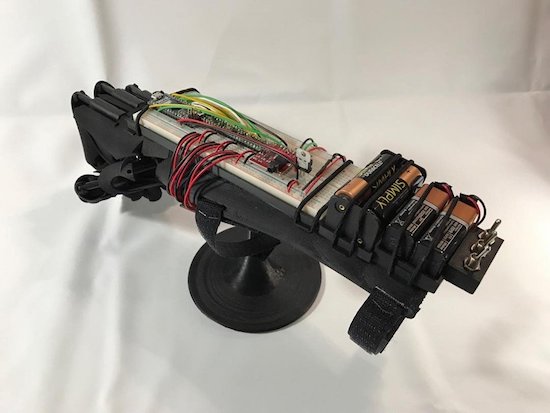
Youbionic’s beautifully 3D-printed, myoelectric prosthesis is envisioned for either application, capable of being controlled by muscle contraction as if it were a real body part.

As seen in the video below, the Youbionic hand can manipulate many different items, including a small box, a water bottle, and a set of keys. Functionality aside, the movement is extremely fluid and the smooth black finish really makes it look great.

The device is currently equipped with an Arduino Micro, servos, various sensors, a battery pack, and a few switches. Even the breadboard appears to be very neat, though one would suspect the final version will use some sort of PCB.

You can learn more and order yours on Youbionic’s website.


  • Newsletter

    Sign up for the PlanetArduino Newsletter, which delivers the most popular articles via e-mail to your inbox every week. Just fill in the information below and submit.

  • Like Us on Facebook