Posts | Comments

Planet Arduino

Archive for the ‘Nano Every’ Category

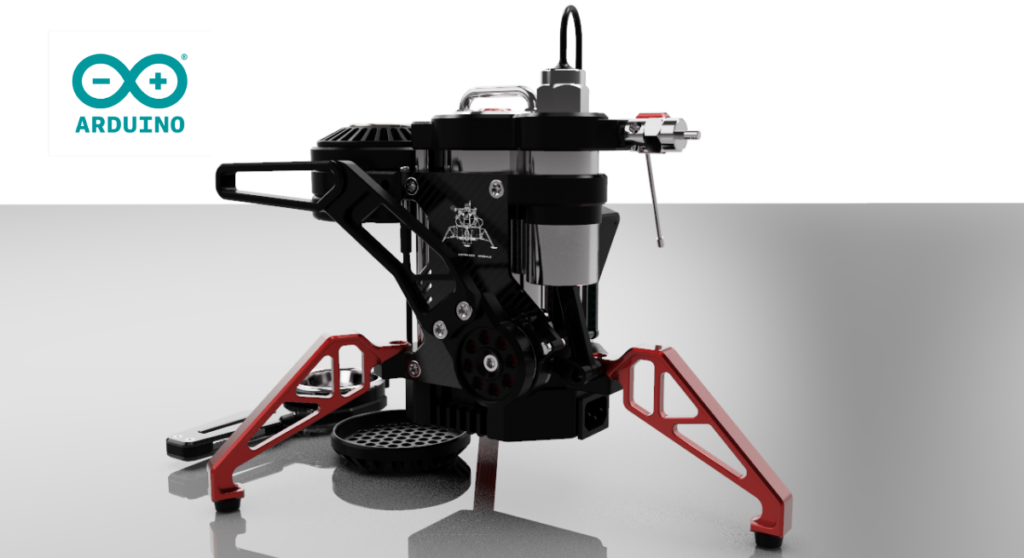
If you think coffee people are opinionated, then you’ve never met an espresso person. There is a lot of art and science that goes into making the perfect little cup of espresso and a good barista will control every factor, from temperature to pressure to pour rate. It isn’t rocket science, but it isn’t far off. So the LanderShot Lunar Espresso Module, a CNC-machined high-tech espresso machine, has a fitting theme.

This is, at its core, a premium espresso machine that merges designer aesthetics with cutting-edge electronics. The founder of LanderShot, Ted Ciamillo, lives in the state of Washington, but is of Italian descent. He wanted to honor his Italian heritage — and the origin of espresso — so he turned to Arduino.

Temperature control is crucial when making espresso; heat the water too much and you’ll burn the coffee, but you’ll lose the flavor and strength if you heat it too little. For that reason, the Lunar Espresso Module utilizes PID (proportional-interval-derivative) control for the 1000-watt heater. That ensures that water comes up to temperature quickly without overshooting the target, helping it go from 20 °C to 100 °C in just 180 seconds. A pneumatic lever lets the user increase the pressure to the desired level, with each stroke adding one bar.

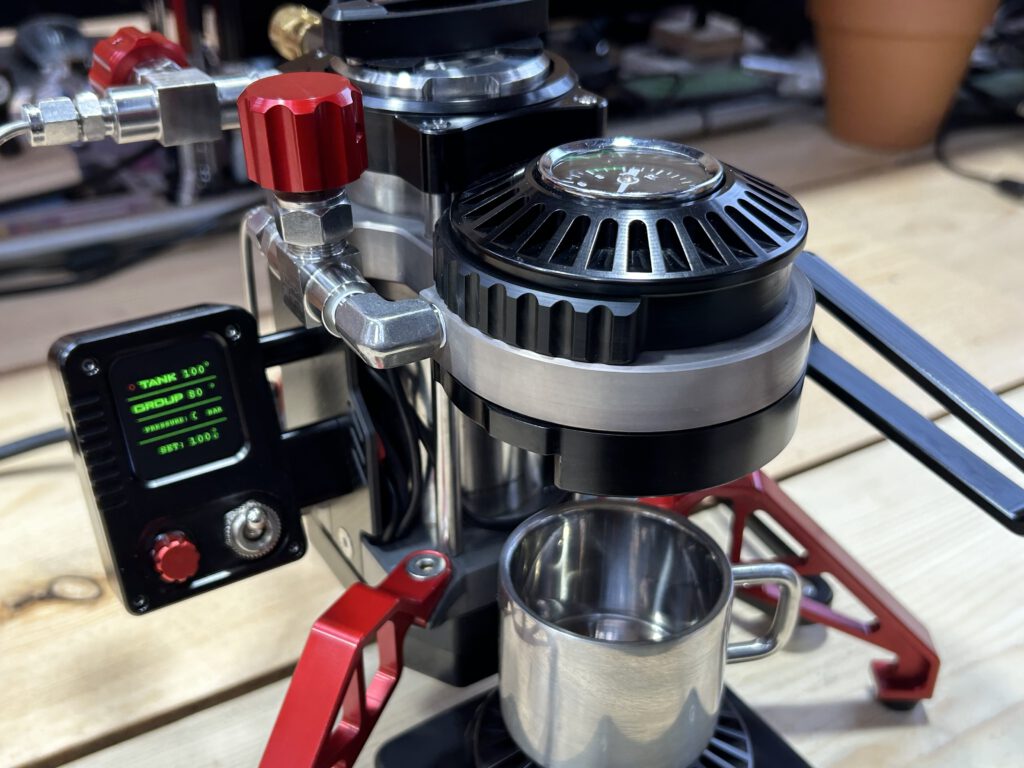
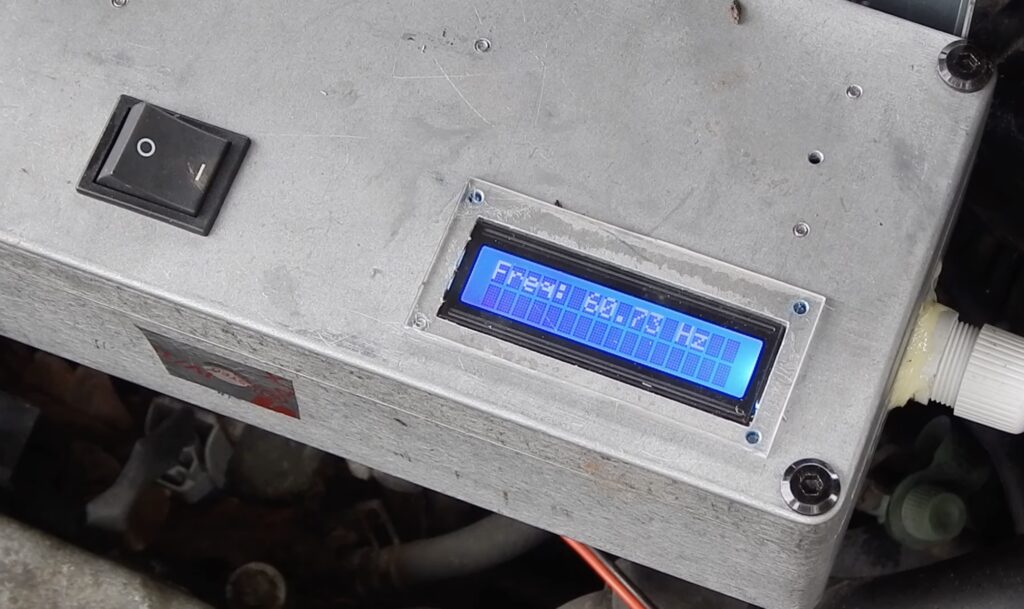
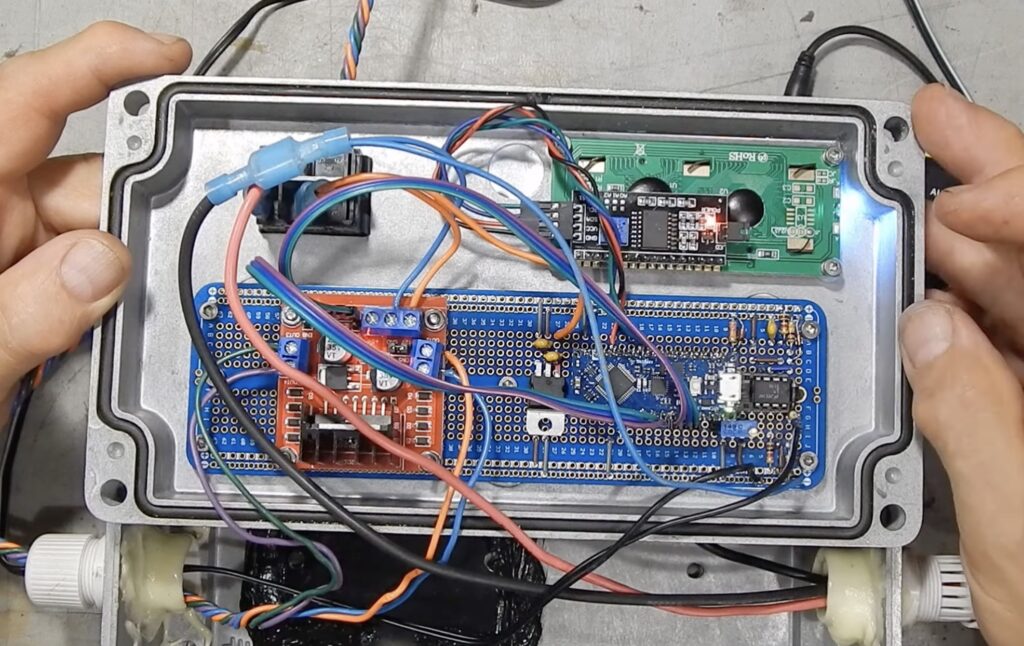
An Arduino Nano Every board controls the heat, monitors temperature and pressure, and displays the results on a small screen offset to the side. “The Nano Every is excellent at performing the several jobs in the machine. We chose it for its low-profile architecture, easy access to the pinouts, robustness and accessible price point. And, of course, we are pleased that the brains of our machine were designed in Italy,” Ciamillo says.

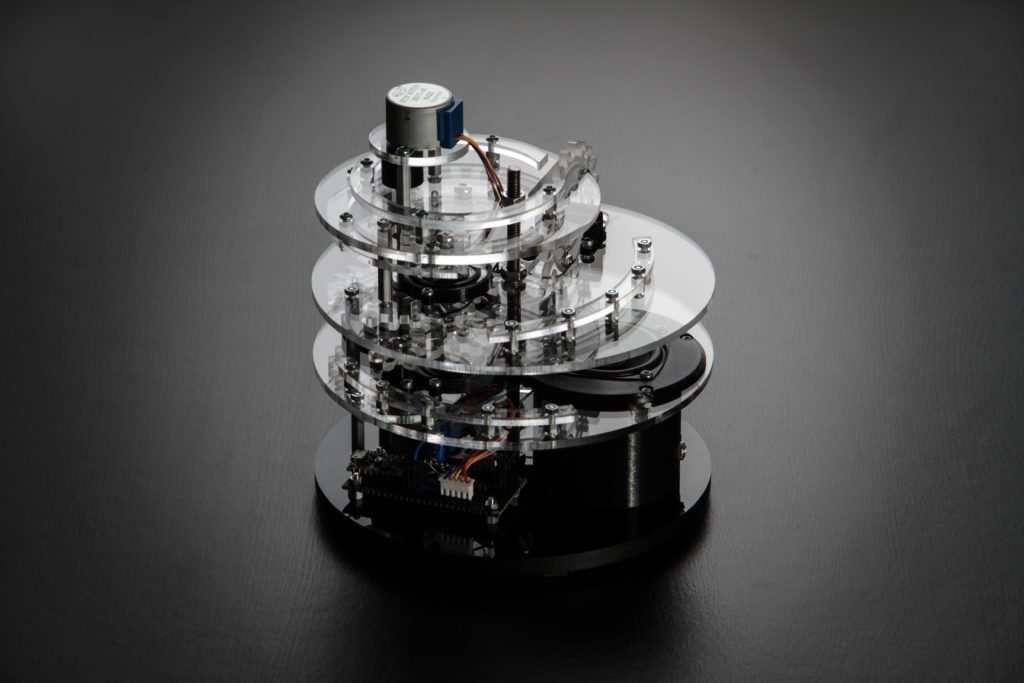
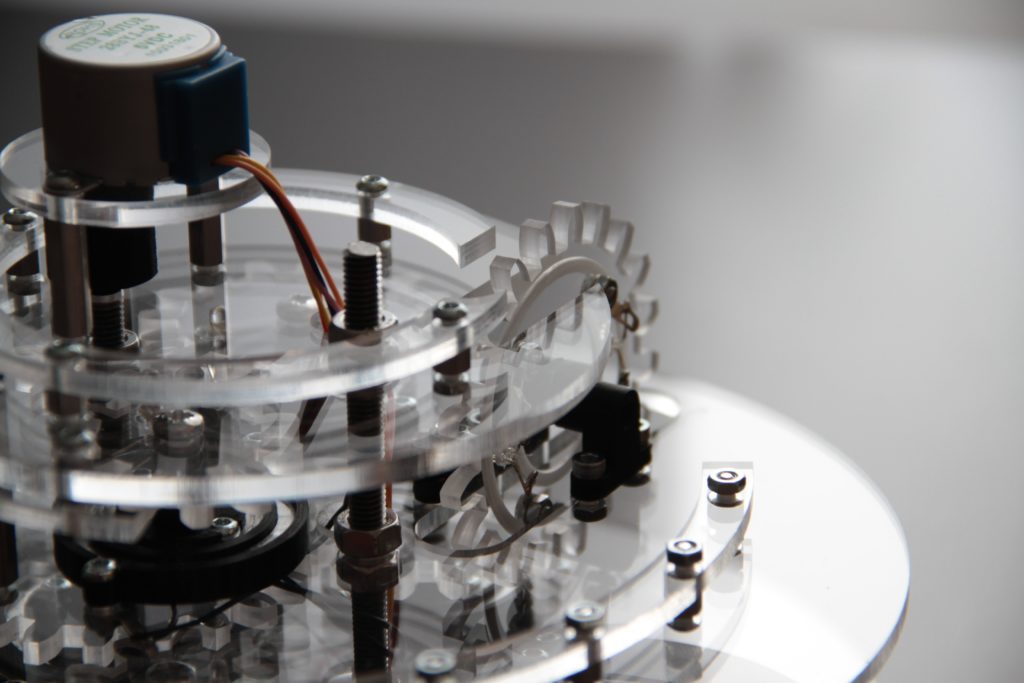
He adds that the greatest technical challenge was fitting all of the electronic components into the compact machine. While that may be true, we think that he’s selling himself short on the design and CNC work. The milled parts are stunning to look at, and we can only imagine that they’re even more pleasing to touch while pulling a shot.Ready to take your daily coffee to new heights? A limited number of LanderShot Lunar Espresso Module machines are available for pre-order and should ship out in June.

The post LanderShot is an out-of-this-world espresso machine appeared first on Arduino Blog.

Generators are expensive pieces of equipment. You can get a small low-quality model for a few hundred dollars, but powerful high-quality generators cost thousands or even tens of thousands of dollars. Old cars, on the other hand, can be very cheap — especially if they aren’t roadworthy anymore. Jake von Slatt has a video series explaining how you can convert an old car with a working engine into a powerful generator.

Most of the cost of a generator is from the engine, and alternator or dynamo with inverter. In this case, the engine is in a Toyota Sienna minivan. The vehicle isn’t worth keeping on the road, but the engine still runs well. And that engine has plenty of power for a generator. The alternator came from a Harbor Freight generator that had a bad engine. To keep the AC voltage output at the steady 60Hz needed for household appliances and tools, von Slatt utilized an Arduino.

The Sienna has a cruise control system that actuates the throttle in an attempt to keep wheel speed consistent. But in this case, von Slatt needed it to keep the engine steady at 3600rpm to maintain 60Hz. So he built a simple circuit around an Arduino Nano Every board and an H-bridge. The Arduino controls the cruise control actuator’s servo motor through the H-bridge while monitoring the alternator output voltage (stepped down to 5V) frequency. If the frequency is too low, the Arduino rotates the cruise control actuator to increase engine speed until the frequency is exactly 60Hz. If the frequency is too low, it does the opposite.

This is a simple and effective way to keep both an old car and an old generator out of the scrap yard while providing off-grid power.

The post Turning an old car into a powerful generator appeared first on Arduino Blog.

The great thing about art is that it doesn’t have to serve a purpose. When utility is irrelevant, the artist is free to express their creativity in whatever way they like. A painting doesn’t have to inspire introspection or revolution — it can just be something pretty to look at. In the same vein, Eirik Brandal’s Intermittent Luminal Phase kinetic sculpture is both gorgeous and useless.

Brandal started this project as an excuse to experiment with his new CNC router. Cutting gears seemed like a good way to do so, but he didn’t have a need for any mechanism that utilized them. That led him to the concept of a kinetic sculpture and Intermittent Luminal Phase is the result. It spins endlessly, making noise and blinking lights. But it is almost hypnotizing to see in action.

An Arduino Nano Every board controls two motors that spin a central input shaft, which turns all of the other gears. The gears aren’t perfect and produce a fair amount of vibration, but Brandal converted that bug into a feature. He added a piezo element that picks up the vibrations. Those are then amplified and pumped out through a speaker on the sculpture. The gears also have LEDs that make contact through DIY slip rings, so they light up at certain points in the rotation.

It may not serve a purpose, but Intermittent Luminal Phase is still mesmerizing and a great project for practicing fabrication techniques.

The post This kinetic sculpture is incredibly mesmerizing appeared first on Arduino Blog.

Today’s consumer and professional drones are very stable. They’re easy to pilot and we’re past the era of rampant out-of-control drone crashes. But drones can still fail and benefit from a system that lets them return safely to the ground without damage. That is also true for hobby rockets, which still have very experimental controlled descent systems. To suit both types of craft, Niklas Bommersbach designed his own setup to detect critical flight behavior and then activate a two-stage parachute.

The idea is something familiar to everyone: if the UAV experiences uncontrolled descent, the parachute deploys and returns it gently to the ground for recovery. But achieving that is more difficult than you might think. Bommersbach had to engineer a robust deployment mechanism, as well as a system to trigger the deployment. He chose to load the primary parachute with a spring mechanism, plus a drogue chute as a backup. That drogue chute would also slow descent if the primary parachute fails to deploy altogether.

An Arduino Nano Every board monitors altitude using a barometric pressure sensor. It can either deploy the parachute at a set altitude when it senses rapid descent indicative of an uncontrolled fall, or it can respond to a manual command sent via radio. The chutes reside within 3D-printed containers opened servo motors. Power comes from a small lithium battery independent of the craft’s battery, so the system is self-contained. The Arduino first deploys the drogue chute, which slows descent and tries to pull out the main chute. If that fails, the Arduino can actively deploy the main chute.

This redundant and self-contained parachute system should be reliable and affordable, making it suitable for drones and experimental rockets.

The post DIY parachute system saves drones and rockets appeared first on Arduino Blog.

Many kids and adults have an interest in electronics because they want to build robots. But it can be difficult to figure out where to even start. There are hundreds of kits on the market and the options are endless where you veer into custom territory. But if you’re looking for a tank-style rover that you can control via Bluetooth®, then this robot designed by Mastoras Inc is a fantastic choice.

We like this project because it combines the advantages of robot kits and custom robots. It uses an off-the-shelf chassis to simplify the complicated mechanical parts, but with custom Arduino electronics that allow for customizability and that offer an introduction to coding. It has Bluetooth capability, so you can control it remotely from your smartphone. Mastoras Inc built an Android app, which you can tweak as much as you like. You can also create your own if you want to try you hand at app development.

The project starts with a tracked robot chassis kit, which includes the frame, DC motors, hubs, and tracks. An Arduino Nano Every board controls those motors through an L298N H-bridge driver. An HC-05 module adds connectivity and power comes from a 9V battery. The electronics enclosures are 3D-printable, but you can also use any pre-built project box. If you do have a 3D printer, you can also add a tank turret rotated by a 9g micro servo motor.

This robot won’t make waves at your local hackerspace, but it is a great way to dip your toes into robotics and develop a foundation that you can build upon.

The post This Bluetooth tank is a perfect first robot appeared first on Arduino Blog.

Ham radio allows for the broadcast and reception of non-commercial radio signals across vast distances with relatively inexpensive equipment. As the name implies, ham radio relies on antennas to function, and most designs can take up large amounts of space. An alternative antenna is the magnetic loop design which has a tall circle of copper tubing around the outside while each end is soldered onto a variable capacitor that is used to tune the signal.

TekMakerUK was inspired by Kevin Loughin’s YouTube video on the design and decided to make his own experimental version capable of 5W transmissions, which he could tune via an Android phone. The variable capacitor is from an old valve radio and has a central shaft that rotates to adjust the distance between the dielectric plates. In order to turn the coupling, a 5V stepper motor was added to the base along with a ULN2003 stepper motor driver. The driver was then connected to an Arduino Uno, although the board was replaced by a Nano Every for soldered connections.

In terms of usage, there is a digital encoder that increments the count either up or down depending on the direction it is rotated in, and this dictates how far the stepper should move. Calibrating the “zero” or home position is done by slowly moving the stepper on initialization until it hits a limit switch. More details about TekMakerUK’s magnetic loop antenna tuner can be found here on Instructables.

The post Building an experimental magnetic loop antenna with a stepper motor and an Arduino appeared first on Arduino Blog.

If you do any kind of video content creation and you still rely entirely on static shots, then you’re missing out on an opportunity to generate visual interest that draws viewers in. Dynamic shots can do a lot to increase the production value of your videos, but most people can’t afford to hire a camera operator. That’s why you should check out Giovanni Aggiustatutto’s camera robot.

This device attaches to a standard tripod to provide motorized panning and tilting. While those movements are not comprehensive, they do allow for a lot of flexibility for capturing dynamic video. The best part is that the setup includes a remote with a joystick to make controlling the movement a snap. The remote lets users program movements ahead of time, which the device can then execute when it is time to get the shot. There is even a timelapse mode that will move the camera slightly between still captures.

Because this pans and tilts, it needs two motors. Those are stepper motors controlled by an Arduino Nano Every board through two TMC2208 stepper motor driver modules. A joystick on the remote lets the user pan or tilt, while an LCD provides information. The remote connects to the main unit via an Ethernet cable. The enclosures and most of the mechanical parts are 3D-printable, but this project does require some hardware like pulleys, bearings, and aluminum tube.

If you’re ready to step up your video production game, this is a relatively easy and affordable way to do so.

The post Easily create your own robotic camera operator appeared first on Arduino Blog.

While their popularity seems to be waning as LCD and OLED TVs grow in size and shrink in price, projectors can still be a good choice for home theaters. They can give you a screen bigger than any TV on the consumer market and at a lower price than large TVs. But if you get a projector for your home theater, you’re going to need a way to mount it. To keep his home theater projector out of the way when it isn’t in use, Sam Baker built this scissor lift mounting system.

A scissor lift was a good choice for this application, because it can be made very compact and still quite rigid. A winch-style cable mechanism would have been a bit more compact and simpler, but wouldn’t have kept the projector from swaying — something that would surely ruin the cinema experience. A scissor lift like this one uses the power of parallel linkages to translate short, high-torque movement into long actuation. It keeps the projector up close to the ceiling most of the time, but then allows it to drop down to the proper height when it is time to watch a movie.

The mechanical parts for the scissor lift (including the lead screw) and the enclosure were all 3D-printed. A stepper motor turns the scissor lift’s lead screw and an Arduino Nano Every board controls that motor through a small driver board. A limit switch at each end keeps the motor from turning the lead screw too far. An infrared receiver connects to the Arduino, which lets it look for a specific code coming from an infrared remote. When it sees that code, the Arduino drops the projector down into place so Baker can start a movie.

The post A DIY scissor lift for home theater projectors appeared first on Arduino Blog.

If you’ve ever stood in an elevator with mirrored walls and saw your reflection bouncing back and forth endlessly, then you’ve experienced an “infinity mirror” from the inside. If you were standing outside of the elevator and one of the walls were a one-way mirror, you’d be able to peer inside as the interior lights reflect forever. That’s the infinity mirror concept, which ThomasJ152 implemented with his laser-cut infinity dodecahedron.

This is an infinity mirror in the form of a dodecahedron, which is a regular polyhedron with 12 sides. Each face is a one-way mirror facing inwards, so light inside reflects while the user can see through the faces. The frame, which follows the edges between faces, contains inward-facing LEDs. The light from those LEDs bounces off the of them mirrors inside the dodecahedron, resulting in an interesting lighting effect. That effect is enhanced by the animations of the RGB LEDs.

ThomasJ152 constructed the dodecahedron’s body using laser-cut acrylic sheet and plywood. One-way mirror film on the acrylic reflects the light. That light comes from strips of WS2812B individually addressable RGB LEDs. An Arduino Nano Every board controls those LEDs. At this time, the Arduino sketch is simple and cycles through different LED animation effects. That looks pretty cool, but it would also be possible to create custom animations that take advantage of the dodecahedron shape.

The post Infinity dodecahedron puts on a mesmerizing light show appeared first on Arduino Blog.


  • Newsletter

    Sign up for the PlanetArduino Newsletter, which delivers the most popular articles via e-mail to your inbox every week. Just fill in the information below and submit.

  • Like Us on Facebook