Posts | Comments

Planet Arduino

Archive for the ‘mp3 player’ Category

Touchscreens are great, but they’re not always the perfect solution. Trying to operate one with gloves on (even alleged “touchscreen-friendly” ones) can be cumbersome at best, and if the screen is on a publicly-shared device, such as a checkout kiosk it can easily become a home for bacteria, viruses and all sorts of other nasty stuff.

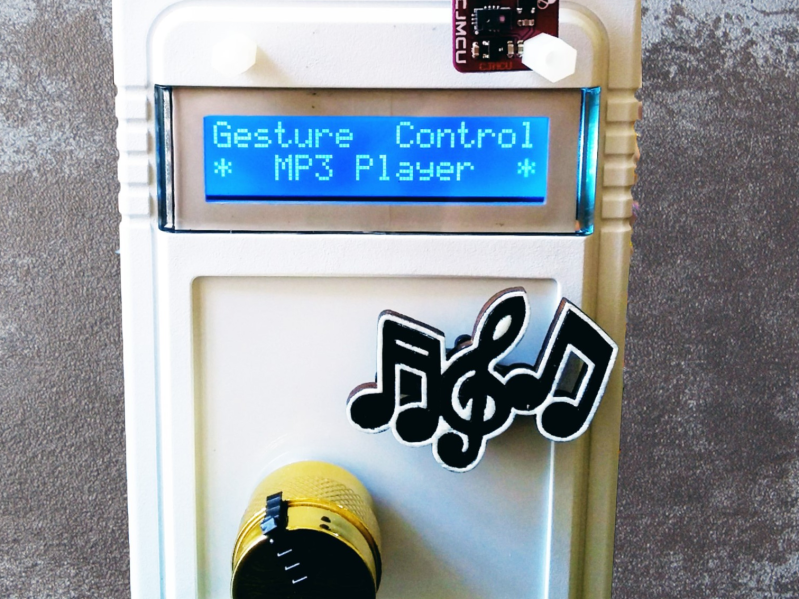
That’s what [Norbert Zare] was thinking when he built his gesture-controlled MP3 player. It uses a PAJ7620U2 gesture sensor to register a few intuitive hand motions including finger twirls to control the volume, hand swipes to skip forward and backwards, and a flat hand to play and pause the song. It even has a motorized knob and cute cutout music notes that move to provide some visual feedback for the gestures, which you can see in-action in the video below. If this seems familiar, it’s because on Tuesday we took a look at the camera-based, glance-to-skip-tracks controller he built.

To actually play some music, he gutted an old MP3 player and hooked the solder pads from the control buttons up to an Arduino, which reads gesture information from the sensor and emulates the MP3 player’s buttons by setting the appropriate pins to HIGH and LOW. Finally, he topped the whole thing off with an LCD screen and a case.

The great thing about [Norbert]’s approach is that it isn’t just limited to an MP3 player — it can be extended to replace the buttons on pretty much any device. Because the Arduino only needs to be connected to the button inputs of the device, it should be relatively easy to adapt most existing tactile interfaces to be touch-free. Paired with this gesture-tracking macro keyboard we saw earlier in the year, the days of actually having to touch our tech may soon be behind us.

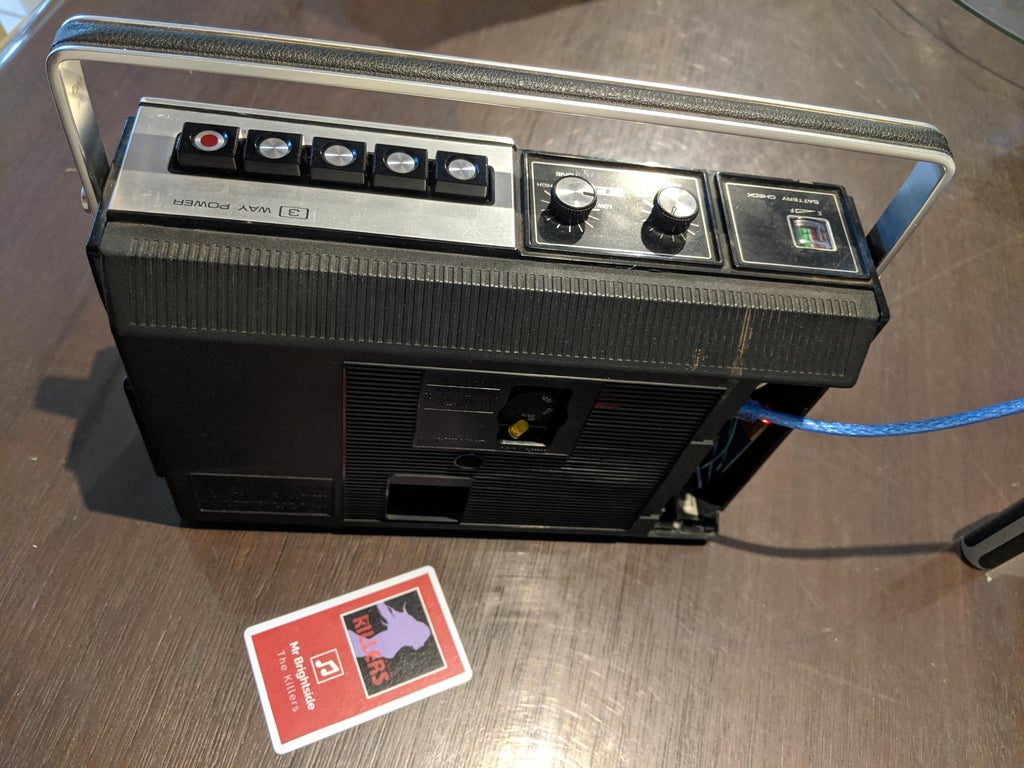
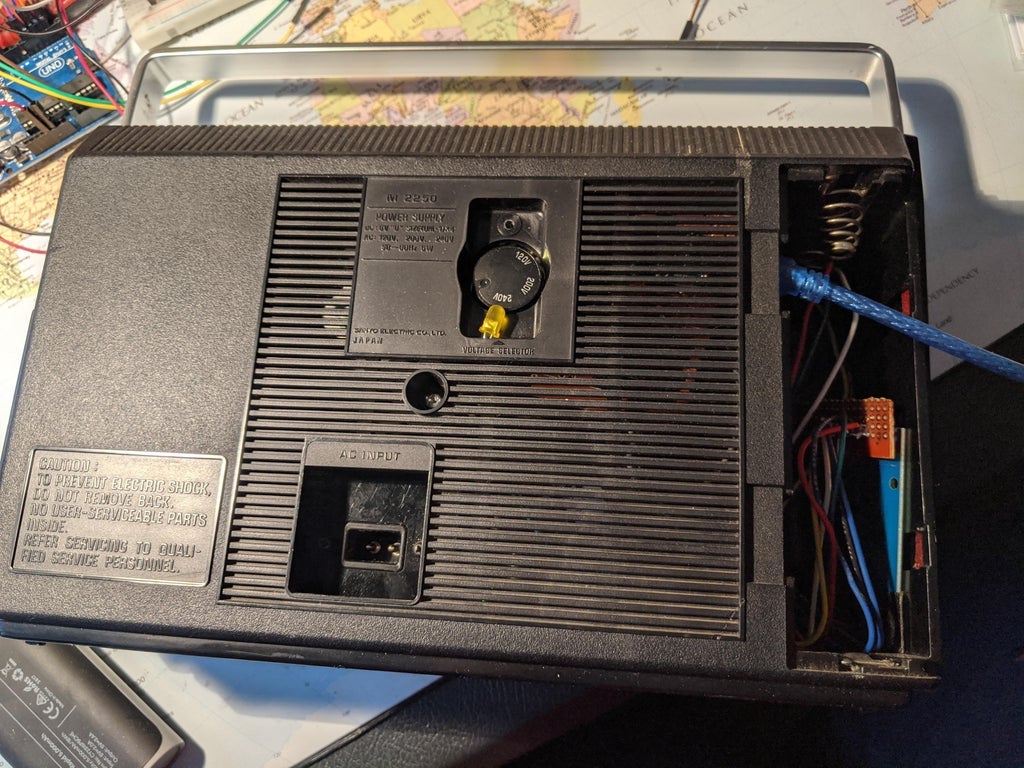
When creator mattb_138’s parents were cleaning out their house, he came across an old cassette player and decided to upgrade it with MP3 capabilities and an RFID interface.

The newly-enhanced device uses an Arduino Nano for control, along with a DFPlayer Mini module to play songs stored on a microSD card. An RC522 reader enables him to select tracks based on RFID cards, printed with their appropriate album art.

The cassette player’s internals are kept largely stock, using a potentiometer to adjust the volume of the original speakers. Two buttons are also implemented with long and short press functionality, allowing for pause/play, skip, shuffle, and selection between A/B “side” of each card.

You can find more details on the upcycled project — which was inspired by the Juuke RFID playerin mattb_138’s Instructables tutorial.

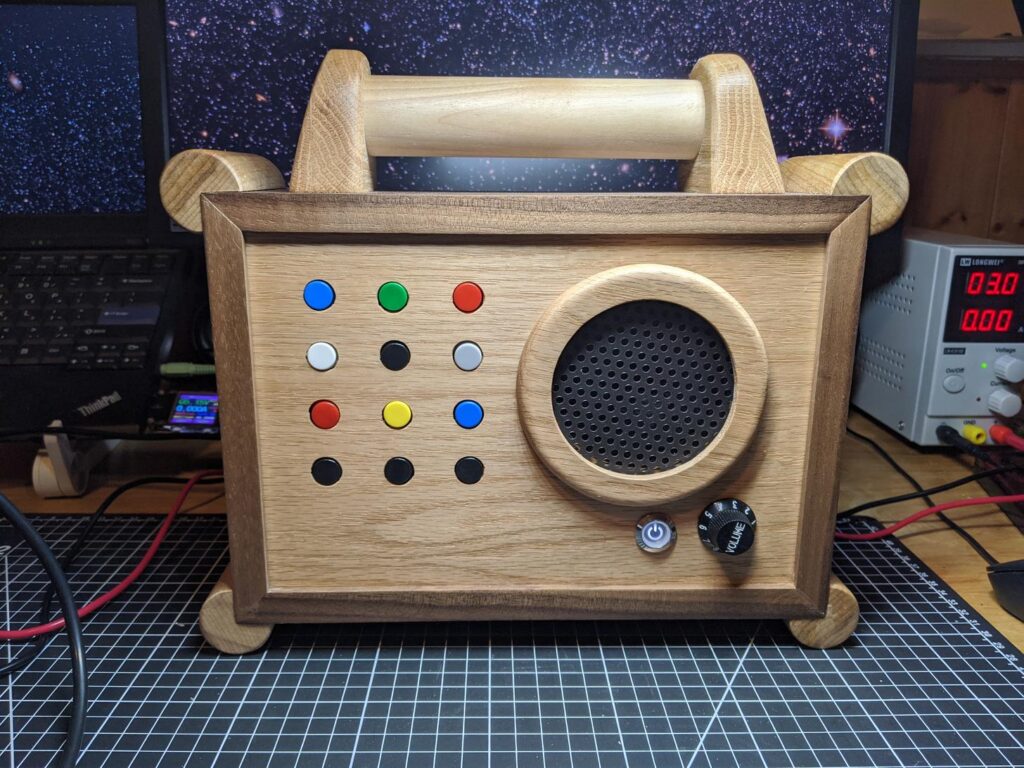
Believe it or not, there’s a $400 toy mp3 player out there for kids. It looks pretty nice, with colorful buttons and a wood console and all, but those features don’t really justify the price tag. [DerThes] wanted one for his 2-year-old anyway, so he made his own ruggedized version for a whole lot less.

The simple and kid-friendly interface lets [DerThes Jr.] choose from one of nine albums to play by pushing one of the candy-colored buttons. The bottom row of buttons handle play/pause and moving through the track list. When mom and dad get tired of listening to whatever the kids are into these days, they can enter the special god mode code to access 99 of their favorite albums.

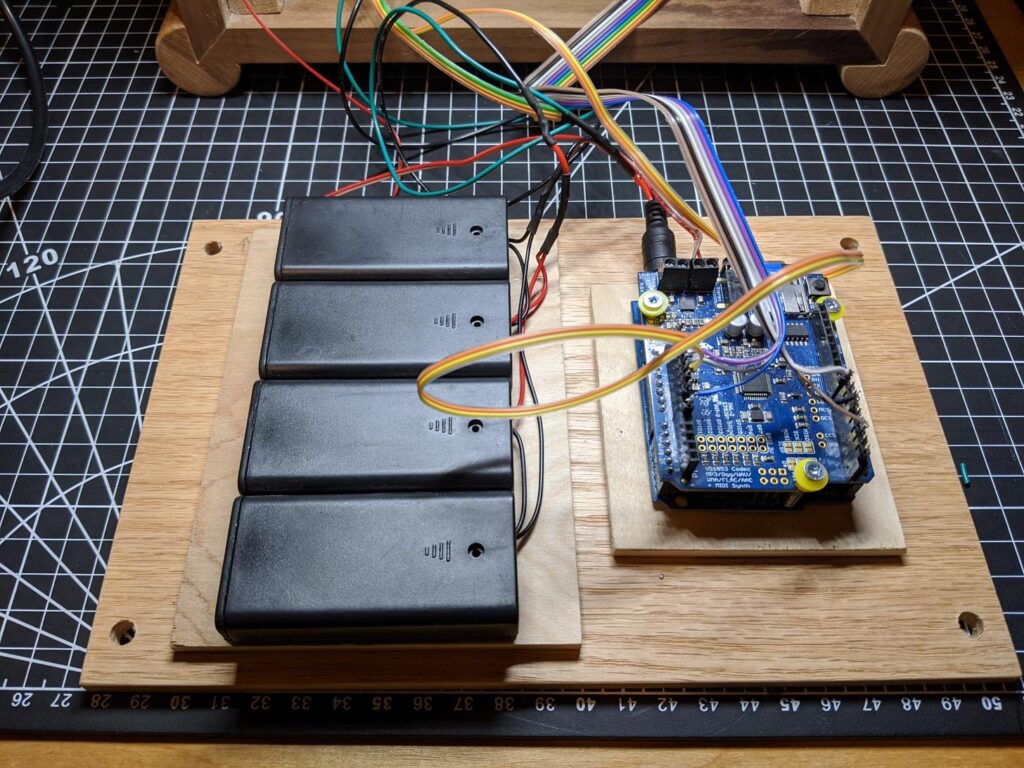
This baby boombox is built with an Arduino Uno and an Adafruit music maker shield. [DerThes] etched his own PCB to hold the buttons and the pair of shift registers needed to interface them with the Uno. If you’ve never etched before, here’s a good chance to dip your toe in the ferric chloride, because [DerThes] has the transparency in his repo and a line on a nice instructional video.

If you don’t think your toddler is ready to respect a field of momentaries, you could make a jukebox with NFC blocks.

[via Arduino blog]

If your young child wants to listen to music, what better way than a beautiful wooden MP3 “radio,” with an array of buttons that select the album? After being inspired by a similar commercial product, Redditor “DerThes” decided to make such a device for a fraction of the cost using an Arduino Uno for control, along with a Music Maker Shield to play off an SD card.

The toddler can select tunes from a grid of 16 input buttons, which are sent to the Uno via a pair of shift registers. There’s also a “parent’s mode” with the ability to choose from up to 99 albums, and a volume knob for… adjusting the volume. 

Finally, the unt features a beautiful enclosure made out of oak and black walnut, with corners softened by dowels to reduce collateral damage “after the player has gone airborne.” More details can be seen on Imgur here and on GitHub.

This is an easy to use MP3 player for small children. I made this for my 2 year old for Christmas. Each of the top 9 buttons will play an album. The black buttons on the bottom are prev – play/pause – next. The player also supports an alternative playback mode that can be activated using a special key combination. That combination will turn the buttons into a 10 digit input matrix allowing playback of up to 99 albums. That way the player can be used by parents as well. 😉

See GitHub for more details, the schematics for the button PCB and the firmware. https://github.com/MichaelThessel/arduino-stoerbert

This is heavily inspired by Hoerbert: https://en.hoerbert.com

When I first saw the Hoerbert at a friends place I wanted it for my child. After I heard of the $400 price tag I knew that I needed to spend 50 hrs and $100 to build my own.

Music, food, and coding style have one thing in common: we all have our own preferences. On the other hand, there are arguably more people on this planet than there are varieties in any one of those categories, so we rarely fail to find like-minded folks sharing at least some of our taste. Well, in case your idea of a good time is calling a service hotline for some exquisite tunes, [Fuzzy Wobble] and his hold music jukebox, appropriately built into a telephone, is just your guy.

Built around an Arduino with an Adafruit Music Maker shield, [Fuzzy Wobble] uses the telephone’s keypad as input for selecting one of the predefined songs to play, and replaced the phone’s bell with a little speaker to turn it into a jukebox. For a more genuine experience, the audio is of course also routed to the handset, although the true hold music connoisseur might feel disappointed about the wide frequency range and lack of distortion the MP3s used in his example provide. Jokes aside, projects like these are a great reminder that often times, the journey really is the reward, and the end result doesn’t necessarily have to make sense for anyone to enjoy what you’re doing.

As these old-fashioned phones gradually disappear from our lives, and even the whole concept of landline telephony is virtually extinct in some parts of the world already, we can expect to see more and more new purposes for them. Case in point, this scavenger hunt puzzle solving device, or the rotary phone turned virtual assistant.

In the world of ham radio, a “Fox Hunt” is a game where participants are tasked with finding a hidden transmitter through direction finding. Naturally, the game is more challenging when you’re on the hunt for something small and obscure, so the ideal candidate is a small automated beacon that can be tucked away someplace inconspicuous. Of course, cheap is also preferable so you don’t go broke trying to put a game together.

As you might expect, there’s no shortage of kits and turn-key transmitters that you can buy, but [WhisleyTangoHotel] wanted to come up with something that could be put together cheaply and easily from hardware the average ham or hacker might already have laying around. The end result is a very capable “fox” that can be built in just a few minutes at a surprisingly low cost. He cautions that you’ll need a ham license to legally use this gadget, but we imagine most people familiar with this particular pastime will already have the necessary credentials.

The heart of this build is one of the fairly capable, but perhaps more importantly, incredibly cheap Baofeng handheld radios. These little gadgets are likely familiar to the average Hackaday reader, as we discussed their dubious legal status not so long ago. At the moment they are still readily available though, so if you need a second (or third…), you might want to pull the trigger sooner rather than later.

At any rate, in the setup that [WhisleyTangoHotel] has outlined, the Baofeng radio is connected up to an MP3 player which is loaded up with a recording of your message and FCC callsign that plays in a loop. An Arduino and a relay module are then used to key the transmitter automatically by grounding out the microphone connector. As it so happens, the lanyard mount on the Baofeng is a convenient ground point and allows you to hook the whole thing up quickly with alligator clips.

If you’re looking for something a little more compact, we’ve previously covered a very nice wearable transmitter which can be used for fox hunting. We’ve even seen a gutted FRS radio stuck into a rocket if you want to take your hunt to the next level.

(more…)

It’s about time we had another awesome clock post around here. [Mattaw] has liked binary clocks since he was 0 and decided to make one in stunning fashion by using driftwood, nature’s drillable, fillable enclosure.

That beautiful wiring job on the RGB LEDs was done in 18g copper. To keep the LEDs aligned during soldering, he drilled a a grid of holes just deep enough to hold ’em face down. There’s an IR remote to set the time, the color, and choice of alarm file, which is currently set to modem_sound.mp3.

Under the wood, there are a pair of Arduino Nanos, an mp3 decoder board, and an RTC module. Why two Nanos, you ask? Well, the IR interrupts kept, uh, interrupting the LED timing. The remote feature was non-negotiable, so [mattaw] dedicated one Nano to receive remote commands, which it streams serially to the other. Here’s another nice touch: there’s an LDR in one of the nooks or crannies that monitors ambient light so the LEDs are never too bright. Don’t wait another second to check it out—we’ve got 10 videos of it after the break.

Believe it or not, this isn’t the first binary clock we’ve seen.  This honey of a clock uses RGB LEDs to tell the time analog style.

[Ash] built Moo-Bot, a robot cow scarecrow to enter the competition at a local scarecrow festival. We’re not sure if Moo-bot will win the competition, but it sure is a winning hack for us. [Ash]’s blog is peppered with delightful prose and tons of pictures, making this an easy to build project for anyone with access to basic carpentry and electronics tools. One of the festival’s theme was “Out of this World” for space and sci-fi scarecrows. When [Ash] heard his 3-year old son sing “hey diddle diddle, the cat and the fiddle…”, he immediately thought of building a cow jumping over the moon scarecrow. And since he had not seen any interactive scarecrows at earlier festivals, he decided to give his jumping cow a lively character.

Construction of the Moo-Bot is broken up in to three parts. The skeleton is built from lumber slabs and planks. The insides are then gutted with all of the electronics. Finally, the whole cow is skinned using sheet metal and finished off with greebles to add detailing such as ears, legs, spots and nostrils. And since it is installed in the open, its skin also doubles up to help Moo-bot stay dry on the insides when it rains. To make Moo-Bot easy to transport from barn to launchpad, it’s broken up in to three modules — the body, the head and the mounting post with the moon.

Moo-Bot has an Arduino brain which wakes up when the push button on its mouth is pressed. Its two OLED screen eyes open up, and the MP3 player sends bovine sounding audio clips to a large sound box. The Arduino also triggers some lights around the Moon. Juice for running the whole show comes from a bank of eight, large type “D” cells wired to provide 6 V — enough to keep Moo-Bot fed for at least a couple of months.

Check out the video after the break to hear Moo-bot tell some cow jokes – it’s pretty funny. We’re rooting for it to win the competition — Go Moo-bot.

If you’re hungry for more scarecrows, this isn’t the first we’ve seen.


Filed under: Arduino Hacks, robots hacks
Jan
16

MBox: A Child’s MP3 Player

arduino hacks, audio amplifier, hörbert, mp3 player, musical hacks Comments Off on MBox: A Child’s MP3 Player 

mobx

For young children, music is a wonderful and exciting thing — but do you really want them playing with your phone, or worse yet, an iPod? [Arons] decided to make the MBox, an Arduino powered MP3 player.

He was inspired by hörbert, a very similar wooden MP3 player for children. Apparently it’s a great product, but it also costs 239€. We don’t blame him for wanting to make his own.

The MBox follows the same exterior design as hörbert — though we must admit, he could have spiced it up a bit! It uses an Arduino Uno at its core with a Freaduino MP3 music shield, capable of playing all the typical formats like MP3, MIDI, WAV, and even Ogg Vorbis. To amplify the sound he’s using a Mono Audio Amp Breakout board from SparkFun which drives an 8Ω loudspeaker. A mini USB power brick provides the juice, and a 12-digit keypad provides the ability to select music — each number plays from a different directory on the SD card.

[Arons'] daughter loves it, and he probably only spent a fifth of what the real hörbert costs!

[Thanks for the tip Renzo!]


Filed under: Arduino Hacks, musical hacks
Nov
15

Arduino Mp3 Player – Arduino JukeBox

IC, jukebox, mp3, mp3 player, music, vs1002d, vs1003, vs1053 Comments Off on Arduino Mp3 Player – Arduino JukeBox 

A full Arduino MP3 player using a SD card and a MP3 module based on a chip from VLSI (VS1002d, VS1003 VS1053). The player includes a small amplifier and two speakers, making it a small Jukebox in the age of Ipods. The project includes a small library for the management of the MP3 and the SD chip. A Funny Arduino project ..

via [arduino-guay]


  • Newsletter

    Sign up for the PlanetArduino Newsletter, which delivers the most popular articles via e-mail to your inbox every week. Just fill in the information below and submit.

  • Like Us on Facebook