Posts | Comments

Planet Arduino

Archive for the ‘servo motors’ Category

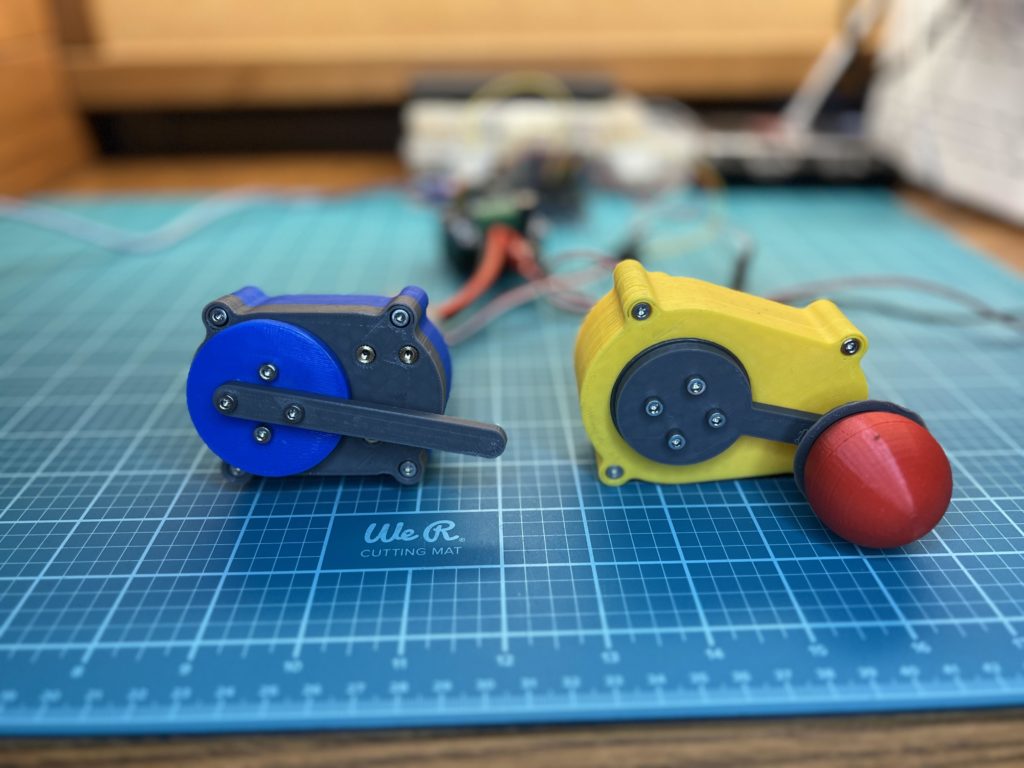
There are three types of motors that makers typically consider: stepper motors, servo motors, and DC motors (either brushed or brushless). Stepper motors are great when you need high precision and torque, but tend to have jerky movement. DC motors work well for high speed movement that doesn’t need any rotational accuracy. Servo motors are somewhat of a compromise between the two. But Aaed Musa’s 3D-printed continuous rotation servo motor is even better, because it is fast, smooth, and accurate.

This motor works like a standard servo motor, so you can set it to any desired position. But it features continuous rotation, an integrated gearbox to improve torque, very smooth movement, and a magnetic encoder to ensure accurate positioning. As you can see in the video, it responds almost instantly, moves fast, and isn’t jittery at all. Because all of the mechanical parts are 3D-printed, durability may be a concern. But otherwise this is a very attractive option.

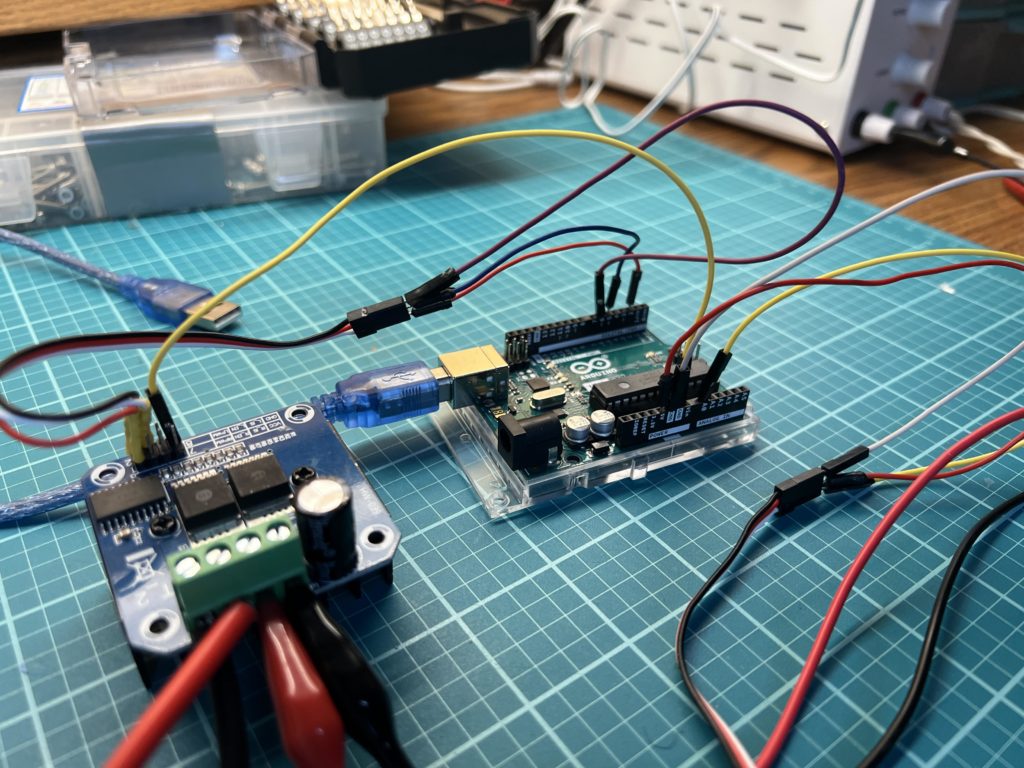
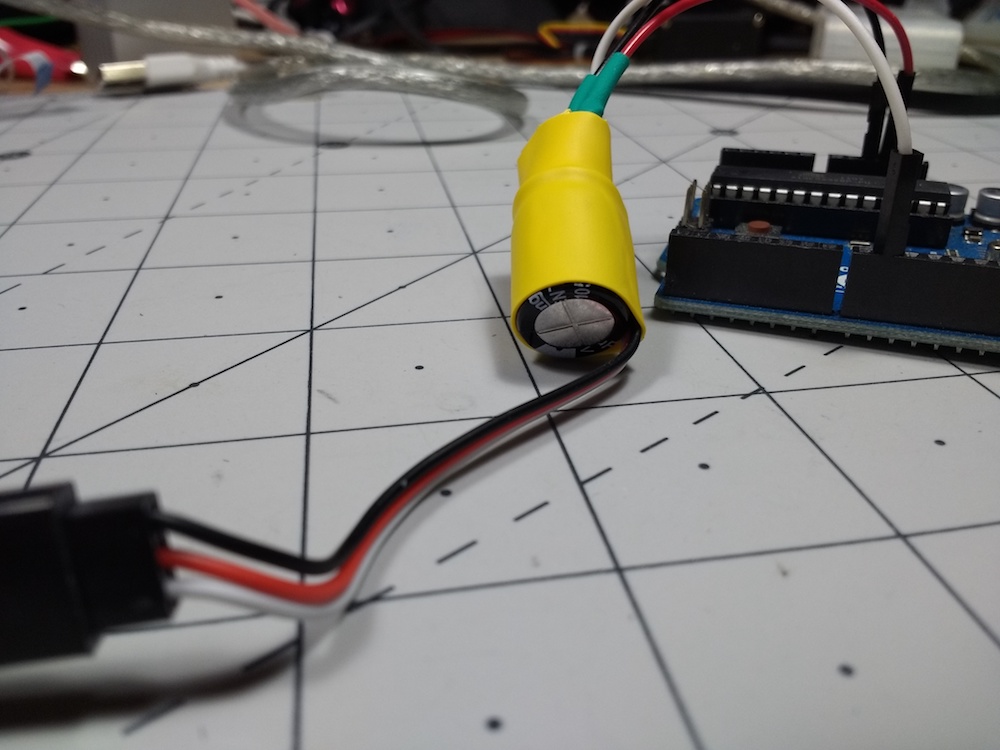
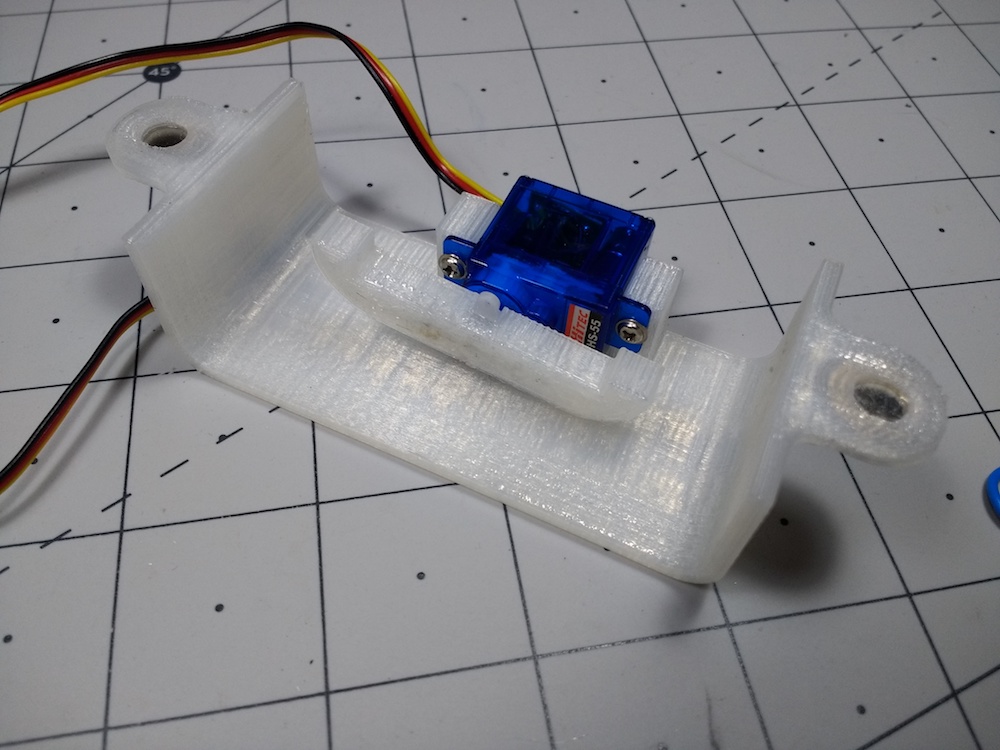
Musa designed this to work with a 600RPM DC gear motor. He then further reduced the output with a 3D-printed gearbox designed in Autodesk Fusion 360. An Arduino Uno board controls the motor through a BTS7960 motor driver and monitors the position with an AS5600 magnetic encoder. The total build cost should be around $30, not including the cost of the Arduino. More details on the project can be found in Muse’s Instructables write-up.

The post 3D-printed continuous rotation servo motor is super smooth appeared first on Arduino Blog.

Servos aren’t particularly hard to control with Arduinos, and in fact there’s a library available just for that purpose. Actually making the connection between the board and servo and managing one’s power usage will require a bit more finesse.

In the video below, Jeremy S. Cook explains how you can create an adapter that goes between your servo and an Uno, including a capacitor to help even out voltage spikes. While in most cases you would want to supply power your servos separately from the Arduino, this technique seems to work well in a quick round of tests. 

In addition, the clip shows how to attach a servo and then detach it to cut it off, using a function outside of the main loop and no additional hardware. This would be very helpful in applications where power is at a premium — or if you just don’t want the servo jittering back and forth!

In the midst of striking for climate change awareness, you may need some extra hands. That’s what [Anred Zynch] thought when they built Strettexter, the text-spraying writing robot that sprays onto streets.

The machine is loaded with 8 spray cans placed into a wooden box (a stop line with a wooden ledge to prevent the cans from falling out) and is fixed on top of a skateboard. It uses a PWN/Servo shield soldered onto an Arduino Uno connected to 8 servo motors (TowerPro SG90s) to control each of the spray bottles. A table converts every character into 5×8 bit fonts to fit the size of the spraying module. The device also includes a safety switch, as well as an encoder for measuring the horizontal distance traveled.

The Strettexter is activated by pulling on the skateboard once it’s been set up and connected to power (for portability, it uses a 8000mAh power bank). In its current configuration, the words stretch out pretty long, but some additional testing will probably lead to better results depending on the constraints of your canvas. The shorter the words, the more difficult it is for the white text to be legible, since there is significant spacing between printed bits.

We don’t condone public vandalism, so use this hack at your own discretion.

[Thanks neiß for the tip!]


  • Newsletter

    Sign up for the PlanetArduino Newsletter, which delivers the most popular articles via e-mail to your inbox every week. Just fill in the information below and submit.

  • Like Us on Facebook