Posts | Comments

Planet Arduino

Archive for the ‘arduino ventilators’ Category

This article was written by César Garcia, researcher at La Hora Maker.

This week, we will be exploring the Apollo Ventilator in detail! This project emerged at Makespace Madrid two months ago. It was a response to the first news about the expected lack of ventilators in Spain because of COVID-19.

Several members of the space decided to explore this problem. They joined Telegram groups and started participating in the coronavirus maker forum. In this group, they stumbled upon an initial design shared by a doctor, that would serve as a starting point for the ventilator project.

Credits: Apollo Ventilator (Photo by Apollo Ventilator Team)

To advance the project, a small but active group would join daily at “Makespace Virtual.” This virtual space used open-source video conferencing software Jitsi. Each one of the eight core members would contribute with their expertise in design, engineering, coding, etc. Due to the confinement measures in place, access to the space was quite limited. Everyone decided to work from home and a single person would merge all advances at the make space physically. A few weeks later doctors from La Paz Hospital in Madrid got in touch with the Apollo team, looking for ways to work together on the ventilator.

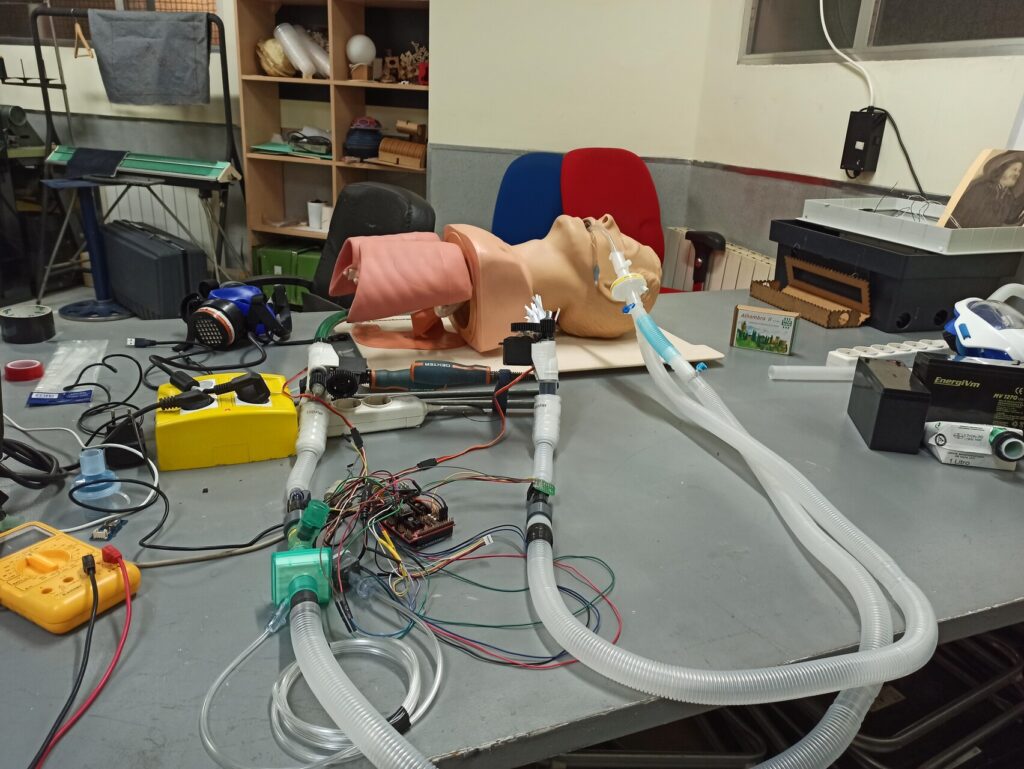
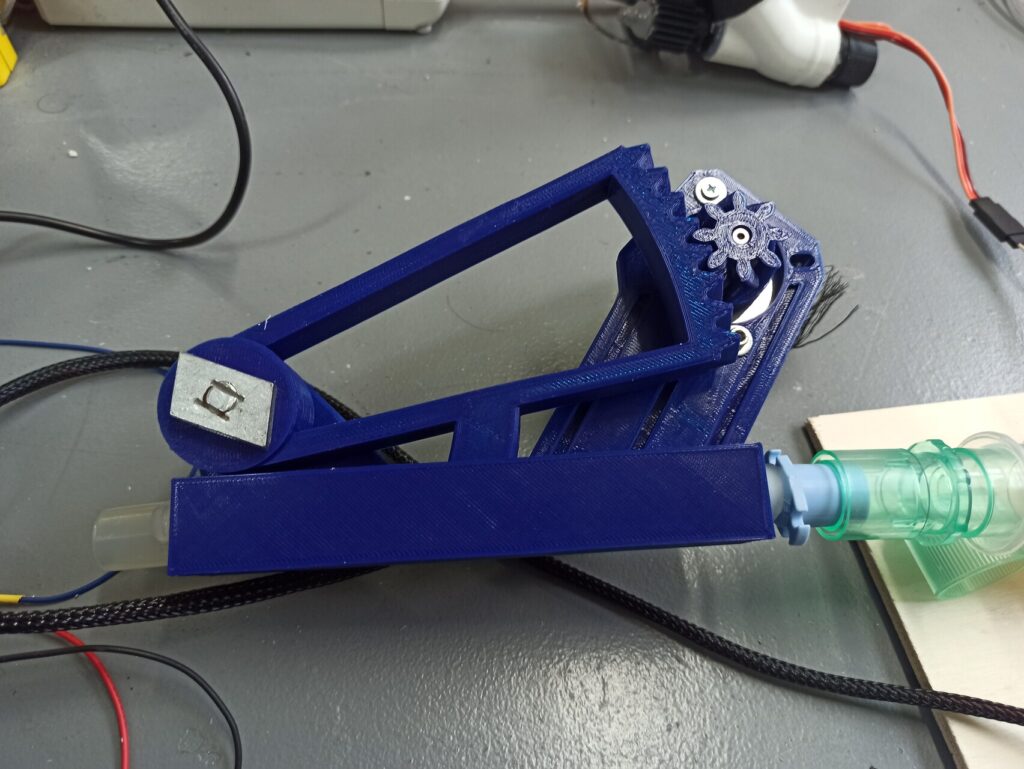
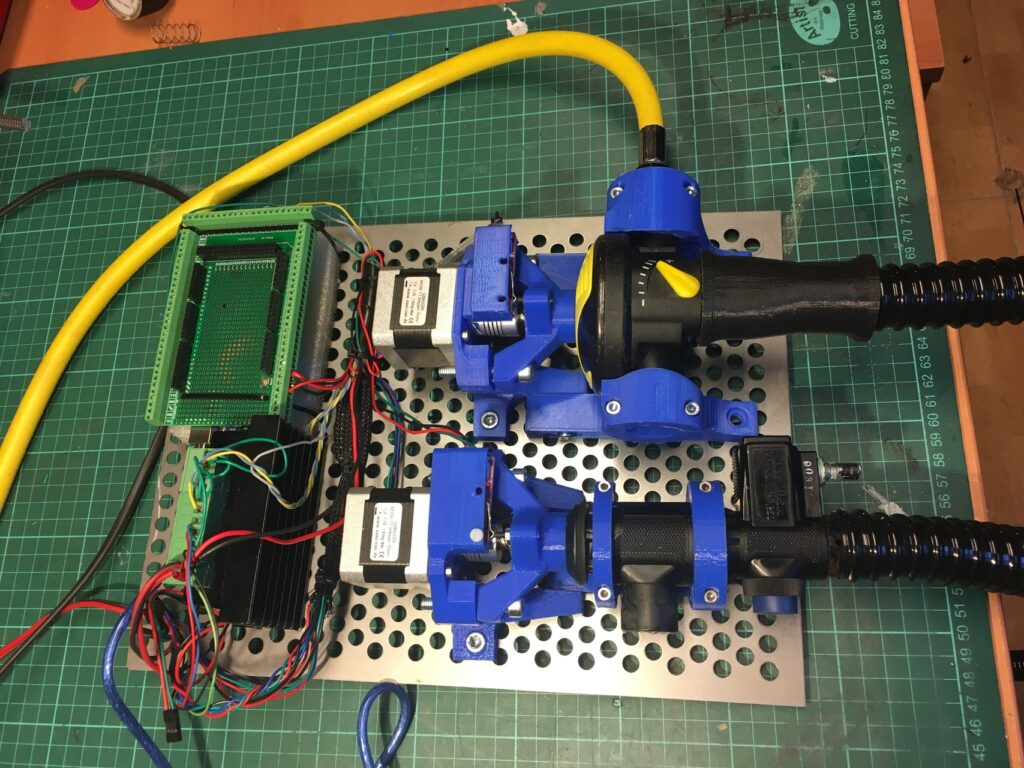
One of the hardest challenges to overcome was the lack of medical materials. The global demand has disrupted supply chains everywhere! The team had to improvise with the means at their disposal. To regulate the flow of gases, they created a 3D-printed pinch, that would collapse a medical-grade silicone tube in the input. This mechanism is controlled using the same electronics used in 3D printers: an Arduino Mega 2560 board with a RAMPS shield!

Credits: 3D-printed valve pinch (Photo by Apollo Ventilator Team)

In respect of sensors, they decided to go for certified versions that could be sterilized in an autoclave. They looked everywhere without success. A few days later, they got support from a large electronics supplier to provide them an equivalent model suited for children or adults up to 80 kg.

They decided to work on a shared repository to coordinate all the distributed efforts. This attracted new members and talents, doubling in size and sparking new lines of development. The Apollo Ventilator is an open-source project, meaning that new people can learn and create together new features.

Based on their expertise sourcing components, they wanted Apollo to be flexible. Most other certified ventilators are too specific. But they want to become “the Marlin for ventilators!” Marlin is one of the most used firmware in the world to control 3D printers. This software can manage all kinds of boards and adapt to different configurations easily.

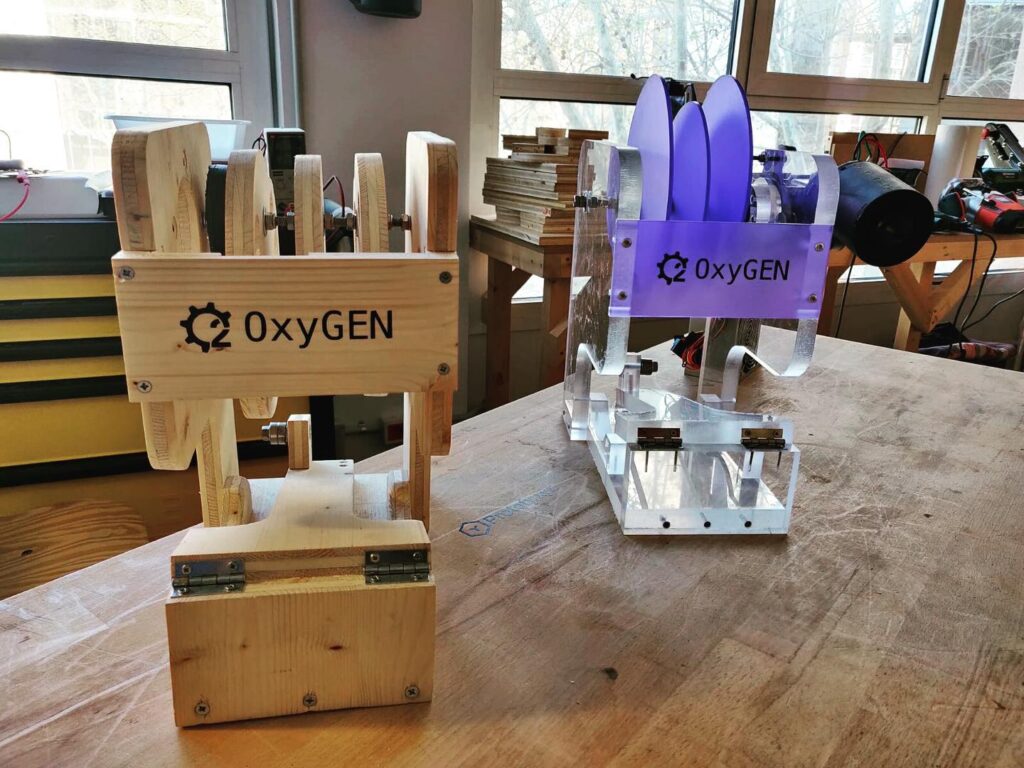
In the case of the Apollo Ventilator, the initial setup runs on a single Arduino Mega board. It uses the attached computer as the display. Current code can be configured to use a secondary Arduino board connected by serial port as a display too. As for the interface, there are several alternatives using GTK and QT. It’s also possible to send this data using MQTT, so data from many ventilators can be centralized. Other alternative builds used even regular snorkeling pieces! The Apollo Ventilator aspires to serve as the basis for several new projects and initiatives where off the shelf solutions are not available. Another potential outcome would be low-cost ventilators for veterinary practice or education.

Credits: Apollo Ventilator made out of snorkeling equipment (Photo by Apollo Ventilator Team)

The Apollo Ventilator is currently under development. They plan to expand the tests on lung simulators right now. Next steps would involve working with hospitals and veterinary schools. They will tackle these phases once the medical services are less overwhelmed.

The Apollo Ventilator takes its name from the famous Apollo missions to the moon. They managed to overcome all obstacles to take us where humanity had not been before. This project shares the same goals in regards to open-source ventilators. They are trying to overcome one of the biggest contemporary challenges, the COVID-19 pandemic. 

To learn more about the Apollo Ventilator, you can check out its repository. At this link you can also find an interview (in Spanish) to Javi, Apollo Ventilator’s project leader.

If you’d like to know more about Makespace Madrid, visit their website.

Arduino staff and Arduino community are strongly committed to support projects aimed at fighting and lessening the impact of COVID-19. Arduino products are essential for both R&D and manufacturing purposes related to the global response to Covid-19, in building digital medical devices and manufacturing processes for medical equipment and PPE. However, all prototypes and projects aimed to fight COVID-19 using Arduino open-source electronics and digital fabrication do not create any liability to Arduino (company, community and Arduino staff members). Neither Arduino nor Arduino board, staff members and community will be responsible in any form and to any extent for losses or damages of whatever nature (direct, indirect, consequential, or other) which may arise related to Arduino prototypes, Arduino electronic equipment for critical medical devices, research operations, forum and blog discussions and in general Covid-19 Arduino-based pilot and non pilot projects, independently of the Arduino control on progress or involvement in the research, development, manufacturing and in general implementation phases.

This article was written by César Garcia, researcher at La Hora Maker.

Welcome to the second article in this series on ventilators! As we’ve seen last week, ventilators are critical pieces of infrastructure. They must work reliably for long periods of time without missing a beat. Today we will uncover what are the different phases involved in developing one of these devices. Please, note that this process is a simplified one, based on current circumstances. It usually takes much more time to get one ventilator ready to market.

First stage is the ideation phase. In this initial stage, teams need to decide what technology they will use for their design. One of the most common these days is repurposing an AMBU, by operating it mechanically. There are other alternatives although like pneumatical, based on electro valves, etc, and some of the models approved in Spain involve techniques like High Frequency Jet Ventilation– that is a complete departure from the AMBU models! 

Andalucía Respira Ventilator photo (Source: Junta de Andalucía press release)

Given that the device is going to be used by medical personnel, it’s really important to look at the clinically relevant parameters for these devices. The MIT e-Vent team has done a wonderful job documenting these clinical aspects. You can find the key ventilator specifications to consider on their site.

It’s also worth noting that not all ventilators are meant to work the same. Some of them are better tailored for emergencies, while others are designed to support the patient for longer periods. Mechanical ventilators are covered by several ISO norms like 80601-2-12:2020. Several agencies have made the specifications available for free, to help new initiatives to develop ventilators against COVID-19.

Once you know which approach you would like to take, it’s time to start working on your first functional prototype.  Most of the designs will require you to get sensors and valves, as well as basic medical supplies. As per the control unit, we would recommend you to take a look at the Arduino boards better suited to the task in this presentation by Dario Pennisi.

Getting your prototype to pump air is the first step. But you need to control the amount of air in a precise way. Too much-pressurized gas could damage the patient lungs while falling short could suffocate them too. There are two approaches to this issue – some ventilators keep track of the volume of air, while others focus on pressure. To test this, you will need a lung simulator – there are plain simple models to really complex ones. UK’s MHRA offers an extensive test suite for Rapid Manufactured Ventilator Systems (RMVS) for this crisis. You can explore the test at Appendix B. 

Photo credits: MHRA’s diagram for the test circuit from the Rapidly Manufactured Ventilator System specification.

If you are producing ventilators in the UK, this is the main mandatory step right now. In other countries, like Spain, the regulation is a bit more complex – we will focus on those additional steps in the rest of this article.

Once you pass all tests with the simulator, you are required to run clinical tests with animals. As you can imagine, this is not something you can do at your local hackerspace or Fablab. Veterinarians and doctors need to supervise the test, and validate if your device works as expected. Even if you pass some initial tests, you may still need to do more extensive trials. If you plan to produce a non-emergency ventilator, you might be required to repeat tests on pathological animals.

Let’s say you pass all these tests, what is next step? You need to supply your prototype and manuals to an external lab. The goal is to make a third party verify the device specs in a controlled environment. They will test for Electromagnetic compliance, so that the device doesn’t interfere with external ICU equipment, neither is affected by third party emissions.

Once you have your documentation ready, you can submit it for review for the local regulatory agency (AEMPS in Spain, FDA in the USA), to receive final approval! Does this mean that the device is certified? Not really!

Regular certification doesn’t just focus on the device, but also on the manufacturing methods, facilities, quality control, etc. To produce certain equipment, you need to ensure the environmental conditions at the factory, proper hygienic procedures, etc are maintained.

How do you make sure that none of the people assembling or printing is not affected by coronavirus? Most prototypes that have passed all tests have been produced by companies with manufacturing experience. Some projects like Oxygen, offer a maker version and an industrial version, that was manufactured by a car company. In their repository, you can find all documents required to move from prototype to an industrial device!

OxYGEN-IP Ventilator exploded view (available at OxYGEN repo)

So, how are these devices going to be deployed? In Spain, they are being used as devices in a clinical trial. Ethical committees in the hospitals would need to approve the trials and set the rules for actual usage.  These devices will be used by trained doctors as compassive devices: if no other ventilator is available, they could decide to use them, after getting permission by patients or relatives. These clinical trials would start with a few patients and then scale to larger numbers if required.

In the next episodes, we will explore the stories behind some of these prototypes!

This article was written by César Garcia, researcher at La Hora Maker.

SARS-CoV-2 virus has been spreading around the world since December 2019. The virus causes a coronavirus disease 2019, also known as COVID-19. This respiratory illness can cause a severe acute respiratory syndrome. Critical patients often require a ventilator during their stay at Intensive Care Units, thus the demand for ventilators has skyrocketed, with traditional manufacturers not able to keep up. Because of this, teams around the world are looking for alternatives and are creating ventilators using Arduino! 

In this new series on ventilators on the Arduino blog, we will explore these devices more detail. We will focus on the steps needed to test a ventilator. Also, on the different technologies available to move the air in a precise way. We will highlight what clinical variables do doctors need. And we will interview some of the teams working on these devices. Let’s start with a brief overview of ventilators using Arduino as a control system!

At the beginning of the crisis, most people started looking for open source ventilators. There were several models available but one of the most popular was MIT Low-Cost Ventilator. This model uses an Ambu, also known as Bag Valve Mask (BVM). These bags are used by paramedics on emergencies. They press the bag to insufflate air into the patient. Given they have to press it by hand, it gets a very tiresome movement after a few minutes. MIT Low-Cost Ventilator automates this movement, saving doctors or nurses of this manual task. Even though, the paper describing the ventilator is quite useful and complete, this model did not pass any clinical trials. It was released on 2010 and nobody took development further until this year.

One of the first teams to launch a new project was the Reesistencia Team. This virtual team, based on Asturias and the Canary Islands in Spain, started working together after meeting in a Telegram group. The team consists of a doctor and several engineers, working to create a DIY open source ventilator, based on Arduino. This model is based around a Jackson Rees bag instead of an Ambu bag. This should allow the device to operate longer than the ones based on emergency bags. This team is active on Twitter, were you can find some of their initial designs.

Latest version from Reesistencia Team 24

This spark of maker ingenuity inspired several other teams to launch their own versions and prototypes in Spain. Oxygen team embraced rapid prototyping, starting with a machine made of scraped wood up to an industrial machine. SEAT, the Spanish car company, has produced five hundred of these devices so far. 

Initial prototypes of OxyGEN ventilador from Protofy.xyz

MIT E-Vent team has recovered the original MIT ventilator and evolved the concept further. They have done already several tests on animals to evaluate the new version. The AmboVent team from Israel has shared another BVM ventilator based on Arduino Nano, and they have provided very complete documentation.

Given the current pace of development it is very hard to document all the processes and steps involved. One of our favorites in this regard is University of Florida Health Open Source Ventilator. They have shared all design documents on their repository along with short videos. They even provide a live stream showing the stress tests for their ventilator!

Next week, we will explore the steps involved in creating a ventilator from scratch. This will help us discover common milestones and give us better tools to evaluate current designs.

Warning: Ventilators are complex machines mean to be operated by trained doctors. They need oxygen and compressed air supplies to operate. Patients are fully dependant on these machines to survive, so they need to run flawlessly. Please, explore this topic with caution and check documentation about previous trials before trying to replicate some of these projects. Not all of them have passed all required clinical trials and validations!

If you’d like to know more about ventilators, check the “Combating COVID-19 Conference” videos.

Arduino staff and Arduino community are strongly committed to support projects aimed at fighting and lessening the impact of COVID-19. Arduino products are essential for both R&D and manufacturing purposes related to the global response to Covid-19, in building digital medical devices and manufacturing processes for medical equipment and PPE. However, all prototypes and projects aimed to fight COVID-19 using Arduino open-source electronics and digital fabrication do not create any liability to Arduino (company, community and Arduino staff members). Neither Arduino nor Arduino board, staff members and community will be responsible in any form and to any extent for losses or damages of whatever nature (direct, indirect, consequential, or other) which may arise related to Arduino prototypes, Arduino electronic equipment for critical medical devices, research operations, forum and blog discussions and in general Covid-19 Arduino-based pilot and non pilot projects, independently of the Arduino control on progress or involvement in the research, development, manufacturing and in general implementation phases.


  • Newsletter

    Sign up for the PlanetArduino Newsletter, which delivers the most popular articles via e-mail to your inbox every week. Just fill in the information below and submit.

  • Like Us on Facebook