26
Walkman-esque Human Interface Device
arduino, arduino hacks, ATMEGA8, hid, human interface device, keyboard, multimedia, USB Comments Off on Walkman-esque Human Interface Device
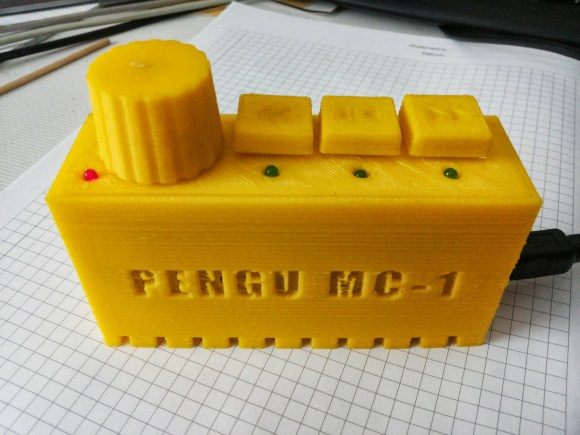
Cheap keyboards never come with extra buttons, and for [Pengu MC] this was simply unacceptable. Rather than go out and buy a nice keyboard, a microcontroller was found in the parts drawer and put to work building this USB multimedia button human interface device that has the added bonus of looking like an old-school Walkman.
The functions that [Pengu MC] wants don’t require their own drivers. All of the buttons on this device are part of the USB standard for keyboards: reverse, forward, play/pause, and volume. This simplifies the software side quite a bit, but [Pengu MC] still wrote his own HID descriptors, tied all of the buttons to the microcontroller, and put it in a custom-printed enclosure.
If you’re looking to build your own similar device, the Arduino Leonardo, Micro, or Due have this functionality built in, since the USB controller is integrated on the chip with everything else. Some of the older Arduinos can be programmed to do the same thing as well! And, with any of these projects, you can emulate any keypress that is available, not just the multimedia buttons.
Filed under: Arduino Hacks