Posts | Comments

Planet Arduino

Archive for the ‘split keyboard’ Category

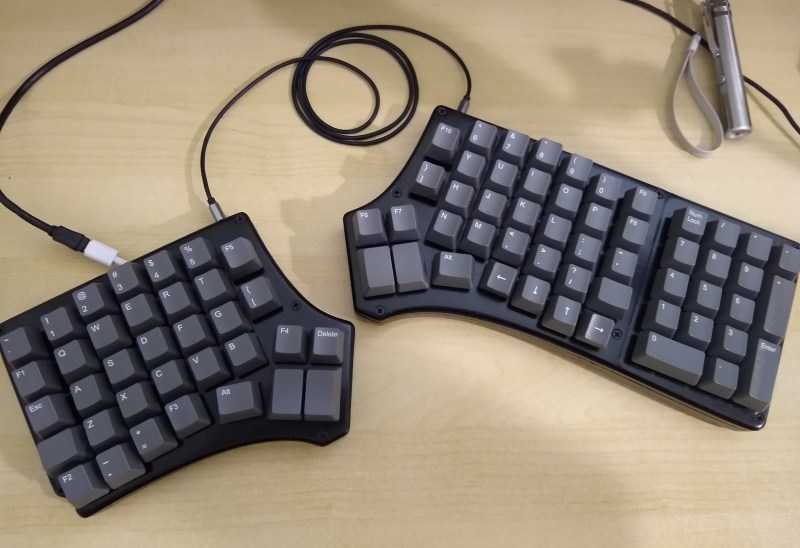
What’s the worst thing about split keyboards? If they have one general fault, it’s that almost none of them have a number pad. If you can fly on that thing, but struggle with using the top row numbers, you will miss the num pad terribly, trust us. So what’s the answer? Design your own keyboard, of course. [ToasterFuel] had enough bread lying around to cook up a little experiment for his first keyboard build, and we think the result is well done, which is kind of rare for first keebs.
This design is based on the Redox, itself a remix of the ErgoDox that aims to address the common complaints about the latter — it’s just too darn big, and the thumb clusters are almost unusable. We love how customized this layout is, with its sprinkling of F keys and Escape in the Caps Lock position. Under those keycaps you’ll find 100% Cherry MX greens, so [ToasterFuel] must have pretty strong fingers to pound those super clackers.

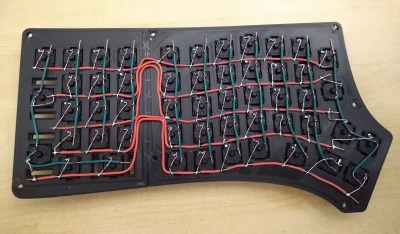
Everything else under the hood is pretty standard, with a pair of Arduino Pro Micros running the show. [ToasterFuel] had to wire up the whole thing by hand because of the num pad, and we’re impressed that he built this entire project in just three weeks. And that includes writing his own firmware!

Already found or built a split you love, but still miss the num pad? Why not build one to match your keyboard?

It happens to pretty much everyone who gets into keyboards. No commercial keyboard can meet all your needs, so you start building them. Use them a while, find problems, build a new keyboard to address them. Pretty soon you think you have enough user experience to design the perfect keeb — the be-all, end-all magnum opus clacker you can take to the grave. This time, it happened to [aydenvis]. We must say, the result is quite nice. But will it still be perfect in six months?

As you might expect, this board uses an Arduino Pro Micro. We can’t say for sure, but it looks like [aydenvis] created a socket with a second Pro Micro board populated only with female header. That’s definitely a cool idea in case the board fails. It also has two rotary encoders and a pair of toggle switches to switch controller and secondary designations between the PCBs.

We like the philosophy at play in this 36-key ‘board that states that prime ergonomics come when each finger must only travel one key distance from the home row. This of course requires programming layers of functionality into the firmware, which is easy enough to set up, but can be tricky to memorize. One thing that will help is the color-coded RGB underglow, which we’re going to call sandwich glow because it is emanating from the middle of a stacked pair of PCBs floating on 7 mm standoffs. We only wish we could hear how loudly those jade Kailh choc switches can clack. The board files are up on GitHub, so we may just have to make our own.

Indeed, many keebs we see use a Pro Micro or two, but here’s a tasty split that runs on a Raspberry Pi Zero W.

Via reddit

Oh, sure, there have been a few cube-shaped PCs over the years, like the G4 and the NeXT cube. But can they really be called cubes when the display and the inputs were all external? We think not.

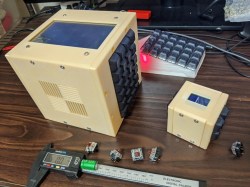
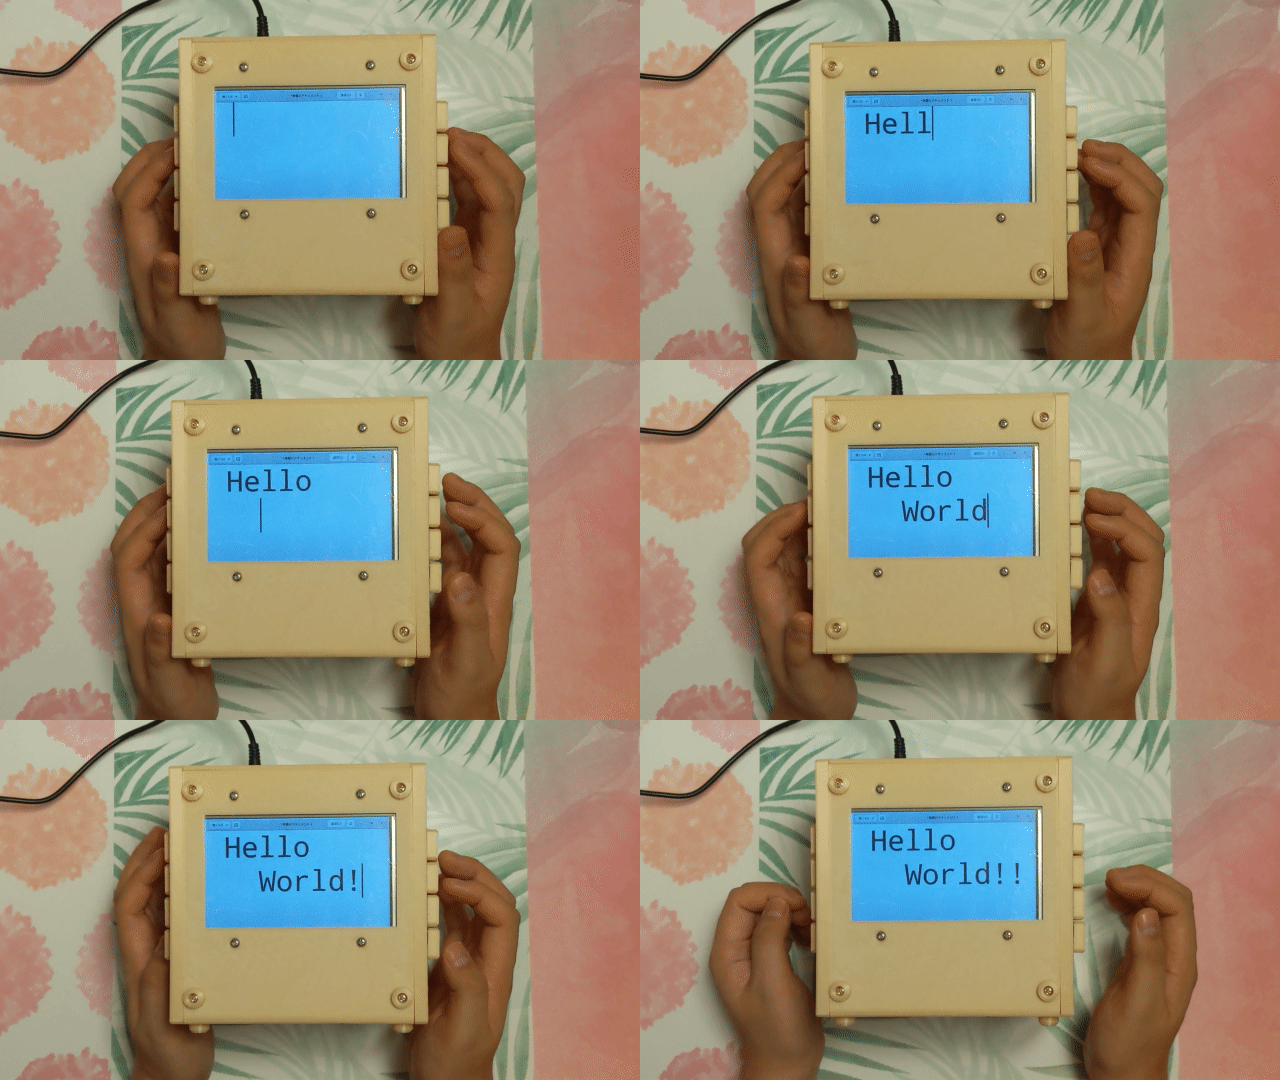
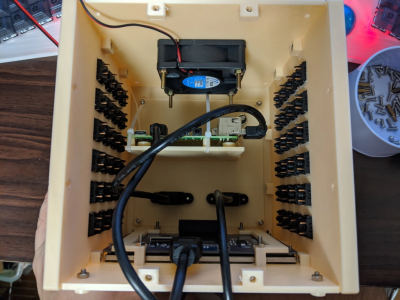
[ikeji] doesn’t think so either, and has created a cube PC that puts them all to shame. Every input and output is within the cube, including our favorite part — the 48-key ortholinear keyboard, which covers two sides of the cube and must be typed on vertically. (If you’ve ever had wrist pain from typing, you’ll understand why anyone would want to do that.) You can see a gif of [ikeji] typing on it after the break.

Inside the 3D printed cube is a Raspberry Pi 4 and a 5″ LCD. There’s also an Arduino Pro Micro for the keyboard matrix, which is really two 4×6 matrices — one for each half. There’s a 6cm fan to keep things cool, and one panel is devoted to a grille for heat output. Another panel is devoted to vertically mounting the microcontrollers and extending the USB ports.

Don’t type on me or my son ever again.

When we first looked at this project, we thought the tiny cube was a companion macro pad that could be stored inside the main cube. It’s really a test cube for trying everything out, which we think is a great idea and does not preclude its use as a macro pad one of these days. [ikeji] already has plenty of plans for the future, like cassette support, an internal printer, and a battery, among other things. We can’t wait to see the next iteration.

We love a good cyberdeck around here, and it’s interesting to see all the things people are using them for. Here’s a cyberduck that quacks in Python and CircuitPython.


  • Newsletter

    Sign up for the PlanetArduino Newsletter, which delivers the most popular articles via e-mail to your inbox every week. Just fill in the information below and submit.

  • Like Us on Facebook