Posts | Comments

Planet Arduino

Archive for the ‘Gaming’ Category

featuredYou’ve amassed a small fortune in diamonds, wood, coal, iron, food, and the other resources you need. You’ve spent hours building the perfect Minecraft fortress to stockpile your goods. But who will watch your stash while you’re on another server? In this project guide, you’ll learn to use Arduino coding […]

Read more on MAKE

The post Minecraft Activated Arduino Alarm appeared first on Make:.

Mar
13

Rocket Controls Fit for a Kerbal

arduino, arduino hacks, controller, Gaming, kerbal space program, LCD, space Comments Off on Rocket Controls Fit for a Kerbal 

Kerbal Space Program is a space simulation game. You design spacecraft for a fictional race called Kerbals, then blast those brave Kerbals into space. Sometimes they don’t make it home.

If controlling spacecraft with your WASD keys isn’t immersive enough for you, [marzubus] has created a fully featured KSP control console. It sports a joystick, multiple displays, and an array of buttons and switches for all your flight control needs. The console was built using a modular approach, so different controls can be swapped in and out as needed.

Under the hood, three Arduinos provide the interface between the game and the controls. One Arduino Mega runs HoodLoader2 to provide joystick data over HID. A second Mega uses KSPSerialIO to communicate with the game over a standard COM port interface. Finally, a Due interfaces with the displays, which provide information on the current status of your spacecraft.

All of the parts are housed in an off the shelf enclosure, which has a certain Apollo Mission Control feel to it. All [marzubus] needs now is a white vest with a Kerbal badge on it.


Filed under: Arduino Hacks

[Bob’s] Pac-Man clock is sure to appeal to the retro geek inside of us all. With a tiny display for the time, it’s clear that this project is more about the art piece than it is about keeping the time. Pac-Man periodically opens and closes his mouth at random intervals. The EL wire adds a nice glowing touch as well.

The project runs off of a Teensy 2.0. It’s a small and inexpensive microcontroller that’s compatible with Arduino. The Teensy uses an external real-time clock module to keep accurate time. It also connects to a seven segment display board via Serial. This kept the wiring simple and made the display easy to mount. The last major component is the servo. It’s just a standard servo, mounted to a customized 3D printed mounting bracket. When the servo rotates in one direction the mouth opens, and visa versa. The frame is also outlined with blue EL wire, giving that classic Pac-Man look a little something extra.

The physical clock itself is made almost entirely from wood. [Bob] is clearly a skilled wood worker as evidenced in the build video below. The Pac-Man and ghosts are all cut on a scroll saw, although [Bob] mentions that he would have 3D printed them if his printer was large enough. Many of the components are hot glued together. The electronics are also hot glued in place. This is often a convenient mounting solution because it’s relatively strong but only semi-permanent.

[Bob] mentions that he can’t have the EL wire and the servo running at the same time. If he tries this, the Teensy ends up “running haywire” after a few minutes. He’s looking for suggestions, so if you have one be sure to leave a comment.


Filed under: Arduino Hacks, clock hacks
Jan
09

Edidoom: Intel Edison Running Doom

arduino, doom, edison, Gaming, General, Intel Edison Comments Off on Edidoom: Intel Edison Running Doom 

Wiring of the TFT to an Intel EdisonProving that the Intel Edison is really a full Pentium-class PC, Lutz has successfully ported Doom to the tiny board. For those who aren’t quite as old as I am and are unfamiliar with the classic title, Doom literally blew away gamers in 1993 with a combination of fast paced […]

Read more on MAKE

Aug
08

A game controller that’s mondo customizable with Lego and Android

arduino, controller, Fun & Games, Gaming, LEGO Comments Off on A game controller that’s mondo customizable with Lego and Android 

Strange Meadowlark’s Lego/Arduino Game Controller: because one size does not fit all.Strange Meadowlark’s Lego/Arduino Game Controller is a collection of off the shelf parts and surplus that fit together perfectly.

Read more on MAKE

Jun
23

Handheld Game System Powered by Arduino

adafruit, arduino, arduino hacks, ATmega, Gaming, LCD, pcb, portable, Shapeoko, Video Games Comments Off on Handheld Game System Powered by Arduino 

DIY Handheld Game System

These days, it’s easy enough to play games on the go. If you have a smart phone, you are pretty much set. That doesn’t mean you can’t still have fun designing and building your own portable gaming system, though.

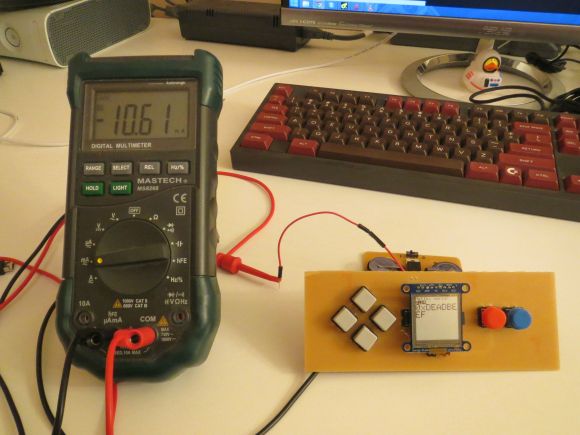
[randrews] did just that. He started out by purchasing a small memory LCD display from Adafruit. The screen he chose is low power as far as screens go, so it would be a good fit for this project. After testing the screen with a quick demo program, it was time to start designing the circuit board.

[randrews] used Eagle to design the circuit. He hand routed all of the traces to avoid any weird issues that the auto router can sometimes cause. He made an efficient use of the space on the board by mounting the screen over top of the ATMega chip and the other supporting components. The screen is designed to plug in and out of the socket, this way it can be removed to get to the chip. [randrews] needs to be able to reach the chip in order to reprogram it for different games.

Once the board design was finished, [randrews] used his Shapeoko CNC mill to cut it out of a copper clad board. He warns that you need to be careful doing this, since breathing fiberglass dust is detrimental to living a long and healthy life. Once the board was milled out, [randrews] used a small Dremel drill press to drill all of the holes.

The final piece of the puzzle was to figure out the power situation. [randrews] designed a second smaller PCB for this. The power board holds two 3V coin cell batteries. The Arduino expects 5V, so [randrews] had to use a voltage regulator. This power board also contains the power switch for the whole system.

The power board was milled and populated. Then it was time to do some measurements. [randrews] measured the current draw and calculates that he should be able to get around 15 hours of play time using the two 3V coin cell batteries. Not bad considering the size.

[via Reddit]


Filed under: Arduino Hacks
Nov
06

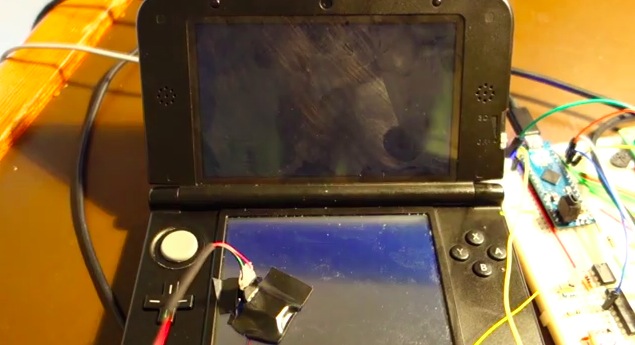
Pokemon X and Y: a Fully Automatic Shiny Finder made with Arduino Micro

arduino, Arduino micro, game, Gaming, Hacks, micro, nintendo, pokemon Comments Off on Pokemon X and Y: a Fully Automatic Shiny Finder made with Arduino Micro 

Pokemon Nintendo

How to enhance performance in gaming from an engineering point of view? dekuNukem created a hands-free finder  built using Arduino Micro to accomplish the task of chaining fishes at full speed and without fail at a touch of a button:

The fishing keeps going without human input until a shiny shows up, at which point it stops and sound a buzzer to notify the user.

It took 81 chains to catch a shiny in this case, but during my other tests it’s usually around 50, and sometimes even less than 20 chains get you one.

Watch the detailed video below and check the code:


Dec
13

Arduino-Controlled Split-Flap Game

arduino, Gaming, gifts Comments Off on Arduino-Controlled Split-Flap Game 

FDXV1KZHA4MBLH6.LARGERichard from the Netherlands built this split-flap game as a gift to his niece. Actually, the gift is inside, but you have to win the game to get it! The wooden box and all the components for the Split-flap display were made on my CNC machine. I used 2mm thick [...]

Read the full article on MAKE


  • Newsletter

    Sign up for the PlanetArduino Newsletter, which delivers the most popular articles via e-mail to your inbox every week. Just fill in the information below and submit.

  • Like Us on Facebook