Posts | Comments

Planet Arduino

Archive for the ‘resin’ Category

With how cheap they’re getting, everyone seems to be jumping on the resin printer bandwagon. They may not be able to fully replace your trusty old FDM printer, but for certain jobs, they just can’t be beaten. Sadly though, creating those smooth time-lapse videos of your prints isn’t quite as easy to do as it is on their filament-based counterparts.

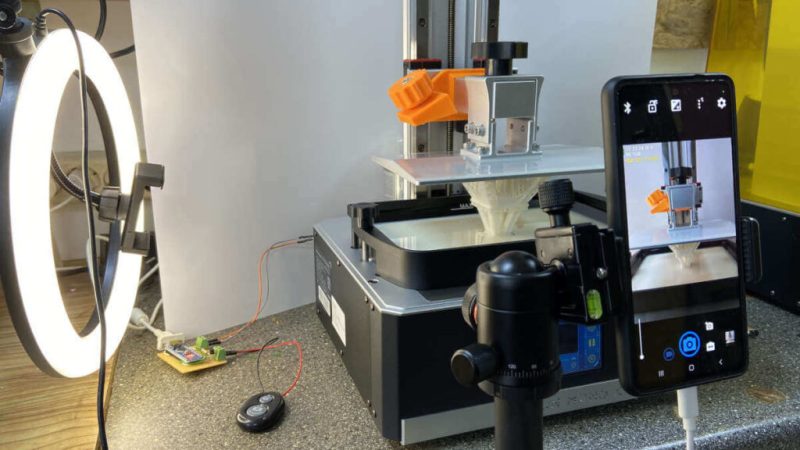
Not as easy, perhaps, but not impossible. [Fraens] found a way to make time-lapses on any resin printer, and in a wonderfully hacky way. First, you need to find a smartphone, which shouldn’t be too hard, given how often we all tend to upgrade. [Fraens] recommends replacing the standard camera app on the phone with Open Camera, to prevent it from closing during the long intervals with nothing happening. The camera is triggered by any readily available Bluetooth dongle, which is connected via a simple transistor circuit to an Arduino output. To trigger the shutter, a light-dependent resistor (LDR) is connected to one of the microcontroller’s inputs. The LDR is placed inside the bed of the resin printer — an Anycubic Photon in this case — where light from the UV panel used to cross-link the resin can fall on it. A simple bit of Arduino code triggers the Bluetooth dongle at the right moment, capturing a series of stills which are later stitched together using DaVinci Resolve.

The short video below shows the results, which look pretty good to us. There are other ways to do this, of course, but we find the simplicity of this method pleasing.

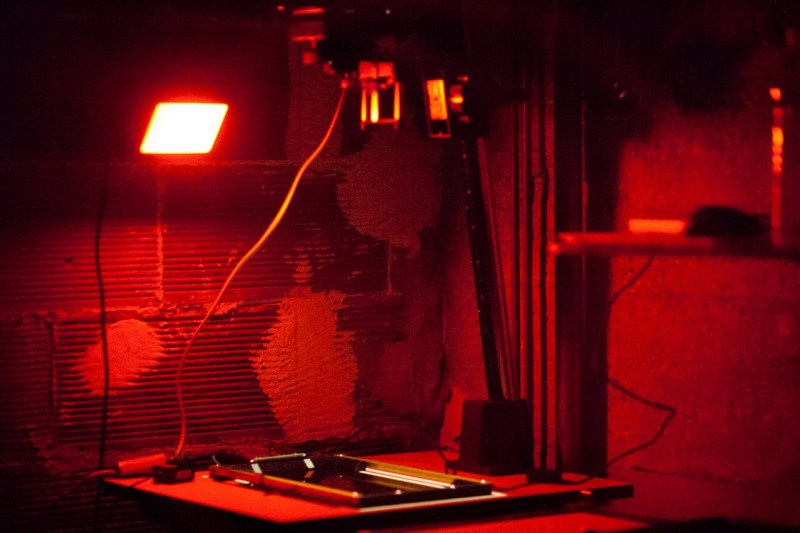
As the world becomes more and more digital, there are still a few holdouts from the analog world we’ve left behind. Vinyl records are making quite the comeback, and film photography is still hanging on as well. While records and a turntable have a low barrier for entry, photography is a little more involved, especially when developing the film. But with the right kind of equipment you can bridge the gap from digital to analog with a darkroom setup that takes digital photographs and converts them to analog prints.

The project’s creator, [Muth], has been working on this project since he found a 4K monochrome display. These displays are often used in resin 3D printers, but he thought he could put them to use developing photographs. This is much different from traditional darkroom methods, though. The monochrome display is put into contact with photo-sensitive paper, and then exposed to light. Black pixels will block the light while white pixels allow it through, creating a digital-to-analog negative of sorts. With some calibration done to know exactly how long to expose each “pixel” of the paper, the device can create black-and-white analog images from a digital photograph.

[Muth] notes that this method isn’t quite as good as professional print, but we wouldn’t expect it to be. It creates excellent black-and-white prints with a unique method that we think generates striking results. The 4K displays needed to reproduce this method aren’t too hard to find, either, so it’s fairly accessible to those willing to build a small darkroom to experiment. For those willing to go further, take a look at some other darkroom builds we’ve seen in the past.


  • Newsletter

    Sign up for the PlanetArduino Newsletter, which delivers the most popular articles via e-mail to your inbox every week. Just fill in the information below and submit.

  • Like Us on Facebook