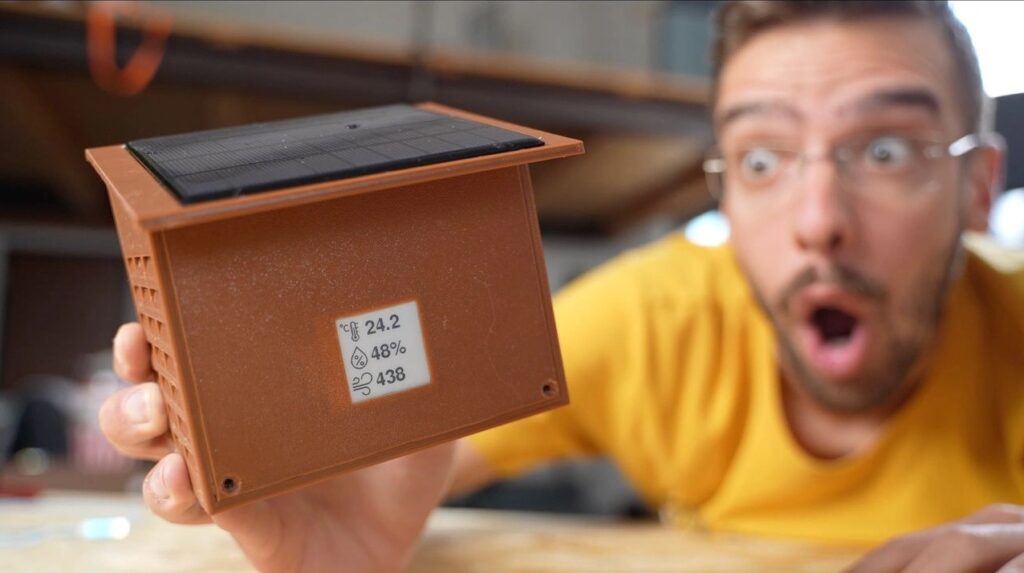
The world just recognized Earth Day and it was a good reminder that we all have a responsibility to protect the planet. Unfortunately, many of our devices suck up energy in direct opposition to that goal. But the market has proven that we aren’t willing to sacrifice convenience. Luckily, that isn’t always necessary. To demonstrate that, overVolt built this solar-powered weather station that features an E Ink display.
The first — and usually easiest — step in the right direction is reducing energy consumption. And it is often possible to make efficient devices that don’t require any sacrifices at all. In this case, overVolt achieved that with the use of an E Ink screen and a power-sipping Arduino Nano ESP32 board.
E Ink technology is perfect for this application, because a weather station doesn’t need to update often. The display only consumes power during a refresh and the rest of the time it continues showing very readable content without any power.
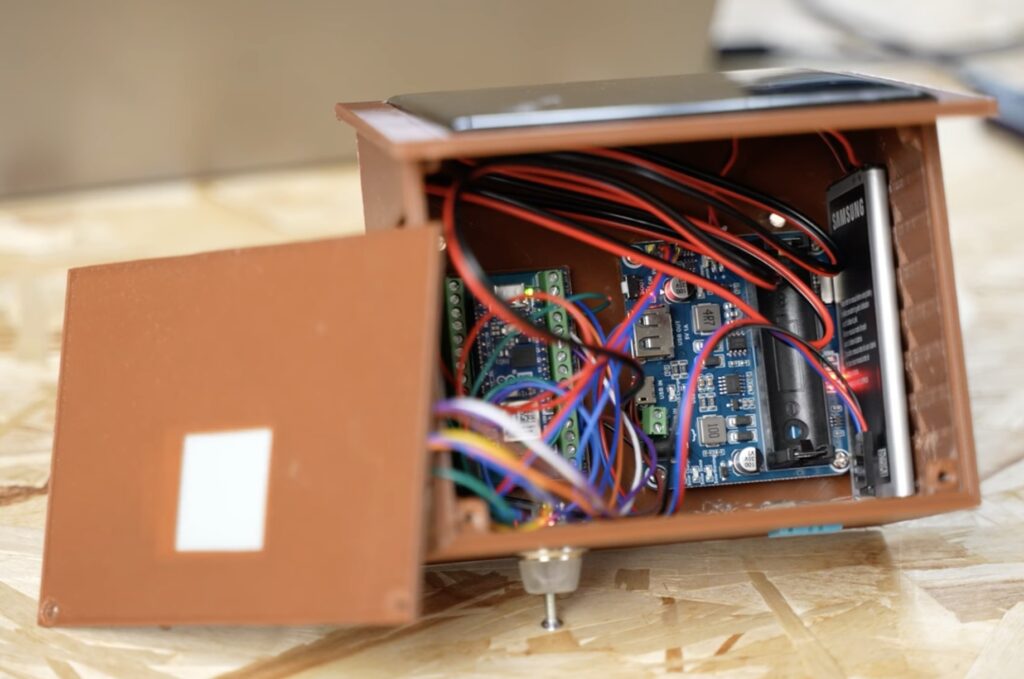
The next step was to eliminate any energy from fossil fuels. Because this weather station consumes so little power, it can run entirely on the power coming from a small solar panel. Sunlight isn’t always available, so overVolt added a lithium battery to store power through dark periods.
The Arduino monitors temperature and humidity with a DHT11 sensor, as well as air quality with an MQ-135 sensor. And because this is a Nano ESP32, it can also connect to the internet to pull weather forecasts.
While lithium batteries aren’t great from an environmental perspective, overVolt’s weather station proves that we can take positive steps without sacrificing convenience.
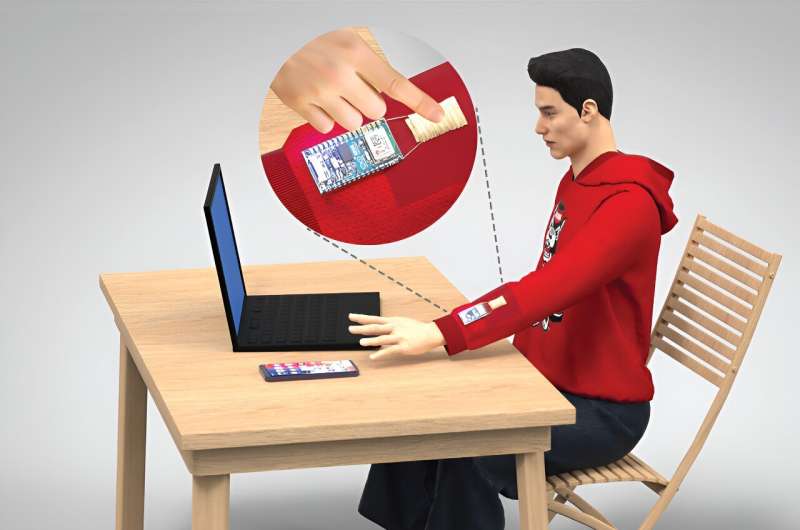
The entire tech industry is desperate for a practical wearable HMI (Human Machine Interface) right now. The most newsworthy devices at CES this year were the Rabbit R1 and the Humane AI Pin, both of which are attempts to streamline wearable interfaces with and for AI. Both have numerous drawbacks, as do most other approaches. What the world really needs is an affordable, practical, and unobtrusive solution, and North Carolina State University researchers may have found the answer in machine learning-optimized fabric buttons.
It is, of course, possible to adhere a conventional button to fabric. But by making the button itself from fabric, these researchers have improved comfort, lowered costs, and introduced a lot more flexibility — both literally and metaphorically. These are triboelectric touch sensors, which detect the amount of force exerted on them by measuring the energy between two layers of opposite charges.
But there is a problem with this approach: the measured values vary dramatically based on usage, environmental conditions, manufacturing tolerances, and physical wear. The fabric button on one shirt sleeve may present completely different readings than another. If this were a simple binary button, it wouldn’t be as challenging of an issue. But the whole point of this sensor type is to provide a one-dimensional scale corresponding to the pressure exerted, so consistency is important.
Because achieving physical consistency isn’t practical, the team turned to machine learning. A TensorFlow Lite for Microcontrollers machine learning model, running on an Arduino Nano ESP32 board, interprets the readings from the sensors. It is then able to differentiate between several interactions: single clicks, double clicks, triple clicks, single slides, double slides, and long presses.
Even if the exact readings change between sensors (or the same sensor over time), the patterns are still recognizable to the machine learning model. This would make it practical to integrate fabric buttons into inexpensive garments and users could interact with their devices through those interfaces.
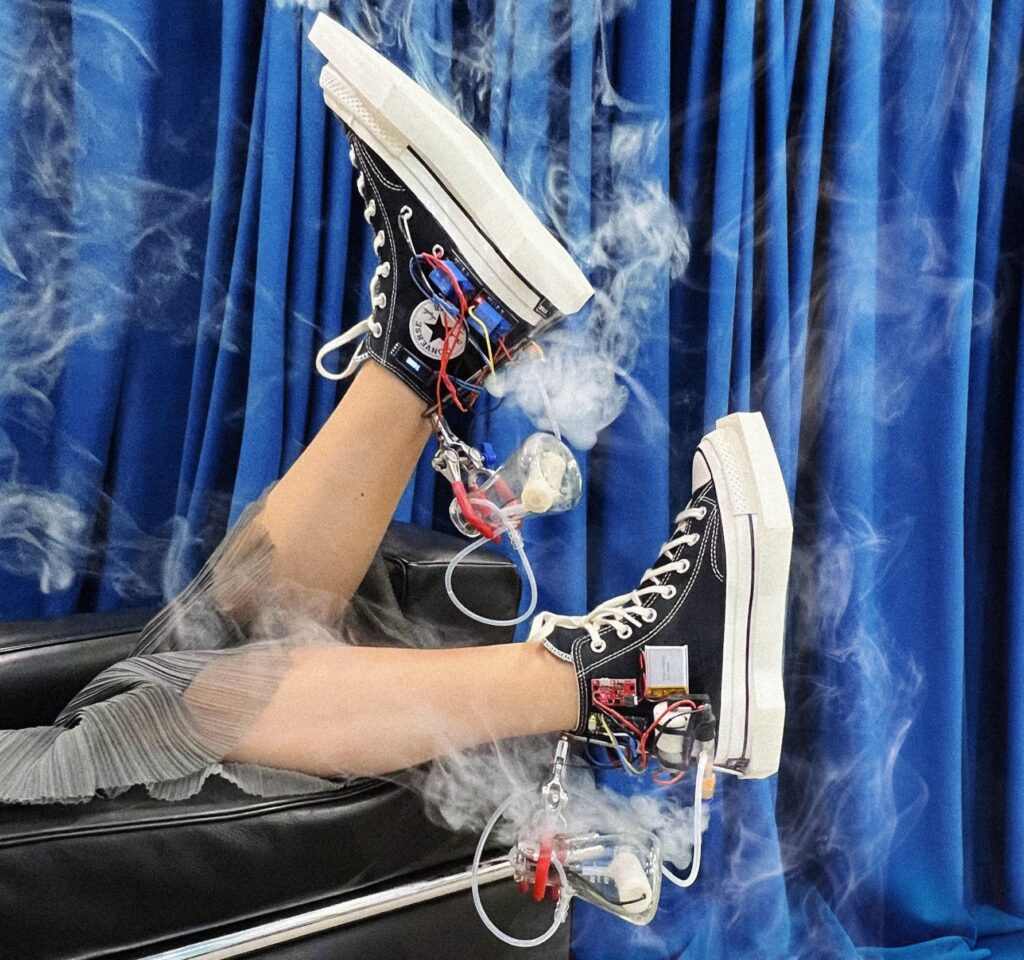
Once you get bored with the shoes on the shelves at Payless, you can dive into the fascinating world of custom sneakers. Converse Chuck Taylors are probably the most popular canvas for shoe customizers, as they offer plenty of room for paint and jewel bedazzling. But creative technologist Tigris Li took it to a whole other level with her Chuck 70s Smoke Shoes that blow clouds as the wearer walks.
Each shoe has an apparatus that looks like it was cobbled together by a mad scientist trying invent their way into dunking. When the wearer puts pressure down on the sole, that apparatus will puff out a cloud of smoke. Those soles are actually custom, too. Li 3D-printed them in TPU to give the shoes a cool, angular look. They also contain the force sensors that trigger the smoke production.
An Arduino Nano ESP32 board in each shoe monitors the force sensor in the sole. When the signal surpasses a set threshold, the Arduino activates a relay that allows power to flow through a heating coil. That coil sits in smoke machine fluid that comes from a tiny flask attached to the shoe. With power flowing, the coil burns the fluid and that expands to create the smoke.
There are almost endless variations of clocks for sale on the internet today, but it is still easy to end up in a situation where you can’t quite find a model with the style and features you want. Marco Zonca ended up with that problem while searching for a new clock to put in his music studio. Nothing on the market fit the bill, so he built this minimalist network-updated digital clock.
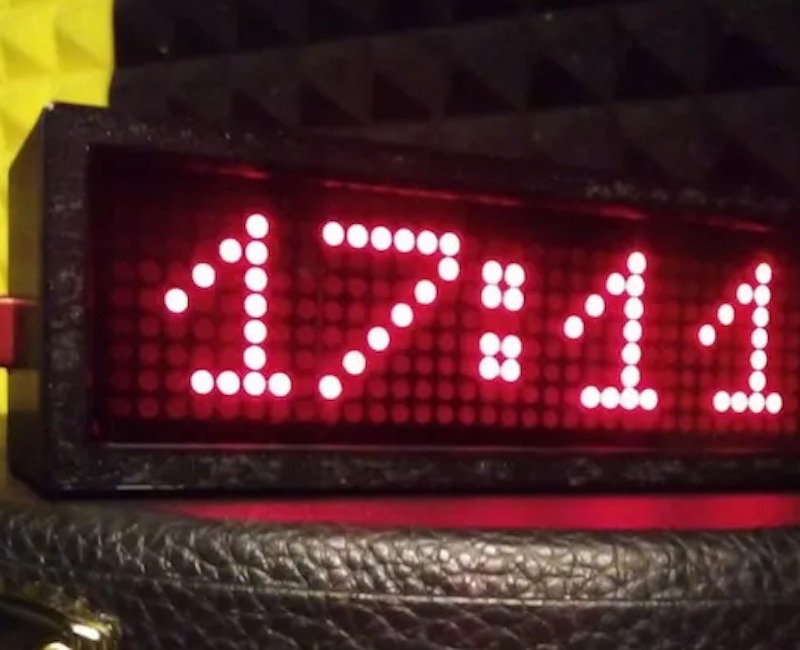
Zonca wanted a simple design, the ability to adjust brightness, and NTP (Network Time Protocol) updates. There are clocks available with those features, but nothing in the style Zonca wanted. So he created the perfect clock for himself. It displays 24-hour time across a red LED matrix, lets the user control settings like brightness via Bluetooth® Low Energy communication, and always stays in sync with network time.
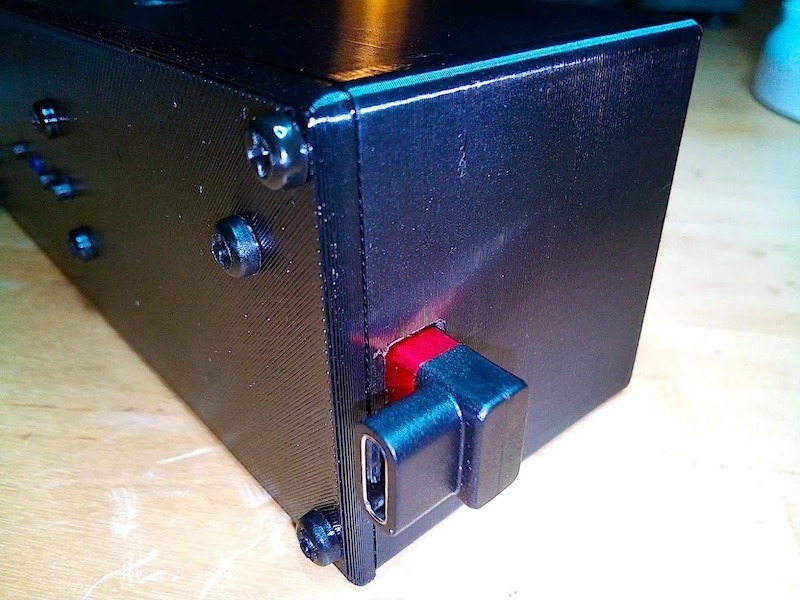
An Arduino Nano ESP32 board, programmed through Arduino Web Editor, controls all of those functions. It mounts onto a custom PCB that Zonca designed for this clock. The PCB also hosts an 8×32 LED matrix display with MAX7219 driver. Three buttons on the PCB let the user select modes. The PCB fits into a black 3D-printed enclosure that reflects the overall minimalist style.
Now Zonca has the perfect clock for his music studio. If you like the look of it, the sketch, PCB files, and 3D enclosure are all available on Hackster.io.
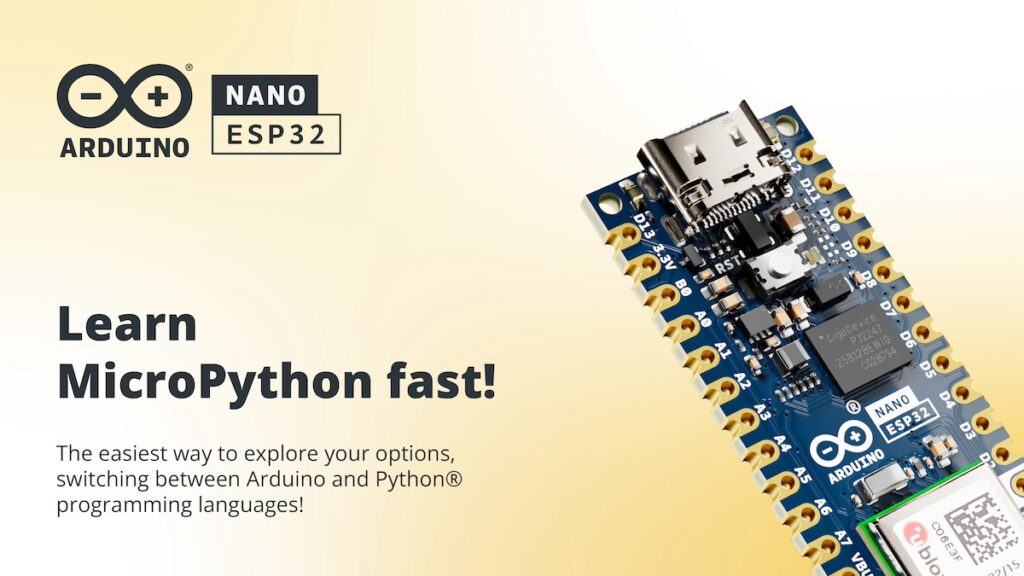
In the past, DIY tech enthusiasts faced limitations when it came to creating small and intricate projects. However, the introduction of technologies like MicroPython and tiny microcontroller boards such as the Arduino Nano revolutionized the field. This enabled makers to build genuinely projects like wearables, miniature robotics, and ultra-thin gadgets, ushering in a new era of innovation. In this article, we’ll explore MicroPython, its utility, the capabilities of the Arduino Nano family, and showcase some shrunken-down project examples.
What is MicroPython (and why does it matter)?
The Python programming language dates back to 1991, and is one of the most widely-known and used languages out there.
In 2014, a more lightweight version of Python was released, with the goal of being run on microcontrollers and other small systems. Thus, MicroPython was born and a new era of engineering began.
What does MicroPython bring to the table? Let’s take a look at some of the advantages:
It’s simple, allowing developers to write code in the famously accessible Python language.
It’s designed for small-scale projects and is able to operate with limited resources.
It’s versatile, and has the ability to work across a range of different microcontroller platforms.
It’s been used, successfully, in countless projects including Internet of Things devices, robotics, sensors and much more.
Understanding Nano boards
Now let’s look at the second ingredient in creating amazing, tiny projects — Nano boards. Developed by Arduino, these boards consist of a microcontroller unit, input and output pins, and components like LEDs and sensors.
Here’s what they offer:
A compact design, making them perfect for projects where space is a key concern.
A range of digital and analog input/output pins that can be easily programmed for more versatility.
They’re cost-effective and easy to find.
Why small projects matter in tech
Do the best things actually come in small packages? Not always, but in the world of tech, this rings pretty true a lot of the time.
While big, grand creations are valuable too, smaller-sized projects have an incredibly useful role to play. Let’s take a look at why fun-sized designs are so important.
Space efficiency: Unlike their bigger counterparts, physically small projects don’t require much space, making them ideal for use in more compact environments like homes, or where more discrete and unobtrusive solutions are required — for example an automated hearing aid.
Expandable: Smaller projects are more modular — you can start with one piece and then add new parts as you go, based on your needs and new ideas.
Accessible: Small projects are simpler to start and cheaper to build, making them great choices for beginners or people with limited resources or financial constraints. They’re a great gateway to the world of home automation and DIY tech.
Customizable: Smaller projects are easy to tweak and adapt, making them more suited to customisation. This lets you build projects in exactly the way you desire and amend them over time.
Prototyping potential: Smaller hardware projects make great prototypes for bigger and more resource-heavy work. They enable you to experiment with different hardware components and concepts on a cheaper and lower-stakes scale before committing to a big, expensive project.
Compatibility with bigger systems: Platforms like Arduino’s Nano boards and MicroPython tend to be highly compatible with larger systems like home automation networks. This makes it effortless to integrate your smaller projects into your overall setup.
Lower power consumption: Thanks to their size, small-scale projects tend not to use up huge amounts of power, and are often built with energy efficiency in mind. This is not only good for the planet, but it also means your smaller projects can run for extended periods of time without the need for constant recharging.
Using Arduino with MicroPython
Now we have some idea of why small projects are so significant, let’s talk about how to start making them with Arduino and MicroPython.
If you remember, one of the great things about MicroPython is its simplicity — you don’t need to be a tech prodigy to learn the basics and start tinkering around with this language. It’s also highly established and there are a ton of resources and documentation for using this language across a number of different boards.
It’s imperative to keep in mind that programming an Arduino board with MicroPython is a very different process to using the Arduino IDE.
Here’s a quick guide to getting started with MicroPython on an Arduino board:
1. Install MicroPython on your Arduino board, and then load a Python script — called a script.py.
2. Download the Arduino Lab for MicroPython. This is a lightweight editor built to enable interaction between your computer and your Arduino board. It allows you to perform tasks like selecting a port and loading scripts.
3. Download the OpenMV editor. This platform enables you to program Arduino boards using a fork of the MicroPython language. The editor lets you upload scripts directly to the board and get started with your very first projects.
Arduino examples
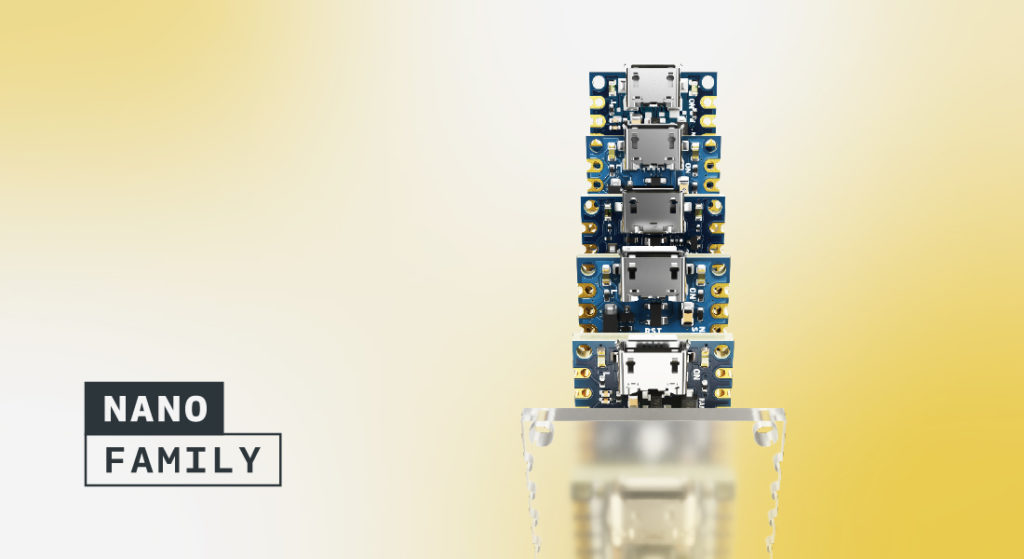
There are currently five Arduino boards that officially support MicroPython:
For a smart maker with imagination, the possibilities are almost endless here. Let’s explore a couple examples of small but spectacular Arduino projects brought to life with MicroPython.
Pico-Kubik quadruped robot
Big robots are so last century.
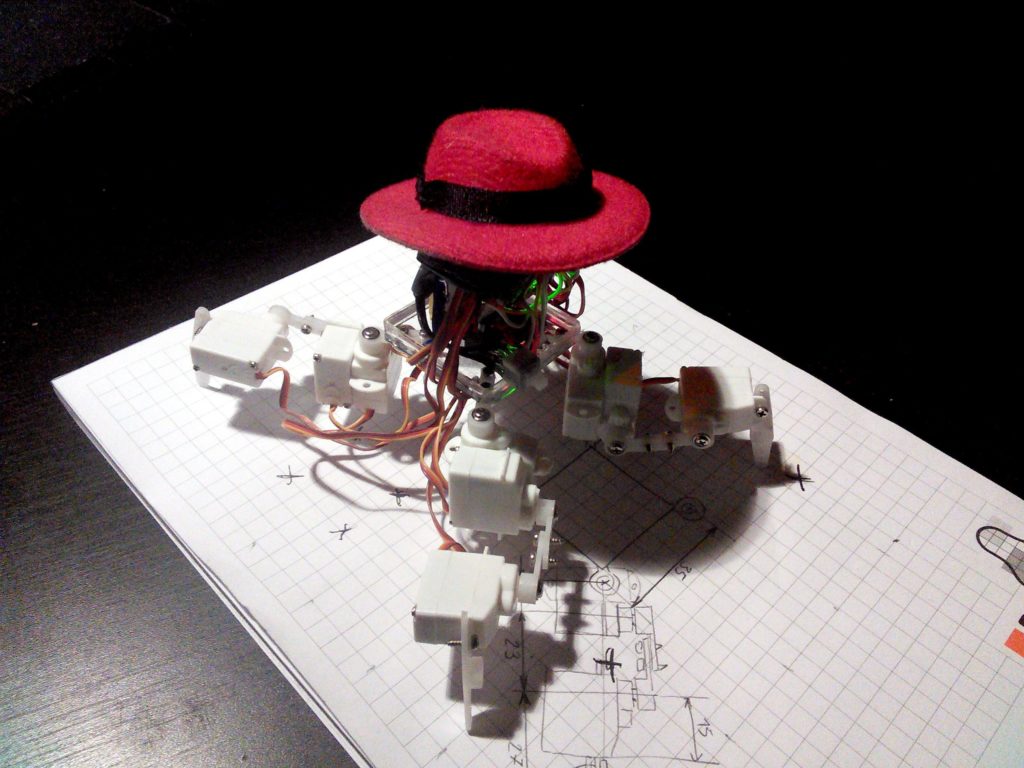
These days, the really cool kids are building tiny robots. Like this one, the Pico-Kubik robot built by Radomir Dopieralski.
It’s the latest in a line of quadruped robots, and this one is small enough to fit in the palm of your hand. One of the two versions runs MicroPython, and even carries its own webcam.
InkPlate 10
With the right tools, it’s possible to build projects that are literally paper-thin.
Enter the InkPlate 10 — a 25cm ePaper display that can be programmed using Arduino and MicroPython. It’s a razor-thin tablet that can be easily programmed, and is made from recycled kindles and similar tech. It’s also available at a very wallet-friendly price point.
The future of tiny tech
As time goes on, we’ll be able to build smaller and smaller projects. This means the future for tiny tech is truly exciting, with some fascinating potential use cases on the horizon. Here’s a glimpse at some things to look forward to here:
AI integration: As small hardware becomes capable of running lightweight AI models, we could see the emergence of new functions like tiny smart cameras with object recognition.
Low-power designs, with tiny tech projects using increasingly sustainable resources: The ability to run for longer and use renewable energy sources and battery technology will allow for more efficient and eco-friendly designs.
Even smaller projects: As the technology around Nano boards and programming continues to develop, it’ll be possible to create smaller and smaller projects, opening the doors to even more possibilities in areas like wearables and healthcare devices.
Better connectivity: Small projects will be able to use technologies like 5G and Wi-Fi 6 more easily and smoothly, allowing for more versatile applications like remote control and use in IoT networks.
Open-source communities: As open-source communities for hardware and software continue to grow and develop, we’ll see even more shared knowledge and libraries of open-source code aimed at helping developers and makers create their own tiny projects.
More diverse uses for tiny tech: In the future, we could see even wider applications for this kind of technology, from wearable health monitors and highly precise farming sensors to new ways of monitoring the environment.
A greater focus on security: As tiny tech becomes more common, it’ll also become more of a target for hackers. This will prompt a push to take security more seriously here, driving more sophisticated and smart approaches to device safety.
Embrace tiny tech with Arduino
The future for tiny tech projects is truly exciting. Today’s makers and tech enthusiasts have access to a wealth of tools, techniques, and learning resources that is growing rapidly, all the time.
At Arduino, our Project Hub is filled with examples of smaller projects. Our Nano boards give you the tools to break through new frontiers of creativity and innovation, taking your smart home and DIY projects to the next level.
Contact us to learn more about Nano boards and Arduino in general, and get started today.
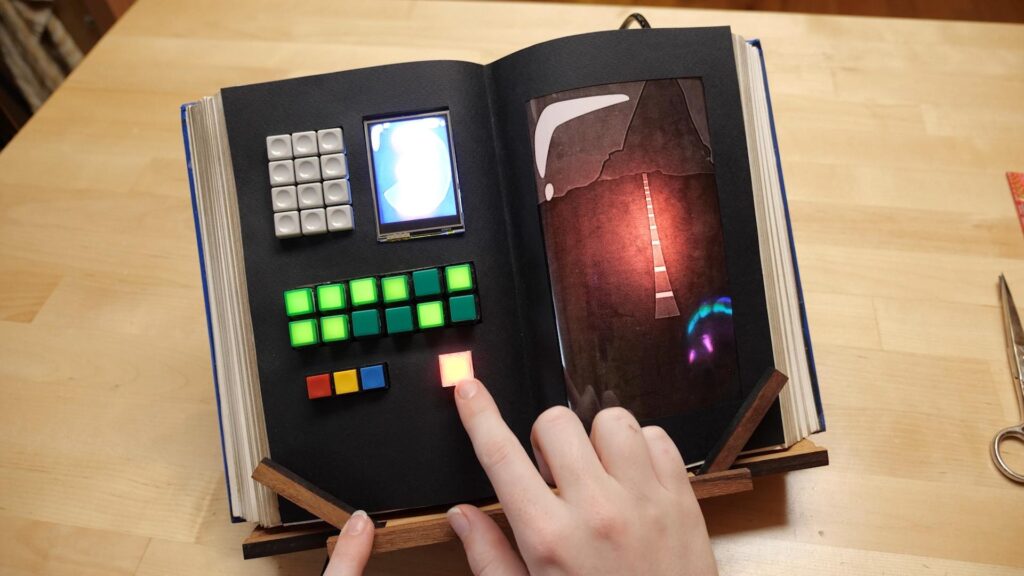
The Inspector Gadget cartoon was, naturally, full of fun gadgets. Even the eponymous inspector’s niece, Penny, got some nifty gizmos. One notable example was her computer book, which was exactly what it sounds like. To pay homage to the classic cartoon, Becky Stern recreated Penny’s computer book using a pair of Arduino boards.
It isn’t clear exactly which functions Penny’s computer book possesses within the canon of the Inspector Gadget cartoon, so Stern got a chance to exercise her own creativity. She referenced the cartoon to get a sense of the device’s aesthetics, design, and some of its capability. That helped her define the look of the replica device and how it should act. She determined that it should have several buttons (including a grid of illuminated buttons), a small screen on one side, and a big screen on the other side — all inside of a book.
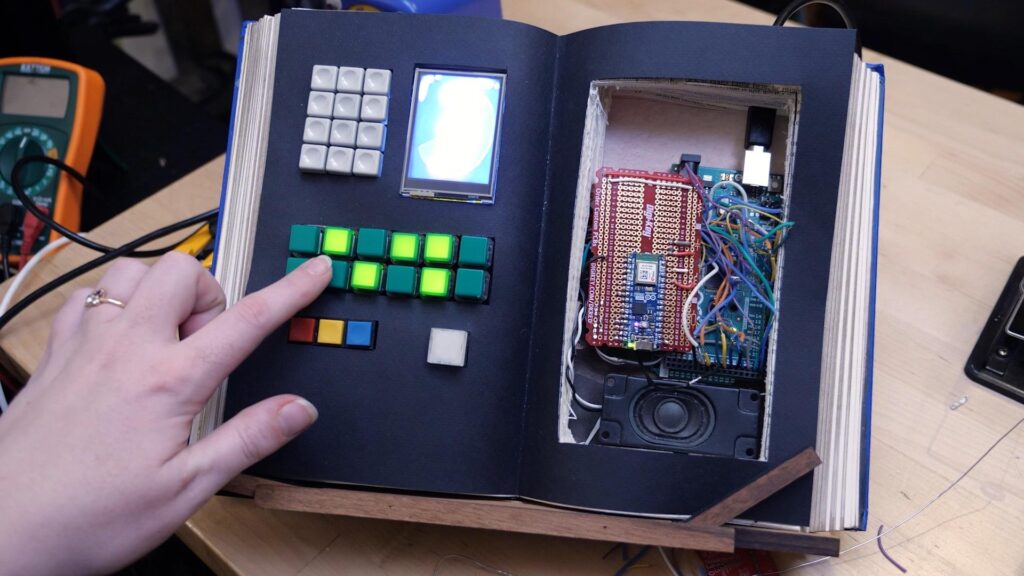
Stern used two different boards to bring the device to life: an Arduino Nano ESP32 and a Mega 2560. The former monitors some of the buttons and controls the LCD panel on the left side. The latter monitors the green buttons and controls their LEDs. It also drives the LEDs behind the right “screen,” which is actually a static semi-transparent image. The LEDs light up in sequence to create an effect similar to what we see in the cartoon.
Most of the buttons lack actual functions, but Stern did add some interactivity by utilizing the Nano ESP32. The board hosts a web interface that users can access after connecting to the Wi-Fi network. That interface lets the user select images to show on the left screen, like a video call from Brain the dog, to really sell the visuals.
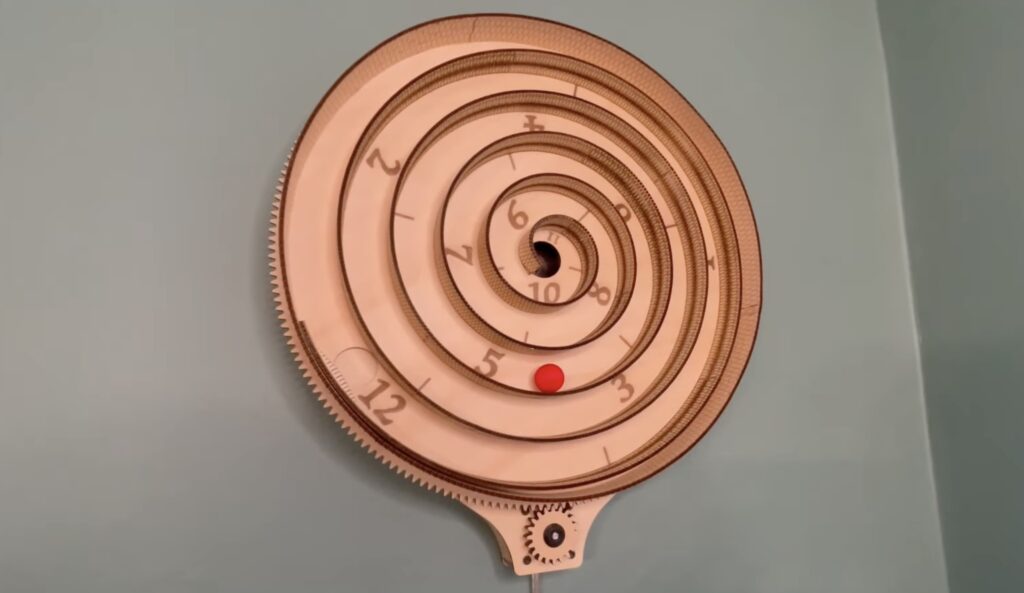
Sometimes makers come across products that they’d love to buy, but which are too expensive to justify. When that happens, the natural inclination of the maker is to build a DIY version. Such projects often end up costing way more — in both time and literal currency — than the product would have. But when we get lucky, we can save some money. That’s the case with this spiral clock built by Kelton.
Kelton based this design on the Aspiral Clock. That product was quite expensive at $542 and the company that made it seems to be defunct now anyway. Kelton’s version looks similar and works in the same way, but only requires about $60 in materials.
This clock is a giant spiral and indicates the time with a ball that rolls along the spiral. The entire spiral rotates at a constant speed, causing the ball to move towards the center. Numbers marked along the path show the time. When the ball reaches the center, it drops through a chute that puts it back at the beginning of the spiral. That repeats endlessly in 12-hour cycles.
The electronics are very simple: an Arduino Nano ESP32 board tells a stepper motor to spin at the exact rate that Kelton calculated. That stepper motor turns the spiral, keeping the ball in motion. Because this development board has an ESP32, it would have been possible to connect it to a WiFi network to find the time and keep everything in sync. But Kelton didn’t think that was necessary, so the spiral just rotates at a constant rate.
The real trick with this clock was the woodworking. All of the parts are laser-cut plywood and Kelton made heavy use of kerf cuts. Those break up a length of wood into many segments, so the wood can easily bend. That technique was perfect for creating the smooth spiral path and the result looks fantastic.
Our fall exclusive offer is here, and it’s packed with incredible savings.
With this promotion, you can enjoy a special 30% discount on the Arduino Cloud Maker yearly plan using the code “CLOUDNANO32.” Plus, when you select any other Arduino Cloud yearly plan (Entry, Maker, or Maker Plus), you can grab a Nano ESP32 for just $1!*
How to redeem the offer:
1. Select your yearly plan: Keep in mind that only the Yearly Maker plan is on sale. If you select the yearly Maker plan, be sure to apply the code “CLOUDNANO32” during checkout to unlock an amazing 30% discount.
2. Activate email notifications: To stay in the loop and receive your invitation for the Nano ESP32 at $1, activate your email notification.
3. Get your Nano ESP32 email invitation: Shortly after completing your Cloud subscription purchase, you will receive a special voucher via email, granting you access to the Nano ESP32 for just $1*.
Whether you’re an experienced IoT developer or a newcomer to the IoT world, this promotion offers something for everyone. Upgrade, save, and take your IoT projects to new heights. Act now before the offer expires on October 27th, 2023.
*To be eligible, you shall not have any active Arduino Cloud paid plan. Please note that the Nano ESP32 offer is exclusively available to the first 300 customers who purchase any Arduino Cloud yearly plan (Entry, Maker, or Maker Plus). Shipping fees and taxes apply. Please refer to our Terms & Conditions.
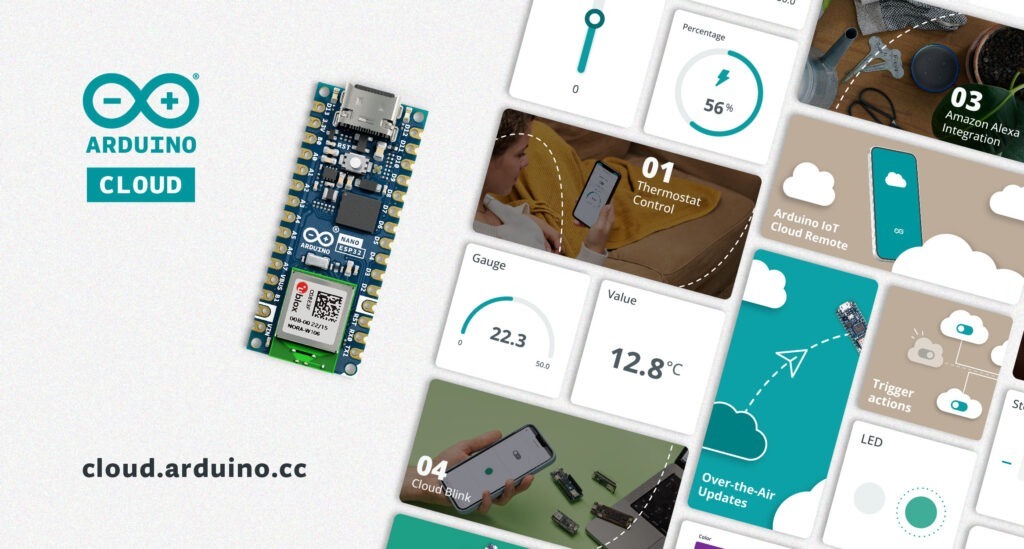
When Arduino first hit the maker scene, the world of embedded electronics was largely unconnected and offline. But as the IoT, home automation, and smart technology advanced, Arduino kept up. Today, there are a variety of Arduino development boards that offer built-in networking capability and you can use the Arduino Cloud to take advantage of them. To demonstrate that, Doug Domke built this button-free alarm clock.
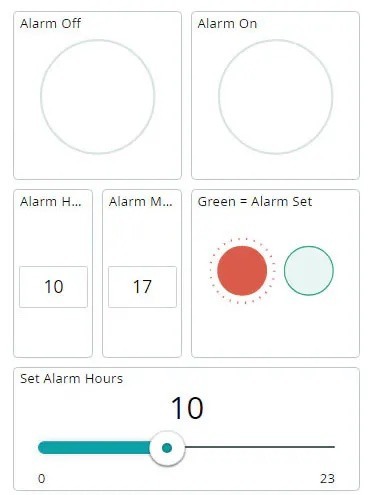
User interface design is a complex field that has to balance usability, simplicity, and practicality. Take a look at the radio alarm clocks of the 1990s to see how bad user interfaces can make device interaction frustrating. Domke’s alarm clock goes in the complete opposite direction and omits buttons altogether. It lets the user “set it and forget it” through a simple Arduino Cloud dashboard. The time automatically updates based on the configured time zone and daylight savings settings.
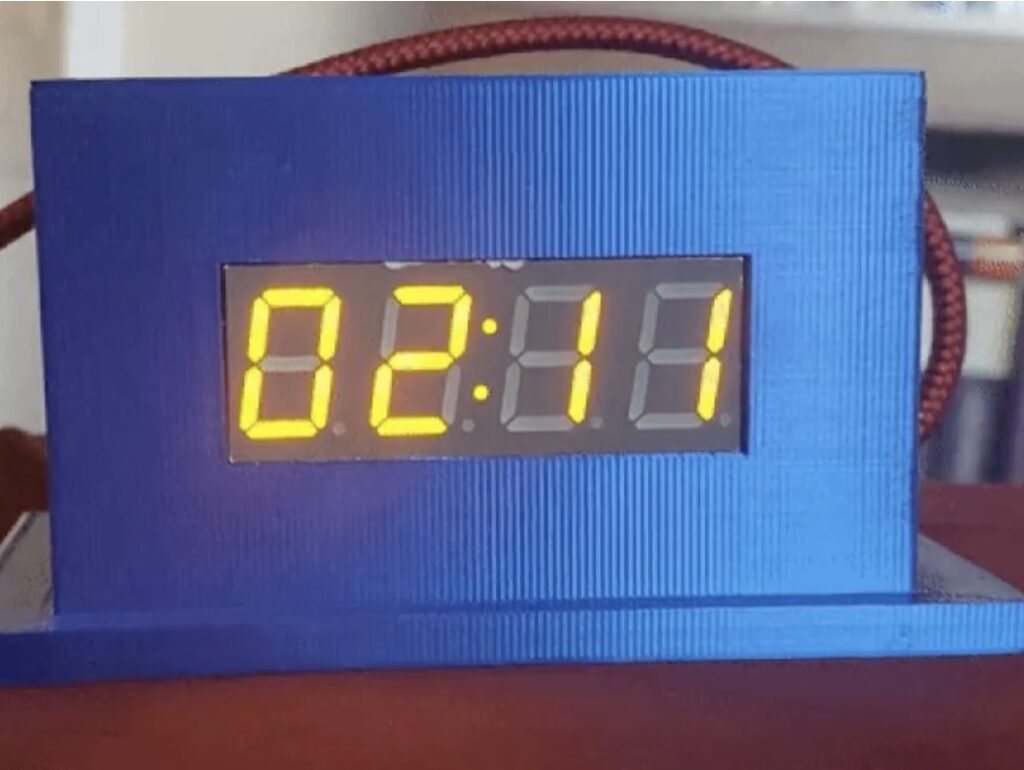
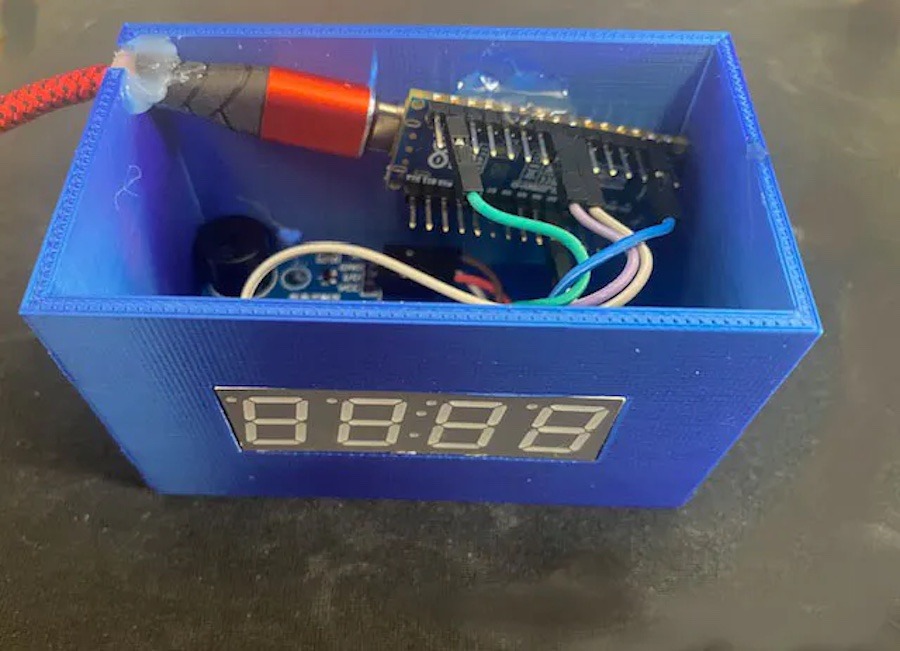
This requires very little hardware. Power comes in through USB to an Arduino Nano ESP32 board, with a connected piezo buzzer module and four-digit seven-segment display. Those fit inside a basic 3D-printed enclosure. All the magic happens through the Arduino Cloud and Domke explains how to set up an Arduino Cloud account, create a dashboard, and connect the Nano ESP32 to that dashboard.
If you want a dedicated alarm clock, this is a quick and easy project that will help you get acquainted with the Arduino Cloud for future IoT projects.
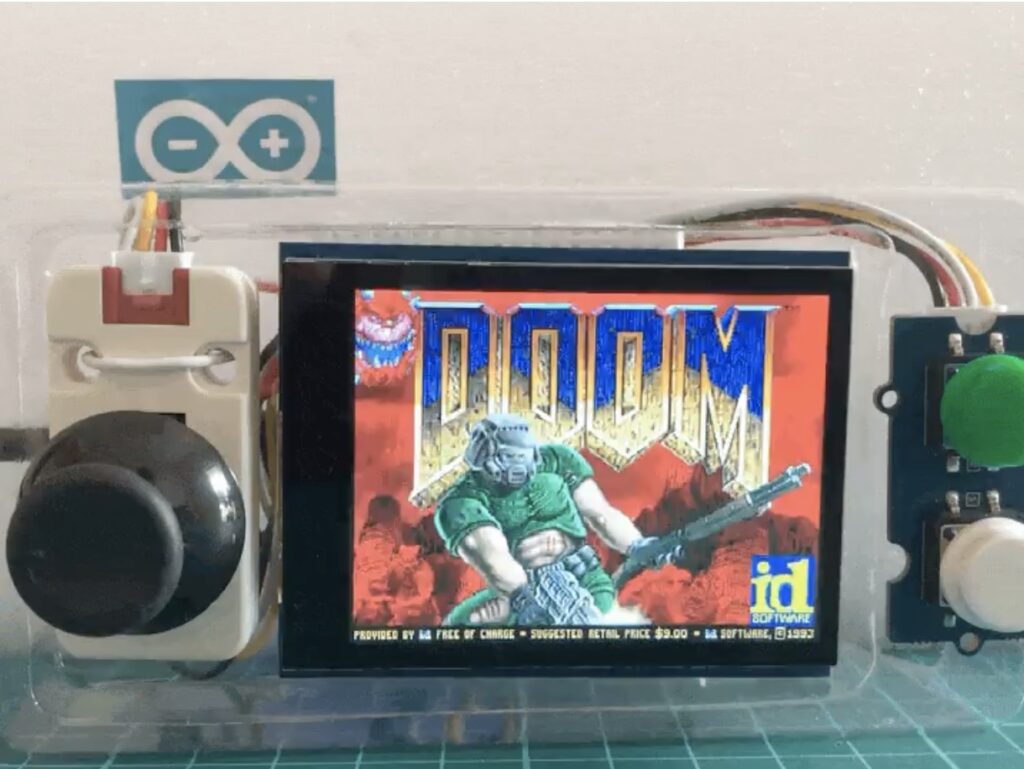
“But can it run Doom?” is more than just a joke in the tech world. It is also a decent litmus test for the computing power of hardware. That test isn’t very relevant for modern computers, but it is still worth asking when discussing microcontrollers. Microcontrollers vary in dramatically in processing power and memory, with models to suit every application. But if you have an Arduino Nano ESP32 board, you can run Doomas Naveen Kumar has proven.
The Nano ESP32 is a small development board for the ESP32-S3 microcontroller. Espressif developed the ESP32 for IoT applications, so it has onboard Wi-Fi® and Bluetooth® adapters. It also has a relatively high clock speed and quite a lot of memory: 240MHz and 512kB SRAM, respectively. That still isn’t enough to meet the requirements of the original Doom release, which needed a lot more RAM. But Kumar demonstrates the use of a microcontroller-friendly port that runs well on this more limited hardware.
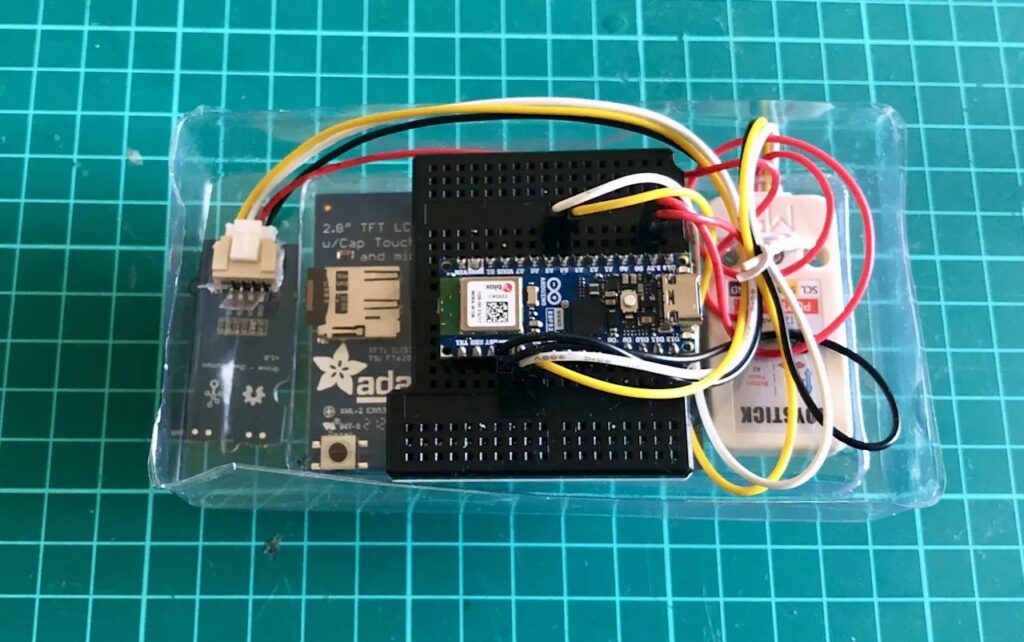
To try this yourself, you’ll need the Nano ESP32, an Adafruit 2.8″ TFT LCD shield, an M5Stack joystick, a Seeed Studio Grove dual button module, a breadboard, and some jumper wires. You’ll then need to compile and flash the Retro-Go firmware, which was designed specifically for running games like Doom on ESP32-based devices. You can then load the specialized WAD (Where’s All the Data) files.
Kumar reports an average frame rate at a 320×240 resolution, which is very playable.
Planet Arduino is, or at the moment is wishing to become, an aggregation of public weblogs from around the world written by people who develop, play, think on Arduino platform and his son. The opinions expressed in those weblogs and hence this aggregation are those of the original authors. Entries on this page are owned by their authors. We do not edit, endorse or vouch for the contents of individual posts. For more information about Arduino please visit www.arduino.cc
You are currently browsing the archives for the Nano ESP32 category.