Posts | Comments

Planet Arduino

Archive for the ‘robots hacks’ Category

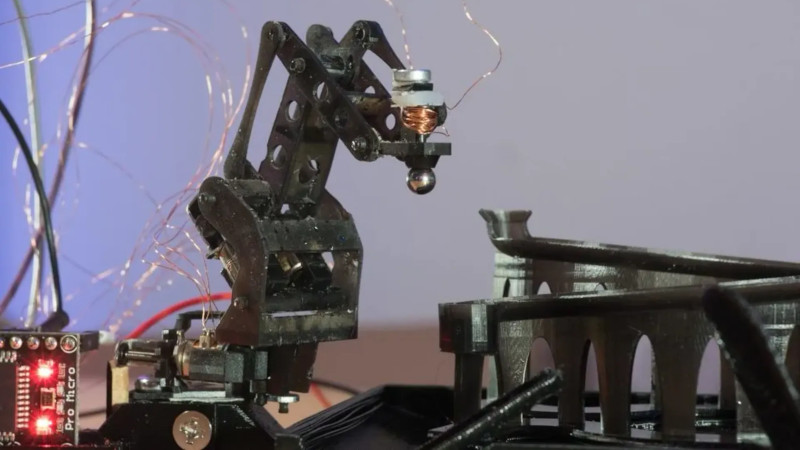
Aren’t ball races and marble runs fun? Wouldn’t they be so much more enjoyable if you didn’t have to climb back up the ladder each time, as it were, and reset the thing? [Johannes] wrote in to tell us about a wee robot with the Sisyphean task of setting a ball bearing on a simple but fun course, collecting it from the end, and airlifting it back to the start of the track.

[Johannes] built this ‘bot to test small-scale resin printing strength as well as the longevity of some tiny linear actuators from Ali that may or may not be available at a moment’s notice. The point was to see how these little guys fared when connected directly to an Arduino or other microcontroller, rather than going the safer route with a motor driver of some kind.

Some things worked well, like the c-clips that keep the axles together, and using quick pulses to release the magnetically-linked ball from the gripper. Other aspects didn’t work out so well. Tiny resin parts do not respond well to force, for starters. And then there’s the actuators themselves. The connections are fragile and the motors are weak, but they vary wildly in quality from piece to piece, so YMMV. Some lose steps, and others occasionally seize. But you wouldn’t know any of that from the graceful movement capture in the video below. Although it appears to be automated, the bot is under remote control because of the motor issues.

Not into ball runs? There are other Sisyphean tasks available, such as moving sand around in the name of meditation.

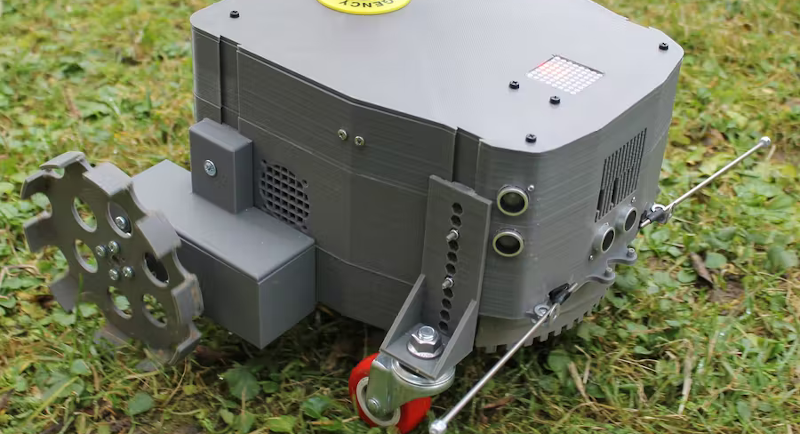
In the Northern hemisphere, summer is about to hit us full bore. While we love the season, we do dislike lawn maintenance. Apparently, so does [salmec] who developed the Mowerino around an Arduino Mega 2560 board.

As you might expect, the robot uses sharp blades so, you probably want to be careful. There are sensors that allow the machine to self-navigate or you can control it via Bluetooth. This is one of those things that seems easy until you try to actually do it. Nylon trimmer string is probably safer, but it breaks and it is hard to keep it cutting. Blades are more robust but also riskier to things like rocks, fingers, and pets.

Moving around in the yard is also an issue. The Mowerino has some ordinary-looking caster wheels in the front. That might be a place for improvement since most yards are not friendly to that kind of wheel. The other thing we worried about is what happens to the grass clippings. Around here, a week of rain means your mower will choke on grass clippings. On the other hand, the Mowerino has a smaller blade so maybe that helps mitigate clipping clogging.

Overall, though, it looks like it might be a good place to start if you dream of robot groundskeepers patrolling your estate. Most of the mowers we see like this have big wheels. But, of course, not all of them.

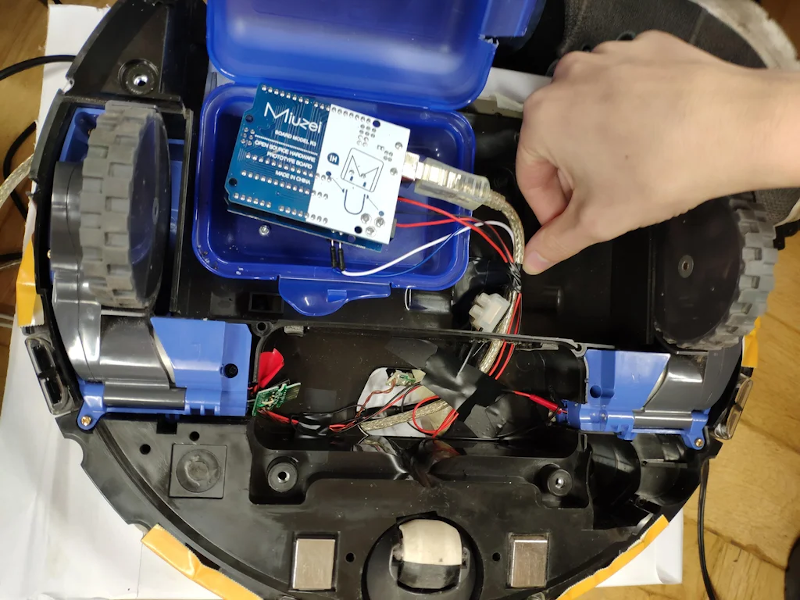
There are several projects you can imagine where it would be useful to have a robot follow you. For example, we’ve always wanted luggage that would trail us at the airport and we’ve seen several coolers that will follow you. [Madmax95] apparently dream of having a medical cart following a patient, though, and that’s good too. But how do you do it? [Max’s] method was to strip down a Roomba and build a work table and electronics on it. An Arduino controls the motor and communicates with a PC. The PC reads video from a Kinect camera on the robot and uses special tracking software to follow the patient.

We could easily imagine all of this project except the tracking. That depended on a service called Nuitrack. There is a free version that only works for 3 minutes, but it costs if you want to use it practically. However, it would still be cheaper than rolling your own if your time has value.

Nuitrack can do body tracking, face tracking, and also gesture recognition. So it would be easy to imagine commanding the robot using some sort of Jedi-style gesture. It looks like using this makes the project significantly easier than you’d imagine.

The project also uses Thingsboard to create a simple control panel. This is another solution that requires a subscription, but there is a free community edition you can host locally.

Overall, we probably won’t duplicate this robot ourselves, but we were interested in learning how we could pull off something similar for other projects. We’ve seen variations of this done with things like OpenCV. Our suitcase idea, by the way, isn’t original, but we wonder about how much packing volume you lose for batteries, electronics, and we imagine the airlines will be unhappy stowing one.

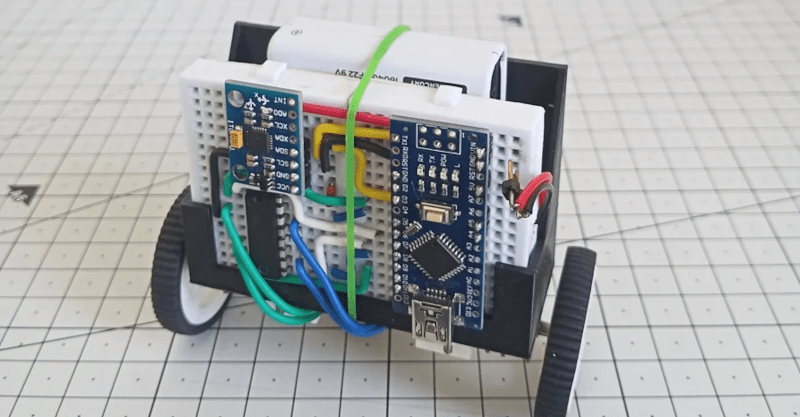
A self-balancing robot isn’t a new idea, but we liked the aesthetics of [Maker ATOM’s] build. The use of a breadboard and a printed bracket looks good, as you can see in the video, below.

Like most first-time projects, though, there were some lessons learned. The power supply needs a little work and the range of balance compliance didn’t meet expectations. But those problems are soluble and, as usual, you often learn more from working through issues like these.

The heart of the system is an MPU6050 which provides a gyroscope and accelerometer along with fusion capability onboard. The availability of libraries for the sensor and the PID controller makes the project pretty simple to finish.

In particular, a PID control loop looks at the desired state of the system and the current state. It then computes an output based on the difference in state at the current time and over time in different ways. In other words, part of the output forms because of the raw difference but other parts of the output form due to accumulated error over time or from sudden perturbations. Adjusting the gains so that these parts stay in balance can be a bit tricky.

However, in the end, the two batteries were not sufficient to power the device adequately. Temporarily, a bench supply did the trick, but the batteries still needed to be there to provide some counterweights for balance. Experimenting wth some PID loop gains might also improve operations.

There are plenty of similar projects to draw inspiration from. The design doesn’t have to be difficult.

While a line-following robot may not be the newest project idea in the book, this one from [Edison Science] is a clean build using modern components and gets a good speed thanks to PID control feedback instead of the more traditional bang-bang control you see in low-end robots.

Of course, PIDs need tuning and that seems to be the weak link — you’ll have to experiment with the settings. The sensors also require calibration, but we bet both of those issues could be fixed pretty easily.

If the idea of PID is new to you, the acronym stands for porotional, integral, and derivative. To determine the output at any given time, you look at where you are compared to where you want to be (the present value vs the set point). Then you compute a proportional error. So, for a temperature, for example, if you want to be at 30 degrees and you are at 20 degrees, that a proportional error of 10 degrees. You also want to look at how much change has been building up over time and the rate of change of the error.

We’ve had some excellent PID tutorials in the past if you want to read some math. Thie simplest line followers don’t need PIDs or even CPUs.

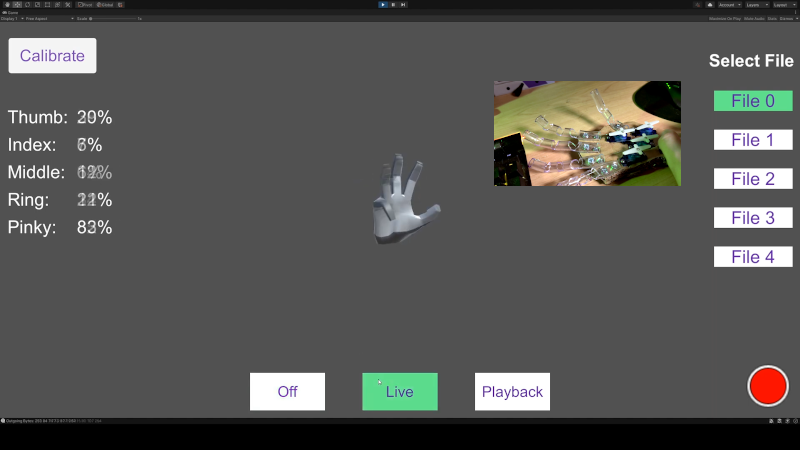
It isn’t uncommon to see a robot hand-controlled with a glove to mimic a user’s motion. [All Parts Combined] has a different method. Using a Leap Motion controller, he can record hand motions with no glove and then play them back to the robot hand at will. You can see the project in the video, below.

The project seems straightforward enough, but apparently, the Leap documentation isn’t the best. Since he worked it out, though, you might find the code useful.

An 8266 runs everything, although you could probably get by with less. The Leap provides more data than the hand has servos, so there was a bit of algorithm development.

We picked up a few tips about building flexible fingers using heated vinyl tubing. Never know when that’s going to come in handy — no pun intended. The cardboard construction isn’t going to be pretty, but a glove cover works well. You could probably 3D print something, too.

The Unity app will drive the hand live or can playback one of the five recorded routines. You can see how the record and playback work on the video.

This reminded us of another robot hand project, this one 3D printed. We’ve seen more traditional robot arms moving with a Leap before, too.

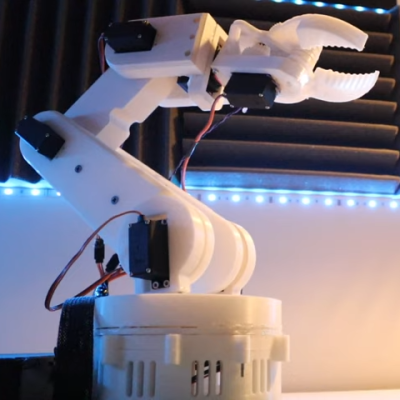
Ever wanted your own gesture-controlled robot arm? [EbenKouao]’s DIY Arduino Robot Arm project covers all the bases involved, but even if a robot arm isn’t your jam, his project has plenty to learn from. Every part is carefully explained, complete with source code and a list of required hardware. This approach to documenting a project is great because it not only makes it easy to replicate the results, but it makes it simple to remix, modify, and reuse separate pieces as a reference for other work.

[EbenKouao] uses a 3D-printable robotic gripper, base, and arm design as the foundation of his build. Hobby servos and a single NEMA 17 stepper take care of the moving, and the wiring and motor driving is all carefully explained. Gesture control is done by wearing an articulated glove upon which is mounted flex sensors and MPU6050 accelerometers. These sensors detect the wearer’s movements and turn them into motion commands, which in turn get sent wirelessly from the glove to the robotic arm with HC-05 Bluetooth modules. We really dig [EbenKouao]’s idea of mounting the glove sensors to this slick 3D-printed articulated gauntlet frame, but using a regular glove would work, too. The latest version of the Arduino code can be found on the project’s GitHub repository.

Most of the parts can be 3D printed, how every part works together is carefully explained, and all of the hardware is easily sourced online, making this a very accessible project. Check out the full tutorial video and demonstration, embedded below.

3D printing has been a boon for many projects, especially those involving robotic arms. All kinds of robotic arm projects benefit from the advantages of 3D printing, from designs that focus on utility and function, to clever mechanical designs that reduce part count in unexpected ways.

When we first saw [Barqunics’] design for a self-stabilizing spoon for people suffering from Parkinson’s disease, we wondered how well something like that could work. But take a look at the video below and you’ll see this does a fine job of responding to the user’s hand movements and keeping the spoon perfectly level through a wide range of motion.

There’s at least one commercial product that attempts to stabilize a spoon in the same way so that people suffering from that affliction can retain a measure of independence. This shows that you don’t need injection molding and factory made boards to prove the concept. An MPU6050 provides sensor information and two servo motors control the spoon using PID control.

PID — short for proportional, integral, derivative — is a way to adjust something to a desired point. For example, consider trying to heat a cup of water to 95 °C. If you simply turn the heater on full blast until you get to 95 °C, the water will actually get hotter because you’ll overshoot. Using PID, the amount of heating provided will depend on how far off you are now (proportional), how far off you’ve been over the long term (integral), and how much change you’ve effected recently (derivative). The same algorithm works for spoon-balancing and many other types of controls.

This isn’t the first bootstrapped assistive spoon project we’ve seen. We even looked at the commercial version, awhile back.

Creativity is a very human trait, and one that many try to emulate with robots. Some focus on the cerebral side of things, working with neural networks and machine learning to produce new artistic output. Others work on the mechanical side, building ‘bots that can manipulate tools in the real world for artistic purposes. [Technovation]’s latest build falls into the latter category – a small Arduino-powered ‘bot that likes to paint.

The robot moves around on two wheels, each driven by a stepper motor for accurate movement. The paintbrush itself is controlled with another stepper, which rotates it between the paint pots and the canvas. A servo is used to dip the brush into pots, and to apply it to the canvas. An Arduino Uno runs the show, with the robot currently programmed to paint random lines of various colors on the canvas.

By virtue of its roving design, it could theoretically paint on arbitrarily large canvasses. It’s a platform that could prove highly capable when paired with a neural network and perhaps some machine vision to allow it to concoct more complex artworks. We’ve seen other paint bots before, too. Video after the break.


  • Newsletter

    Sign up for the PlanetArduino Newsletter, which delivers the most popular articles via e-mail to your inbox every week. Just fill in the information below and submit.

  • Like Us on Facebook