Posts | Comments

Planet Arduino

Archive for the ‘servo’ Category

In Disney’s 1991 film Beauty and the Beast, an enchantress curses the young (10 or 11-year-old) prince to beast-hood for spurning her based solely on her appearance. She gives him a special rose that she says will bloom until his 21st birthday, at which time he’ll be turned back into a prince, provided that he learned to love by then. If not, he’ll be a beast for eternity. As the years go by, the rose drops the occasional petal and begins to wilt under the bell jar where he keeps it.

[Gord Payne] was tasked with building such a rose of enchantment for a high school production and knocked it out of the park. With no budget provided, [Gord] used what he had lying about the house, like nylon trimmer line. In fact, that’s probably the most important part of this build. A piece of trimmer line runs up through the stem made of tubing and out the silk rose head, which connects with a custom 3-D printed part.

Each loose petal hangs from the tubing using a short length of wire. Down at the base, the trimmer line is attached to a servo horn, which is connected to an Adafruit Circuit Playground. When the button is pressed on the remote, the servo retracts the trimmer line a little bit, dropping a petal. Be sure to check out the demo after the break.

Dropping petals is an interesting problem to solve. Most of the flower hacks we see around here involve blooming, which presents its own set of troubles.

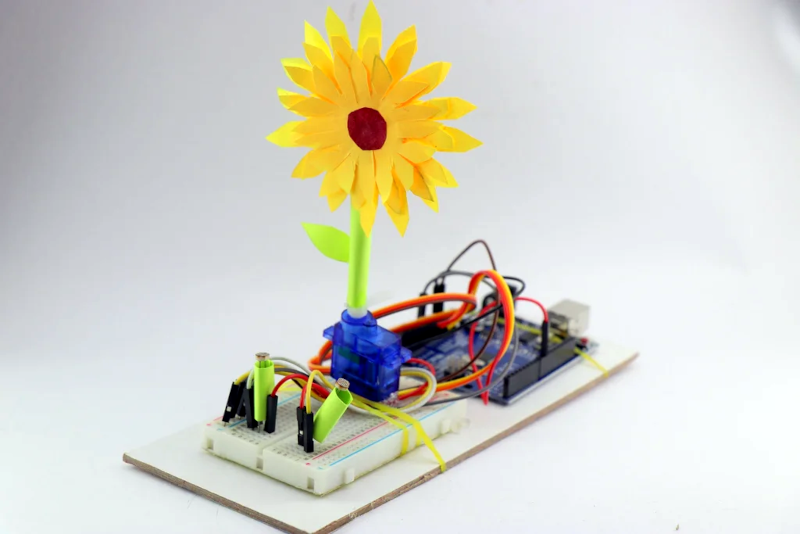
Real flowers do it, and even the Beatles did it. [Robo Hub] now has a plastic sunflower that tracks the sun using, of course, an Arduino. It may not qualify as a real robot, but it does mimic a real sunflower. The electronics aren’t earth-shattering, of course. An Arduino, a light sensor, and a servo motor are all you really need. But we enjoyed the whimsy and the artistic sensibility. This would be a great school project, for example. Interesting enough to get kids interested but not so hard as to be undoable. You can see a video of the ersatz flower below.

There are actually a pair of light sensors, as you might expect. That way you can determine which sensor is getting the most light. Obviously, these can’t be on-off sensors. They are, in fact, light-dependent resistors, so you get a nice analog reading.

Of course, you might not need an Arduino for this. A 555 driving a servo and a handful of discrete components could measure a bridge with the photoresistors and get the same effect. On the other hand, a microcontroller these days is inexpensive and versatile, so why not?

Usually, people tracking the sun are trying to get more energy. That doesn’t have to be any more complicated, though.

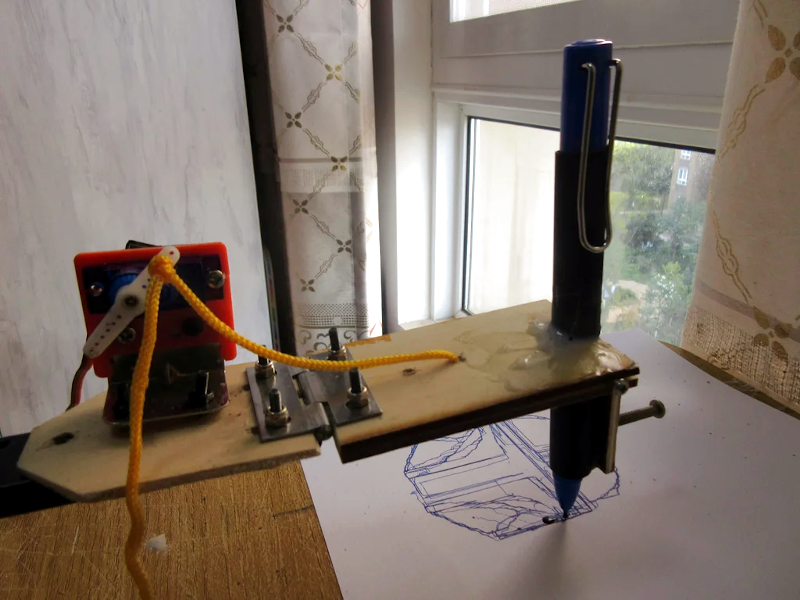
Although the widespread use of 3D printers has made things like linear bearings and leadscrews more common, you still can’t run down to your local big-box hardware store and get them. However, you can get drawer slides and any hobby shop can sell you some RC servos. That and an Arduino can make a simple and easy plotter. Just ask [JimRD]. You can also watch it do its thing in the video below.

Of course, servos aren’t usually what you use in a plotter. But the slides convert the rotation of the servo into linear motion. One servo for X and one for Y is all you need. Another microservo lifts the pen up and down using a hinge you could also get from a hardware store.

Is it pretty? No. Does it do amazing artwork? No, again. But it is the kind of thing you could probably throw together from things you happen to have hanging around, especially if you are about to trash an old desk or cabinet with slides in it.

This would make a great rainy day project. We are suckers for simple plotter projects even though you could just mate a pen to your 3D printer or CNC machine. Those won’t fit your whiteboard, though.

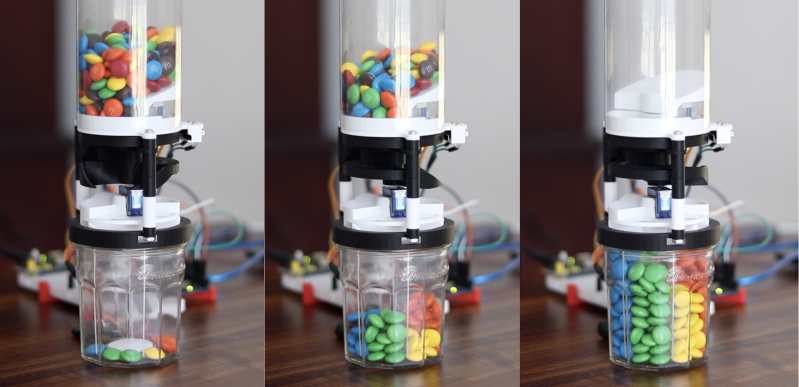
Let’s face it — eating different colored candy like M&Ms or Skittles is just a little more fun if you sort your pile by color first. The not-fun part is having to do it by hand. [Jackofalltrades_] decided to tackle this time-worn problem for engineering class because it’s awesome and it satisfies the project’s requirement for sensing, actuation, and autonomous sequencing. We’d venture to guess that it satisfies [Jackofalltrades_]’ need for chocolate, too.

Here’s how it works: one by one, M&Ms are selected, pulled into a dark chamber for color inspection, and then dispensed into the proper cubby based on the result. [Jackofalltrades_] lived up to their handle and built a color-detecting setup out of an RGB LED and light-dependent resistor. The RGB LED shines red, then, green, then blue at full brightness, and takes a voltage reading from the photocell to figure out the candy’s color. At the beginning, the machine needs one of each color to read in and store as references. Then it can sort the whole bag, comparing each M&M to the reference values and updating them with each new M&M to create a sort of rolling average.

We love the beautiful and compact design of this machine, which was built to maximize the 3D printer as one of the few available tools. The mechanical design is particularly elegant. It cleverly uses stepper-driven rotation and only needs one part to do most of the entire process of isolating each one, passing it into the darkness chamber for color inspection, and then dispensing it into the right section of the jar below. Be sure to check out the demo after the break.

Need a next-level sorter? Here’s one that locates and separates the holy grail of candy-coated chocolate — peanut M&Ms that didn’t get a peanut.

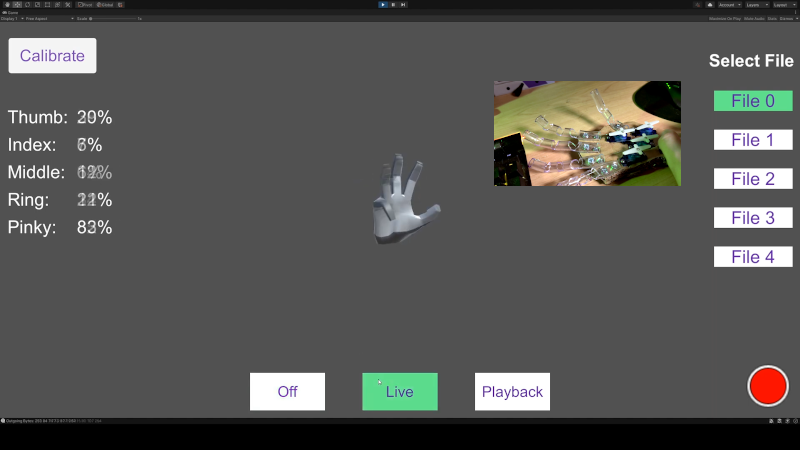
It isn’t uncommon to see a robot hand-controlled with a glove to mimic a user’s motion. [All Parts Combined] has a different method. Using a Leap Motion controller, he can record hand motions with no glove and then play them back to the robot hand at will. You can see the project in the video, below.

The project seems straightforward enough, but apparently, the Leap documentation isn’t the best. Since he worked it out, though, you might find the code useful.

An 8266 runs everything, although you could probably get by with less. The Leap provides more data than the hand has servos, so there was a bit of algorithm development.

We picked up a few tips about building flexible fingers using heated vinyl tubing. Never know when that’s going to come in handy — no pun intended. The cardboard construction isn’t going to be pretty, but a glove cover works well. You could probably 3D print something, too.

The Unity app will drive the hand live or can playback one of the five recorded routines. You can see how the record and playback work on the video.

This reminded us of another robot hand project, this one 3D printed. We’ve seen more traditional robot arms moving with a Leap before, too.

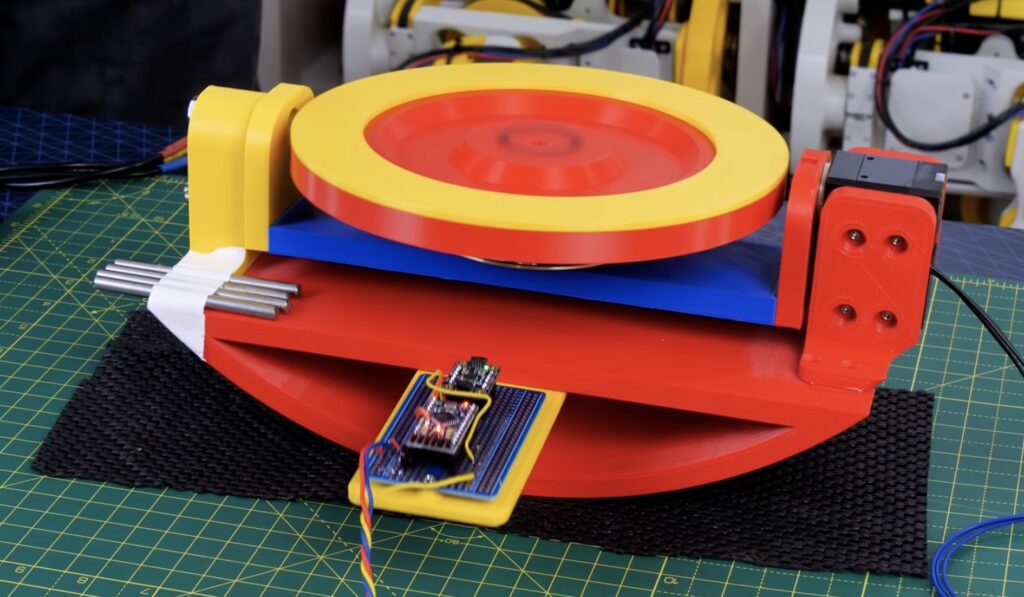
When you use a “gyroscope” in Arduino and robotics projects, generally this means a small IMU that leverages several methods of sensing to tell how a device is moving. However, physical gyroscopes are able to employ a spinning disk stay upright mechanically. Could one be combined with advanced electronics to stabilize a robot or other craft?

James Bruton answers this question in the video below, going from a “bare” gyroscope, to an unpowered gimbal, and finally to a simulated boat. This utilizes a powered gimbal for stabilization that’s tilted in one axis by a DYNAMIXEL servo. Angle is measured using an Arduino Pro Mini along with an MPU-6050 IMU, and the gyroscope is controlled by an Arduino Mega.

You can check out the progression of this fun experiment in the video below, and find code/CAD info on GitHub.

The post Spinning gyroscope “boat” stabilization appeared first on Arduino Blog.

If there’s one bright spot on the blight that is this pandemic, it’s got to be all the extra time we’re spending with our pets. Dogs especially love that we’re home all the time and want to spend it playing, but sometimes you need to get stuff done. Why not head outside with your laptop and keep the dog happy with an automatic ball launcher?

This is a work in progress, and [Connor] plans to publish a BOM and the STL files once it’s all finished. For now, it’s a working prototype that shoots a ball into the air and about 25 feet away, from the looks of it. Far enough to be fun, but not so far that it goes over the fence.

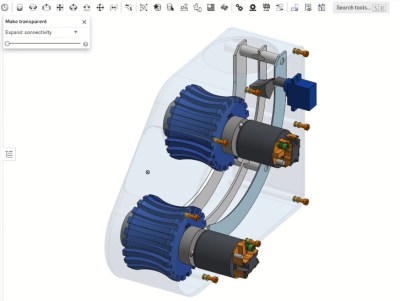
All [Connor] has to do is drop the ball in the top, which you know is going to lead to training the dog to do it himself. A proximity sensor detects the ball and starts up a pair of 540 R/C motors, then a servo drops the ball down the internal chute. The motors spit the ball out with great force with a pair of profiled, 3D-printed wheels that are controlled by a Turnigy ESC and an Arduino Nano.

In the future, [Connor] plans to print a cover for the electronics and enlarge the funnel so it’s easier for the dog to drop in the ball. Check out the brief demo and build video after the break.

All dogs should be able to get in a good game of fetch as often as they want, even if they happen to be blind.

Steampunk Tea Timer Arduino Project

Prolific project maker and Arduino lover Alain Mauer has made a rather splendid tea maker project with a steampunk twist. Despite Mauer being based in Luxemburg, we’d have to say this feels like a very British Arduino application.

Crumpets or Battenburg, anyone?

Putting the “Tea” in “Steampunk”

The Tea Timer is a classic Arduino project. A simple idea with a simple execution, beautifully presented.

Mauer’s put together a timer that submerges a teabag for a preset period. We all have our preferences for the strength of tea, and everyone knows an entire day can be ruined if the teabag’s left in for too long (right?). So a five-stage timer lets you determine just how strong your tea will be.

Arduino Nano and servo in steampunk tea maker project

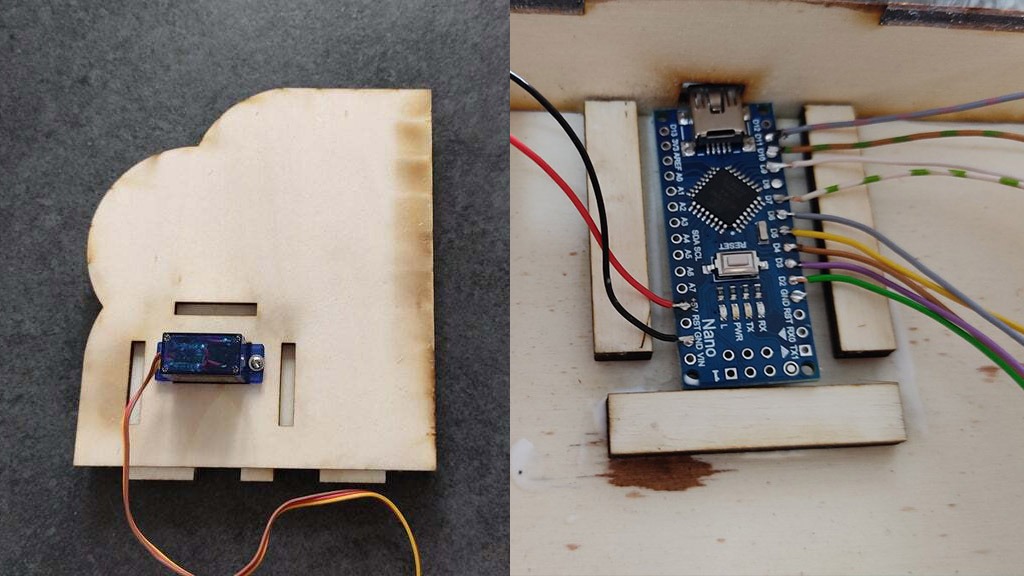
Once the timer’s run down, an Arduino Nano fires up the servo, which turns the gears and lifts the bag out so you don’t forget. Adjusted correctly, this also means you can consistently make the perfect cup of brown joy.

And just like the perfect cuppa, presentation is everything. Mauer didn’t need to add the gears, wooden housing or the brass finish. But the steampunk aesthetic really completes the project, and makes it into a work of art as well as an essential kitchen appliance. Now we just need to hook it up to a home automation system.

Mauer has provided all the CAD parts on his GitHub along with the Arduino code, so it’s easy to replicate.

Tea is a subject of great significance to the British. It can cause arguments, hysteria and family feuds that last for generations. All in a very civilized manner, of course. No Brit would be uncouth enough to have cross words in public about the proper way to drink tea. But we do reserve the right to tut and roll our eyes behind closed doors afterwards, should someone get it wrong.

Check out the steampunk Tea Timer and automatic teabag remover on Mauer’s blog. And let’s leave the last word on the vital importance of a cup o’ brown joy to the immortal Professor Elemental.

The post A splendid steampunk tea maker appeared first on Arduino Blog.

We will be the first to admit that it’s often hard to be productive while working from home, especially if no one’s ever really looking over your shoulder. Well, here is one creepy way to feel as though someone is keeping an eye on you, if that’s what gets you to straighten up and fly right. The Eyecam research project by [Marc Teyssier] et. al. is a realistic, motorized eyeball that includes a camera and hangs out on top of your computer monitor. It aims to spark conversation about the sensors that are all around us already in various cold and clinical forms. It’s an open source project with a paper and a repo and a how-to video in the works.

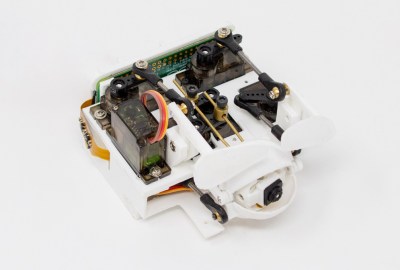
The eyebrow-raising design pulls no punches in the uncanny department: the eye behaves as you’d expect (if you could have expected this) — it blinks, looks around, and can even waggle its brow. The eyeball, brow, and eyelids are actuated by a total of six servos that are controlled by an Arduino Nano.

Inside the eyeball is a Raspberry Pi camera connected to a Raspi Zero for the web cam portion of this intriguing horror show. Keep an eye out after the break for the Eyecam infomercial.

Creepy or fascinating, it succeeds in making people think about the vast amount of sensors around us now, and what the future of them could look like. Would mimicking eye contact be an improvement over the standard black and gray oblong eye? Perhaps a pair of eyes would be less unsettling, we’re not really sure. But we are left to wonder what’s next, a microphone that looks like an ear? Probably. Will it have hair sprouting from it? Perhaps.

Yeah, it’s true; two eyes are more on the mesmerizing side, but still creepy, especially when they follow you around the room and can shoot frickin’ laser beams.

Thanks for the tip, [Sven, greg, and Itay]!


  • Newsletter

    Sign up for the PlanetArduino Newsletter, which delivers the most popular articles via e-mail to your inbox every week. Just fill in the information below and submit.

  • Like Us on Facebook