
Apr
24
24
Arduino Pro has introduced a groundbreaking solution for IoT development with the launch of 4G global...
The post Arduino Introduces 4G Global Connectivity for Portenta in Mini-PCIe Form Factor appeared first on Electronics-Lab.com.
Arduino Pro has introduced a groundbreaking solution for IoT development with the launch of 4G global...
The post Arduino Introduces 4G Global Connectivity for Portenta in Mini-PCIe Form Factor appeared first on Electronics-Lab.com.
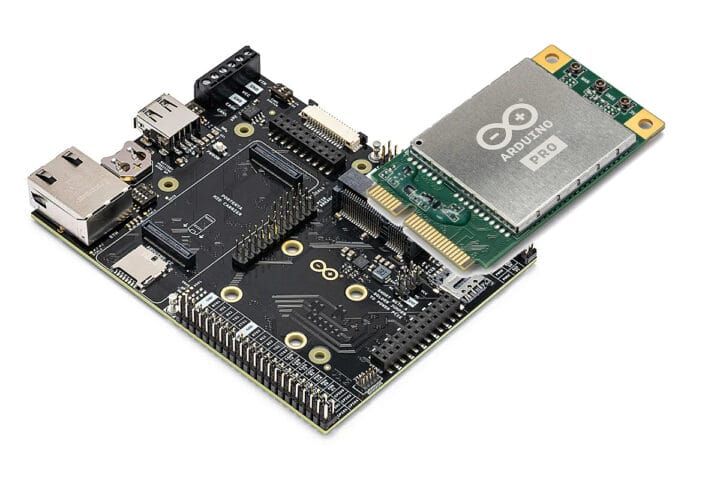
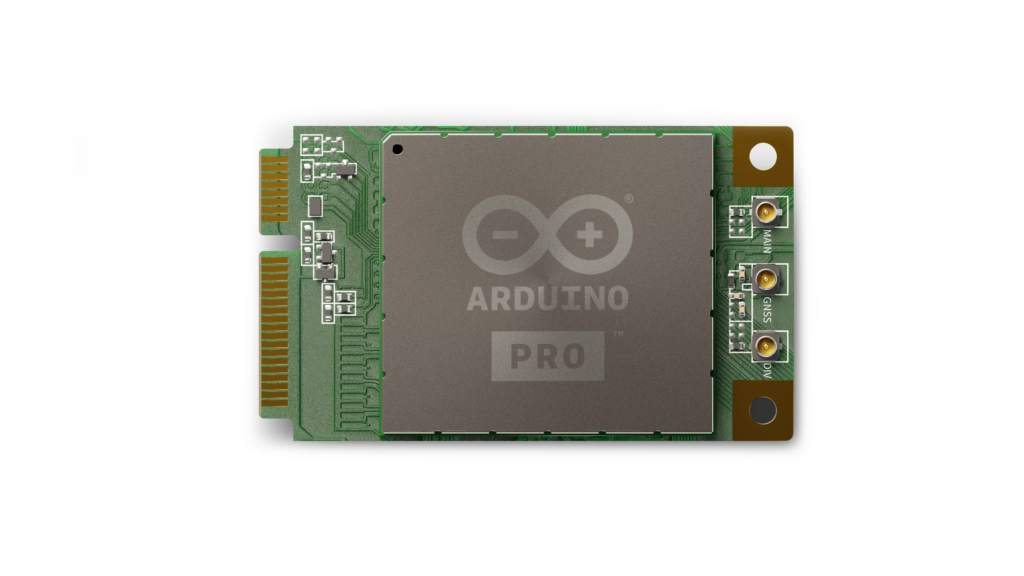
Arduino has announced two new products that are part of the Arduino Pro family at Embedded World 2024: the Arduino Pro 4G Module and Arduino Portenta Mid Carrier board. Arduino Pro 4G module Two variants of the mini PCIe module are available: one global and one for the EMEA and Southeast Asia markets with similar interfaces, but based on different Quectel modules, and the global model also supports GNSS. Specifications: Both also support 3G/2G fallback if 4G LTE network connectivity is out of range. The 4G LTE module works with Arduino Pro carrier boards featuring a mini PCIe connector such as the Max Carrier and the new Mid Carrier which we will be covering below. More information can be found on the documentation website and product page. The Arduino Pro 4G module global goes for $65 while the EMEA version sells for 29 Euros. Those prices are without antennas which [...]
The post Arduino announces the Pro 4G Module and Portenta Mid Carrier board at Embedded World 2024 appeared first on CNX Software - Embedded Systems News.
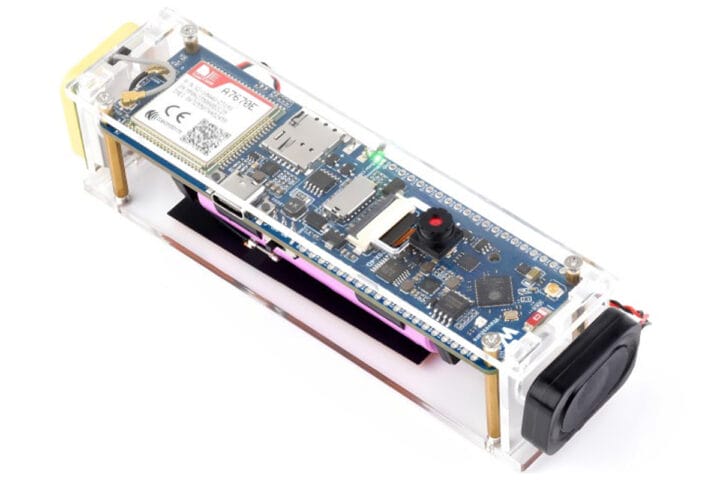
Waveshare has recently launched two new ESP32-S3 4G dev boards – the ESP32-S3-SIM7670G-4G and the ESP32-S3-A7670E-4G. These boards support 4G LTE Cat-1, Wi-Fi, Bluetooth, and GNSS, and come with an OV2640 camera, and a battery holder for a 18650 battery. The main difference between the two is that the A7670E module also supports 2G GSM/GPRS/EDGE at 900/1800MHz while the SIM7670G module does not. The board has two rows of I/Os including GPIO, I2C, SPI, ADC, and USB 2.0. It also has a USB-C port for power and programming, a slot for a MicroSD card, and an option to connect an external speaker. There’s a USB switching IC and DIP switch for easily connecting the module to a PC for internet or debugging. Waveshare ESP32-S3 4G Dev Boards Specification: Communication module A7670E 4G – A7670E Cat-1 4G module supporting 4G Cat-1 + 2G networking, GNSS positioning, telephone calls, and SMS. SIM7670G [...]
The post Waveshare ESP32-S3 4G dev boards feature LTE Cat-1, 2G, and camera support appeared first on CNX Software - Embedded Systems News.
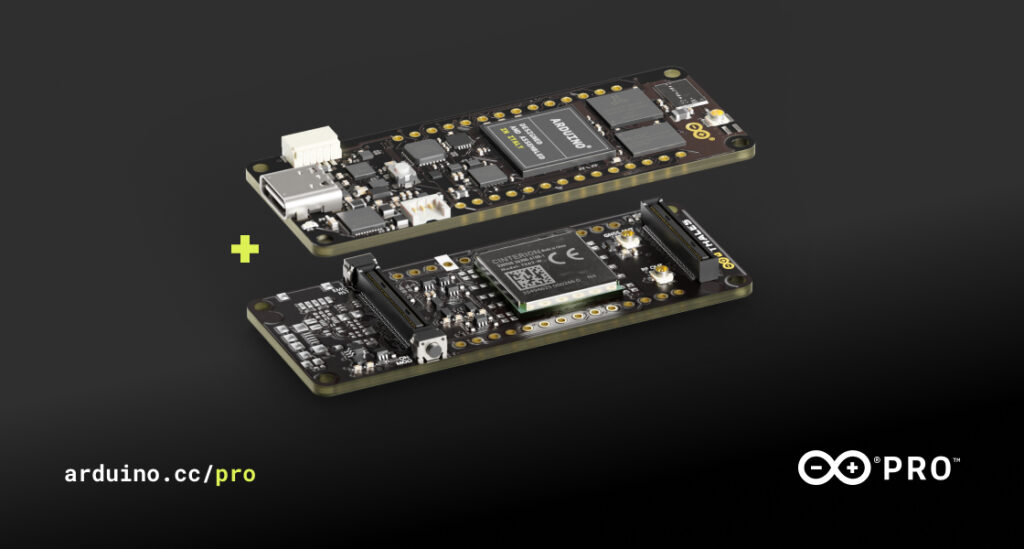
Despite how powerful and high-performance we make our boards, we know some of you always want more – especially in the fast-evolving Industry 4.0! Enter the Portenta Cat. M1/NB IoT GNSS Shield, a new product we developed in partnership with aerospace, defense, transportation and security multinational Thales.
It’s what you need to unleash a world of new opportunities for edge computing. By leveraging a Cinterion TX62 wireless module built for highly efficient, low-power IoT applications, the Portenta Cat. M1/NB IoT GNSS Shield delivers optimized bandwidth and performance, while adding global connectivity and positioning capabilities to Portenta and MKR boards.
It is the ideal solution for the development of positioning, tracking and remote monitoring applications in industrial settings, including agriculture, public utilities and smart cities.
With the new Portenta Cat. M1/NB IoT GNSS Shield, you can:

Here are just a few examples.
The computational power of the Portenta H7 combined with the Portenta Cat. M1/NB IoT GNSS Shield greatly reduces the communication bandwidth requirements in IoT applications. The Portenta Cat. M1/NB IoT GNSS Shield is specifically designed for edge ML applications, enabling low-power, long-distance communications over NBIoT and CAT.M1 networks.
So, are you ready to take your projects to the next level? Add a Portenta Cat. M1/NB IoT GNSS Shield to your Portenta H7 or MKR board.
The Portenta Cat. M1/NB IoT GNSS Shield is available for €73/$87.60 USD.For more information and full tech specs, please visit: https://www.arduino.cc/pro/hardware/product/portenta-catm1
The post Portenta Cat. M1/NB IoT GNSS Shield: Connectivity and Positioning for your Boards appeared first on Arduino Blog.
Over the last few years I’ve been writing a few Arduino tutorials, and during this time many people have mentioned that I should write a book. And now thanks to the team from No Starch Press this recommendation has morphed into my new book – “Arduino Workshop“:
Although there are seemingly endless Arduino tutorials and articles on the Internet, Arduino Workshop offers a nicely edited and curated path for the beginner to learn from and have fun. It’s a hands-on introduction to Arduino with 65 projects – from simple LED use right through to RFID, Internet connection, working with cellular communications, and much more.
Each project is explained in detail, explaining how the hardware an Arduino code works together. The reader doesn’t need any expensive tools or workspaces, and all the parts used are available from almost any electronics retailer. Furthermore all of the projects can be finished without soldering, so it’s safe for readers of all ages.
The editing team and myself have worked hard to make the book perfect for those without any electronics or Arduino experience at all, and it makes a great gift for someone to get them started. After working through the 65 projects the reader will have gained enough knowledge and confidence to create many things – and to continue researching on their own. Or if you’ve been enjoying the results of my thousands of hours of work here at tronixstuff, you can show your appreciation by ordering a copy for yourself or as a gift ![]()
You can review the table of contents, index and download a sample chapter from the Arduino Workshop website.
Arduino Workshop is available from No Starch Press in printed or ebook (PDF, Mobi, and ePub) formats. Ebooks are also included with the printed orders so you can get started immediately.
04/07/2013 – (my fellow) Australians – currently the easiest way of getting a print version is from Little Bird Electronics.

In the meanwhile have fun and keep checking into tronixstuff.com. Why not follow things on twitter, Google+, subscribe for email updates or RSS using the links on the right-hand column? And join our friendly Google Group – dedicated to the projects and related items on this website. Sign up – it’s free, helpful to each other – and we can all learn something.

Over the last few years I’ve been writing a few Arduino tutorials, and during this time many people have mentioned that I should write a book. And now thanks to the team from No Starch Press this recommendation has morphed into my new book – “Arduino Workshop“:

Although there are seemingly endless Arduino tutorials and articles on the Internet, Arduino Workshop offers a nicely edited and curated path for the beginner to learn from and have fun. It’s a hands-on introduction to Arduino with 65 projects – from simple LED use right through to RFID, Internet connection, working with cellular communications, and much more.
Each project is explained in detail, explaining how the hardware an Arduino code works together. The reader doesn’t need any expensive tools or workspaces, and all the parts used are available from almost any electronics retailer. Furthermore all of the projects can be finished without soldering, so it’s safe for readers of all ages.
The editing team and myself have worked hard to make the book perfect for those without any electronics or Arduino experience at all, and it makes a great gift for someone to get them started. After working through the 65 projects the reader will have gained enough knowledge and confidence to create many things – and to continue researching on their own. Or if you’ve been enjoying the results of my thousands of hours of work here at tronixstuff, you can show your appreciation by ordering a copy for yourself or as a gift ![]()
You can review the table of contents, index and download a sample chapter from the Arduino Workshop website.
Arduino Workshop is available from No Starch Press in printed or ebook (PDF, Mobi, and ePub) formats. Ebooks are also included with the printed orders so you can get started immediately.

In the meanwhile have fun and keep checking into tronixstuff.com. Why not follow things on twitter, Google+, subscribe for email updates or RSS using the links on the right-hand column? And join our friendly Google Group – dedicated to the projects and related items on this website. Sign up – it’s free, helpful to each other – and we can all learn something.
The post Book – “Arduino Workshop – A Hands-On Introduction with 65 Projects” appeared first on tronixstuff.
 There is a new Arduino GSM Shield that connects an Arduino Uno, Mega, or Leonardo to the GSM cellular network, enabling you to make and receive phone calls and SMS. I can’t wait to see all the cool projects that come out of this technology! Filed under: Arduino
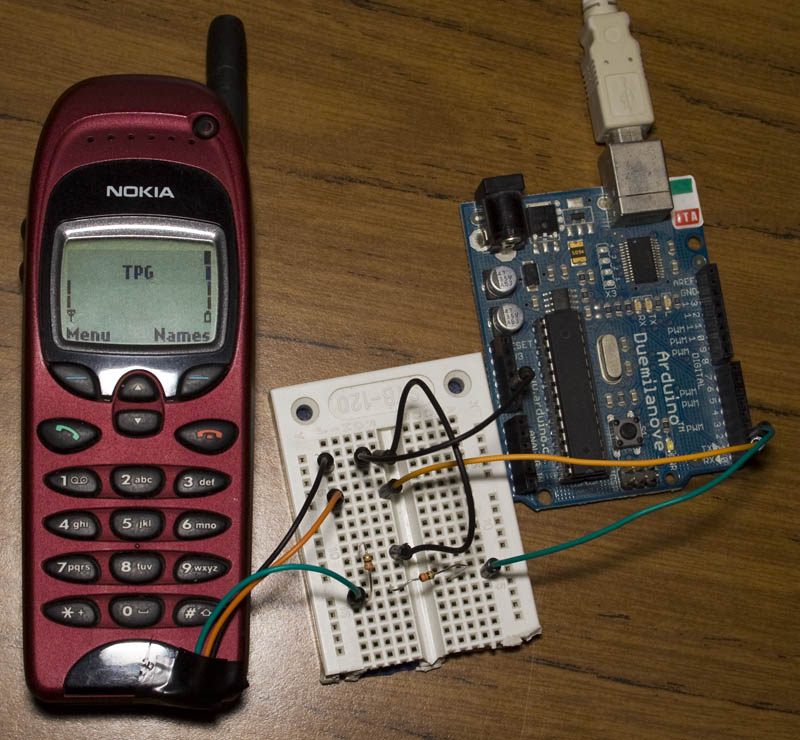
It’s always nice to see how creative makers approach communication issues in DIY projects, and today we would like to highlight the approach followed by Alex, from InsideGadgets.
On his website, he provides a detailed tutorial on how to use an old Nokia 6110 (or any derivatives) to send SMS messages by exploiting the Nokia’s F-bus, a simple bi-directional and full-duplex serial protocol.
After considerable reverse engineering work, made possible by useful online documentation, Alex finally managed to send a SMS from his Arduino board, connected to the phone, thanks to AVR libraries made available by AVRFreaks.
More information can be found on InsideGadget.
[Via: Inside Gadgets]
Introduction
In this article we examine the Seeedstudio ”Bluetooth Bee“ modules and how they can be used in a simple way in conjunction with Android devices to control the Arduino world. Here is an example of a Bluetooth Bee:

For the curious, the hardware specifications are as follows:
You may have noticed that the Bluetooth Bee looks similar to the Xbee-style data transceivers – and it is, in physical size and some pinouts, for example:

The neat thing with the BtB (Bluetooth Bee) is that it is compatible with Xbee sockets and Arduino shields. It is a 3.3V device and has the same pinouts for Vcc, GND, TX and RX – so an existing Xbee shield will work just fine.
In some situations you may want to use your BtB on one UART and have another for debugging or other data transport from an Arduino – which means the need for a software serial port. To do this you can get a “Bees Shield” which allows for two ‘Bee format transceivers on one board, which also has jumpers to select software serial pins for one of them. For example:

Although not the smallest, the Bees Shield proves very useful for experimenting and busy wireless data transmit/receive systems. More about the Bees Shield can be found on their product wiki.
Quick Start
In the past many people have told me that bluetooth connectivity has been too difficult or expensive to work with. In this article I want to make things as simple as possible, allowing you to just move forward with your ideas and projects. One very useful function is to control an Arduino-compatible board with an Android-based mobile phone that has Bluetooth connectivity. Using the BtB we can create a wireless serial text bridge between the phone and the Arduino, allowing control and data transmission between the two.
We do this by using a terminal application on the Android device – for our examples we will be using “BlueTerm” which can be downloaded from Google Play – search for “blueterm” as shown below:

In our Quick Start example, we will create a system where we can turn on or off four Arduino digital output pins from D4~D7. (If you are unsure about how to program an Arduino, please consider this short series of tutorials). The BtB is connected using the Bees shield. This is based on the demonstration sketch made available on the BtB Wiki page - we will use commands from the terminal on the Android device to control the Arduino board, which will then return back status.
As the BtB transmit and receive serial data we will have it ‘listen’ to the virtual serial port on pins 9 and 10 for incoming characters. Using a switch…case function it then makes decisions based on the incoming character. You can download the sketch from here. It is written for Arduino v23. If you were to modify this sketch for your own use, study the void loop() section to see how the incoming data is interpreted, and how data is sent back to the Android terminal using blueToothSerial.println.
Before using it for the first time you will need to pair the BtB with your Android device. The PIN is set to a default of four zeros. After setting up the hardware and uploading the sketch, wait until the LEDs on the BtB blink alternately – at this point you can get a connection and start communicating. In the following video clip you can see the whole process:
Where to from here?
There are many more commands that can be set using terminal software from a PC with a Bluetooth adaptor, such as changing the PIN, device name and so on. All these are described in the BtB Wiki page along with installation instructions for various operating systems.
Once again I hope you found this article interesting and useful. The Bluetooth Bees are an inexpensive and useful method for interfacing your Arduino to other Bluetooth-compatible devices. For more information and product support, visit the Seeedstudio product pages.
Bluetooth Bees are available from Seeedstudio and their network of distributors.

Disclaimer - Bluetooth Bee products used in this article are promotional considerations made available by Seeedstudio.
In the meanwhile have fun and keep checking into tronixstuff.com. Why not follow things on twitter, Google+, subscribe for email updates or RSS using the links on the right-hand column? And join our friendly Google Group – dedicated to the projects and related items on this website. Sign up – it’s free, helpful to each other – and we can all learn something.
The post Arduino, Android and Seeedstudio Bluetooth Bee appeared first on tronixstuff.
Planet Arduino is, or at the moment is wishing to become, an aggregation of public weblogs from around the world written by people who develop, play, think on Arduino platform and his son. The opinions expressed in those weblogs and hence this aggregation are those of the original authors. Entries on this page are owned by their authors. We do not edit, endorse or vouch for the contents of individual posts. For more information about Arduino please visit www.arduino.cc
You are currently browsing the archives for the cellular category.
 Arduino Blog Make Magazine Blog Hackaday Electronics-Lab Noel Portugal CNX-Software Matthew Rollings Chris Debenham Techatronic Giasone John Boxall Arduino++ Adafruit Blog EngineeringException Mamaus's Blog Tinker Hobby Bits and Pieces Wayne and Layne NerdyTechy Liudr's Blog Steve Marple b7arduino Chipwired Embedded-Lab