Posts | Comments

Planet Arduino

Archive for the ‘bicycle’ Category

Cycling is a great way to spend time outdoors while simultaneously getting exercise and even as a mode of efficient transportation. And in the last few years due to the recent proliferation of e-bikes on the market and the pandemic, there has been an explosion in the number of people wanting to use bikes on a regular basis. A few people have gone a step further and have taken it upon themselves to create devices that make this experience safer, more convenient, or more fun. For this year’s World Bicycle Day, let’s celebrate these makers and how they were able to creatively embed Arduino products into their designs for a better cycling experience.

Automatic shifter
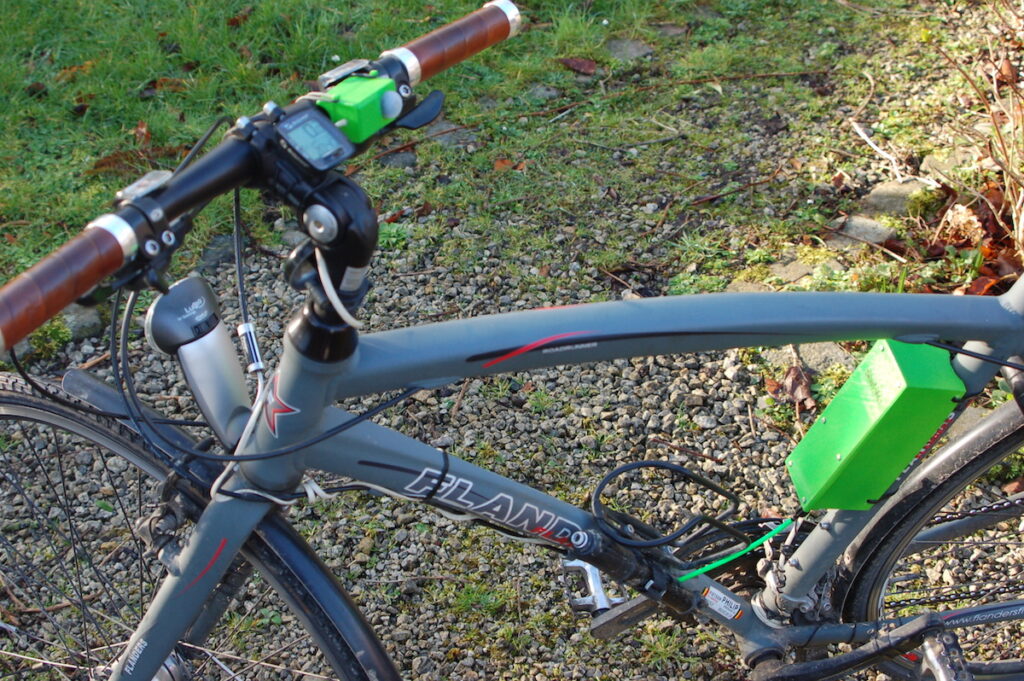
The purpose of a transmission is to convert the rotation of the motor into torque for the wheels, with more being needed at lower speeds for acceleration and less when cruising. Similarly, most bikes also have gearing wherein the rider can downshift to get up a hill or upshift to make larger strides on a straightaway. Jan Oelbrandt’s Shift4Me project eliminates the need to consciously think about this since it uses a magnetic cadence sensor attached to an Arduino Nano which allows it to automatically shift up or down depending on how quickly the pedals are moving. 

Bikelangelo water “graffiti” trailer

Similar to how a persistence of vision (POV) display moves rapidly changing pixels through the air to produce the illusion of a larger image, maker Sagarrabanana devised a towable bike trailer that sprays water on the ground using seven individual jets which take the place of the pixels in a POV display. Controlled by an Arduino Nano, the jets’ timing is determined by the bike’s speed in order to precisely deposit even lines of water in a dot-matrix pattern. Text from the user is inputted on a mobile phone and sent to the Nano via an HC-05 Bluetooth® module for printing. 

Biking position sensing
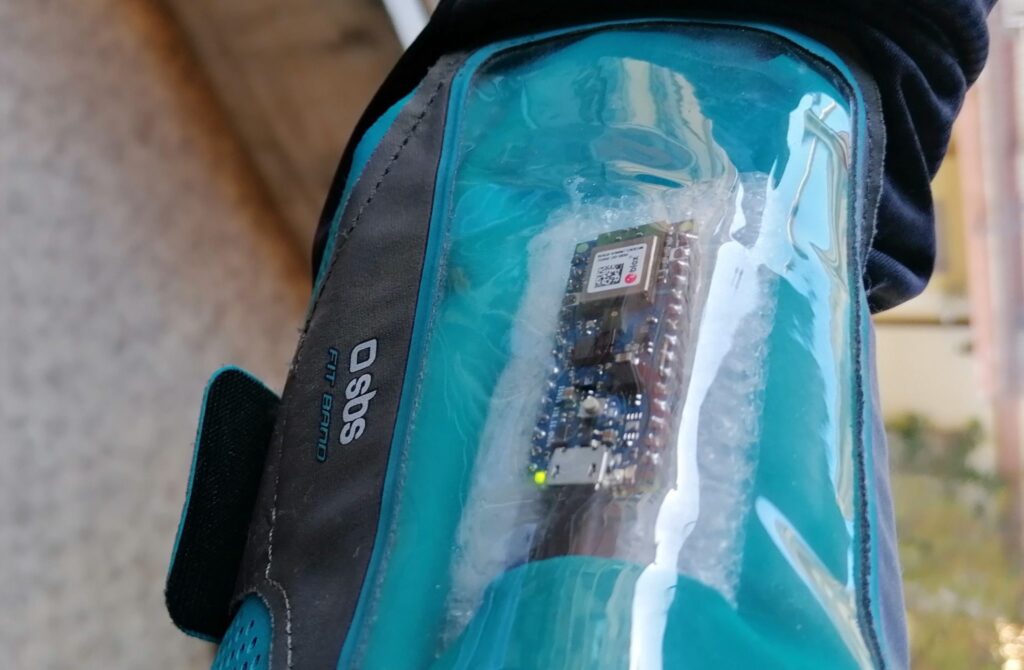
Bike computers are great for collecting detailed information on speed, cadence, power output, elevation, and more, but none can say whether the cyclist was sitting or standing for a period of time. This is why Fabio Antonini used an Arduino Nano 33 BLE Sense and Edge Impulse to develop such a device. He started by gathering 20 minutes of him sitting on a plane, sitting while going uphill, jumping on the pedals going uphill, and pushing on a flat sprint, then after training, deployed it to the Nano. In order to tell what is being detected, the built-in RGB LED changes color to notify the user. 

An unusual two-wheel steering system
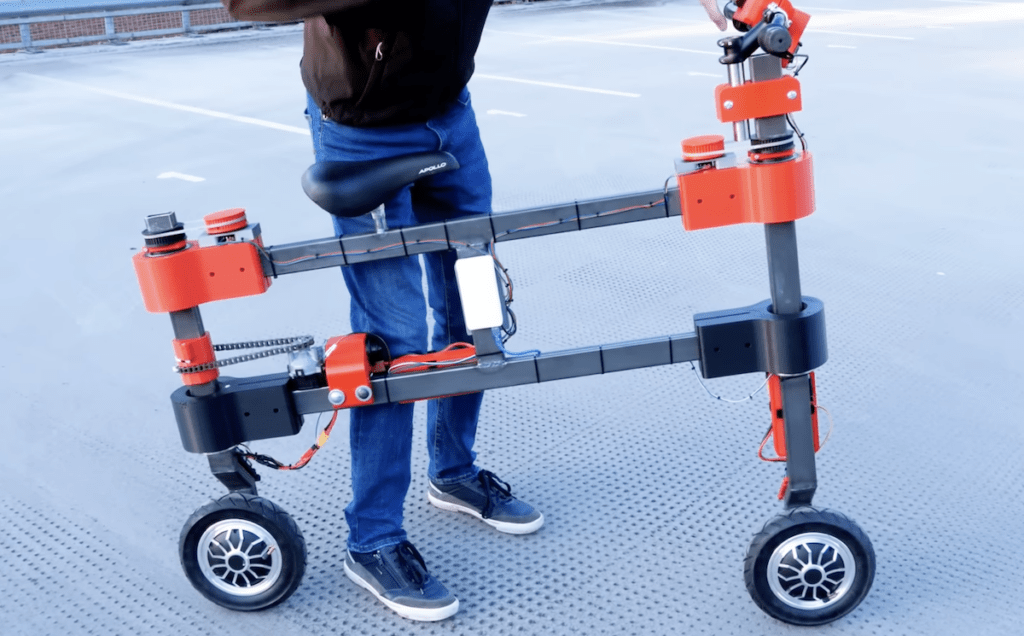
Prolific YouTuber and maker James Bruton is no stranger to unique robots and vehicles, and his take on the bicycle is no different. Unlike a traditional design that has a free front wheel and a locked rear wheel, this e-bike has a hub motor in both wheels that can turn independently thanks to an additional pair of motors. When the rider turns the front wheel, an Arduino Uno reads the encoder value and uses it to spin the rear wheel according to one of three modes: lock, mimic the front, and mirror the front. And although the resulting creating isn’t too practical, it’s a great way to see what’s possible when thinking out of the box. 

Intelligent lock
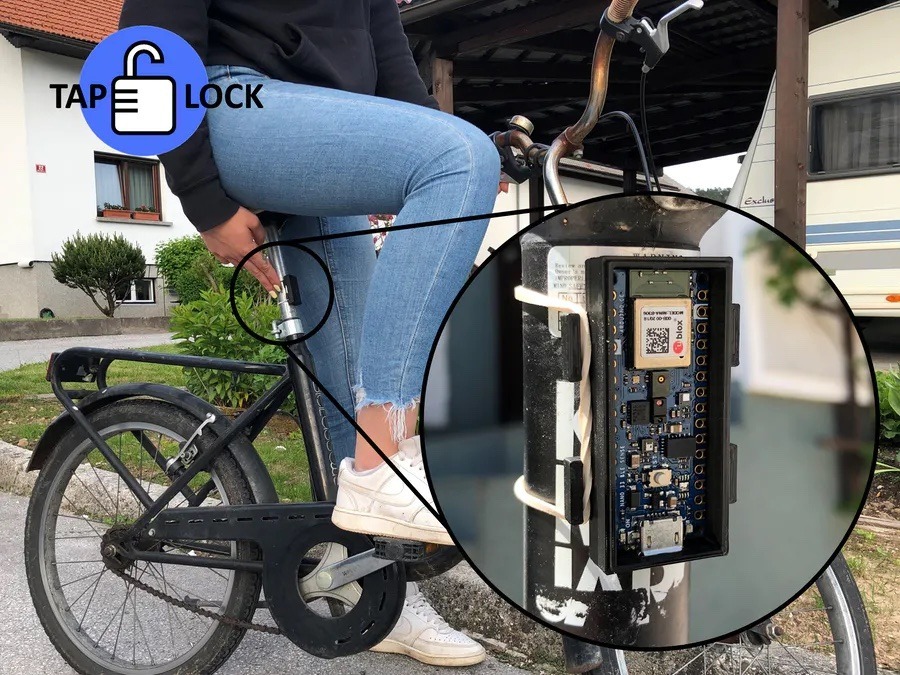
Nearly every bike lock in existence is operated by inserting a key into a cylinder and turning it to release the secured frame and/or wheel from a post. While this approach works, it also lacks several useful features such as keyless entry, mobile connectivity, and location tracking. The TapLock project reinvents the lock by relying on either a series of physical taps on the lock’s enclosure in a certain pattern or a paired phone to unlock. Beyond this, the TapLock’s Arduino Nano 33 BLE Sense communicates with the mobile app to store the current location on a map and even remotely lock the bike. 

Compact turn signals
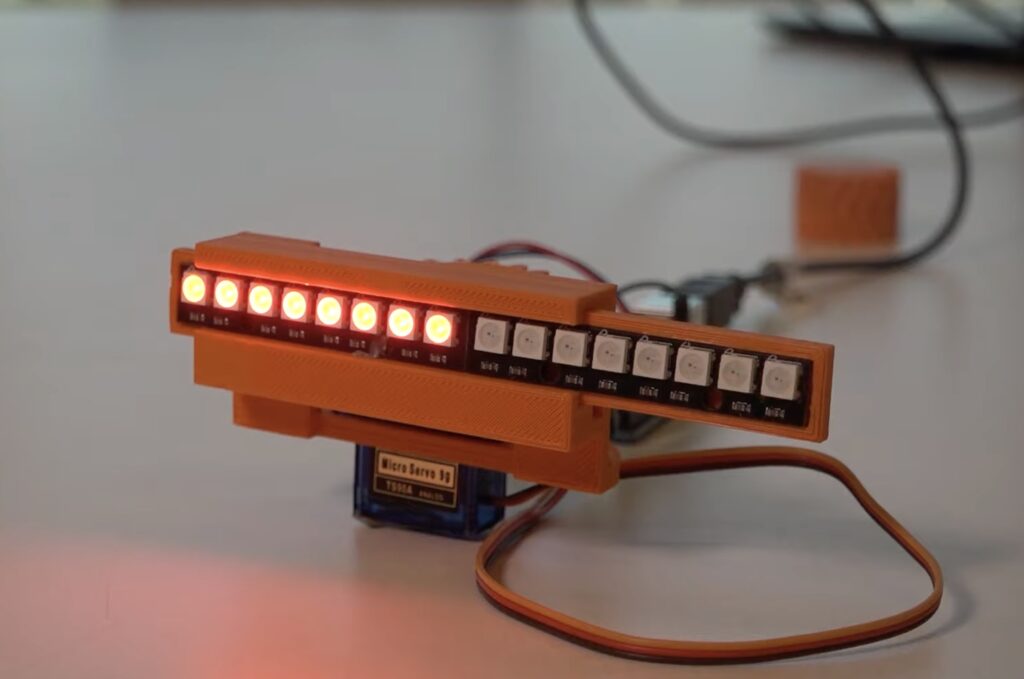
In a car, signaling is as easy as pushing a stock up or down to indicate your intention of changing lanes or turning, but for bikes, this role falls to the rider having to move their arm around. Tom Ouwerkerk’s solution was to buld a very compact signal by combing two eight-LED NeoPixel strips and an Arduino Uno to act as the signal. The strips sit on a gliding mechanism which moves either left or right thanks to a servo motor underneath, and it helps to clarify the intended direction of travel even further. 

ML-powered adjustable suspension
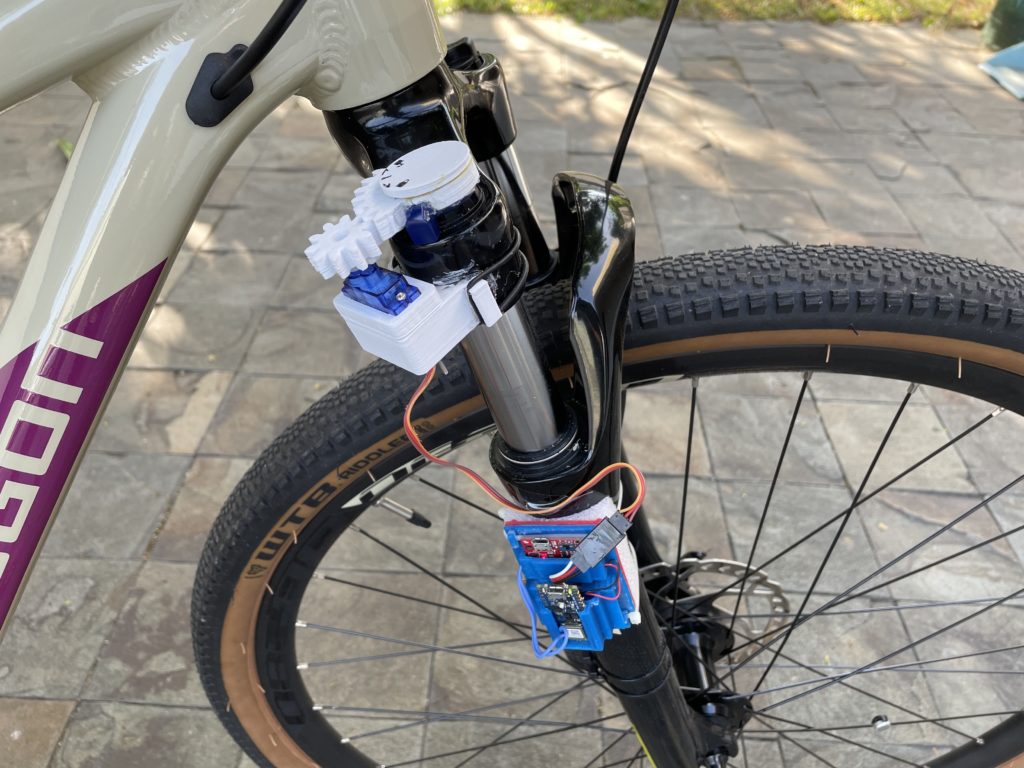
Higher-end, modern cars are beginning to add automatically adjustable suspension systems to their drivetrains which help to adapt the car to the current terrain, atmospheric conditions, and the driver’s comfort level. Jallson Suryo was able to create his own thanks to an Arduino Nano 33 BLE Sense and a servo motor that turns the bike’s front suspension fork to increase or decrease stiffness. Terrain recognition was accomplished by training an edge ML model on IMU readings and using them to distinguish between idle, smooth, medium, rough, and sprint conditions. 

Connecting a stationary bike to a simulator
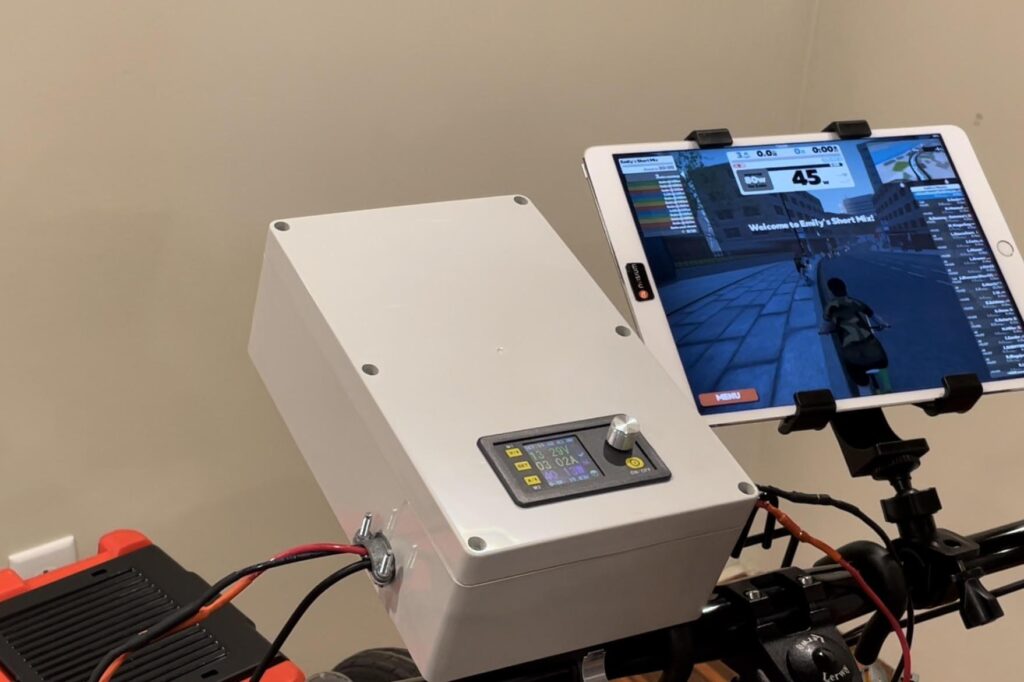
Bicycling simulators are a great way to experience races against others, explore trails, or simply enjoy a pleasant ride no matter what the weather outside is. Zwift is one such software, and two important features are that your actual pedaling speed is matched in-game and the game controls the pedaling difficulty. Gene’s Green Machine was able to integrate his bike with the system by connecting an Arduino Nano 33 IoT board to a DPS5020 charge controller for reading the current wattage and setting the target resistance. All of this information is sent and received by utilizing the Nano’s capabilities. 

A video game controller

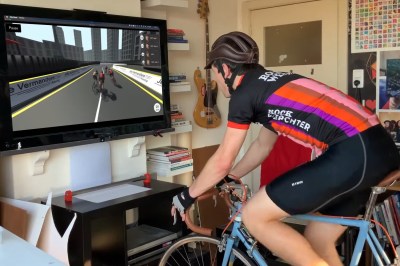
Similar to the previous project, video game creator Jelle Vermandere wanted to ride his bike indoors along a virtual track. But this time, he took it a step further by not only integrating his bike using an Arduino Uno which determines the wheel speed via a magnetic reed switch, but building the game himself in Unity. He had to construct and animate models for himself, the bike, and the scenery. After adding an AI and ranking system to the game, he was able to successfully race within the virtual environment on a real bike. 

Responsive LED system

Motivated by the desire for a more advanced lighting system while on her nighttime bike rides, Natasha (TechnoChic) decided to affix strips of NeoPixel LEDs all over her bike that could react to music in real-time. The LEDs are controlled by an Arduino Nano 33 IoT that is, in turn, connected to her boombox via a 3.5mm audio jack for reading the audio signal. Two additional Nano 33 IoT boards were used for the wheels, along with more NeoPixels and batteries for each. 

GPS tracker
Bicycle theft has been rapidly increasing over the last couple of years, which is why being able to recover a stolen bike has become vital. Johan’s bike tracker project contains an Arduino MKR GSM 1400 which reads motion data from an IMU and uses it to determine if the bike has moved when it is not supposed to. Once movement is detected, the board reads GPS data from a MKR GPS Shield and sends it over an LTE data connection in real-time so that the bike can be found. 

Integrated safety features

The majority of mountain bikes lack useful safety features such as integrated lights, turn signals, and speed tracking, which is why Collin Wentzien embarked on his “(not so) electric bike” project. He built a series of features, including automatic brake/turn lights, a headlight, and an electronic horn with the goal of improving safety. Furthermore, his bike also got a bike computer upgrade which contains an Arduino Mega, GPS module, and dual screens for displaying relevant telemetry data. 

Speedometer display
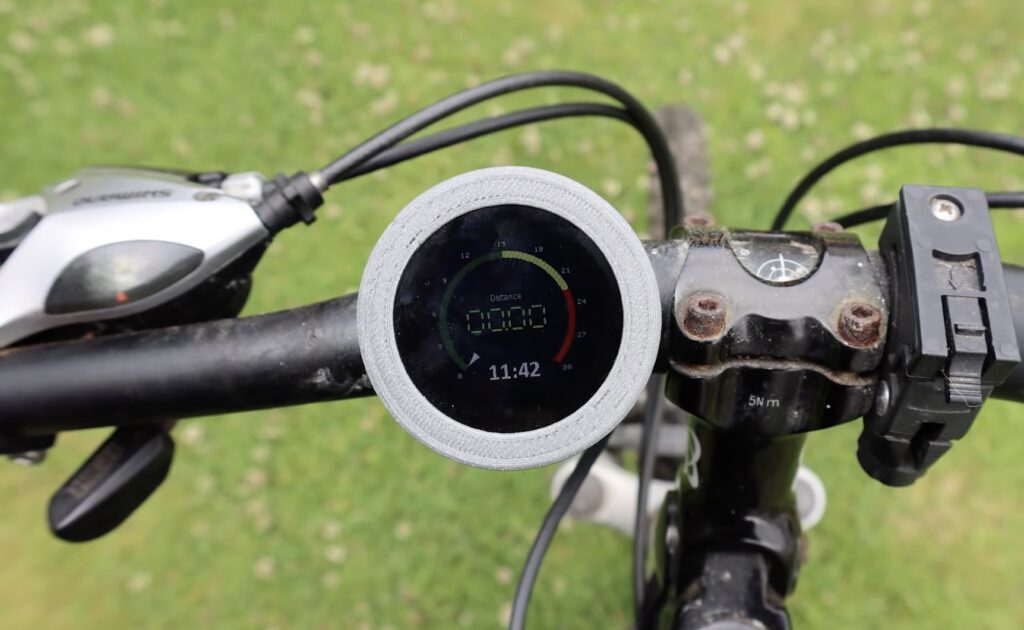
After losing the display unit for her bike computer, Element14 Presents host Katie wanted to replace it with a DIY version that tracked the current speed via GPS instead of wheel rotations. An Arduino Nano 33 IoT board handled communication between the small 1.3” LCD screen and one of Quectel’s L80 small form-factor GPS modules. On each loop of the program, the time, speed, and distance are all shown on the screen thanks to the 4D Systems genieArduino display library. 

BLE-enabled cycling computer

This last DIY bicycle computer was made by YouTuber cubicpixelDE, and it integrates an Arduino Nano 33 BLE Sense along with a myriad of bicycle sensors and a heart rate sensor over BLE to display valuable data to the rider. The entire system combines a 1.8” color TFT screen and the Nano 33 BLE Sense into a single, compact unit which fits alongside the handlebar and reads out data to a mobile app wirelessly. 

The post Celebrate World Bicycle Day with these Arduino-powered bike projects appeared first on Arduino Blog.

One of the keys to efficient cycling performance is a consistent pedalling cadence. To achieve this the cyclist must always be in the correct gear, which can be tricky when your legs are burning and you’re sucking air. To aid in this task, [Jan Oelbrandt] created Shift4Me, an open-source Arduino powered electronic shifter.

The system consists of a hall effect sensor at the pedals to measure cadence, an Arduino controller, and a servo mechanism to replace the manual shifter. Everything is mounted in a small enclosure on the frame. The only way to get one is to build your own, so a forum is available for Shift4Me builders, where the BOM, instructions, code and other documentation is available for download. Most bikes should be easy to convert, and [Jan] invites builders to post their modifications and improvements.

Since the only input is the cadence sensor, we wonder if the system will interfere more than help when the rider has to break cadence. It does however include allowance to hold on the current gear, or reset to a starting gear by pushing a button. One major downside is that you will be stuck in a single gear if the battery dies since the manual shifter is completely removed.

As one of the oldest continuously used forms of mechanical transport, there is no shortage of bicycle-related hacks. Some of the more recent ones we’ve seen on Hackaday include e-bike with a washing machine motor, and a beautifully engineered steam-powered bicycle.

Graffiti is a controversial subject, and whether you see it as art or vandalism usually depends where and how you come across it. From the scribbled tag on a house wall, to highly sophisticated murals, they tend to have one thing in common though: making a statement — whether that’s political, showing appreciation, or a simple “I was here”. [Sagarrabanana] had his own statement to make, but chose a less permanent way to express himself with his type of graffiti.

Unhappy about the lack of dedicated cycle lanes in his area, he built an automatic, Arduino-controlled water dispensing bicycle trailer, writing his message on every street he rides on. The build is documented in a video, and shown in action in another one — which are both in Spanish (and also embedded after the break), but pictures are worth their thousand words in any language.

Inspired by persistence of vision (POV), where moving LEDs sync up their blinking to give the illusion of a static image, [Sagarrabanana] transformed the concept to water on a road using an array of solenoids attached to a water tank. Each solenoid is controlled by a relay, and a predefined font determines when to switch each relay — the same way pixels on a display would be set on or off, except small amounts of water are squirted out as the bicycle is moving along. The message itself is received via serial Bluetooth module, and can be easily modified for example from a phone. To adjust the water dispensing to the cycling speed, the whole system is synced to a magnetic switch mounted to one of the trailer’s wheels, so you could theoretically take it also with you on a run.

Time will tell if [Sagarrabanana]’s mission has the success he hopes for, but there’s no doubt the trailer will attract attention anywhere he goes. Well, we wish him all the best to get the message through without requiring a too drastic alternative as writing medium. Although, we’ve seen a graffiti robot that uses chalk spray in the past, so there’s certainly room for a not-too-permanent upgrade if needed.


While we’re still far away from returning to a pre-Corona everyday life, people seem to have accepted that toilet paper will neither magically cease to exist, nor become our new global currency. But back at the height of its madness, like most of us, [Jelle Vermandere] found himself in front of empty shelves, and the solution seemed obvious to him: creating a lifelike toilet paper chasing game in hopes to distract the competition.

Using Unity, [Jelle] created a game world of an empty supermarket, with the goal to chase after distribution tubes and collect toilet paper packs into a virtual cart. Inspired by the Wii Wheel, he imitated a shopping cart handle built from — as it appears — a sunshade pole that holds an Arduino and accelerometer in a 3D-printed case as game controller. For an even more realistic feel, he added a sound sensor to the controller, and competing carts to the game, which can be pushed out of the way by simply yelling loud enough. You can witness all of this delightful absurdity in his build video after the break.

From racing shopping carts to racing bicycles

But that’s not all. With the toilet paper situation sorted out, [Jelle] found himself in a different dilemma: a cloud foiled his plans of going for a bicycle ride. In the same manner, he ended up building a cycling racing game, once again with Unity and Arduino. From a 3D-scanned model of himself and his bicycle, to automatically generating tracks on the fly and teaching an AI to ride a bike, [Jelle] clearly doesn’t joke around while he’s joking around.

However, the best part about the game has to be the controller, which is his actual bicycle. Using a magnetic door sensor to detect the speed, and a potentiometer mounted with an obscure Lego construction to the handlebar, it’s at least on par with the shopping cart handle — but judge for yourself in another build video, also attached after the break. The only thing missing now is to level up the difficulty by powering the Arduino with the bicycle itself.


Tired of risking his life every time he had to signal a turn using his hands while riding his bicycle in rainy Vancouver, [Simon Wong] decided he needed something a bit higher tech. But rather than buy something off the shelf, he decided to make it into his first serious Arduino project. Given the final results and the laundry list of features, we’d say he really knocked this one out of the park. If this is him getting started, we’re very keen to see where he goes from here.

So what makes these turn signals so special? Well for one, he wanted to make it so nobody would try to steal his setup. He wanted the main signal to be easily removable so he could take it inside, and the controls to be so well-integrated into the bike that they wouldn’t be obvious. In the end he managed to stuff a battery pack, Arduino Nano, and an HC-05 module inside the handlebars; with just a switch protruding from the very end to hint that everything wasn’t stock.

On the other side, a ATMEGA328P microcontroller along with another HC-05 drives two 8×8 LED matrices with MAX7219 controllers. Everything is powered by a 18650 lithium-ion battery with a 134N3P module to bring it up to 5 VDC. To make the device easily removable, as well as keep the elements out, all the hardware is enclosed in a commercial waterproof case. As a final touch, [Simon] added a Qi wireless charging receiver to the mix so he could just pull the signal off and drop it on a charging pad without needing to open it up.

It’s been some time since we’ve seen a bike turn signal build, so it’s nice to see one done with a bit more modern hardware. But the real question: will he be donning a lighted helmet for added safety?


It is pretty easy to go to a big box store and get a digital speedometer for your bike. Not only is that no fun, but the little digital display isn’t going to win you any hacker cred. [AlexGyver] has the answer. Using an Arduino and a servo he built a classic needle speedometer for his bike. It also has a digital display and uses a hall effect sensor to pick up the wheel speed. You can see a video of the project below.

[Alex] talks about the geometry involved, in case your high school math is well into your rear view mirror. The circumference of the wheel is the distance you’ll travel in one revolution. If you know the distance and you know the time, you know the speed and the rest is just conversions to get a numerical speed into an angle on the servo motor. The code is out on GitHub.

Granted, reading a magnet, keeping time, and driving a servo isn’t exactly cutting edge. On the other hand, it made us think about what other kinds of outputs you could drive. We haven’t seen a nixie tube speedometer (well, not on a bicycle, anyway), for example. Or maybe one built with mechanical flip numbers like an old clock.

We have seen some with Arduinos and lots of LEDs (although, again, not really for a bicycle). This speedometer might still be our favorite, though.


Filed under: Arduino Hacks, transportation hacks

Bicycle riders can never be too visible: the more visible you are, the less chance there is someone will hit you. That’s the idea behind the Arduibag, a neat open-source project from [Michaël D’Auria] and [Stéphane De Graeve]. The project combines a joystick that mounts on the handlebars with a dot matrix LED display in a backpack. By moving the joystick, the user can indicate things such as that they are turning, stopping, say thank you or show a hazard triangle to warn of an accident.

The whole project is built from simple components, such as an Adafruit LED matrix and a Bluno (an Arduino-compatible board with built-in Bluetooth 4.0) combined with a big battery that drives the LED matrix. This connects to the joystick, which is in a 3D printed case that clips onto the handlebars for easy use. It looks like a fairly simple build, with the larger components being mounted on a board that fits into the backpack and holds everything in place. You then add a clear plastic cover to part of the backpack over the LED matrix, and you are ready to hit the road, hopefully without actually hitting the road.

Like any good project, [Michaël] and [Stéphane] aren’t finished with it yet: they are also looking for ways to improve it. In particular, they want to reduce the number of batteries, as there is currently a large battery that drives the display and another smaller one that drives the Arduino.


Filed under: Arduino Hacks, wearable hacks
Jun
03

Secure and Track Your Bike with this Arduino-Based GPS Lock

arduino, bicycle, bike, bike lock, lock, Security, Transportation Comments Off on Secure and Track Your Bike with this Arduino-Based GPS Lock 

Riding a bike can be fun, great exercise, and, if you live in a city conducive to it, a great mode of transportation. According to author Scott Bennett who lives in Vancouver BC, Canada, a city with a high bike theft rate, he “wanted to have some peace of mind […]

Read more on MAKE

The post Secure and Track Your Bike with this Arduino-Based GPS Lock appeared first on Make:.

Aug
21

A Custom Bicycle Dashboard

arduino, bicycle, Dashboard, LED, Woodworking Comments Off on A Custom Bicycle Dashboard 

dashboardIf you’re not satisfied with the lightweight digital speedometer that you can buy at your local bike shop, why not build your own bicycle dashboard using various electrical components and wood? DJ decided to do just that, and gives instructions with an electrical schematic, parts list, and Arduino sketch, in […]

Read more on MAKE

Jul
28

Electronic dashboard for a bicycle

arduino, bicycle, Dashboard Comments Off on Electronic dashboard for a bicycle 

Edashboard

by R-B @ embedded-lab.com:

This electronic dashboard for a bicycle uses an Arduino and a few other parts to create a light control system and an LED speedometer. It is powered with eight 1.5V batteries connected in series. Six LEDs on the dashboard indicates how fast are you going on your bicycle.

Electronic dashboard for a bicycle - [Link]


  • Newsletter

    Sign up for the PlanetArduino Newsletter, which delivers the most popular articles via e-mail to your inbox every week. Just fill in the information below and submit.

  • Like Us on Facebook