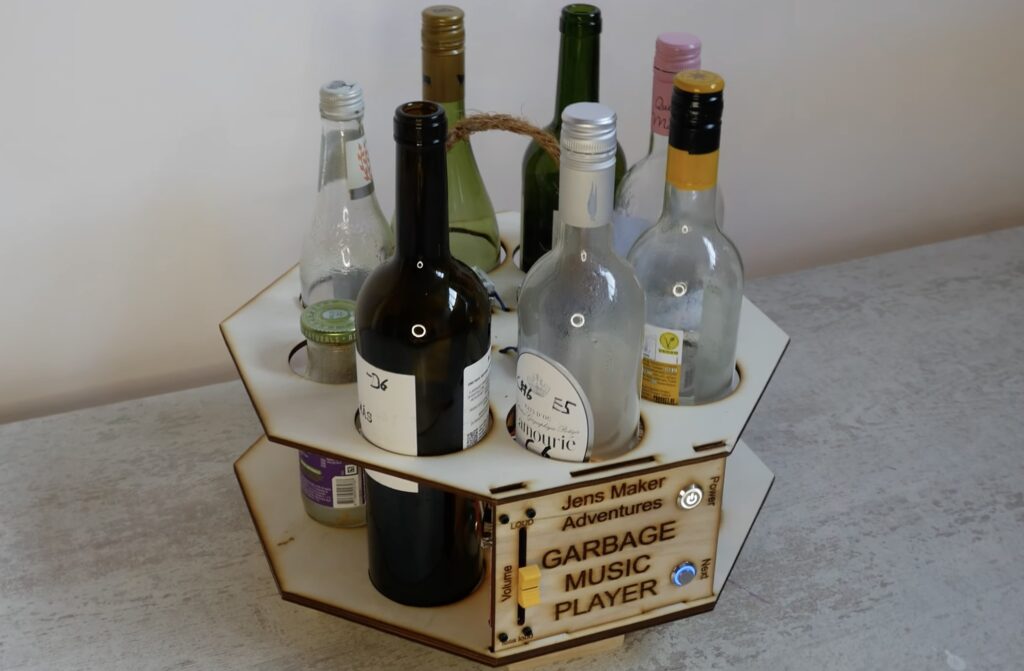
Percussion instruments are likely the first kind that humanity invented, because they’re quite simple: hit a thing and a noise happens. Different things produce different frequencies with different timbres, and glass bottles have a nice xylophonic sound to them. Because glass bottles are easy to find among discarded garbage, Jens of the Jens Maker Adventures YouTube channel took advantage of them to build this awesome robotic instrument.
Jens started by collecting a bunch of different bottles. He tapped each to while searching to get a sense of the notes they produced, which he could then lower by adding some water to fine tune the pitch. Once he had enough bottles to cover a range of notes, he set out to construct a robot to play them.
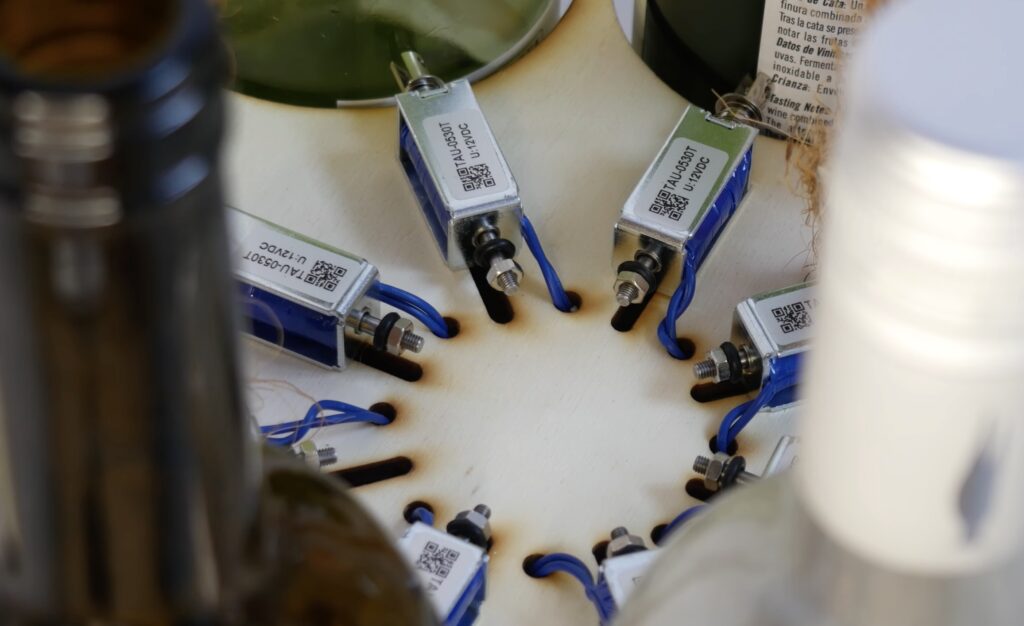
Solenoid actuators tap each bottle and an Arduino UNO Rev3 board controls that tapping. It does so according to MIDI files created in the popular Ableton software. Jens matched the available notes in Ableton to those produced by the glass bottles, so he could simply compose melodies using those notes knowing that the robot could play them. The Arduino reads the MIDI files output by Ableton and strikes the corresponding bottles.
Finally, Jens laser-cut a plywood frame and enclosure that holds the bottles, the Arduino, and the solenoids. It works with seven bottles, which is the number of notes this machine can play.
Jens demonstrated that by playing a guitar along with the robotic instrument and the result sounds very pleasant — especially for something made with garbage.
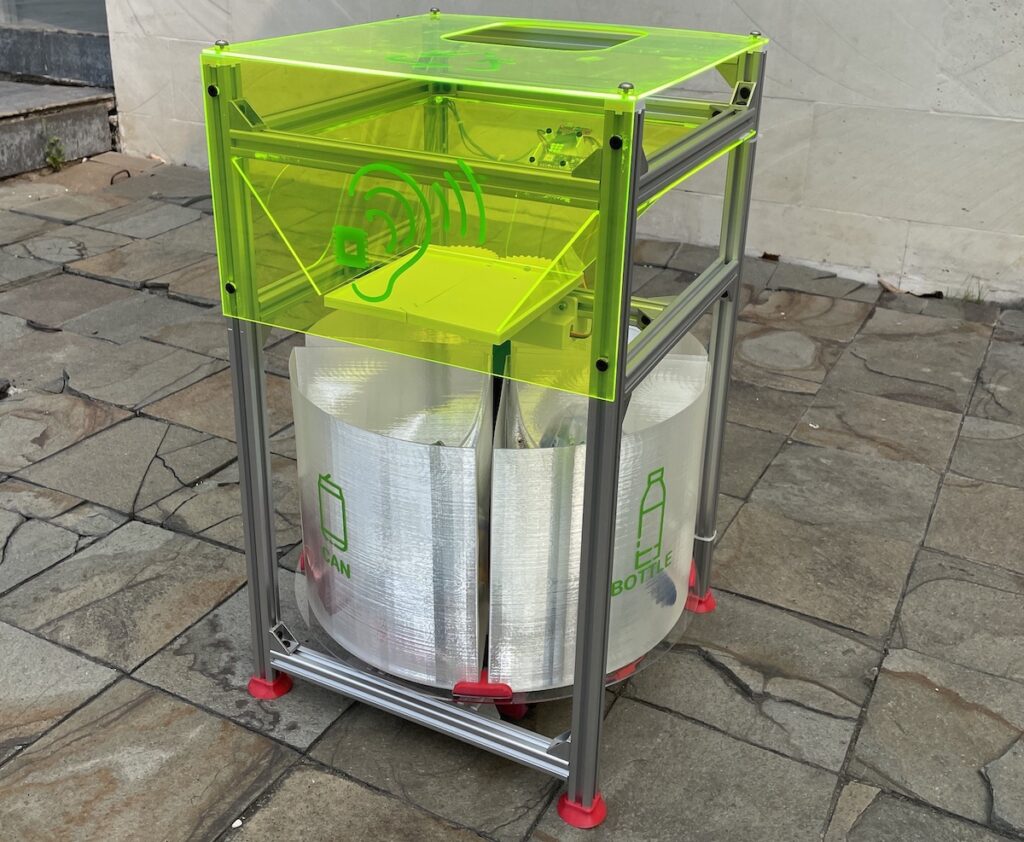
Although a large percentage of our trash can be recycled, only a small percentage actually makes it to the proper facility due, in part, to being improperly sorted. So as an effort to help keep more of our trash out of landfills without the need for extra work, Samuel Alexander built a smart recycling bin that relies on machine learning to automatically classify the waste being thrown in and sort it into separate internal compartments.
Because the bin must know what trash is being tossed in, Alexander began this project by first constructing a minimal rig with an Arduino Nano 33 BLE Sense to capture sounds and send them to an Edge Impulse project. From here, the samples were split into 60 one-second samples for each rubbish type, including cans, paper, bottles, and random background noise. The model, once trained, was then deployed to the Nano as a custom Arduino library.
With the board now able to determine what type of garbage has been thrown in, Alexander got to work on the remaining portions of the smart bin. The base received a stepper motor which spins the four compartments to line up with a servo-actuated trap door while a LiPo battery pack provides power to everything for fully wireless operation.
To read more about how this bin was created, you can visit Alexander’s write-up here on Hackaday.io.
Often you might see a recycling bin next to a trash can, and notice that someone else has thrown their waste into the wrong container. To help with this conundrum, the team of Shalin Jain, Viraj Singh, Edward Chen, and Joshua Kim created a double-sided container that sorts things automatically.
Their device, dubbed “Splash,” takes a webcam image of the item presented to it, analyzes this with a Python script and the Azure Custom Vision API, and reports back to an Arduino Uno controller with its findings. Depending on the results, the Arduino then uses a driver board and motor to properly position a flap, directing refuse into in the correct bin.
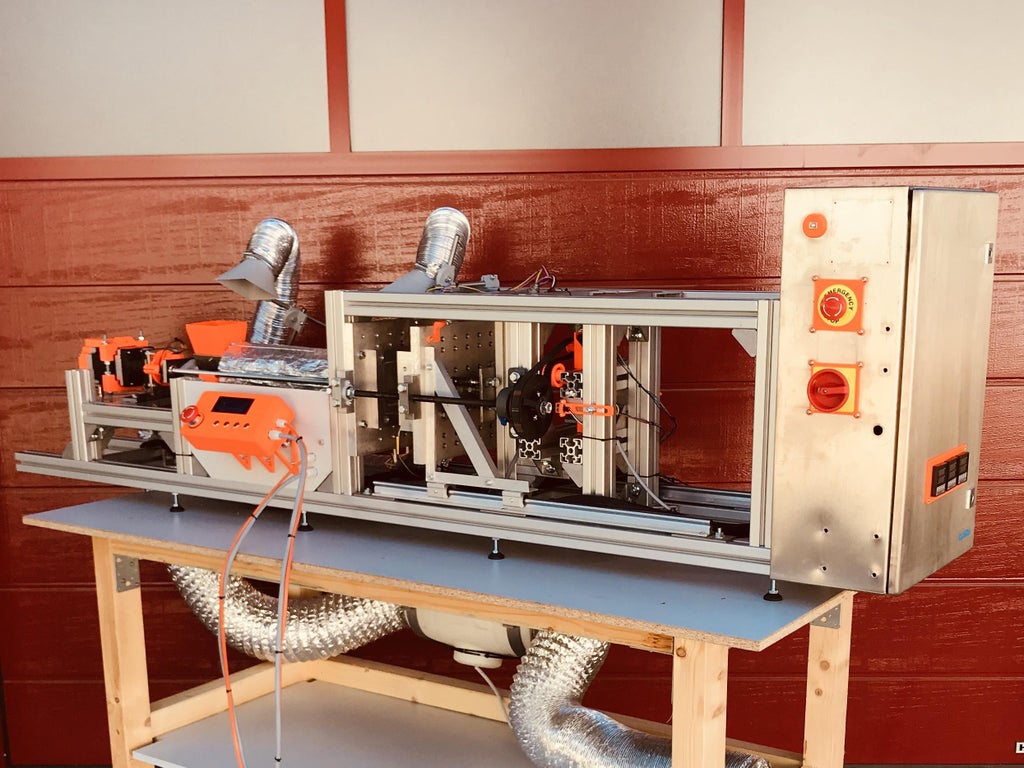
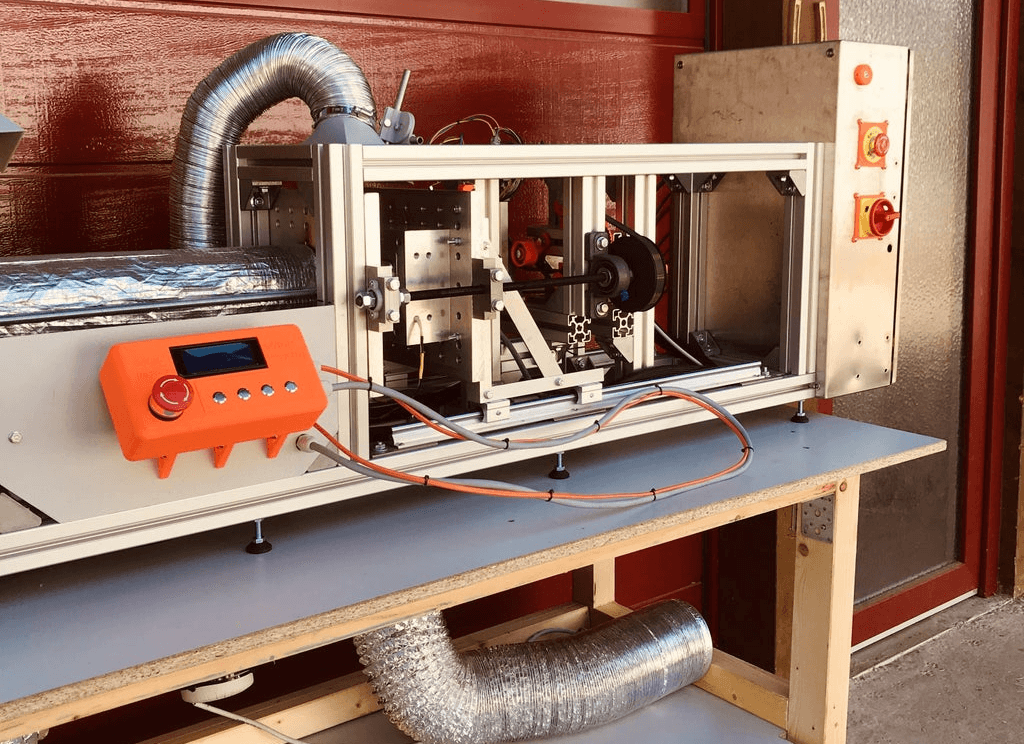
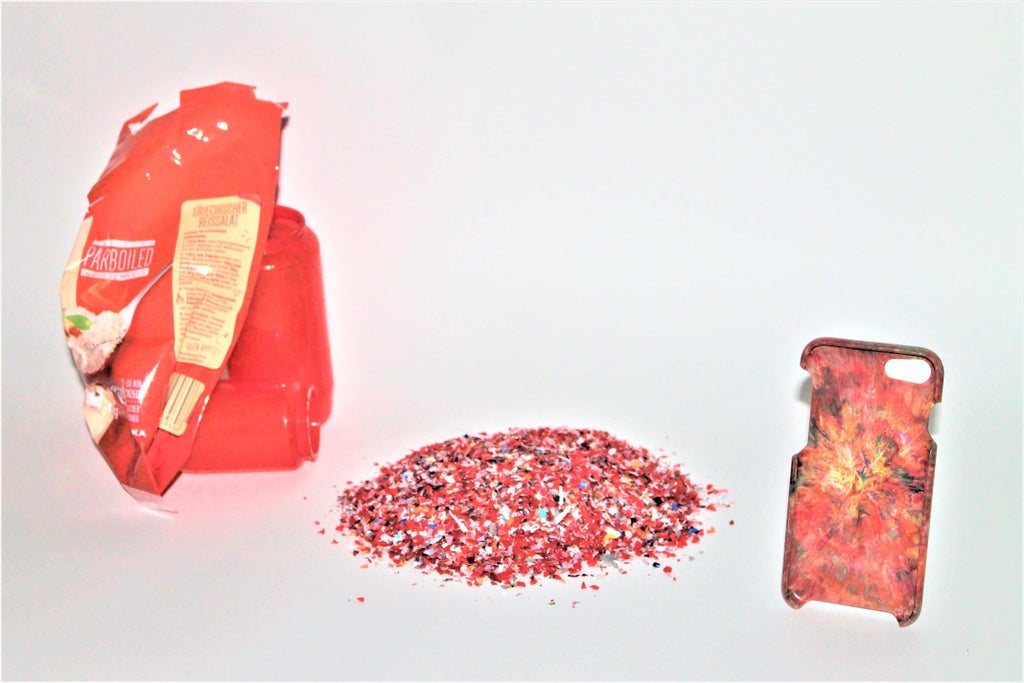
While that plastic cup, bag, dish, or other item may have served its purpose, more than likely it could be formed into something new. With this in mind, the SOTOP-Recycling team of Manuel Maeder, Benjamin Krause, and Nadina Maeder developed an automated injection molding machine that can be built at home and is small enough to allow you to run your own recycling operation!
The “Smart Injector” receives shredded pieces of plastic in a small hopper, then transports them down an extrusion pipe where heat is applied. This material is clamped together via a pair of stepper motors, with screws and timing belts implemented to apply sufficient pressure. Everything is controlled by an Arduino Mega.
As shown in the video, the plastic waste is converted into phone covers in just minutes, though other things could also be made depending on the form tooling used.
Every month Australian electronics magazine Silicon Chip publishes a variety of projects, and in January 2013 they published the “Garbage Recycling Reminder” by John Clarke. Jaycar picked it up and now offers a kit, the subject of our review. This kit solves the old but recurring (for some) problem – which bin to put out, and when!
The kit offers a simple way of keeping track of the bin schedule, and is suitable for up to four bins. With a simple user-interface consisting of a button and LED for each bin – once setup the reminder can easily be used by anyone. It allows for weekly, fortnightly and alternate fortnights – which is perfect for almost every council’s schedule.
Assembly
The kit arrives in typical Jaycar fashion:
and includes everything you need, including an enclosure, front panel sticker and battery:
The PCB is well done, and routed nicely to fit inside the enclosure:
Now to get started. The instructions included are a reprint of the magazine article, and as Jaycar have modified the kit a little, their notes and photos are also included. However there isn’t anything to worry about.
Assembly is straight-forward, the only annoying thing was the assumption that the constructor will use off-cuts for jumper links. Instead – use your own header pins:
Furthermore, when soldering in the resistors and 1N914 diodes next to the LEDs – leave them floating so you can move them a bit to make way for the LEDs:
This is also a good time to check the buttons line up with the holes drilled into the front panel (a template is included with the instructions):
At this point you can fit the LEDs to the PCB, and carefully match it up with the drilled lid. You are supplied with a red, green, yellow and blue LED – which generally match the bin lid colours from various councils. Screw the PCB into the lid then solder the LEDs in – after double-checking they protrude out of lid. Then insert the battery and make a final test:
If you made it that far, you can apply the sticker included to illustrate the front panel. To save time we cut the sticker up for a minimalist look. However you now need to set-up the jumpers before closing the box up. There is a set of three pins for each bin, and a jumper can bridge the first two or last two pins, or none. If you don’t bridge them – that bin is weekly. If you bridge the first two – that bin is fortnightly from the setup day. If you bridge the last two – that bin is fortnightly from the next week, for example:
So you can easily set it up for a weekly bin and an alternating-fortnight pair of bins. Once you’ve setup the jumpers, screw up the box and you’re done.
Operation
Once you’ve set the jumpers up as described earlier, you just need to execute the programming function at the time you want the reminders to start every week. For example, if your weekly collection is 4 AM on a Thursday – do the programming around 5pm Wednesday night – that will then be the time the LEDs start blinking. When you put out the appropriate bin, press the button below the matching bin LED to stop the blinking. You can control the number of bins – so if you only have two bins, only two LEDs will activate. The blinking period is eighteen hours, and you can adjust the start time via the buttons.
How it works
The circuit is based around a Microchip PIC16LF88 and has an incredibly low current draw, around 15 uA when the LEDs aren’t blinking. This allows the circuit to run for over two years on the included 3v coin cell battery. The internal clock is kept accurate to around 10 minutes per year using an external 32.768 kHz crystal. After a period of use the battery voltage may drop to a level insufficient to adequately power the LEDs, so each one has a voltage doubler by way of a diode and capacitor – very clever. This ensures LED brightness even with a low battery. For complete details purchase the kit or a copy of the January 2013 edition of Silicon Chip.
Now it sits next to the kettle, waiting for bin night…
Conclusion
Personally I needed this kit, so I’m a little biased towards it. However – it’s simple and it works. Kudos to John Clarke for his project. You can purchase it from Jaycar and their resellers, or read more about it in the January 2013 edition of Silicon Chip. Full-sized images available on flickr. This kit was purchased without notifying the supplier.
In the meanwhile have fun and keep checking into tronixstuff.com. Why not follow things on twitter, Google+, subscribe for email updates or RSS using the links on the right-hand column? And join our friendly Google Group – dedicated to the projects and related items on this website. Sign up – it’s free, helpful to each other – and we can all learn something.
About
Planet Arduino is, or at the moment is wishing to become, an aggregation of public weblogs from around the world written by people who develop, play, think on Arduino platform and his son. The opinions expressed in those weblogs and hence this aggregation are those of the original authors. Entries on this page are owned by their authors. We do not edit, endorse or vouch for the contents of individual posts. For more information about Arduino please visit www.arduino.cc
You are currently browsing the archives for the recycling category.