Posts | Comments

Planet Arduino

Archive for the ‘wearable hacks’ Category

When you want a backpack that turns heads and gets people talking, you can get ahead of the conversation with a talking backpack. [Nina] created a rucksack with the legendary babbler itself, the infamous Furby.

Believe it or not, no actual Furbies were sacrificed in the making of this backpack. The build uses an Arduino Nano, two servos, and a DFPlayer Mini for audio. A 3D printed faceplate is used for the iconic eyes and face. The code is fairly simple, waiting for a random delay and then triggering one of four effects. It can play a sound or blink and does its best to move the mouth while the sound is playing thanks to the handy busy line coming off the sound module. A unicorn children’s backpack offered a furry shell to stuff the electronics inside. A custom PCB makes the whole thing just a little neater internally.

Perhaps next [Nina] can integrate voice recognition so that the backpack can answer simple questions like an Alexa-powered Furby we’ve seen before.

Smart watches are pretty common today, but how many people do you know with a smart hat? [Oliver] built Wilson which he bills as “the IoT hat.” We wonder if the name was inspired by the Home Improvement character of the same name who only appeared as a hat above the fence line. You can see a video of the project, below.

The project is pretty straightforward for hardware. An LED strip, an Arduino, and a Bluetooth module. Oh. And a hat. The software, as you might expect, is a bit more complex. It allows you to display SMS messages to your hat.

As wearables go, your happiness with this project will depend on what’s important to you. If you want to read your text messages, you might like to stick with a watch since it is hard to see a hat while it is on your head. But if you want to show the world what’s on your mind — and your phone — this might be just the ticket.

Regardless of practicality, we thought it was a fun project and now that in person meetups are coming back, a great thing to wear at the next Supercon. It sure looks nicer than the heads up baseball cap, although you can read that one yourself. Oddly enough, most of the hat hacks we see involve baseball caps.

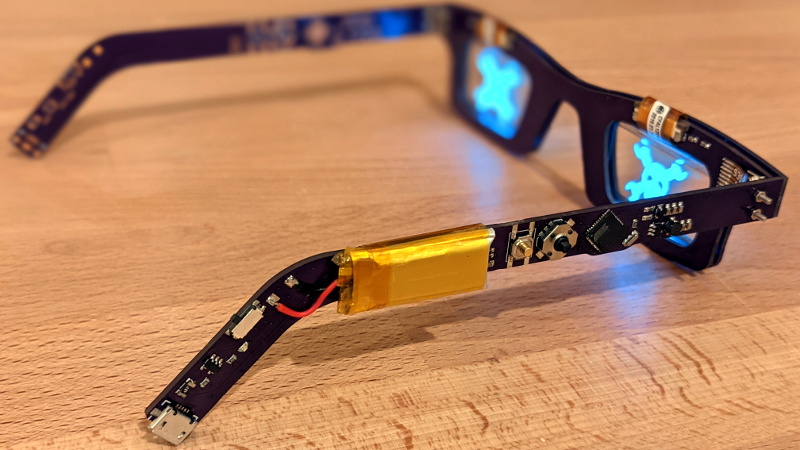
Tiny OLED displays are an absolute must-have in the modern parts bin, so what better way to show your allegiance to the maker movement than with a pair of Arduino-compatible OLED glasses? Created by Arduboy mastermind [Kevin Bates], these digital spectacles might not help you see any better — in fact, you’ll see a bit worse — but they’ll certainly make you stand out in the crowd at the next hacker con. (Whenever we can have one of those again, anyway.)

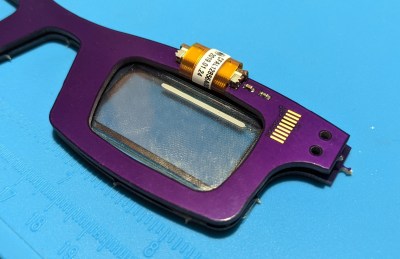
The key to this project is a pair of transparent CrystalFonts OLED displays, just like the ones [Sean Hodgins] recently used to produce his gorgeous volumetric display. In fact, [Kevin] says it was his success with these displays that inspired him to pursue his own project. With some clever PCB design, he came up with some boards that could be manufactured by OSH Park and put together with jewelry box hinges. Small flexible circuits, also from OSH Park, link the boards and allow the frames to fold up when not being worn.

The Arduglasses use the same ATmega32U4 microcontroller as the Arduboy, and with a few basic controls and a small 100 mAh rechargeable battery onboard, they can technically run anything from the open source handheld’s extensive software library. Of course, technically is the operative word here. While the hardware is capable of playing the games, [Kevin] reports that the OLED displays are too close to the wearer’s eyes to actually focus on them. That said the ability to easily create software for these glasses offers plenty of opportunity for memes, as we see in the video below.

For reasons that are probably obvious, [Kevin] considers the Arduglasses an experiment and isn’t looking to turn them into a commercial product or kit. But if there’s interest, he’s willing to put the design files up on GitHub for anyone who wants to add a pair of Arduino glasses to their cyberpunk wardrobe.

It used to be that building your own watch was either a big project or it meant that you didn’t really care about how something looked on your wrist. But now with modern parts and construction techniques, a good-looking smart watch isn’t out of reach of the home shop. But if you don’t want to totally do it yourself, you can turn to a kit and that’s what [Stephen Cass] did. Writing in IEEE Spectrum, he took a kit called a Watchy and put it through its paces for you.

Watchy is an open source product that uses an ESP32, an E-ink display, and costs about $50. The display is 1.5 inches — good enough for a watch — and it has a real time clock, a vibration motor, an accelerometer, and four buttons. The whole thing runs on a 200 mAh lithium polymer battery. The charger is microUSB and you can also upload software to it using the usual Arduino tools.

However, [Stephen] found that none of the examples he tried would work at first. He found problems with the Mac software, but he also had problems under Windows. The answer? Switching to a Raspberry Pi seemed to work and once the watch was wiped clean, the Mac tools would work, too. It sounds like this isn’t a common problem, but he has to erase the watch with the Pi before each programming cycle.

Unlike a normal Arduino program, all the work in a typical Watchy program happens in setup() so the watch can mostly sleep and it updates the 200×200 typically just once a minute. As an example, [Stephan] wrote a watch face that uses an old Irish alphabet to tell time. He plans to add code to grab online data, too, and the phone has support for connecting wirelessly and parsing JSON to make tasks like that easier.

We always thought the EZ430-Chronos was a good-looking watch, but its screen is dated now. You can also pick up a lot of cheap import watches that can be hacked.

Let’s face it, we probably all sit at our computers for way too long without getting up. Yes, there’s work to be done, games to be played, and the internet abounds with people who are wrong and must be down-voted and/or corrected. We totally get and respect all that. However, if you want to maintain your middle- and long-range vision, you should really get up regularly and gaze out the window for a bit.

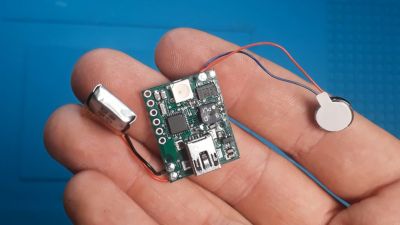
In fact, the Arduband does you one better. Its Arduino Nano and accelerometer check your position every ten minutes. If you haven’t changed your Z by the third check, then it’s time for a break. The combination of an RGB LED, buzzer, and vibrating disc motor working together should be enough to pull you out of any computerized stupor, and they won’t give up and go back to sleep until you have stood up and remained upright for one minute.

We like that [ardutronics123] spun up a board and made it small enough to be wrist-mounted using a watch strap. It would work just as well worn around your neck, and would probably even fit in your pocket. Blink a few times before you check out the build video after the break.

Arduband would be great on the go, but who does that anymore? If you spend every day at the same desk, you could point a time-of-flight sensor at your chair and start a timer.

What could you do with a dual-core 240 MHz ESP32 that supports Arduino-style programming, with 16 MB of flash, 8 MB of PSRAM, and 520 k of RAM? Oh, let’s throw in a touchscreen, an accelerometer, Wifi, and Bluetooth. Besides that, it fits on your wrist and can show the time? That’s the proposition behind Lilygo T Watch 2020. If it sounds like a smartwatch, it is. At around $25 –and you can snag the hardware from a few different places — it is not only cheaper than the latest flagship smartwatch, but it is also infinitely more hackable.

OK, so the screen is only 1.54″, but then again, it is a watch. If Arduino isn’t your thing, you can use anything else that supports the ESP32 like Micropython or even Scratch. There are variants that have LoRA and GPS, at slightly higher prices. You can also find ones with heart rate monitors and other features.

If you would like a preview of the firmware, it is all there on GitHub and there is a smattering of documentation. There are even a few examples, although brush up on your Mandarin. The watch actually looks passable for a smartwatch, although the one blemish is that it is 20 mm thick.  That’s almost double the thickness of an Apple Watch 5 or a Samsung Active 2.

Still, if you want total hackability, that extra 10 mm is probably worth it. You can, of course, hack some watches that are not meant to be used this way. Besides, this watch is a bit more socially acceptable than one that would earn you hacker street cred.

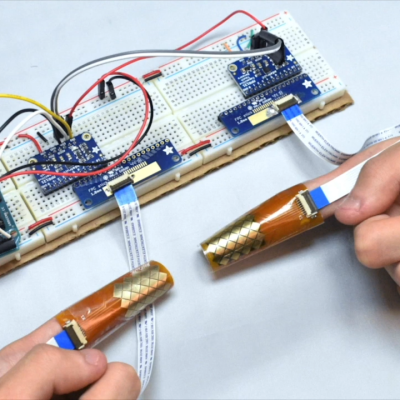
The fingertips are covered in touch sensors, each intended to be tapped by the thumbtip of the same hand.

Touch-typing with thumbs on a mobile phone keyboard is a pretty familiar way to input text, and that is part of what led to BiTipText, a method of allowing bimanual text input using fingertips. The idea is to treat the first segments of the index fingers as halves of a tiny keyboard, whose small imaginary keys are tapped with the thumbs. The prototype shown here was created to see how well the concept could work.

The prototype hardware uses touch sensors that can detect tap position with a high degree of accuracy, but the software side is where the real magic happens. Instead of hardcoding a QWERTY layout and training people to use it, the team instead ran tests to understand users’ natural expectations of which keys should be on which finger, and how exactly they should be laid out. This data led to an optimized layout, and when combined with predictive features, test participants could achieve an average text entry speed of 23.4 words per minute.

Judging by the prototype hardware, it’s understandable if one thinks the idea of fingertip keyboards may be a bit ahead of its time. But considering the increasingly “always on, always with you” nature of personal technology, the goal of the project was more about investigating ways for users to provide input in fast and subtle ways. It seems that the idea has some merit in principle. The project’s paper can be viewed online, and the video demonstration is embedded below.

One interesting thing is this: the inertia of users being familiar with a QWERTY layout is apparent even in a forward-thinking project like this one. We covered how Dvorak himself struggled with people’s unwillingness to change, even when there were clear benefits to doing so.

[via Arduino Blog]

Unless you’re particularly fond of looking at the back of 88 individual WS2812B LEDs, these “RGB Goggles” from [Mukesh Sankhla] won’t offer you much of a view. But from an outsider’s perspective, the smartphone-controlled glasses certainly make a statement. Just don’t try to operate any heavy machinery while wearing them.

The build starts off with a pair of shades dark enough that the lights won’t be obvious until they’re powered up. [Mukesh] then carefully aligned the LEDs into a grid pattern on a piece of clear tape so they could be soldered together with the fewest number of jumper wires possible. Even if you’re not in the market for some technicolor eyewear, this clever arrangement of WS2812B modules could come in handy if you’re looking to make impromptu LED panels.

To control the LEDs, [Mukesh] is using an Arduino Nano and an HC-06 Bluetooth module that’s linked to an application running on an Android smartphone. The software, developed with the MIT App Inventor, allows the user to easily switch between various patterns and animations on the fly. With such an easy-to-use interface, the RGB Goggles don’t look far off from a commercial product; other than the whole not being able to actually see through the thing.

We’ve actually seen a number of custom glasses projects over the years, as it seems that a cheap pair of shades make an ideal platform for head-mounted hacks. We’ve even found what may be the ideal power source for them.

The latest creation from Bengali roboticist [nabilphysics] might sound familiar. His laser-augmented glove gives users the ability to detect objects horizontally in front of them, much like a cane or pole is used by the visually impaired to navigate through a physical space.

As a stand in for the physical cane, he uses the VL53L0X time-of-flight (TOF) sensor which detects the time taken for a laser source to bounce back to the sensor. Theses are much more accurate than IR distance sensors and have a much finer focus than ultrasonic sensors for excellent directionality.

While the sensors can succumb to interferences from background light or other time-of-flight sensors, the main advantages are speed of calculation (it relies on a single shot to compute the distances within a scene) and an efficient distance algorithm that simplifies the measurement of distance data. In contrast to stereo vision, which requires complex correlation algorithms, the process for extracting information for a time-of-flight sensor is entirely direct, requiring a small amount of processing power.
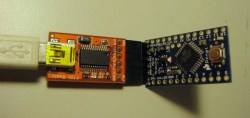
The glove delivers haptic feedback to the user to determine if an object is in their way. The feedback is controlled through an Arduino Pro Mini, powered remotely by a LiPo battery. The code is uploaded to the Arduino from an FTDI adapter, and works by taking continuous readings from the time-of-flight sensor and determining if the object in front is within 450 millimeters of the glove, at which point it triggers the vibration motor to alert the user of the object’s presence.

Since the glove used for the project is a bicycle glove, the form factor is straightforward — the Arduino, motor, battery, and switch are all located inside a plastic box on the top of the glove, while the time-of-flight sensor sticks out to make continuous measurements when the glove is switched on.

In general, the setup is fairly simple, but the idea of using a time-of-flight sensor rather than an IR or sonar sensor is interesting. In the broader usage of sensors, LIDARs are already the de facto sensor used for autonomous vehicles and robotic components that rely on distance sensing. This three-dimensional data wouldn’t be much use here and this sensor works without mechanical moving parts since it doesn’t rely on the point-by-point scan from a laser beam that LIDAR systems use.

Over the last several months, [Aaron Christophel] has been working on creating a custom firmware for cheap fitness trackers. His current target is the “D6 Tracker” from a company called MPOW, which can be had for as little as $7 USD. The ultimate goal is to make it so anyone will be able to write their own custom firmware for this gadget using the Arduino IDE, and with the release of his new Android application that allows wirelessly flashing the device’s firmware, it seems like he’s very close to realizing that dream.

Previously, [Aaron] had to crack open the trackers and physically connect a programmer to update the firmware on the NRF52832-based devices. That might not be a big deal for the accomplished hardware hacker, but it’s a bit of a hard sell for somebody who just wants to see their own Arduino code running on it. But with this new tool, he’s made it so you can easily switch back and forth between custom and original firmware on the D6 without even having to take it off your wrist.

After the break, you can see the video that [Aaron] has put together which talks about the process of flashing a new firmware image. It’s all very straightforward: you simply pick the device from the list of detected BLE devices, the application puts the tracker into bootloader mode, and then you select the DFU file you want to flash.

There are a couple of ready-made firmwares you can put on the D6 right now, but where’s the fun in that? [Aaron] has put together a customized version of the Arduino IDE that provides everything you need to start writing and flashing your own firmware. If you’ve ever dreamed about creating a wearable device that works exactly the way you want, it’s hard to imagine a cheaper or easier way to get in on the action.

When we last heard from [Aaron] earlier this year, he was working on the IWOWN I6HRC tracker. But it looks like the availability of those devices has since dried up. So if you’re going to try your hand at hacking the MPOW D6, it might be wise to buy a few now while they’re still cheap and easy to find.


  • Newsletter

    Sign up for the PlanetArduino Newsletter, which delivers the most popular articles via e-mail to your inbox every week. Just fill in the information below and submit.

  • Like Us on Facebook