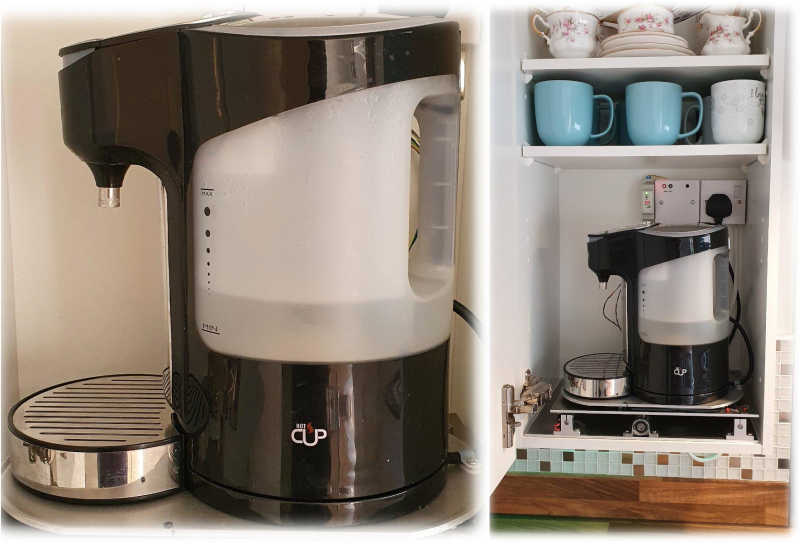
How far would you go for your cup of tea? [samsungite]’s missus doesn’t like clutter on her countertops, so away the one-cup kettle would go back into the cupboard for next time while the tea steeped. As long as there’s room for it in there, why not install it there permanently? That’s the idea behind RoboTray, which would only be cooler if it could be plumbed somehow.
RoboTray went through a few iterations, most importantly the switch from 6mm MDF to 4 mm aluminum plate. A transformer acts as a current sensor, and when the kettle is powered on, the tray first advances forward 7 cm using a 12 VDC motor and an Arduino. Then it pivots 90° on a lazy Susan driven by another 12 VDC motor. The kettle is smart enough to turn itself off when finished, and the Arduino senses this and reverses all the steps after a ten-second warning period. Check it out in action after the break.
If [samsungite] has any more Arduinos lying around, he might appreciate this tea inventory tracker.
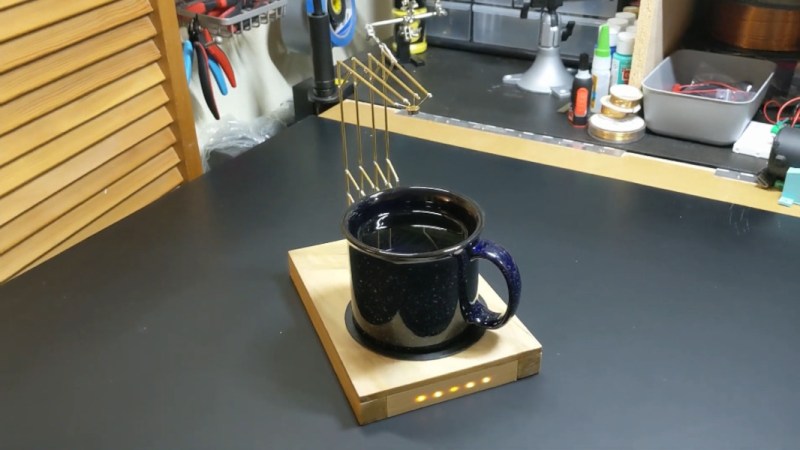
We’ve all been there. Your current project has hit a wall, or the next step will take days to complete, and you need something to do in the meantime. So you start a project that you envision will fit nicely in the gap, and then, inevitably, it doesn’t. Maybe it even takes so long that the original project gets finished first. So what? There’s nothing wrong with that, especially when the filler project turns out as well as this drink temperature monitor disguised as a circuit sculpture (video, embedded below). Just put your mug on the coaster, and the weight of it activates a hidden switch, which causes the sculpture to display its secret LEDs.
[MakeFunStuff] wanted to make something that looked less like a circuit and more like art, while building a tool that could determine the relative hotness of a beverage. Such a a useful circuit sculpture sounds like a tall order to us, but [MakeFunStuff] pulled it off with finesse and style.
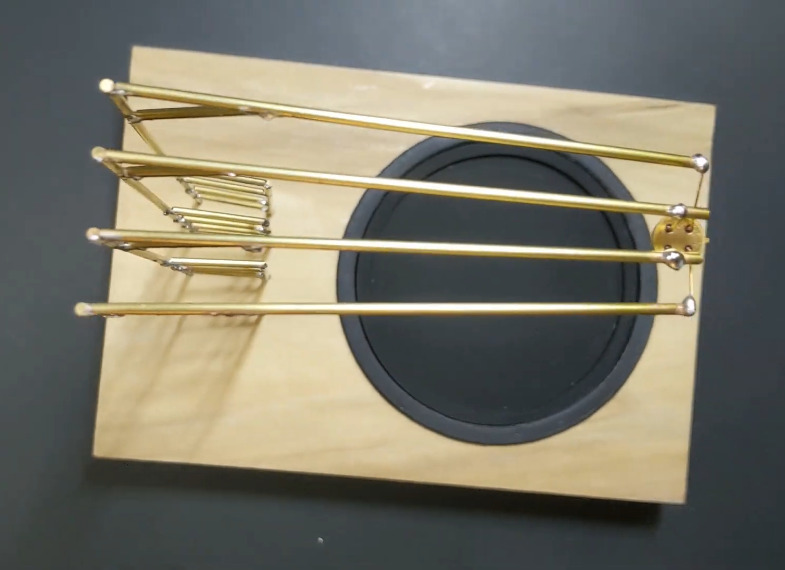
The circuit is based around this Sputnik-looking standalone IR temperature sensor which, as [MakeFunStuff] aptly describes, is “a single-pixel infrared camera that picks up everything in a 90° cone starting at the sensor.”
[MakeFunStuff] paired this easy-to-use sensor with an Arduino Nano and five LEDs that show how hot a beverage is on a scale from 1 to 5. The sensor is hidden in plain sight, suspended from the top of the brass rod sculpture and blending in perfectly. We love that the LEDs are hidden behind a thin layer of carefully-drilled wood and agree that a drill press would have been much easier.
The code is set up for just about every temperature scale from Celsius to Rømer, so that solves that argument. [MakeFunStuff] went with the Kelvin scale because science. Our favorite thing about this video is that [MakeFunStuff] shared their failures and fixes as they built their way toward answering the questions of how to suspend the sensor over the drink, and how best to display the heat level while hiding the electronics. Go grab a hot cup of something and check it out after the break while you let it cool off the normie way.
In theory, it’s fun to have a lot of toys tools around, but the sad reality is that it’s only as fun as the organization level applied. Take it from someone who finds organization itself thrilling: it really doesn’t matter how many bits and bobs you have, as long as there’s a place for everything and you put away your toys at the end of the day.
[Cranktown City] is always leaving drill bits lying around instead of putting them back in their bit set boxes. Since he responds well to yelling, he decided to build an intelligent drill bit storage system that berates him if he takes one out and doesn’t put it back within ten minutes.
But [Cranktown City] did much more than that. The system is housed in a really nice DIY stand that supports his new milling and drilling machine and has space to hold a certain type of ubiquitous red tool box beneath the drill bits drawer.
All the bits now sit in a 3D-printed index that fits the width of the drawer. [Cranktown City] tried to use daisy-chained pairs of screws as contacts behind each bit that could tell whether the bit was home or not, but too much resistance interfered with the signal. He ended up using a tiny limit switch behind each bit instead. If any bit is removed, the input signal from the index goes low, and this triggers the Arduino Nano to do two things: it lights up a strip of red LEDs behind the beautiful cut out letters on the drawer’s lip, and it starts counting upward. Every ten minutes that one or more bits are missing, the drawer complains and issues ad hominem attacks. Check out the demo and build video after the break, but not until you put your tools away. (Have you learned nothing?)
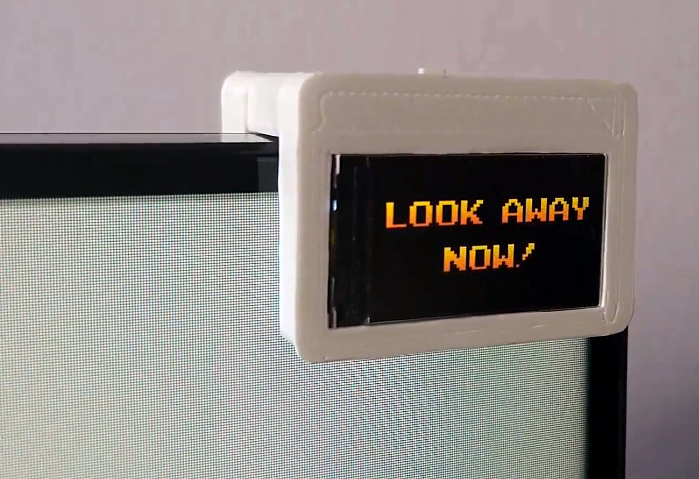
Don’t know about you, but over the last year or so, we have gone from spending ten or twelve hours a day at this computer to upwards of sixteen or eighteen. Fortunately there’s a window behind the monitor for taking those 20/20/20 breaks that are supposed to prevent eye strain, but it’s so hard to remember (and boring) to do it. And nobody needs yet another thing to remember in the name of self-care.
[Daniel Hingston] certainly agrees. As you’ll see in the delightful video after the break, [Daniel] has made a game out of the whole process of stopping every twenty minutes to spend twenty seconds looking at a point that’s at least twenty feet away. Once the break is over, [Daniel] uses the dual-purpose start button to acknowledge having looked away for 20 seconds. The device is meant to clip onto the corner of any monitor, and [Daniel] has provided several sizes of the bridge piece so that everyone can find their fit.
The Guardian’s guts are pretty simple — an Arduino Pro Mini runs the stop watch and a TFT display to show the graphics that live on an SD card. This is a great way to preserve your eyesight by gamifying something we all know we should be doing. It might be nice to add a break timer that counts up to 25 or thereabouts so you have time to stand up and come back. If you press the button too soon, it scolds you and you have to start your eye break over.
Considering the state of well, everything, we can’t tell you how glad we are to be out of school. That goes double for not being a teacher these days. [Elena] had some awesome light-up tactile buttons set aside for a killer Kerbal Space Program controller, but it’s funny how a pandemic will change your priorities. Instead, those buttons found a good home in this colorful and enticing Zoom control panel.
[Elena]’s ready pile of Arduinos yielded no Leonardos or Pro Micros, but that’s okay because there’s a handy bootloader out there that allows you to reprogram the USB interface chip of an Uno or a Mega and use it as a keyboard. After setting that up, it was mostly a matter of wiring all those latching and momentary buttons and LEDs to the Mega and making them look fantastic with a set of icons. (We all know the big red mushroom button is for aborting the call; so does it really need an icon?)
Like many of us, [Michael] needed a way to let the family know whether pants are required to enter the room — in other words, whenever a videoconference is in progress. Sure he could hang a do not disturb sign, but those are easy to forget. There’s no need to worry about forgetting to change status because this beautiful wall-mounted sign can be controlled with Alexa.
Inside the gorgeous box made from walnut, curly maple, and oak is an ESP32, some RGB LEDs, and three MOSFETs. [Michael] is using the fauxmoESP library to interface the ESP32 with Alexa, which emulates a Phillips Hue bulb for the sake of using a protocol she already knows. [Michael] can change the color and brightness percentage with voice commands.
The sign is set up as four different devices — one default, and one for each color. Since talking to Alexa isn’t always appropriate, [Michael] can also change the color of the LEDs using sliders on a website that’s served up by the ESP. Check out the full build video after the break.
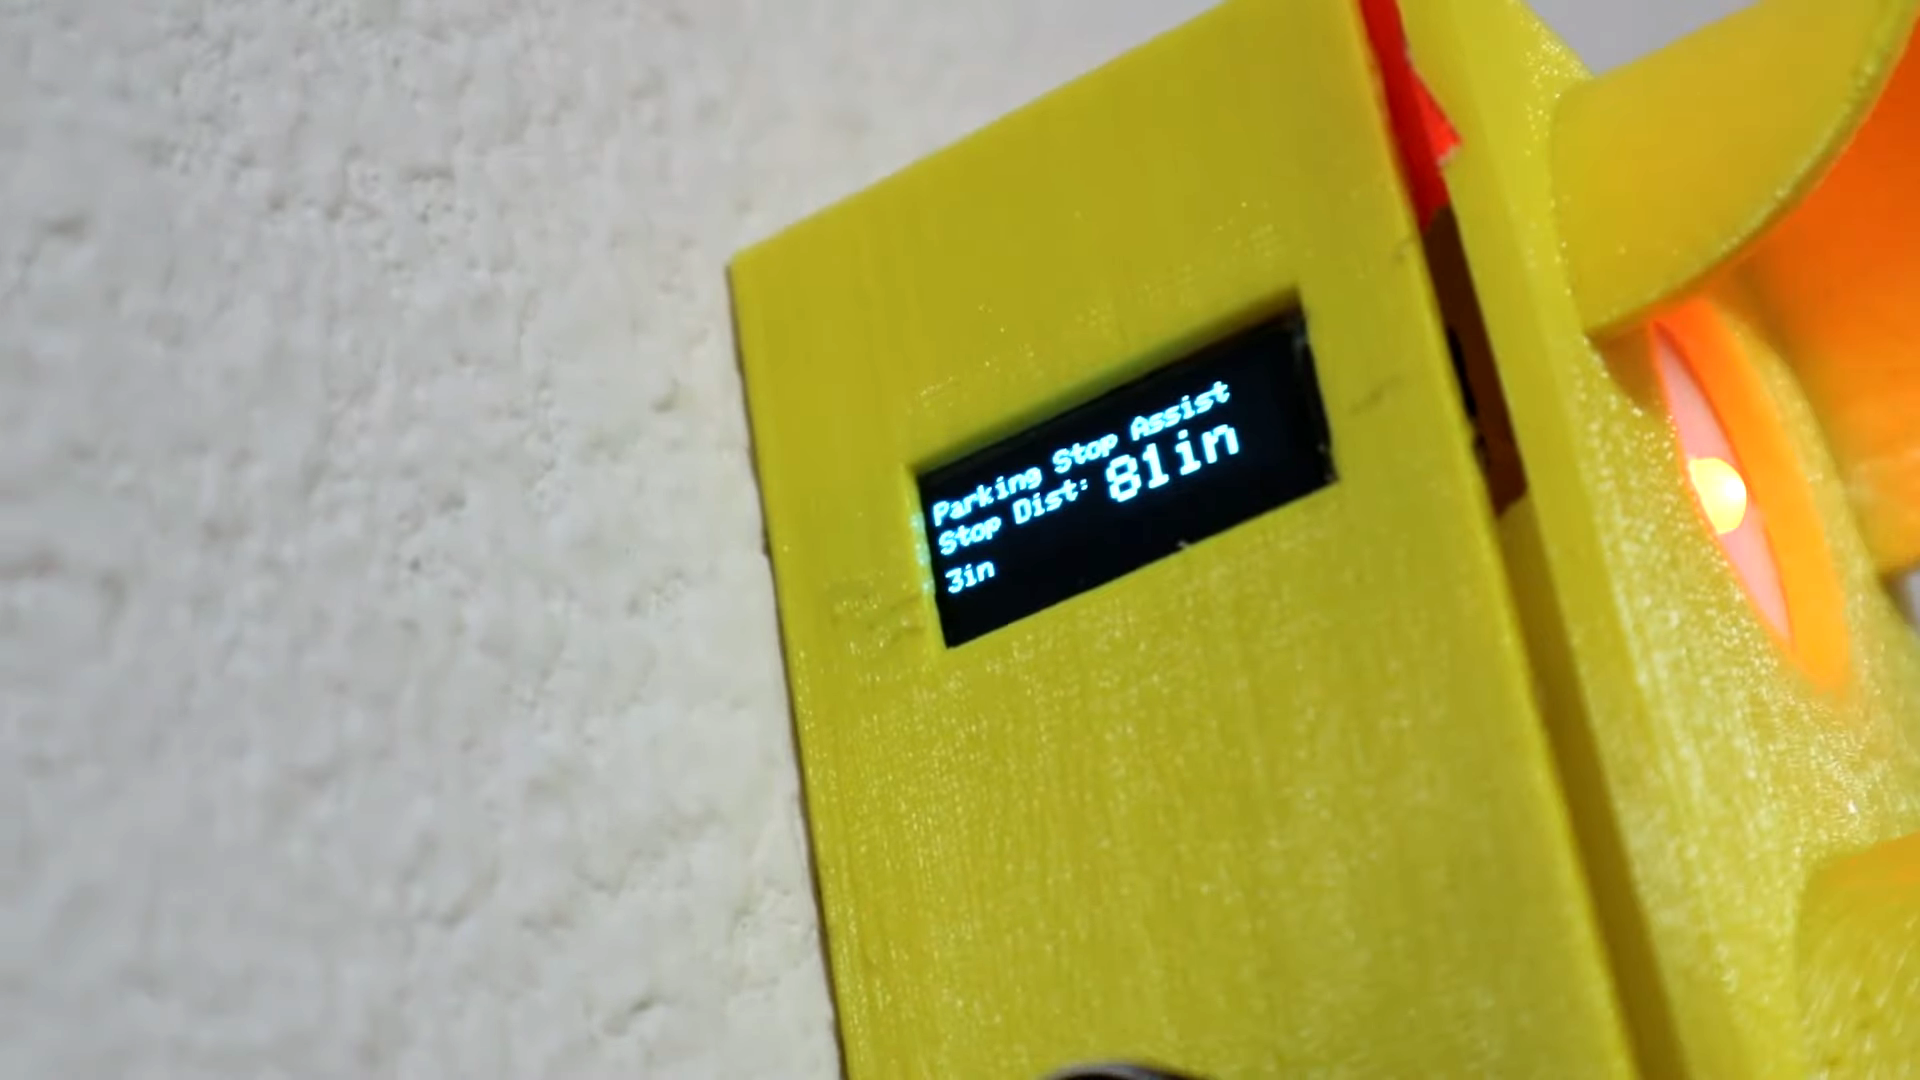
Sure, [Ty Palowski] could have just hung a tennis ball from the ceiling, but that would mean getting on a ladder, testing the studfinder on himself before locating a ceiling joist, and so on. Bo-ring. Now that he finally has a garage, he’s not going to fill it with junk, no! He’s going to park a big ol’ Jeep in it. Backwards.
Inside the light is an Arduino Nano, which reads from the ultrasonic sensor mounted underneath the enclosure and lights up the appropriate LED depending on the car’s distance. All [Ty] has to do is set the distance that makes the red light come on, which he can do with the rotary encoder on the side and confirm on the OLED. The distance for yellow and green are automatically set from red — the yellow range begins 24″ past red, and green is another 48″ past yellow. Floor it past the break to watch the build video.
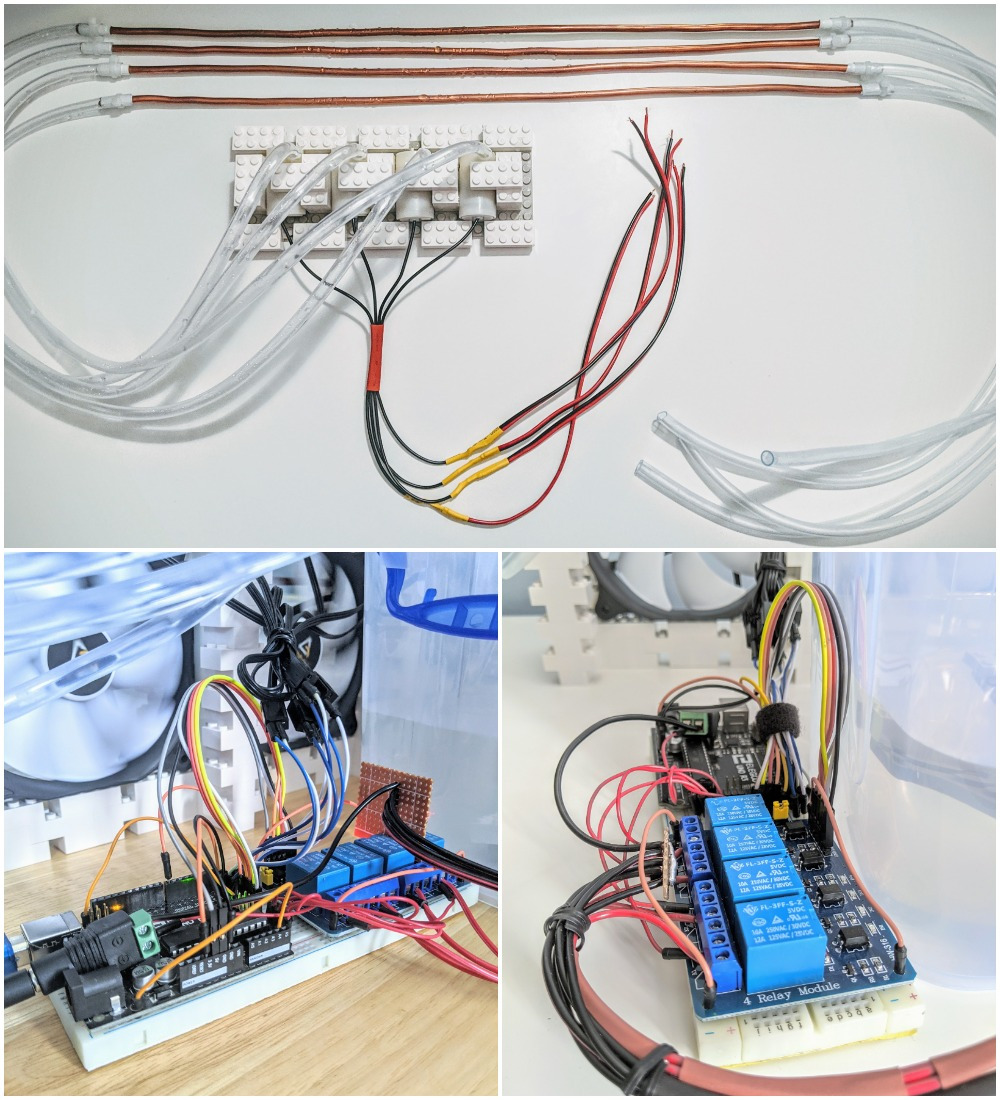
What’s the coolest thing a person can build with LEGO? Well it’s gotta be an air conditioner, right? Technically, [Manoj Nathwani] built a LEGO-fied swamp cooler, but it’s been too hot in London to argue the difference.
This thoroughly modular design uses an Arduino Uno and a relay module to drive four submersible pumps. The pumps are mounted on a LEGO base and sunk into a tub filled with water and ice packs. In the middle of the water lines are lengths of copper tubing that carry it past four 120mm PC case fans to spread the coolness. It works well, it’s quiet, and it was cheap to build. Doesn’t get much cooler than that.
[Manoj] had to do a bit of clever coupling to keep the tubing transitions from leaking. All it took was a bit of electrical tape to add girth to the copper tubes, and a zip tie used as a little hose clamp.
We think the LEGO part of this build looks great. [Manoj] says they did it by the seat of their pants, and lucked out because the copper and plastic tubing both route perfectly through the space of a 1x1x1 brick.
We would be preaching to the choir if we told you that fear is the action killer when it comes to the challenge of new projects in uncharted territory. Everyone who reads Hackaday knows that it takes mettle to forge through the self-doubt as we push ourselves to new engineering heights.
[JBV Creative] hears the voice, too: the one that says you can’t build that thing, it’s too difficult/useless. He knows that both creativity and anti-creativity stem from the same source — the powerful human mind that dreams up these projects in the first place.
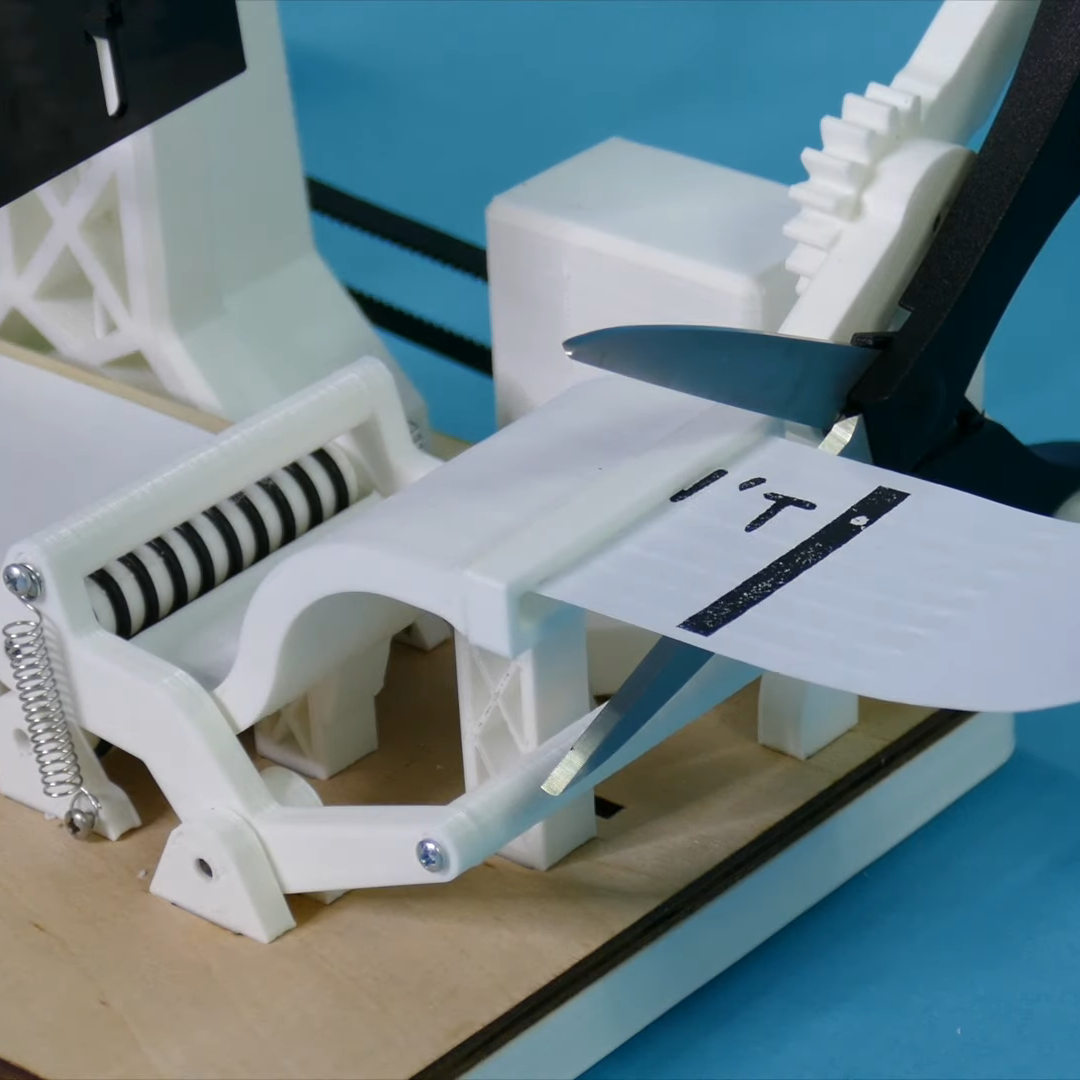
The Encouragement Machine combines the two in a piece that engineers art from garbage, aka negative thoughts. It works by first acknowledging the most basal of discouraging thoughts — an important step of the process — and then it simply trims away the negativity.
This machine uses a stepper motor to feed receipt paper underneath a custom stamp that says YOU CAN’T DO IT. Then it passes the paper through a pair of servo-driven scissors that snip off the apostrophe-t.
Ironically or not, [JBV Creative] ran into a few issues with this build, but managed to muster up enough moxie to work through the problems without encouraging slips of paper. We have to wonder how much more smoothly the next project will go given all the positivity he now has on-demand.
[JBV] doesn’t delve into the electronics much, but it looks like an Arduino and a motor driver to us. We totally dig the design — it looks like an electrical substation or rocket launch pad that happens to have a Ferris wheel. Step right up and check out the build video after the break.
Deep freezers are a great thing to have, especially when the world gets apocalyptic. Of course, freezers are only good when they’re operating properly. And since they’re usually chillin’ out of sight and full of precious goods, keeping an eye on them is important.
When [Adam] started looking at commercial freezer alarms, he found that most of them are a joke. A bunch are battery-powered, and many people complain that they’re too quiet to do any good. And you’d best hope that the freezer fails while you’re home and awake, because they just stop sounding the alarm after a certain amount of time, probably to save battery.
If the Arduino loses sight of the DHT22 temperature sensor inside the freezer, then the alarm sounds continuously. And if [Adam] is ever curious about the temperature in the freezer, it’s right there on the 7-segment. Pretty elegant if you ask us. We’ve got the demo video thawing after the break, but you might wanna turn your sound down a lot.
Planet Arduino is, or at the moment is wishing to become, an aggregation of public weblogs from around the world written by people who develop, play, think on Arduino platform and his son. The opinions expressed in those weblogs and hence this aggregation are those of the original authors. Entries on this page are owned by their authors. We do not edit, endorse or vouch for the contents of individual posts. For more information about Arduino please visit www.arduino.cc
You are currently browsing the archives for the lifehacks category.