Posts | Comments

Planet Arduino

Archive for the ‘chemistry hacks’ Category

At the risk of putting too fine a point on it, Hackaday exists because people are out there building and documenting open source gadgets. If the person who built a particular gizmo is willing to show the world how they did it, consider us interested. Since you’re reading this, we’ll assume you are as well. Over the years, this mentality has been spreading out from the relatively niche hacker community into the greater engineering world, and we couldn’t be happier.

Case in point, the Poseidon project created at the California Institute of Technology. Developed by students [Sina Booeshaghi], [Eduardo Beltrame], and [Dylan Bannon], along with researcher [Jase Gehring] and professor [Lior Pachter], Poseidon consists of an open source digital microscope and syringe pump which can be used for microfluidics experiments. The system is not only much cheaper than commercial offerings, but is free from the draconian modification and usage restrictions that such hardware often comes with.

Of course, one could argue that major labs have sufficient funding to purchase this kind of gear without having to take the DIY route. That’s true enough, but what benefit is there to limiting such equipment to only the established institutions? As in any other field, making the tools available to a wider array of individuals (from professionals to hobbyists alike) can only serve to accelerate progress and move the state of the art forward.

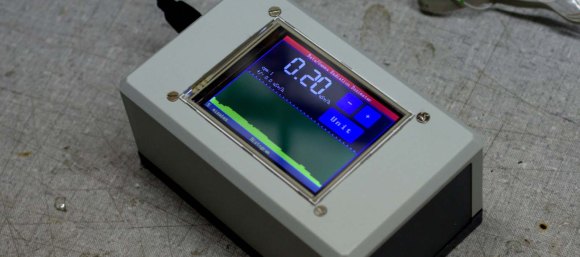
The Poseidon microscope consists of a Raspberry Pi, touch screen module, and commercially available digital microscope housed in a 3D printed stage. This device offers a large and clear view of the object under the microscope, and by itself makes an excellent educational tool. But when running the provided Python software, it doubles as a controller for the syringe pumps which make up the other half of the Poseidon system.

Almost entirely 3D printed, the pumps use commonly available components such as NEMA 17 stepper motors, linear bearings, and threaded rods to move the plunger on a syringe held in the integrated clamp. Controlled by an Arduino and CNC shield, these pumps are able to deliver extremely precise amounts of liquid which is critical for operations such as Single-cell RNA sequencing. All told a three pump system can be built for less than $400 USD, compared to the tens of thousands one might pay for commercially available alternatives.

The Poseidon project joins a relatively small, but very exciting, list of DIY biology projects that we’ve seen over the years. From the impressive open source CO2 incubator we saw a few years ago to the quick and dirty device for performing polymerase chain reaction experiments, there’s little doubt about it: biohacking is slowly becoming a reality.

It wouldn’t be much of a stretch to say that here at Hackaday, we’re about as geeky as they come. Having said that, even we were surprised to hear that there are people out there who collect elements. Far be it from us to knock how anyone else wishes to fill their days, but telling somebody at a party that you collect chemical elements is like one step up from saying you’ve got a mold and fungus collection at home. Even then, at least a completed mold and fungus collection won’t be radioactive.

But if you’re going to spend your spare time working on a nerdy and potentially deadly collection, you might as well put it into an appropriate display case. You can’t just leave your Polonium sitting around on the kitchen counter. That’s the idea behind the interactive periodic table built by [Maclsk], and we’ve got to admit, if we get to put it in a case this awesome we might have to start our own collection.

A large portion of this project is building the wooden display case itself as, strangely enough, IKEA doesn’t currently stock a shelving unit that’s in the shape of the periodic table. The individual cells and edge molding are made of pine, the back panel is MDF, and the front of the display is faced off with thin strips of balsa to cover up all the joints. Holes were then drilled into the back of each cell for the LED wiring, and finally the entire frame was painted white.

Each cell contains an WS2812B RGB LED, which at maximum brightness draws 60mA. Given the 90 cells of the display case, [Maclsk] calculated a 5.4A power supply would be needed to keep everything lit up. However, he found a 4A power supply that made his budget happier, which he reasons will be fine as long as he doesn’t try to crank every cell up to maximum at the same time. Control for the display is provided by an Arduino Nano and HC05 Bluetooth module.

The final piece of the project was the Android application that allows the user to control the lighting. But it doesn’t just change colors and brightness, it’s actually a way to visualize information about the elements themselves. The user can do things like highlight certain groups of elements (say, only the radioactive ones), or light up individual cells in order of the year each element was discovered. Some of the information visualizations are demonstrated in the video below, and honestly, we’ve seen museum displays that weren’t this well done.

We last caught up with [Maclsk] when he created a very slick robotic wire cutting machine, which we can only assume was put to work for this particular project. Too bad he didn’t have a robot to handle the nearly 540 soldering joints it took to wire up all these LEDs.

[via /r/DIY]

The clever folks over at [Novaetech SRL] have unveiled openQCM, their open-source quartz crystal microbalance. A QCM measures very minute amounts of mass or mass variation using the piezoelectric properties of quartz crystal. When an object is placed on the surface of this sensor, the changes in the crystal’s resonant frequency can be detected and used to determine its mass in a variety of experimental conditions (air, vacuum, liquid). However, most QCM technology is proprietary and pricey – at least US$3000 for the microbalance itself. Any consumables, such as additional crystals, cost several hundred dollars more.

The openQCM has a sensitivity of 700 picograms. At its core is an Arduino Micro with a custom PCB. The board contains a 10K thermistor for temperature offset readings and the driver for a Pierce oscillator circuit. The quartz crystal frequency is determined by hacking the timer interrupts of the Arduino’s ATmega32u4. An external library called FreqCount uses the clock to count the number of pulses of the TTL signal in a 1 second time frame. This yields quartz crystal frequency resolution of 1Hz. The user interface is built in Java so that data can be read, plotted, and stored on your computer. The entire casing is 3D-printed, and it appears that the sensors are standard oscillator crystals without their cases.

Simplistic design makes assembly and maintenance a breeze. It only weighs 55 grams. Replacing the quartz crystal requires no special tools due to the clip system. The openQCM can be used as a single unit, or in multiples to form a network for all of your precise measurement needs. While they have kits available that will set you back US$500, all of the files and schematics for 3D-printing, assembly, and the PCB are available on the openQCM site for free.

[Special Thanks to Augustineas for sending us this tip!]


Filed under: Arduino Hacks, chemistry hacks
Oct
15

Margarita Drip Infuser Ensures a Perfect Mix

arduino hacks, barbot, beer hacks, chemistry hacks, drip infuser Comments Off on Margarita Drip Infuser Ensures a Perfect Mix 

Margarita Drip Infuser!

In order to get a margarita just right, the various ingredients need to be mixed together quite vigorously to over-come the different viscosity of the fluids. Looking to create his own barbot of sorts, [TVMiller] decided to make a Margarita Drip Infuser to help make margaritas a bit easier.

Using various chem lab supplies, [TVMiller] has cobbled together something pretty awesome. The Infuser can take up to 8 different ingredients into its test tube reserves, and after the drink ingredients are programmed on the computer, the magic begins.

An Arduino Uno controls a bank of 8 relays which control small fluid solenoids, with each control pulse releasing just a single droplet of fluid. An LED for each valve is run in parallel adding a bit of a light show to the mixing experience. If that’s not enough, he’s also created a copper cooling coil to chill the drink as it is poured.

For a slightly more advanced build, check out the Inebriatior.


Filed under: Arduino Hacks, Beer Hacks, chemistry hacks
Mar
06

Here’s the Dirt on Printing With Pollution

arduino hacks, chemistry hacks, pollution, print head, Soot Comments Off on Here’s the Dirt on Printing With Pollution 

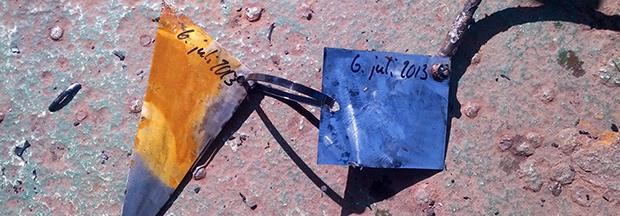
[Anirudh] and his friends were sitting around reminiscing about India. In particular, they recalled riding around in auto-rickshaws in stifling heat, watching their skin turn black from the exhaust. They started thinking about all of the soot and pollution in crowded cities the world over and wondered whether the stuff could be re-purposed for something like printer ink. That’s how they came up with their soot/pollution printer.

They created a soot-catching pump which they demonstrate with a burning candle. The pump mixes the soot particles with rubbing alcohol and an oil substrate and sends the ink to an HP C6602 inkjet cartridge. They used [Nicolas C Lewis]‘s print head driver shield for Arduino to interface with the cartridge, turning it into a 96dpi printing head that uses only five pins.

[Anirudh] and his friends plan to design a carbon separator using charged plates to capture the soot particles from pollution sources and filter out dust. Be sure to check out their demonstration video after the jump.

Update: In response to [Hirudinea]‘s comment about mining the carbon from cars, [Anirudh] is now looking for collaborators (tinkerers, filmmakers, DIY enthusiasts) to move forward with the idea of re-purposing carbon. Email him at anirudhs@mit.edu.


http://vimeo.com/87233029


Filed under: Arduino Hacks, chemistry hacks

geiger

We’re assuming [Toumal] was desperately bored one day, because in the depths of the Internet he found some really cool components to build a solid state Geiger counter.

The Arduino and touchscreen are rather standard fare [Toumal] picked up on eBay for about $30. What really sets this project apart from all the other geiger counter builds we’ve seen is the solid state geiger counter [Toumal] used. This device uses a specially-made photodiode made by First Sensor to detect gamma emissions from 5 to 1000 keV.

[Toumal] put all the software for his Arduino touch screen radiation detector up on github. To be honest, we’re really impressed with the rad sensor [Toumal] used for this project, so if you ever decide to pick one of those up, he’s got your back with an Arduino library for it.


Filed under: Arduino Hacks, chemistry hacks
Aug
27

Stopping a hackerspace from rusting away

arduino hacks, cathodis protection, chemistry hacks, ship, steel Comments Off on Stopping a hackerspace from rusting away 

steel

The illutron hackerspace in Copenhagen makes their home on a barge sitting in port. Not only is this awesome, but the members of the hackerspace also worry about corrosion to their beloved fablab. In an effort to ally some fears about rust slowly eating through the hull, [Dzl] has rigged up a cathodic protection system for their hull, essentially preserving their barge at the expense of a few old steel rails.

Cathodic protection systems are able to protect the steel of a ship’s hull by offering up a sacrificial anode made of aluminum or zinc. This can be done by either attaching a sacrificial anode directly to the hull, or with a more complex system that connects both the cathode (the ship) and the anode (an engine block) to a DC power source.

[Dzl] is converting mains voltage down to 12 VDC, then further lowering the voltage with an Arduino-controlled buck converter. The control panel allows for adjustments in the voltage, as well as a nice uptime meter to make sure it’s running.

The results are fairly impressive; in the above pic, the right piece of steel was electrically connected to the barge’s hull, while the left piece was free to rust in the North Sea. That’s only two days worth of corrosion there.


Filed under: Arduino Hacks, chemistry hacks
Jun
04

Automated aquarium fertilizer doser

aquarium, arduino hacks, chemistry hacks, fertilizer, fish tank Comments Off on Automated aquarium fertilizer doser 

aquarium-auto-doser

If you are using live plants in your aquarium you must remember to fertilize them at regular intervals. Being a bit forgetful, [Deven] automated the process by building this auto-doser.

There are three different chemicals which are dispensed by the system. They are stored in the drink bottles seen above. Each has a plastic tube which runs up to the dosing motors mounted on the black box. [Deven] sourced the motors from eBay. They are designed for this type of application.

Inside the black box is the Arduino that handles timing and switches the motors. The control circuitry is protected using one MOSFET for each. To keep the fish safe the outflow is directed right into the aquarium pump so that the concentrated chemicals are quickly dispersed through the entire tank.

Now that he’s made it this far he might as well add the ability to feed the fish and control the lighting.


Filed under: Arduino Hacks, chemistry hacks


  • Newsletter

    Sign up for the PlanetArduino Newsletter, which delivers the most popular articles via e-mail to your inbox every week. Just fill in the information below and submit.

  • Like Us on Facebook