Posts | Comments

Planet Arduino

Archive for the ‘nintendo hacks’ Category

Even for those of us who are fans of retrocomputing, it’s fair to say that not everyone plays their old-school games on real old-school hardware. The originals are now fragile and expensive, and emulators are good enough that if the gaming experience is all you’re after there’s little point in spending all that cash.

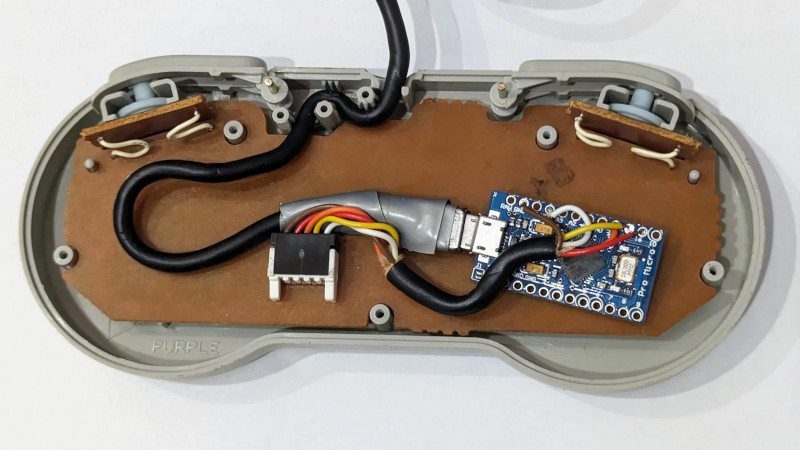
There’s one place in which the originals sometimes have the edge though, the classic controllers are the personal interface with the game. So when [Dome] found a SNES controller in an Akibahara shop, of course he picked it up. How to make it talk to a PC? Tuck an Arduino Pro Micro inside it, of course!

What we like about this project is that instead of ripping out the original electronics it instead hooks the Arduino board onto the original serial interface. We might have made a Nintendo socket to USB box to keep the original cable, but either way, the SNES (technically Super Famicom, because it’s a Japanese market unit) original stays true to its roots. The Arduino polls the clock line at the speed of the console, reads the result, and translates it to a USB interface for the computer. There’s a full run-down of the code and how it was made, should you wish to try.

Of course, if you don’t always have a PC handy, you could also put the whole computer in the controller.

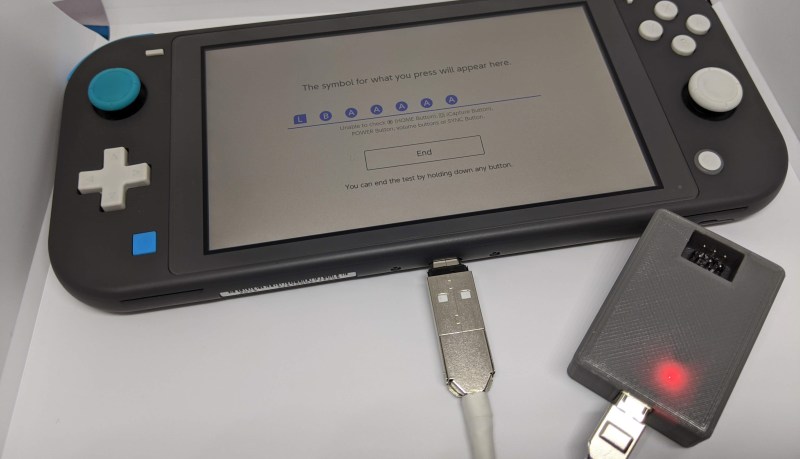
Repetitive tasks in video games often find a way of pushing our buttons. [Facelesstech] got tired of mashing “A” while catching shooting stars in Animal Crossing, so he set out to automate his problem away. After briefly considering rigging up a servo to do the work for him, he recalled a previous effort that used an Arduino Teensy to automate a bowling mini-game in Zelda: Breath of the Wild and decided to use a microcontroller to catch stars for him.

[Facelesstech] programmed an Arduino Pro Micro to fake controller button presses. It starts with a couple of presses to identify itself to the Switch, before generating an endless stream of button presses that automatically catch every shooting star. Hooking it up is easy—an on-the-go adapter allows the Switch’s USB-C port to connect directly to the Arduino’s Micro-USB port, even supplying power!

[Facelesstech] also designed a compact 3D-printed case that packages up the Arduino Pro Micro along with an ISP header for easy updating. The case even lets the Arduino’s power LED shine through so you know that it’s working!

If you, too, need to automate video game button-pushing, [Facelesstech] has kindly uploaded the source code and 3D designs for you to try. If you’d prefer something a little more low-tech, perhaps you might try a mechanical button pusher.


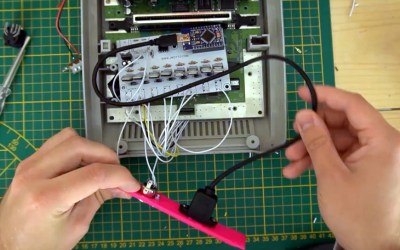
A Super Nintendo that has trouble showing sprites doesn’t make for a very good game system. As it turns out, Super Mario World is a lot less fun when the titular hero is invisible. So it’s no surprise that [jwotto] ended up tossing this partially functional SNES into the parts bin a few years back.

But he recently came up with a project that may actually benefit from its unusual graphical issues; turning the glitched console into a circuit bent video synthesizer. The system was already displaying corrupted visuals, so [jwotto] figured he’d just help things along by poking around inside and identifying pins that created interesting visual effects when shorted out.

Installing the new electronics into the SNES.

Once he mapped out the pins, he wired them all up to a transistor switching board that he’d come up with for a previous project. That would let an Arduino short out the pins on command while still keeping the microcontroller relatively isolated from the SNES. Then it was just a matter of writing some code that would fire off the transistors based on MIDI input.

The end result is a SNES that creates visual glitches along with the music, which [jwotto] can hook up to a projector when he does live shows. A particularly neat feature is that each game responds in its own way, so he can swap out the cartridge to show completely different visuals without having to change any of the MIDI sequencing.

A project like this serves as a nice introduction to both circuit bending and MIDI hacking for anyone looking to get their digital feet wet, and should pair nicely with the MIDI Game Boy Advance.

[Thanks to Irregular Shed for the tip.]

While the Nintendo GameCube stood deep in the shadows of the PS2 in its day, its controller remains a popular target for all sorts of modifications today — many of them involving LEDs, thanks to a translucent bottom and button option. As an avid player of the Super Smash Bros. series, [goomysmash] is of course an owner of the very same controller, which motivated him to write GoomWave, a “versatile and hackable LED library”. In an impressively detailed Instructable, he shows how to modify your own controller in two different ways to make use of the library for yourself.

Initially inspired by the Shinewave mod that lights up RGB LEDs in colors associated to pre-defined moves in Smash Bros, [goomysmash] aimed to improve on it and add more versatility from the very beginning. Its latest iteration comes in a simplified ABXY-buttons-only variety using an ATtiny85, and a full-blown all-button variety using an Arduino Nano. Both of them are powered straight from the controller board, and have different modes where they either react to controller interactions, or are just custom lights. A brief showcasing of all the different modes can be seen in the video after the break, and there a few more details also in an older version’s video, also embedded below.

Mesmerizing LED-blinking aside, we just have to admire the diligence and cleanliness [goomysmash] put into the wiring and fitting everything inside the controller. But in case light mods aren’t your thing or you’re looking for other GameCube controller modifications, how about adding Bluetooth?

The Arduboy is a Kickstarter backed, 8 bit video game console that mimics the look of a very tiny Nintendo Gameboy. The Arduboy Classic is actually using the case, button and LCD screen from a classic Game Boy.

[uXe] is using the same brains, an ATMEGA32U4, along with a 328 as a co-processor to handle the classic “creme-n-spinich” gameboy screen. 2K of dual port ram acts as a buffer between the two micro-controllers meaning they can not only run while not being in lock step with eachother, but that each micro can read or write to the ram at the same time.

Currently the whole setup is spread out on a breadboard while all the interfacing is worked out, but it is working quite well. Future plans are to make a drop in motherboard replacement for the classic game system, and there is ample room for all the new electronics on the original footprint.

If you’re unfamiliar with the Arduboy project, check out our interview with it’s creator, [Kevin Bates]. That and the demo of [uXe’s] hack based on the project are both found after the break.

Demos powered by Arduboy on Classic Display

Arduboy Interview with [Kevin Bates]


Filed under: Arduino Hacks, handhelds hacks, nintendo hacks
Sep
11

NES: Nixie Entertainment System

arduino hacks, console, nintendo hacks, nixie, nixie clock, Raspberry Pi Comments Off on NES: Nixie Entertainment System 

nixieNES

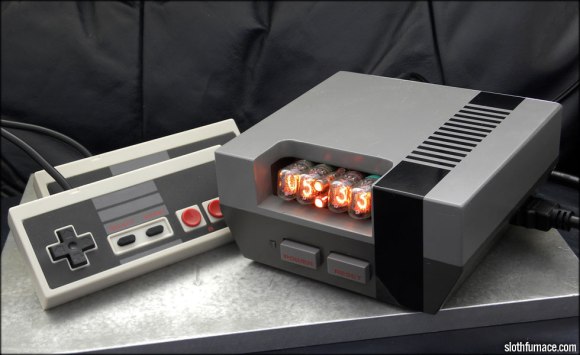
[Bradley W. Lewis] is no stranger to Nixie clock builds, and he felt his latest commission was missing something. Instead of merely mounting the Nixie clock into a case resembling an NES console, he goes full tilt and makes it into an NES console emulator. After some work on the milling machine, a wooden box has room to squeeze in a few new components. [Bradley] originally planned to mount only an Arduino with an ArduNIX shield to handle the Nixie clock, but the emulator demands some space saving. Flipping the Arduino on its side freed up plenty of room and the shield still easily connects to the adjacent Nixie tube board.

A Raspberry Pi serves as the console emulator and was mounted close to the side of the case to allow access to its HDMI port. The other ports from both the Arduino and RasPi stick out of the back, including an extension to the Pi’s RCA video out and buttons to set both the hour and minutes of the clock. The two surplus NES buttons on the front of the case control power to the RasPi and provide a reset function for the Nixie clock.

If that isn’t enough Nixie to satisfy you, check out the WiFi Nixie counter.


Filed under: Arduino Hacks, nintendo hacks, Raspberry Pi
Sep
11

nixieNES

[Bradley W. Lewis] is no stranger to Nixie clock builds, and he felt his latest commission was missing something. Instead of merely mounting the Nixie clock into a case resembling an NES console, he goes full tilt and makes it into an NES console emulator. After some work on the milling machine, a wooden box has room to squeeze in a few new components. [Bradley] originally planned to mount only an Arduino with an ArduNIX shield to handle the Nixie clock, but the emulator demands some space saving. Flipping the Arduino on its side freed up plenty of room and the shield still easily connects to the adjacent Nixie tube board.

A Raspberry Pi serves as the console emulator and was mounted close to the side of the case to allow access to its HDMI port. The other ports from both the Arduino and RasPi stick out of the back, including an extension to the Pi’s RCA video out and buttons to set both the hour and minutes of the clock. The two surplus NES buttons on the front of the case control power to the RasPi and provide a reset function for the Nixie clock.

If that isn’t enough Nixie to satisfy you, check out the WiFi Nixie counter.


Filed under: Arduino Hacks, nintendo hacks, Raspberry Pi
Jul
13

No nonsense guide for patching into a gaming controller

adaptive technology, arduino hacks, controller, nes, nintendo hacks Comments Off on No nonsense guide for patching into a gaming controller 

patching-into-a-gaming-controller

Here a straight-forward guide for tapping into the buttons on most gaming controllers. Why do something like this? Well there’s always the goal of conquering Mario through machine learning. But we hope this will further motivate hackers to donate their time and expertise developing specialized controllers for the disabled.

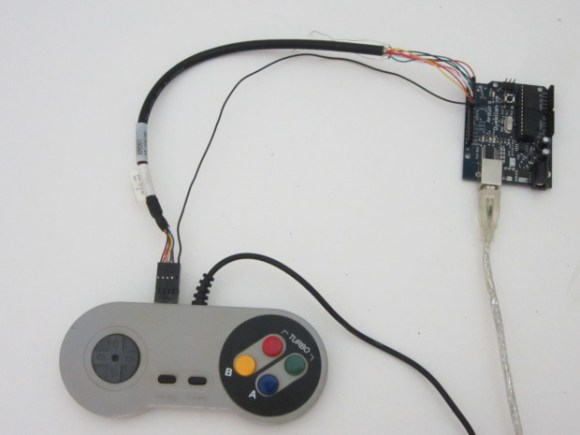
In this example a generic NES knock-off controller gets a breakout header for all of the controls. Upon close inspection of the PCB inside it’s clear that the buttons simply short out a trace to ground. By soldering a jumper between the active trace for each button and a female header the controller can still be used as normal, or can have button presses injected by a microcontroller.

The Arduino seen above simulates button presses by driving a pin low. From here you can develop larger buttons, foot pedals, or maybe even some software commands based on head movement or another adaptive technology.


Filed under: Arduino Hacks, nintendo hacks
Jul
03

The 14th game for the Nintendo Power Pad

arduino hacks, nes, nintendo, nintendo hacks, power pad, unity Comments Off on The 14th game for the Nintendo Power Pad 

Released 25 years ago, the Nintendo Power Pad, a plastic mat that plugged into an NES, saw very limited success despite its prevalence in basements and attics. In total, only six games for the Power Pad were released in North America, and only 13 worldwide. The guys over at cyborgDino thought they should celebrate the sliver anniversary of the Power Pad by creating its 14th game, using an Arduino and a bit of playing around in Unity 3D.

The first order of business was to read the button inputs on the Power Pad. Like all NES peripherals, the Power Pad stores the state of its buttons in a shift register that can be easily read out with an Arduino. With a bit of help from the UnoJoy library, it was a relatively simple matter to make the Power Pad work as intended.

The video game cyborgDino created is called Axis. It’s a bit like a cross between Pong and a tower defense game; plant your feet on the right buttons, and a shield pops up, protecting your square in the middle of the screen from bouncing balls. It’s the 14th game ever created for the Power Pad, so that’s got to count for something.

Video of the game below.


Filed under: Arduino Hacks, nintendo hacks


  • Newsletter

    Sign up for the PlanetArduino Newsletter, which delivers the most popular articles via e-mail to your inbox every week. Just fill in the information below and submit.

  • Like Us on Facebook