Posts | Comments

Planet Arduino

Archive for the ‘calculator’ Category

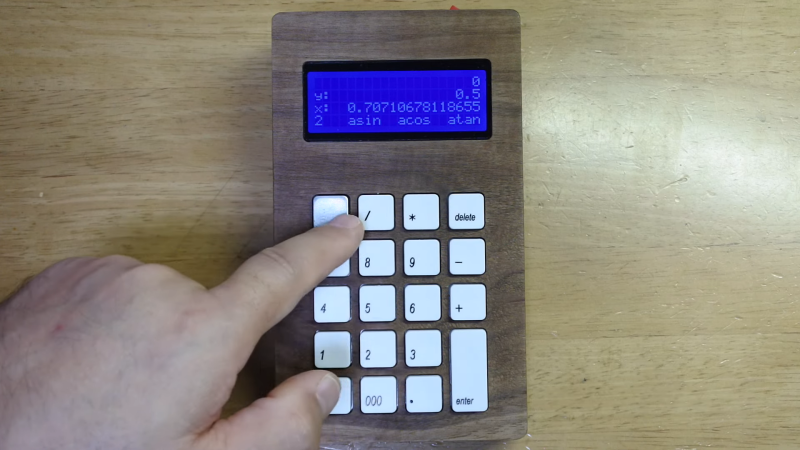
As the smartphone has eaten ever more of the gatgets with which we once surrounded ourselves, it’s with some sadness that we note the calculator becoming a less common sight. It’s with pleasure then that we bring you [Nekopla]’s keychain calculator, not least because it’s a little more than a conventional model. This is a calculator which uses Reverse Polish Notation, or RPN.

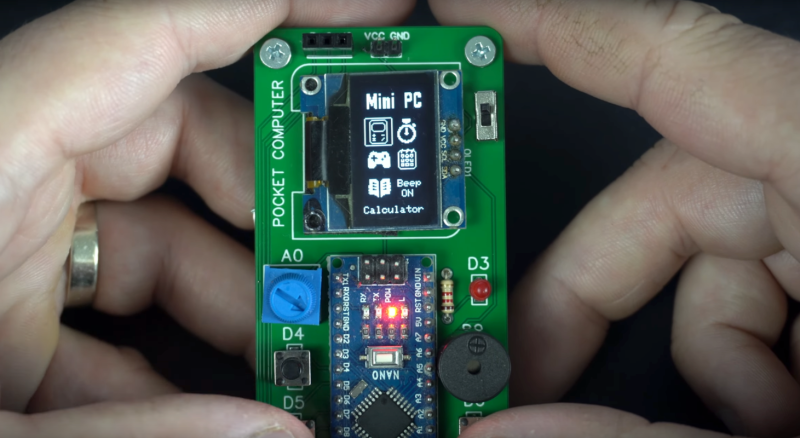
A full write-up in Japanese (Google Translate link) carries an impressive level of detail about the project, but in short, it takes an Arduino Pro Micro, an array of keys, and an OLED display, and packages them on a couple of fiberglass prototyping boards in a sandwich between laser-cut Perspex front and rear panels.

The RPN notation is what makes it especially interesting,a system in which where you might be used to writing 2+2=  to get 4, in RPN you would write 2 2 + . It allows the use of much simpler code with a stack-based architecture than that used in a conventional calculator. It’s a system that’s usually the preserve of some pretty exclusive machines, so it’s great to see on something with more of the toy about it.

If RPN interests you, then you might like to read our look at the subject, and even feast your eyes on the teardown of a vintage 1975 Sinclair RPN calculator.

How many of us have an everyday tool that’s truly unique? Likely not many of us; take a look around your desk and turn out your pockets, but more often than not, what you’ll find is that everything you have is something that pretty much everyone else on the planet could have bought too. But not so if you’ve got this beautiful custom RPN calculator in a wooden case.

This one comes to us from [Shinsaku Hiura], who generally dazzles us with unique mechanical clocks and displays. This calculator solves a more practical problem — the dearth of RPN calculators on the market with the correct keyboard feel, specifically with the large keys and light touch he desired. Appropriately, the build started with a numeric keypad, which once liberated of its USB interface was reverse-engineered to figure out how the matrix was wired. Next up, a custom PCB to connect the keypad to an Arduino and a 20×4 LCD display was milled up, while a test case was designed and printed to check fitment. The final case was milled from a block of solid walnut and fitted with an acrylic window, for a sharp look with clean lines and pleasing colors.

As for the calculator itself, the demo below shows it going through its paces. The code is clever because it leverages the minimal number of keys available by hiding all the scientific and engineering functions behind a “secret silver key” that was once the equals key and obviously not needed in RPN. Hats off to [Shinsaku] for a handsome and unique addition to his desk.

Before smartphones exploded on the scene in the late 00s, there was still a reasonable demand for pocket-sized computers that could do relatively simple computing tasks. Palm Pilots and other PDAs (Personal Digital Assistants) were all the rage in the ’90s and early ’00s, although for cutting-edge tech from that era plenty of these devices had astronomical price tags. This Arduino-based PDA hearkens back to that era, albeit with a much more accessible parts list.

The build is based around an Arudino Nano with an OLED screen and has the five necessary functions for a PDA: calculator, stopwatch, games, phonebook, and a calendar. With all of these components on such a small microcontroller, memory quickly became an issue when using the default libraries. [Danko] uses his own custom libraries in order to make the best use of memory which are all available on the project’s GitHub page. The build also includes a custom PCB to keep the entire pocket computer pocket-sized.

There are some other features packed into this tiny build as well, like the breakout game that can be played with a potentiometer. It’s an impressive build that makes as much use of the microcontroller’s capabilities as is possible, and if you enjoy projects where a microcontroller is used as if it is a PC take a look at this Arduino build with its own command-line interface.

All by itself, a calculator based on an Arduino isn’t necessarily very novel. However, [Volos] has a nice board that, of course, looks like a calculator. There are 16 keys and an LED display. But it seems to us the real value would be using this as a base for other projects.

As an inexpensive development board, it’s handy to have a simple processor with a keyboard and a display. There’s some extra I/O pins and the first example in the video below shows using the setup as a simple organ, for example. We’d love to see an option to replace the LED with an LCD and maybe even some different CPU options, as well.

The board is essentially an Arduino with a standard USB to serial chip and a MAX7219 display driver. Of course, you could breadboard up all of these things, but it wouldn’t be as neat looking. One unusual thing about the keyboard is that it is not multiplexed. Each button has a label that indicates what Arduino pin it connects with. So key 6 connects to pin 6 and pin A2 connects to the key marked =/A2.

With the availability of inexpensive PC boards, we’re seeing many nice designs out there that would be easy to repurpose for other things. For example, we thought this board would easily run the Kim Uno, with some modifications to the I/O routines. Might even be able to work out a clone of an even older computer to fit on the board.

Obviously, we would never endorse cheating on an exam, but sometimes a device is just too tempting to be left untouched. For [Neutrino], it was an old Casio calculator that happened to have a perfectly sized solar panel to fit a 128×32 OLED as replacement. But since the display won’t do much on its own, he decided to connect it to an ESP8266 and mount it all inside the calculator’s housing, turning it into a spy-worthy, internet-connected cheating device, including a stealthy user interface controlled by magnets instead of physical buttons. (Video, embedded below.)

To achieve the latter, [Neutrino] added two Hall effect sensors and a reed switch inside each end of the calculator. Placing a magnet — possibly hidden in a pen cap — near the reed switch will turn the display on, and placing another magnet near the Hall-effect sensors will navigate through the display’s interface, supporting two inputs with long, short, and multi-tap gestures each. To obtain information through WiFi, the ESP8266 connects to Firebase as backend, allowing to set up predefined content to fetch, as well as a possibility to communicate with your partner(s) in crime through a simple chat program.

As the main idea was to keep visible modifications to a minimum, one shortcoming is that charging the additional battery that powers the whole system would require an additional, external charging circuit. But [Neutrino] had a solution for that as well, and simply exposed two wires to the back, which could easily be mistaken for random solder splatters. And well, of course, requiring WiFi might also be tricky in some situations, so maybe you might want to consider a mobile network upgrade for yourself.

Considering their hardware specification, graphing calculators surely feel like an anachronism in 2019. There are plenty of apps and other software available for that nowadays, and despite all preaching by our teachers, we actually do carry calculators with us every day. On the other hand, never underestimate the power of muscle memory when using physical knobs and buttons instead of touch screen or mouse input. [epostkastl] combined the best of both worlds and turned his broken HP-48 into a Bluetooth LE keyboard to get the real feel with its emulated counterpart.

Initially implemented as USB device, [epostkastl] opted for a wireless version this time, and connected an nRF52 based Adafruit Feather board to the HP-48’s conveniently exposed button matrix pins. For the software emulation side, he uses the Emu48, an open source HP calculator emulator for Windows and Android. The great thing about Emu84 is that it supports fully customizable mappings of regular keyboard events to the emulated buttons, so you can easily map, say, the cosine button to the [C] key. The rest is straight forward: scanning the button matrix detects button presses, maps them to a key event, and sends it as a BLE HID event to the receiving side running Emu84.

As this turns [epostkastl]’s HP-48 essentially into a regular wireless keyboard in a compact package — albeit with a layout that outshines every QWERTY vs Dvorak debate. It can of course also find alternative use cases, for examples as media center remote control, or a shortcut keyboard. After all, we’ve seen the latter one built as stomp boxes and from finger training devices before, so why not a calculator?

We often think that less is more, but what can you do with a device that has only a single button? [Volos] wondered the same thing and he built an Arduino with a single button and a display. After doing some obvious things  (like a counter or stopwatch) he decided to make a calculator.

You can find the source code online and he used a library from GitHub to handle the reaction to single presses, double presses, and long presses. Is it ideal? Probably not. But if you only have a limited amount of space or pins, it can make the difference between a feasible project and one you can’t finish.

His original projects also included a Flappy Bird clone. The OLED display is only 64×48 so that’s not a lot of room. The packaging of the tiny Arduino, the battery, and the display in a good looking case, was pretty impressive. So the device might be usable for something.

Of course, the library will work with any program and there’s no reason you can’t have more than one button and simply multiply their functions with the same strategy. There’s a sample on GitHub that shows how you can create two OneButton objects connected to different hardware devices.

By the way, the little box may have only one button, but it also has a power switch. Turns out, you can use it as an input in certain circumstances. If the OLED display strikes you as too luxurious, try the DUO BINARY.

[Aguilera Dario] likes his Casio fx-82ES calculator. However, it was missing a few functions, including complex numbers. A Casio fx-991ES has more functions but, of course, costs more. A quick Google revealed that if you press the right buttons, though, you can transform an fx-82ES into an fx-991ES.

Because it is apparently a buffer overflow exploit, the hack involves a lot of keys and once you cycle the power you have to do it again. [Aguilera] realized this would be a good candidate for automation and added a microcontroller to push his buttons. You can see a video of a breadboard version below. He also has a PCB version in the works that should be better integrated.

The automation hardware patches into the button matrix through test pads on the back of the calculator’s PCB. [Aguilera] soldered ribbon cable directly to these pads, then snaked it out through a slot cut into the back of the calculator case where it is terminated with a 0.1″ pin socket. An Arduino Mini is used in the prototype, the next revision will use an ATmega328P on a custom board. The uC interfaces with the button connections using the venerable 4066 chip which is able to act as an analog switch.

The board layout for the PCB version is shown on the project page. There is no word on whether this is meant to be a permanent addition to the calculator, or just plugged in for the exploit and stored away for use the next time power is cycled. Either way, it’s neat to learn about this exploit and a cool challenge to automate it!

If you don’t want to hack up an off-the-shelf calculator, grab some nixie tubes and make your own. Or, if you are short on tubes, try this one.


Filed under: Arduino Hacks

[Joekutz] wanted to re-build an audio-rate function generator project that he found over on Instructables. By itself, the project is very simple: it’s an 8-bit resistor-ladder DAC, a nice enclosure, and the rest is firmware.

[Joekutz] decided this wasn’t enough. He needed an LCD display, a speaker, and one-hertz precision. The LCD display alone is an insane hack. He reverse-engineers a calculator simply to use the display. But instead of mapping each key on the calculator and typing each number in directly, he only taps the four 1, +, =, and clear keys. He can then enter arbitrary numbers by typing in the right number of ones and adding them up. 345 = 111 + 111 + 111 + 11 + 1. In his video, embedded below, he describes this as a “rather stupid” idea. We think it’s hilarious.

The meat of the project is the Arduino-based waveform generator, though. In the second video below, [joekutz] walks through the firmware in detail. If you’d like a simple introduction to DDS, check it out (or read up our more in-depth version).

He also makes custom detents for his potentiometers so that he can enter precise numerical values. These consist of special knobs and spring-clips that work together to turn a normal pot into a rough 8-way (or whatever) switch. Very cool.

So even if you don’t need an R-2R DAC based waveform generator, go check this project out. There’s good ideas at every turn.


Filed under: Arduino Hacks
Jan
20

High Cost Arduino Calculator Is Unwieldy, Still Cool Though

arduino, arduino hacks, calculator Comments Off on High Cost Arduino Calculator Is Unwieldy, Still Cool Though 

One of [Kale_3D]’s teachers had made an Arduino-powered calculator. It wasn’t robust and didn’t last too long in the classroom environment. After the non-functional calculator sat around the class for a while, [Kale_3D] decided he would give a shot at repairing it. Along the way the project didn’t just get repaired, it got a full rebuild.

This calculator uses a full 16 button matrix keypad. The Arduino deciphers button pushes with the help of the Keypad library, at which time the appropriate character is displayed on the 2×8 LCD screen. Selecting the function is a little different from normal since this project is limited to 16 buttons. Two of the buttons allow scrolling through not only standard arithmetic functions but trigonometric functions also. This was one of the features that the previous version was not capable of.

To protect the components, an enclosure was made out of 1/4″ laser cut wood. The pieces have notched edges to permit a nice fit. Even so, corner blocks were added to give the case even more rigidity.

Yes, this calculator is not practical, but that’s not the point. In the end [Kale_3D] felt that the project was definitely worth doing. He had learned a bunch of stuff about Arduino and especially code debugging! Most important of all he had a good time building it. There’s a video after the break showing how it works. The code and wiring diagrams are available for download on the project’s Instructable page.


Filed under: Arduino Hacks


  • Newsletter

    Sign up for the PlanetArduino Newsletter, which delivers the most popular articles via e-mail to your inbox every week. Just fill in the information below and submit.

  • Like Us on Facebook