Posts | Comments

Planet Arduino

Archive for the ‘Retro’ Category

Great build and write up from Mumbai-based maker indoorgeek (via instructrables):

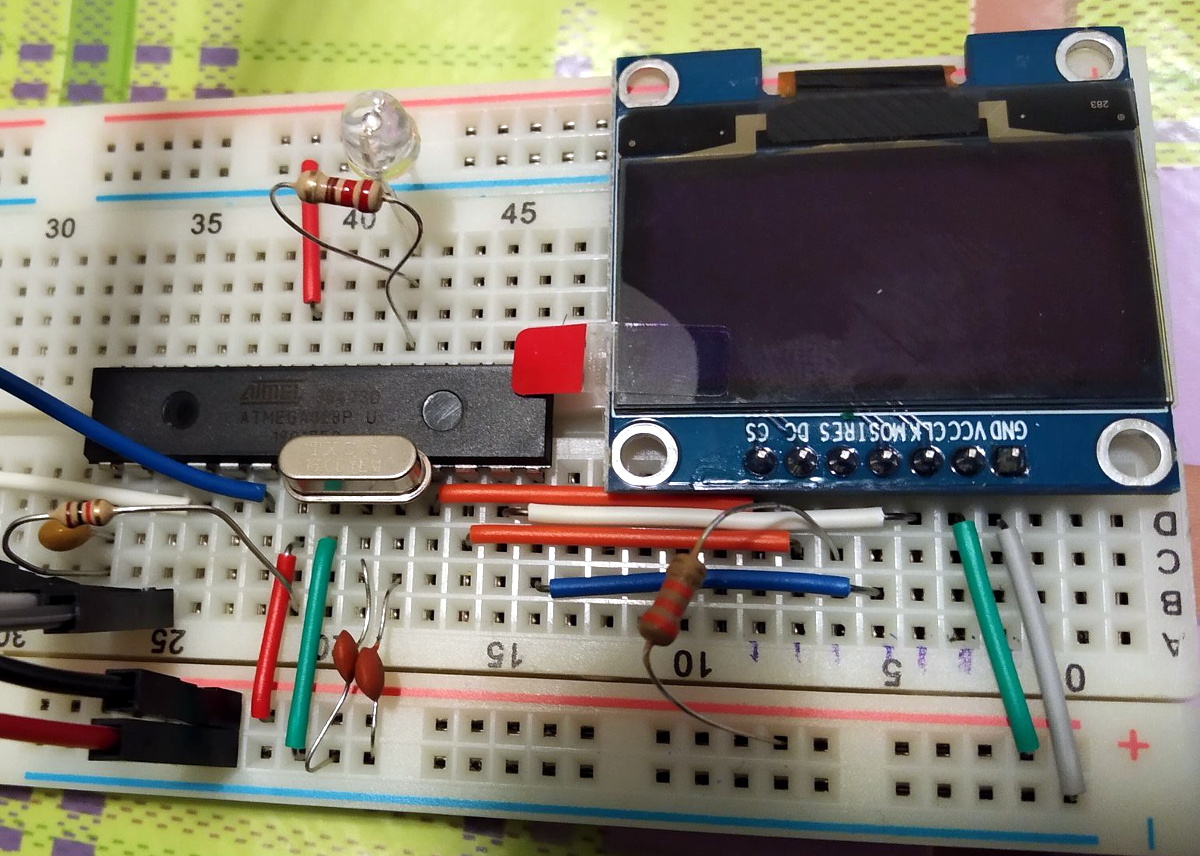
Several years ago, I crafted an FM radio using the compact RDA5807M module, a tuner that delivered FM radio in a small package. While it functioned well and brought enjoyment to the entire family, the reception was subpar. I resorted to hanging a lengthy wire down my window to enhance reception just to get a usable audio on few of the stations.

Now, I’ve opted to construct another radio, but this time, it will be an internet radio instead of an FM one. It can be kept anywhere in the house without the need of an antennae. As far as it has good Wi-Fi reception, it should work fine. Also, there a lot of internet streaming stations which we can listen to and not just the regular stations.

Cool to see our Adafruit I2S 3W Class D Amplifier Breakout – MAX98357A in action!

See more project details here.

CERBERUS 2100 8-bit computer board

Olimex has just announced the launch of the CERBERUS 2100 open-source hardware, educational, multi-processor 8-bit computer with both Z80 and 6502 CPUs, as well as a Microchip AVR processor serving as an I/O controller. The CERBERUS 2100 features several CPLD and is fully programmable from the lowest level (individual gates and flip-flops) up to BASIC interpreters running on the Z80 and 6502 CPUs. Olimex did not design this themselves as the hardware design is from Bernardo Kastrup (aka TheByteAttic), while BASIC interpreters were written by Alexander Sharikhin (6502) and Dean Belfield (Z80). CERBERUS 2100 specifications: Processors Zilog Z80 8-bit microprocessor at 4 or 8 MHz (user selectable) Western Design Center W65C02S 8-bit microprocessor at 4 or 8 MHz (user selectable) “FAT-CAT” (Custom ATmega328pb) Microchip 8-bit AVR ATMega328PB microcontroller at 16 MHz CPLDs (ATF1508AS-7AX100) FAT-SCUNK (Scan CoUNter and clocK) and FAT-CAVIA (ChAracter Video Adapter) for video circuit connected to a 25.175 [...]

The post CERBERUS 2100 is a BASIC-programmable educational board with Z80 and 6502 8-bit CPUs appeared first on CNX Software - Embedded Systems News.

Not satisfied with any of the DIY retro computer kits on the market, [Leonardo Leoni] decided to make his own. Built using only the finest through-hole technology and powered by the ATmega328 microcontroller, his diminutive 8-bit computer is easy to build and even easier to develop for. Whether you’re looking to hone your BASIC skills or play some Zork on the bus, this little computer looks like a great project for anyone who has a soft spot for computing’s simpler days.

All things considered, using this diminutive machine looks like it would be relatively pleasant. [Leonardo] is using a common SH1106 OLED display, and there’s a full QWERTY keyboard (with number row) done up with tactile momentary buttons. There’s very few passive components involved in the build, which is sure to be appealing to new players; especially after they’ve finished soldering all those switches to the board.

On the software side, [Leonardo] says he leaned heavily on open source projects to get his machine up and running. Beyond the hardware drivers for things like the display, he specifically calls out the Tiny Basic and Tiny Lisp Computer projects for their code. If small-scale programming isn’t your style, the machine is compatible with the Arduino IDE so you can easily throw something else on it. If you’ve ever dreamed of a QWERTY Arduboy, this might be your chance.

From the way [Leonardo] describes the computer, which he calls the Cobalt 3, we get the impression a commercial kit might be in the cards. We hope the community shows enough interest to make it happen. After all, not everyone was able to make it to Hackaday Belgrade 2018 to get their own pocket retro computer.

Despite all the incredible advancements made in video game technology over the last few decades, the 8-bit classics never seem to go out of style. Even if you weren’t old enough to experience these games when they were new, it’s impossible not to be impressed by what the early video game pioneers were able to do with such meager hardware. They’re a reminder of what can be accomplished with dedication and technical mastery.

The grid has been split up for easier printing.

If you’d like to put a little retro inspiration on your desk, take a look at this fantastic 16 x 16 LED matrix put together by [Josh Gerdes]. While it’s obviously not the only thing you could use it for, the display certainly seems particularly adept at showing old school video game sprites in all their pixelated glory. There’s something about the internal 3D printed grid that gives the sprites a three dimensional look, while the diffused glow reminds us of nights spent hunched over a flickering CRT.

The best part might be how easy it is to put one of these together for yourself. You’ve probably got most of what you need in the parts bin; essentially it’s just a WS2812B strip long enough to liberate 256 LEDs from and a microcontroller to drive them. [Josh] used an Arduino Nano, but anything compatible with the FastLED library would be a drop-in replacement. You’ll also need a 3D printer to run off the grid, and something to put the whole thing into. The 12×12 shadowbox used here looks great, but we imagine clever folks such as yourselves could make do with whatever might be laying around if you can’t nip off to the arts and crafts store right now.

Beyond looking great, this project is a fantastic reminder of how incredibly handy WS2812 LEDs really are. Whether you’re recreating iconic game sprites or fashioning your own light-up sunglasses, it’s hard to imagine how we managed before these little wonders hit the scene.

After covering a few of his builds at this point, we think it’s abundantly clear that [Igor Afanasyev] has a keen eye for turning random pieces of antiquated hardware into something that’s equal parts functional and gorgeous. He retains the aspects of the original which give it that unmistakable vintage look, while very slickly integrating modern components and features. His work is getting awfully close to becoming some kind of new art form, but we’re certainly not complaining.

His latest creation takes an old-school “Monopak” electronic flash module and turns it into a desk clock that somehow also manages to look like a vintage television set. The OLED displays glowing behind the original flash diffuser create an awesome visual effect which really sells the whole look; as if the display is some hitherto undiscovered nixie variant.

On the technical side of things, there’s really not much to this particular build. Utilizing two extremely common SSD1306 OLED displays in a 3D printed holder along with an Arduino to drive them, the electronics are quite simple. There’s a rotary encoder on the side to set the time, though it would have been nice to see an RTC module added into the mix for better accuracy. Or perhaps even switch over to the ESP8266 so the clock could update itself from the Internet. But on this build we get the impression [Igor] was more interested in playing with the aesthetics of the final piece than fiddling with the internals, which is hard to argue with when it looks this cool.

Noticing the flash had a sort of classic TV set feel to it, [Igor] took the time to 3D print some detail pieces which really complete the look. The feet on the bottom not only hold the clock at a comfortable viewing angle, but perfectly echo the retro-futuristic look of 50s and 60s consumer electronics. He even went through the trouble of printing a little antenna to fit into the top hot shoe, complete with a metal ring salvaged from a key-chain.

Late last year we were impressed with the effort [Igor] put into creating a retro Raspberry Pi terminal from a legitimate piece of 1970’s laboratory equipment, and more recently his modern take on the lowly cassette player got plenty of debate going. We can’t wait to see what he comes up with next.

After booting up his RetroPie system, [jfrmilner] had the distinct feeling that something was off. Realizing that the modern Xbox 360 controller didn’t fit right when reliving the games of his youth, he rounded up all his old controllers to make sure he always had the right gamepad for the game.

Wanting to keep the controllers unmodified — so they could still be used on the original systems — he had to do a bit of reverse-engineering and source some controller sockets before building his controller hub. Using shift-in registers, shift-out registers, and some multiplexers, he designed a large circuit selector — which acts as a shield for an Arduino Micro — so all the controllers remain connected. A potentiometer allows him to select the desired controller and a few arcade buttons which access RetroPie shortcuts really round out the hub. Check out the demo after the break!

[jfrmilner] kept the controllers relevant to the games he would be playing, but we hope there’s some room to include a controller in rug format in his build. Of course, there’s always the option of Jerry-rigging old systems to use your preferred retro gamepad.


Filed under: Arduino Hacks, Raspberry Pi

Browse around eBay for an original Altair 8800 and you quickly find that the price range is in the thousands of dollars. If you are a collector and have some money in your pocket maybe that’s okay. But if you want the Altair 8800 experience on a budget, you can build yourself a clone with an Arduino. [David] kindly shared the build details on his Arduino Project Hub post. Using an Arduino Due (or a Mega for 25% of original speed), the clone can accurately reproduce the behavior of the Altair’s front panel elements. We covered a similar project in the past, using the Arduino Uno.

While not overly complicated to build one, you will need a back
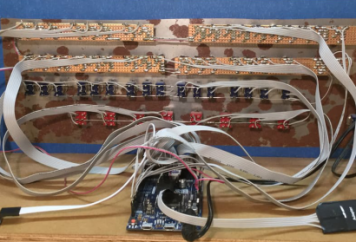
fair amount of patience so you can solder all the 36 LEDs, switches, transistors, and resistors but in the end, you’ll end up with a brand new computer to play with.  In 1975, an assembled Altair 8800 Computer was selling for $621 and $439 for an unassembled version. Sourced right, your clone would be under 50 bucks. Not bad.

The simulator comes with a bunch of software for you to try out and even games like Kill-the-Bit and Pong. BASIC and Assembler example programs are included in the emulator software and can easily be loaded.

In addition, the simulator includes some extra functions and built-in software for the Altair which are accessible via the AUX1/AUX2 switches on the front panel (those were included but not used on the original Altair). From starting different games to mount disks in an emulated disk drive, there are just too many functions to describe here. You can take a look at the simulator documentation for more information.

In case you don’t know already, here’s how to play Kill-the-Bit:


Filed under: Arduino Hacks

Photo: Hep Svadja3D-print this 1872 replica Electro-Magnetic Engine that works like your drone's modern motors.

Read more on MAKE

The post Ye Olde Brushless Motor appeared first on Make: DIY Projects, How-Tos, Electronics, Crafts and Ideas for Makers.

A good hacker hates to throw away electronics. We think [Matt Gruskin] must be a good hacker because where a regular guy would see a junky old 1980’s vintage Fisher Price cassette player, [Matt] saw a retro stylish Bluetooth speaker. His hack took equal parts of electronics and mechanics. It even required some custom 3D printing.

You might think converting a piece of old tech to Bluetooth would be a major technical challenge, but thanks to the availability of highly integrated modules, the electronics worked out to be fairly straightforward. [Matt] selected an off the shelf Bluetooth module and another ready-to-go audio amplifier board. He built a custom board to convert the stereo output to mono and hold the rotary encoder he used for the volume control. An Arduino (what else?) reads the encoder and also provides 3.3V to some of the other electronics.

The really interesting part of the hack is the mechanics. [Matt] managed to modify the existing mechanical buttons to drive the electronics using wire and hot glue. He also added a hidden power switch that doesn’t change the device’s vintage look. Speaking of mechanics, there’s also a custom 3D printed PCB holder allowing for the new board to fit in the original holder. This allows [Matt] to keep the volume control in its original location

We couldn’t help but think that if you were wanting to become a hardware hacker, there are a lot of lessons here. You might not be able to find a Fisher Price recorder, but the same electronics would allow you to convert lots of things into a functioning Bluetooth speaker. [Matt’s] methods for fitting everything together might not apply when you create your own Bluetooth backpack or flower pot. However, his ingenuity ought to inspire your own.

If you want something less original than a backpack, you could modify some headphones (check out the second video below), or maybe an old AM/FM radio.


Filed under: Arduino Hacks, how-to, wireless hacks
Jul
30

This Nixie Tube Speedometer Gives Retro-Futuristic Life to a 70s Motorcycle

1971, arduino, cafe racer, Electronics, motorcycles, nixie tubes, Retro, retro-futuristic, speedometer, vintage Comments Off on This Nixie Tube Speedometer Gives Retro-Futuristic Life to a 70s Motorcycle 

nix-bike1Nixie tubes are interesting pieces of equipment. They have a "retro-futuristic" look that has great appeal to electronics hackers.

Read more on MAKE

The post This Nixie Tube Speedometer Gives Retro-Futuristic Life to a 70s Motorcycle appeared first on Make: DIY Projects, How-Tos, Electronics, Crafts and Ideas for Makers.


  • Newsletter

    Sign up for the PlanetArduino Newsletter, which delivers the most popular articles via e-mail to your inbox every week. Just fill in the information below and submit.

  • Like Us on Facebook