Posts | Comments

Planet Arduino

Archive for the ‘etch-a-sketch’ Category

Etch-a-sketch made with LEDs

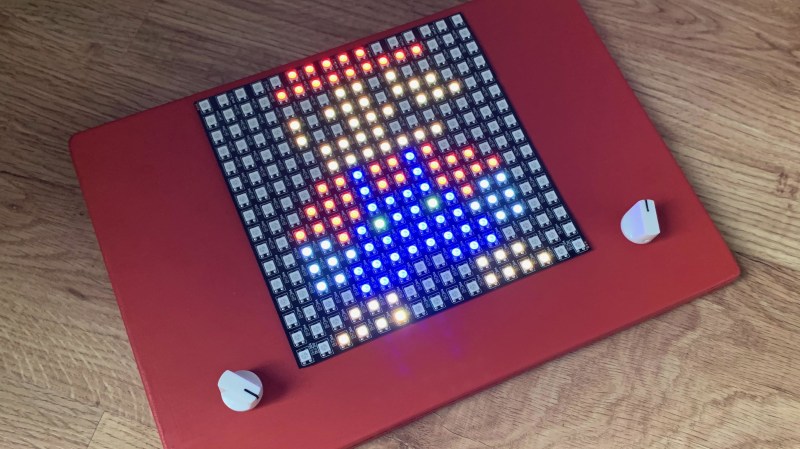
We never did crack open our Etch-a-Sketch, but we did scrape out a window large enough to really check out the mechanism inside. [MrLangford] is bringing the Etch-a-Sketch into the 21st century while at the same time, bringing an even bigger air of mystery, at least for the normies.

Instead of scraping aluminum powder off of plastic by driving a stylus on an x-y gantry with a pair of knobs, this bad boy uses rotary encoders to move the cursor around and put down squares of colored light. The familiar movements are there — the left knob moves the cursor left and right, and the right knob moves it up and down. But this wouldn’t be a 21st century toy without newfangled features. Push the left encoder down and it cycles through eight color choices, or push the right one down to go through them backwards. We hope one of the colors is setting it back to darkness in case you screw up. And while we’re dreaming up improvements, it would be awesome to add an accelerometer so you could shake it clear like a standard Etch-a-Sketch.

Inside the requisite red enclosure with white knobs are an Arduino Nano and a 16×16 RGB LED matrix. The enclosure is four sheets of 6mm MDF glued together, and we like the use of protoboard to distribute GND and 5 V in the name of keeping the thing slim.

If you’re not much of an artist, here’s a TV-sized Etch-a-Sketch build that can draw by itself.

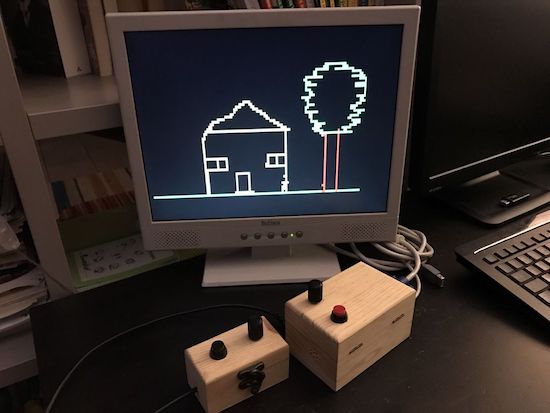
After building a Pong game using an Arduino Uno and a VGA monitor, Rob Cai realized this same setup could be used to make Etch A Sketch-style drawings.

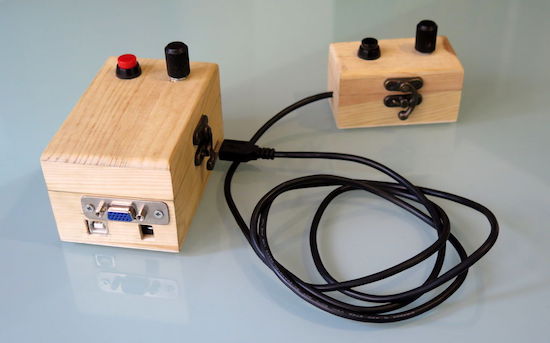
Control is surprisingly “Pong-compatible” with two boxes, each with a potentiometer and a button. One knob moves the cursor horizontally and the other vertically. Unlike an actual Etch A Sketch from your childhood, one button chooses the line color, while the other resets the screen (instead of shaking).

His system takes advantage of Sandro Maffiodo’s VGAx library, meaning it doesn’t need much more than a sacrificial VGA cable to draw a low-resolution picture on the display.

You can check out Cai’s Etch A Sketch on Instructables, where you’ll also find the project in its Pong form.

We hate to break it to [Rob Cai], but he’s built a VGA drawing toy, not an Etch-a-Sketch. How do we know? Simple, Etch-a-Sketch is a registered trademark. Regardless, his project shows how an Arduino can drive a VGA monitor using the VGAx library. Sure, you can only do four colors with a 120×60 resolution, but on the other hand, it requires almost no hardware other than the Arduino (you do need four resistors).

The hardware includes two pots and with the right firmware, it can also play pong, if you don’t want to give bent your artistic side. You can see videos of both the art toy and the pong game, below.

Because the device started as a pong game, [Rob’s] version has two boxes, each with a pot and a button. Of course, if you were really building it just for the drawing toy, you’d probably put it all in a box. Maybe even a red box. If we were building it, we’d be tempted to put a tilt sensor or an accelerometer in the box so you could shake it to erase the picture. Just saying.

If you want 640×480 resolution from an Arduino, it can be done, but it takes more hardware. If you were trying to get a kid interested in Arduino, you could do worse than start with two projects with video that are fun, use a handful of easy-to-source parts, and shares hardware. Then again, if you are in the “go big or go home” camp, we’d redirect to this pong game, instead.


Filed under: Arduino Hacks

Turning the classic toy Etch-A-Sketch into a CNC drawing tablet intrigues a large number of hackers. This version by [GeekMom] certainly takes the award for precision and utility. Once you build something like this, you can hardly stop writing firmware for it; [GeekMom] produced an entire Arduino library of code to allow joystick doodling, drawing web images, and a self-erasing spirograph mode. The topper is the version that runs as a clock!

gallery

The major hassle with making a CNC version of this toy is the slop in the drawing mechanism. There is a large amount of backlash when you reverse the drawing direction. If that isn’t bad enough, the backlash is different in the vertical or horizontal directions. Part of [GeekMom’s] presentation is on how to measure and correct for this backlash.

The EtchABot uses three small stepper motors. Two drive the drawing controls and the third flips the device forward to erase the previous drawing. The motors are each controlled by a ULN2003 stepper motor drivers. An Arduino Uno provides the intelligence. Optional components are a DS3231 Real Time Clock and a dual axis X-Y joystick for the clock and doodling capability. Laser cut wood creates a base for holding the Etch-A-Sketch and the electronics.

The write up and details for this project are impressive. Be sure to check out the other entries in [GeekMom’s] blog. Watch the complete spirograph video after the break.


Filed under: Arduino Hacks, toy hacks
Feb
02

Automated Etch-a-Sketch Re-Produces Famous Artwork

arduino hacks, etch-a-sketch, python, uln2803 Comments Off on Automated Etch-a-Sketch Re-Produces Famous Artwork 

Unless you’re some incredibly gifted individual with more dexterity than a fighter jet pilot, making anything on a Etch-a-Sketch is hard. So [Evan] decided to motorize it, and cheat a little bit.

He’s using an Arduino Uno to control two stepper motors that he has bound to the Etch-a-Sketch knobs using a short piece of rubber tube and Gorilla Glue. He 3D printed some custom motor mounts to allow the motors to be positioned directly above the knobs, and a ULN2803 to switch the 12V required for the steppers.

After he had the hardware all setup, he coded a simple Python script to take in .PNGs and produce vector art to be sent through the Arduino. In case you’re wondering, an Etch-a-Sketch has approximately 550 x 370 pixels, or about 500 x 320 for the “safe zone”.

Due to the limitations of the Etch-a-Sketch, like its inability to stop writing, some images might require some editing before sending it off to your new Etch-a-Sketch printer.

While Etch-a-Sketches have been the bane of existence for many people’s childhoods, there’s quite a few hacks out there of people getting their revenge. Etch-a-Sketch clock? Check. Etch-a-Sketch CNC? Check. Etch-a-Sketch Automatic? Check.


Filed under: Arduino Hacks

For someone who has never used stepper motors, real-time clocks, or built anything from scratch, [Dodgey99] has done a great job of bending them to his will while building his Etch-A-Sketch clock.

He used two 5V stepper motors with ULN2003 drivers. These motors are mounted on the back and rotate the knobs via pulleys. They are kind of slow; it takes about 2 1/2 minutes to draw the time, but the point of the hack is to watch the Etch-A-Sketch. [Dodgey99] is working to replace these steppers with Nema 17 motors which are much faster. [Dodgey99] used an EasyDriver for Arduino to drive them. He’s got an Arduino chip kit in this clock to save on the BOM, but you could use a regular Arduino. He left out the 5V regulator because the EasyDriver has one.

[Dodgey99] has published three sketches for the clock: one to set up the RTC so that the correct time is displayed once the Etch-A-Sketch is finished, some code to test the hardware and sample the look of the digits, and the main code to replace the test code.

The icing on this timekeeping cake is the acrylic base and mounting he’s fashioned. During his mounting trials, he learned a valuable lesson about drilling holes into an Etch-A-Sketch. You can’t shake an Etch-A-Sketch programmatically, so he rotates it with a Nema 17. Check it out after the jump.

If you’re paying attention, you’ll realize we just saw the exact opposite of this project a few hours ago: a CNC tool (laser cutter) controlled by turning Etch-A-Sketch knobs.


Filed under: Arduino Hacks, clock hacks
Sep
09

An etch-a-sketch on dope

arduino, etch-a-sketch, inspiration, motor, shield Comments Off on An etch-a-sketch on dope 

Magnetography

Arduino Facebook  page is a great source of inspiration  with plenty of people posting everyday about projects and experiments. Some days ago a user shared this interesting video about Magnetography, an alternative drawing toy using ferrofluid, a liquid which becomes strongly magnetized in the presence of a magnetic field.

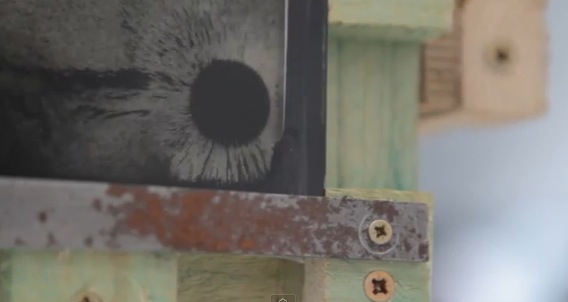
Magnetography, by Christian Robach, is built out of old DC-Motors, a frame filled with water and ferrofluids.  The “pen” can be controlled by using the W-A-S-D letters on the keyboard allowing the users to play with the liquid metal without getting their hands dirty.
The commands are sent to the serial Port via Processing then Arduino UNO, with an Adafruit Motor Shield extension, reacts by powering the motors and moving the magnet according to the coordinates. Enjoy the video below:


  • Newsletter

    Sign up for the PlanetArduino Newsletter, which delivers the most popular articles via e-mail to your inbox every week. Just fill in the information below and submit.

  • Like Us on Facebook