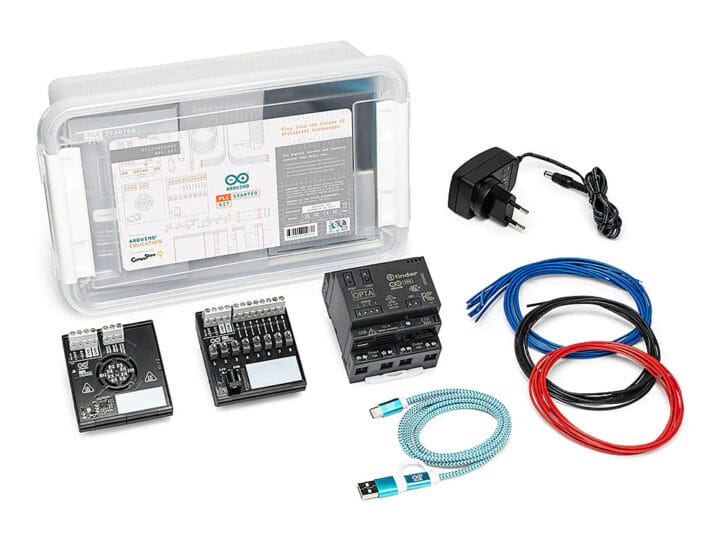
Arduino PLC Starter Kit combines the Arduino Opta micro PLC, the Arduino DIN Simul8 digital input simulator and power distribution board, and the Arduino DIN Celsius board with two independent heater circuits and one temperature sensor acting as a temperature laboratory. The kit is supported by the Arduino PLC IDE first introduced in 2022 and comes with various cables and a power supply that allows users to quickly get started. Arduino says the kit targets the education of students aged 17 years and more. It includes 20 hours of lessons going through the history of programmable logic controllers, Modbus RS-485 communications, and how PLCs integrate with industrial simulated systems. The main hardware and software components of the kits are: Arduino Opta WiFi micro PLC based on an STMicro STM32H747XI dual-core Arm Cortex-M7/M4 MCU, offering Ethernet and RS485 communication interfaces, and exposing eight digital/analog inputs, plus four relay outputs. DIN Rail-mountable [...]
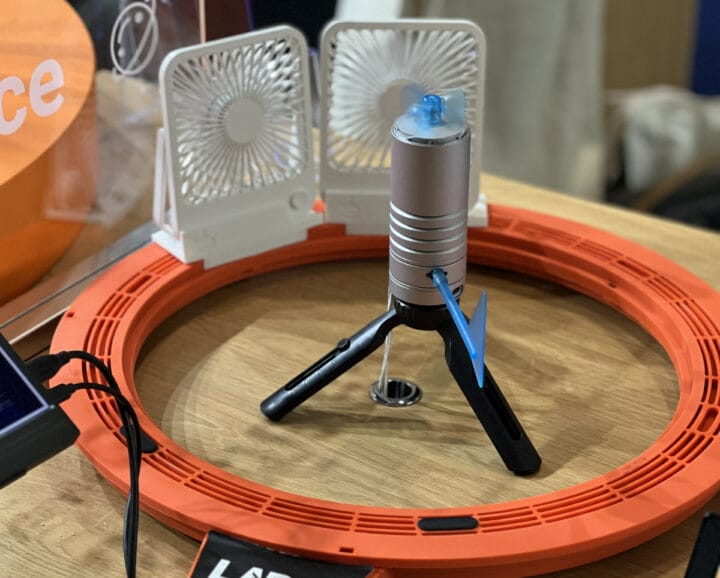
The Lark Weather Station measures wind speed, wind direction, temperature, humidity, and air pressure through a range of sensors and connects to popular development boards such as Arduino UNO, ESP32, BBC micro:bit, Raspberry Pi, or DFRobot Unihiker through I2C or UART. We’ve seen several projects for Internet-connection weather stations that retrieve weather data from the web and display the results locally, but the Lark Weather Station allows the users to get atmospheric data right in his/her current location thanks to its built-in anemometer, wind vane, and built-in sensors, as well as expansion interfaces for additional sensors. Lark Weather Station specifications: Storage – 16MB flash good to store about 160 days of data (when data is recorded once per minute) Sensors Compass Anemometer Wind Speed: 0.5~12m/s Cover to protect the anemometer during storage/transport Wind vane and wind direction shaft to report the wind direction (eight directions) Temperature Range –20~60℃ ±0.2℃ Humidity [...]
Many people find the subjectivity of art to be frustrating, but that subjectivity is what makes art interesting. Banksy’s self-shredding art piece is a great example of this. The original painting sold at auction for $1.4 million — and then it shredded itself in front of everyone. That increased its value and the now-shredded piece, dubbed “Love Is in the Bin,” sold again at auction in 2021 for a record-breaking $23 million. In a similar vein to that infamous work, this robot destroys the artwork that it produces.
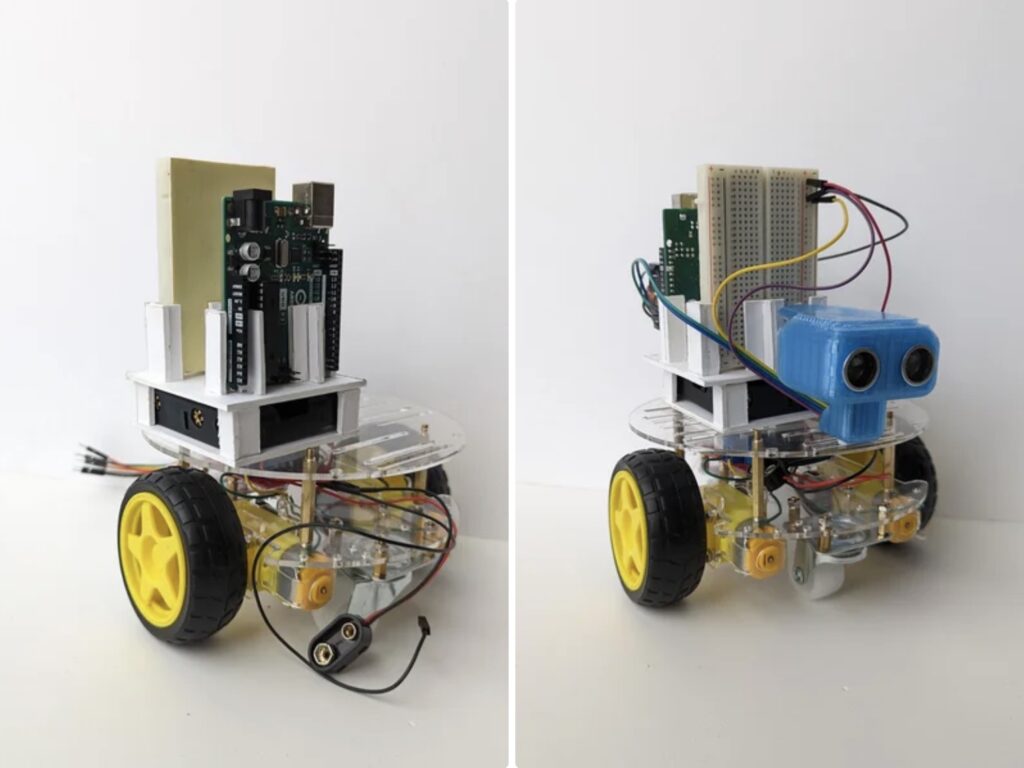
“The Whimsy Artist” is a small robot rover, like the kind you’d get in an educational STEM kit. It is the type of robot that most people start with, because it is very simple. It only needs two DC motors to drive around and it can detect obstacles using an ultrasonic distance sensor and has two infrared sensors for line-following. An Arduino Uno Rev3 board controls the operation of the two motors according to the information it receives from the sensors.
That decision-making is where the artistic elements come into play. When it doesn’t detect any obstacles, the robot will run in “creative” mode. It opens a chute on a dispenser to drop a trail of fine sand while it moves in a pleasant spiral pattern. But if it sees an obstacle with the ultrasonic sensor, it gets angry. In that mode, it reverses direction and uses the IR sensors to follow the line it just created while deploying a brush to ruin its own sandy artwork.
Hopefully you’ve been with us during the roller-coaster ride of Arduino EDUvision season 4, which just came to a close. We’ve had a wonderful time, and the response from the community has been outstanding.
Arduino EDUvision began life as a way to compensate for the lack of in-person events during 2020. And now we’ve already live streamed 40 episodes, with thousands of viewers tuning in each week as we interview guests from across education, tech, science and STEM.
EDUvision Season 4 Podcast
This latest season, which wrapped on 11th November, also broke out into an accompanying podcast.
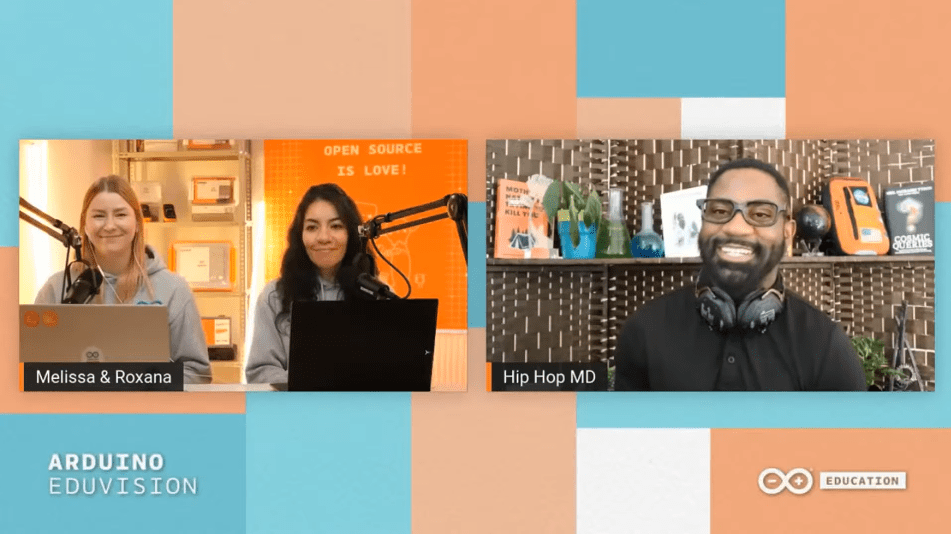
Over the months, and with so many episodes under the EDUvision umbrella, we’ve had some amazing guests. The conversations you see in the episodes are only the tip of the interview iceberg. The new podcast gives Arduino fans the opportunity to listen to the full conversations that Melissa and Roxana have with the guests.
The subjects go so much deeper, and there’s so much more to learn from these amazing, entertaining thought leaders who share their time with us all.
You can listen to the Arduino EDUvision podcast anywhere you like. Here are a few links so you can catch up on the exciting edtech, STEM and science subjects we’ve delved into this season.
The good news is that all the EDUvision live streams remain online. So you can still watch them at your convenience. It’s been a really exciting season thanks to the diverse and fascinating guests who’ve shared their insights, work and projects with us.
Educational technology expert Damien Kee joined us to celebrate International Programmers’ Day in the first episode. Stick around until the end, when he took the opportunity to show off his amazing DIY R2-D2.
There was an outpouring of excitement from the Arduino community when Locomation’s Çetin Meriçli showed us what the future has in store for self-driving trucks and cars.
And Dr. Erica Colón from YouTube’s Nitty Gritty Science rounded out the season. She dazzled us with an amazing array of science projects you can do at home.
The famous and fabulous Hip Hop Scientist visited us for Halloween. We had a great discussion about bridging the gap between music and science by bringing it into everyday pop culture.
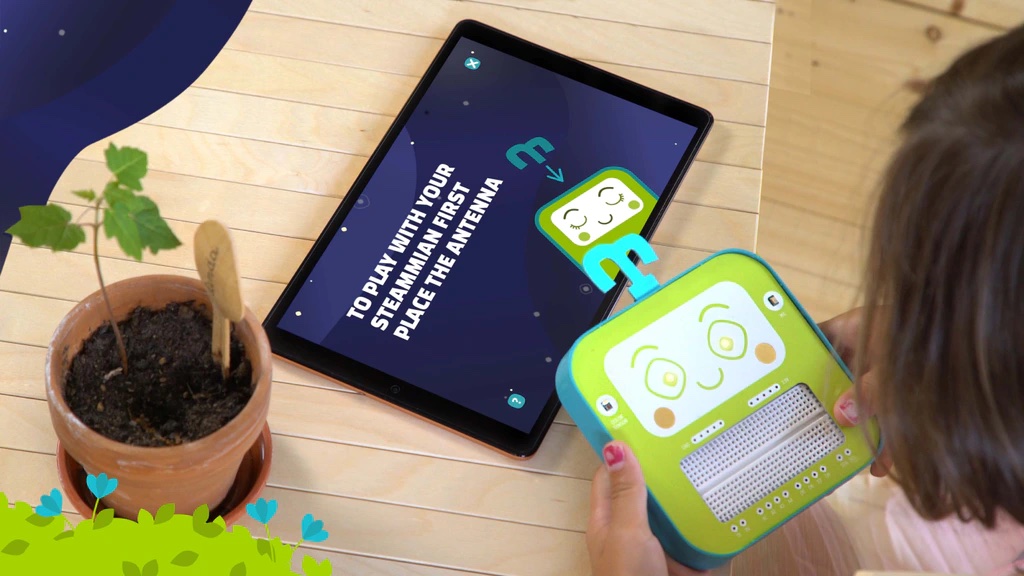
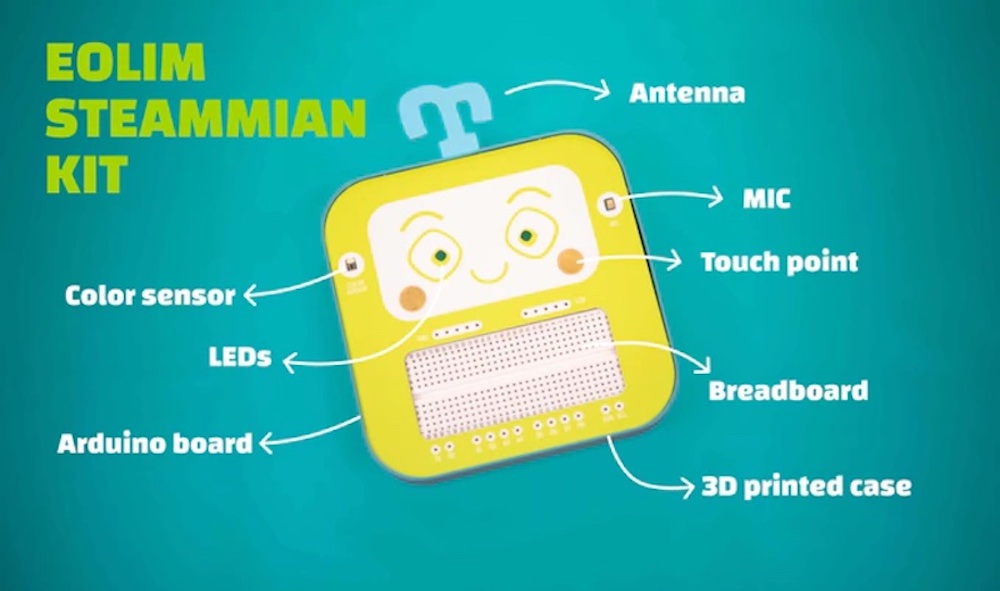
Teaching children concepts in science, technology, engineering, and mathematics is extremely important as the world is becoming even more dependent on people with those skills. To help achieve this goal, Leyla Tawfik, Serena Cangiano and the Ethafa team came up with a series of interactive learning solutions that they call “STEAMMIANS.” Each one targets a particular subset within the field of electronics, and their first one, “Eolim,” is focused on guiding kids ages 9-11 on how to use certain kinds of sensors to perform various actions.
Eolim consists of a large PCB that acts as a shield for the Arduino Nano 33 IoT, as it’s equipped with a microphone, a color sensor, two LEDs, and a pair of touch points on its surface. The 3D-printed case allows the shield and Nano 33 IoT to slot in alongside a breadboard for connecting other components to one of several exposed GPIO pins.
Because of the focus on experiential learning, the accompanying app enables users to go on certain “adventures” where they are instructed to follow directions to create a circuit. Programming can be done through either a block-style interface (akin to Scratch) or via the Arduino IDE for more advanced users. Finally, data can be read from the device and displayed within the app.
The Arduino #Include program was first announced as part of the 2021 Arduino Day event. Since then, the team has been refining exactly how #Include will help members of the Arduino community to spread our love of electronics around the world.
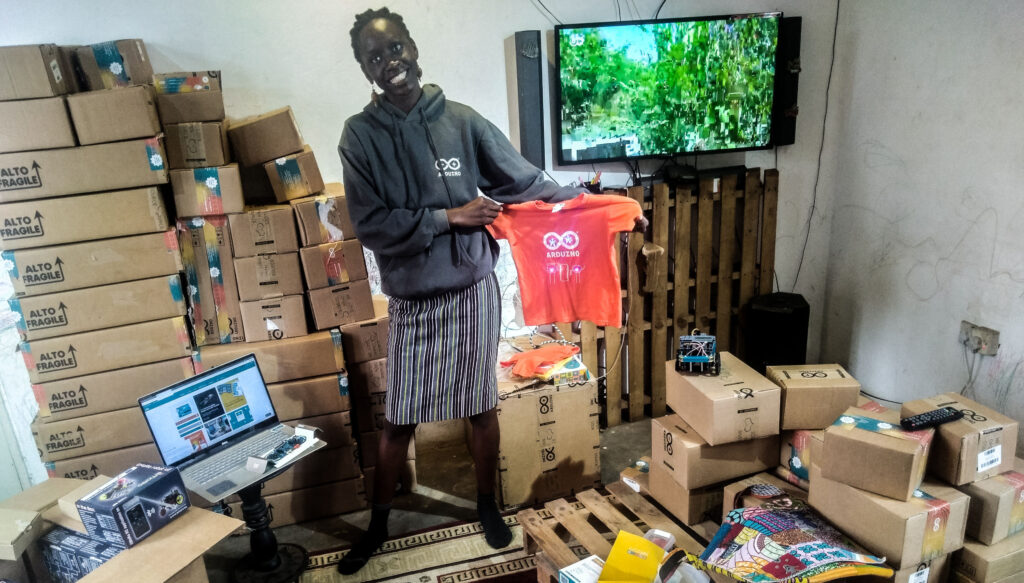
One of the pilot programs has just taken delivery of equipment provided through #Include. This marks an exciting milestone for Arduino, its users, and a whole community of brand new Arduino lovers in Accra, Ghana.
Jenga Labs in Ghana gets #Include gear
Brenda Mboya is well known at Arduino. She was a guest speaker at Maker Faire Rome in 2019. She’s done a huge amount of work in Africa, bringing electronics, robotics and educational technology to students and teachers across Ghana. In 2018, she was listed among the top 25 women in the world to have made a significant contribution to robotics.
Her latest project is Jenga Labs, which she describes as being a “lab on wheels”. The objective is to bring coding and robotics to some of the most remote areas of the region. She’ll be running courses for 7- to 14-year-olds, and Brenda primarily works to encourage young people into robotics. She’s also very active in supporting teachers, and helping them bring, use and understand tech in the classroom.
We’re thrilled that Brenda’s now taken delivery of the Arduino kits and electronic components we sent her as part of the pilot program for #Include.
We can’t wait to see what Brenda’s students create with the tools they now have. It’s exciting on all kinds of levels. Bringing accessible technology to new people and places, for example. Or finding out how we can begin to expand on this early test case for the Arduino #Include initiative.
More about Arduino #Include
The history of Arduino has been one of inclusivity. Everything here is designed to make electronics accessible to as many people as possible. That’s an ongoing challenge that we both relish, and take seriously.
In an effort to bring that philosophy to the forefront of the ongoing business, we’ve developed the Arduino #Include program. We’ll build on our efforts of expanding the understanding of electronics and technology. This will have a strong focus on the diversity values that Arduino also holds dear.
This means making a special effort to bring visibility to people who use Arduino as a tool for inclusivity, equality, social justice and accessibility. We see this very much as an opportunity. It’s a long term program that we hope will help to create positive role models across the tech communities.
Ultimately the #Include initiative will see Arduino help to establish “ambassadors”. It’ll donate hardware and software services, and give visibility to diverse people and groups across the spectrum.
Which brings us to wishing Brenda all the best with her Jenga Labs robotics project as part of the Arduino #Include program.
We’ll keep you posted on Jenga Labs, and about how you can get involved in #Include as the program expands.
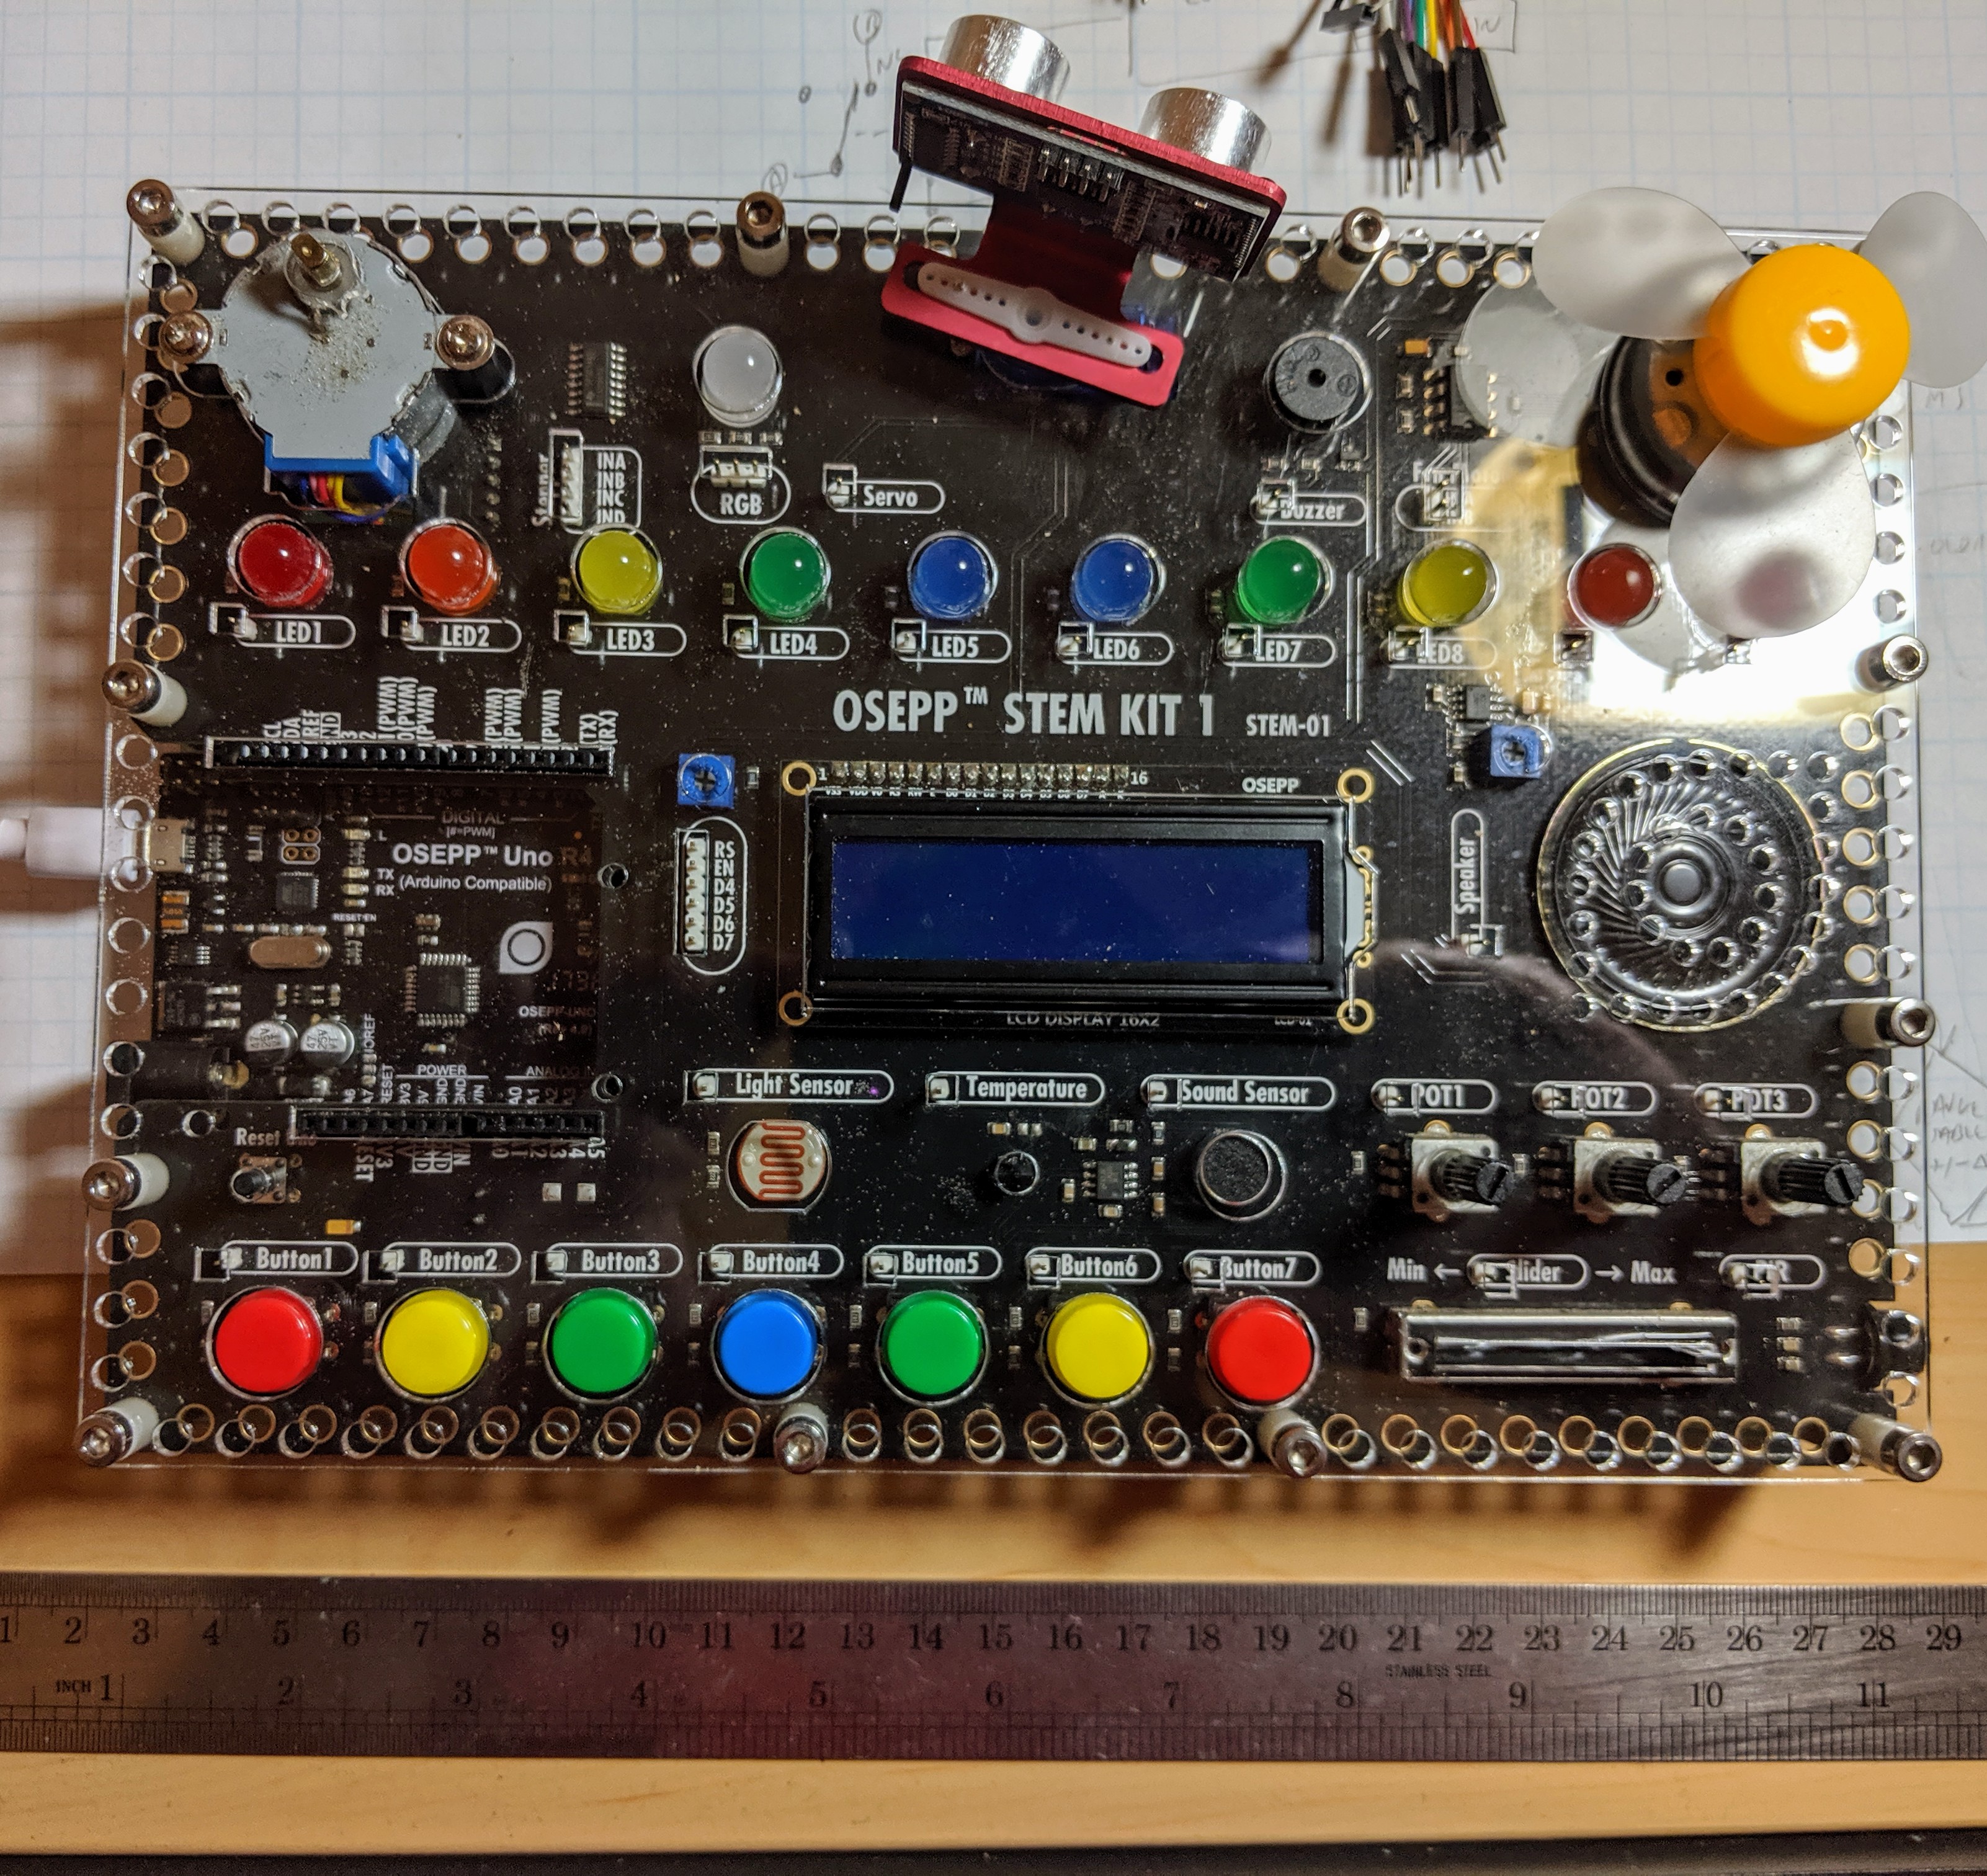
As the name implies, the OSEP STEM board is an embedded project board primarily aimed at education. You use jumper wires to connect components and a visual block coding language to make it go.
I have fond memories of kits from companies like Radio Shack that had dozens of parts on a board, with spring terminals to connect them with jumper wires. Advertised with clickbait titles like “200 in 1”, you’d get a book showing how to wire the parts to make a radio, or an alarm, or a light blinker, or whatever.
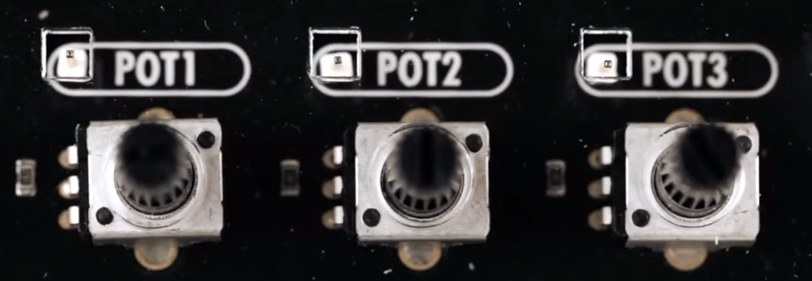
The STEM Kit 1 is sort of a modern arduino-powered version of these kits. The board hosts a stand-alone Arduino UNO clone (included with the kit) and also has a host of things you might want to hook to it. Things like the speakers and stepper motors have drivers on board so you can easily drive them from the arduino. You get a bunch of jumper wires to make the connections, too. Most things that need to be connected to something permanently (like ground) are prewired on the PCB. The other connections use a single pin. You can see this arrangement with the three rotary pots which have a single pin next to the label (“POT1”, etc.).
I’m a sucker for a sale, so when I saw a local store had OSEPP’s STEM board for about $30, I had to pick one up. The suggested price for these boards is $150, but most of the time I see them listed for about $100. At the deeply discounted price I couldn’t resist checking it out.
So does an embedded many-in-one project kit like this one live up to that legacy? I spent some time with the board. Bottom line, if you can find a deal on the price I think it’s worth it. At full price, perhaps not. Join me after the break as I walk through what the OSEPP has to offer.
What’s Onboard?
There are plenty of input and output devices:
7 Push Buttons
Potentiometers (3 rotary and 1 slide)
Passive Infrared Sensor (PIR)
Light Sensor
Sound Sensor
LM35 Temperature Sensor
10 LEDs (various colors)
Servo Motor
Stepper Motor
DC Motor
LCD Display
Buzzer
Speaker
RGB LED
In addition, the kit comes with an ultrasonic distance sensor in a little bracket that can connect to the stepper motor. That’s the only part that needs power and ground that isn’t already wired up.
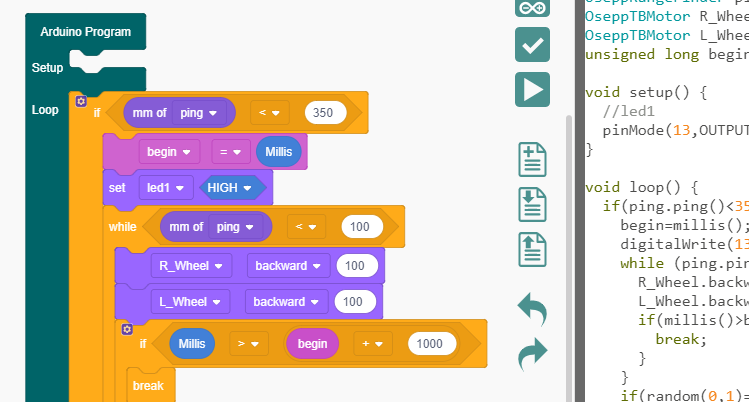
Because the heart of the board is an Arduino UNO clone, you can do anything you like to program it. However, OSEPP touts their visual block diagram language that is basically Scratch. You can use it for free on most platforms and there is even a Web-based version although it can’t download code. It looks like Scratch or other block-oriented systems you’ve seen before.
I’m not usually fond of the visual block languages, but this one at least shows you the actual Arduino code it generates, so that isn’t bad. But you can still use any other method you like such as the standard IDE or PlatformIO.
You can see a video about the board, below.
The Good and the Bad
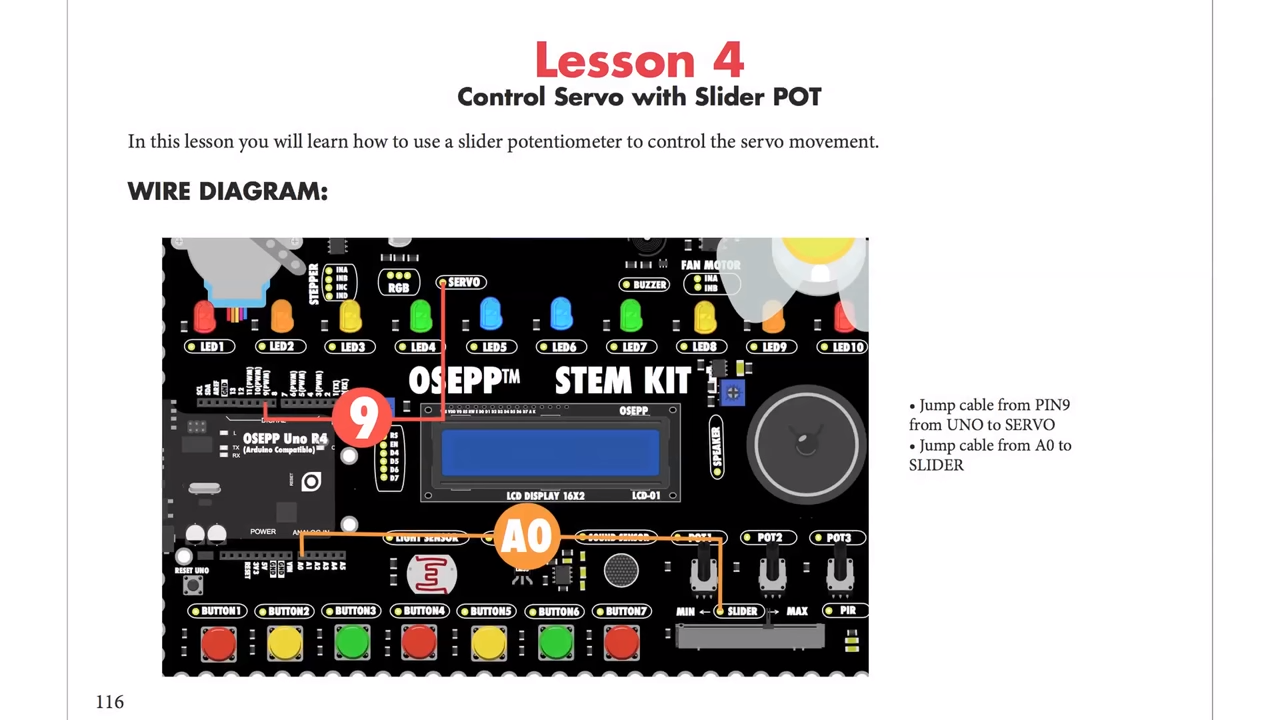
The board feels substantial and able to withstand a good bit of abuse. There’s a good range of components, and I like that the arduino is a real daughter board and not just built onto the PCB. Despite using the block language, I do like the tutorial booklet. It is very slick and has projects ranging from an IR doorbell to a mini piano. You can see a page below — very colorful and clear.
Of course, the suggested retail price of $150 is a bit offputting. You might think a breadboard with a handful of LEDs and other parts would be a much lower-cost option but just look around for arduino kits for beginners and you’ll find prices are all over the place. On the other hand, with a parts kit you would have to know how to wire up things like stepper motors or DC motors, so there is some value to having it already done for you. There’s also value in not having a bag of parts to misplace.
The jumper wires in the kit have pins on one side and sockets on the other. The pins go into the Arduino’s connector and the sockets go over pins on the components. These aren’t quite as reliable as a spring clip and not as versatile either.
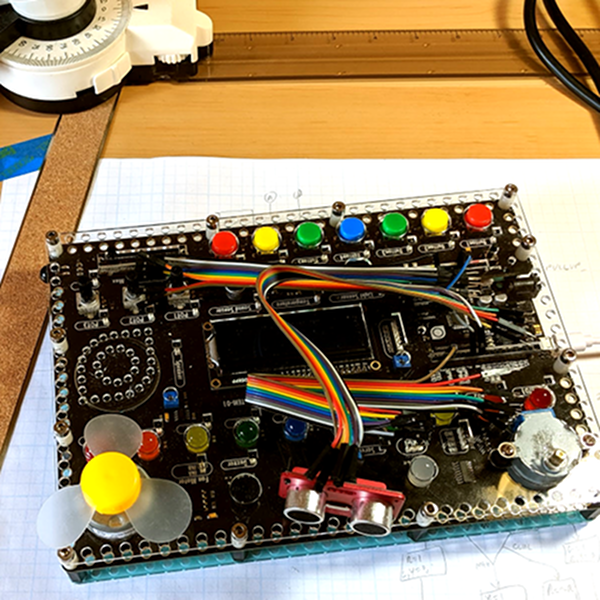
In my mind the worst part of the kit design is that the pins are right next to each of the components. That’s good for understanding, but it makes a mess of wiring. For instance, there are ten LEDs, and connecting them all means stretching jumper wires to both edges of the board The jumpers aren’t very long either, so any complex project is going to have wires crisscrossing the sensors and LCD.
Granted, in this image I could have removed some of the wires from the bundles but that wouldn’t help that much, either. If you need to hook up more than a few of the available components you will have a mess. I would have put some sort of spring clip or even screw terminals and put them all on the top and bottom of the board with clear color-coded marking about where they connect. Then the wiring would all be out of the way. There are probably a few other ways they could have gone, and at this price, they could afford the few extra inches on the PCB.
There are a few other things that would have been nice touches to finish off this kit. I would have enjoyed a short chapter in the booklet about using the Arduino IDE directly so that people know it exists. And having even a small breadboard attached for your own exploration would make sense, but would then call for a different type of jumper wire.
Short Example Using the Distance Sensor
I wanted to do something with the board so I decided to play with the distance sensor and the servo. The distance sensor is a bit annoying both because you have to wire it all up and it has a tendency to fall off when you transport the board.
The demo (you can find it online) won’t win any originality prizes. The program moves the servo to scan from 0 to 180 degrees in 5 degree increments. It measures the distance of what’s in front of it. When it completes a scan, if it saw something close (you could adjust the sensitivity), it moves the sensor back to that position and waits 30 seconds. Otherwise, it keeps scanning.
Really, this is no different from any other Arduino program. That’s kind of the point. Despite the emphasis in the book on the point-and-click language, this is really just an Arduino.
In Summary
For the deep sale price I found, the board will work well for its intended audience of students or anyone starting out with Arduino or microcontrollers. Even a more advanced audience who just wants a way to hammer out a quick prototype might find it worth the $30 or $40 you can sometimes pay. But at full price, it is hard to imagine this makes sense because of the mess of wire routing and limited expansion options.
Con el fin de apoyar a los nuevos participantes del Desafío STEM 2017, Arduino y Telefónica se han unido para crear una serie de tres podcast, abiertos al público en general, conducidos por David Cuartielles.
Desafío STEM es un concurso interescolar que fomenta el desarrollo de competencias tecnológicas, creado por Telefónica Educación Digital para impulsar la implantación de nuevas formas de aprender a través de dinámicas motivadoras y fomentar las vocaciones STEM.
Durante los podcast se abordarán los siguientes temas:
Primer podcast: 15 de Noviembre
Cómo crear proyectos creativos usando tecnología digital.
Segundo podcast: 22 de Noviembre
Identificación de problemas técnicos en la creación de proyectos.
Tercer podcast: 5 de Diciembre
Nuevos usos de tecnología en el aula.
La duración de los podcast será de una hora comenzando a las 19: 00 GMT+1. Podrán seguir la transmisión del podcast en: http://verkstad.cc/urler/desafiostem
David responderá durante el podcast preguntas de la audiencia que se envíen antes de los podcast. Para enviar las preguntas, seguir el link que se presenta a continuación y llenar el formulario: http://verkstad.cc/urler/desafio-preguntas. También se podrá participar en twitter con el hashtag #desafiostempreguntas.
To support the new participants of Desafío STEM 2017, Arduino and Telefónica have come together to create a series of three open podcasts, conducted by David Cuartielles.
Desafío STEM is an interscholastic competition that promotes the development of technological competences, created by Telefónica Educación Digital to promote the implementation of new ways of learning to motivate and inspire students to pursue STEM vocations.
The following topics will be addressed:
First podcast: November 15
How to build creative projects using digital technology.
Second podcast: November 22
Identification and resolution of technical challenges in the creation of projects.
Third podcast: December 5th
New uses of technology in the classroom.
The duration of each podcast will be one hour starting at 19:00 GMT + 1. To follow along, please click on the following link: http://verkstad.cc/urler/desafiostem
David will answer questions from the audience during the podcast, which need to be sent beforehand via this link: http://verkstad.cc/urler/desafio-preguntas. Twitter users can also participate using the hashtag #desafiostempreguntas.
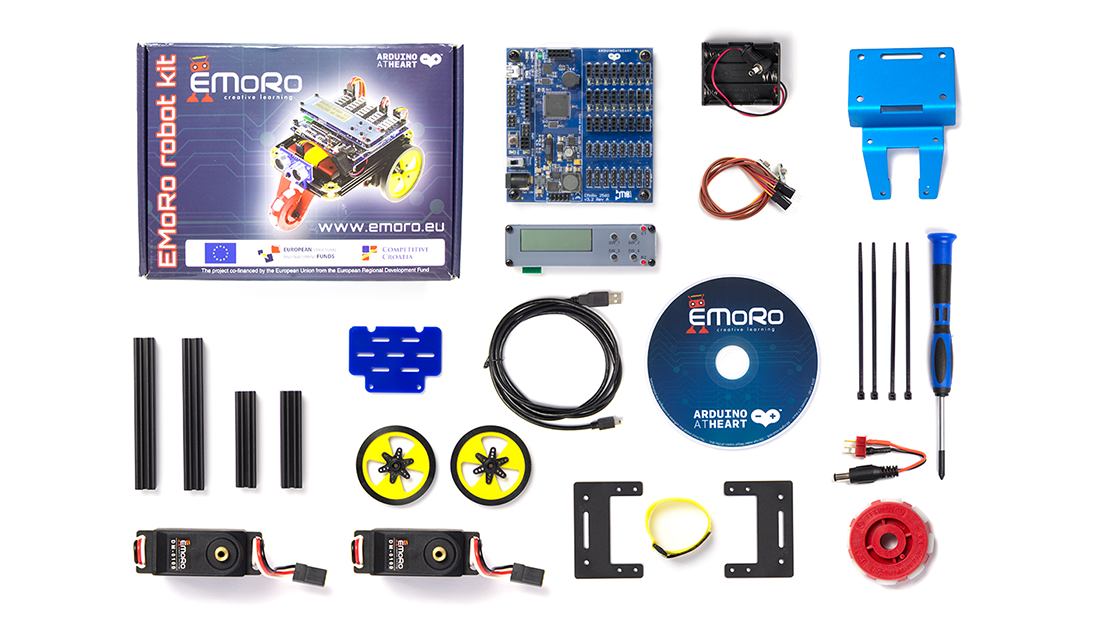
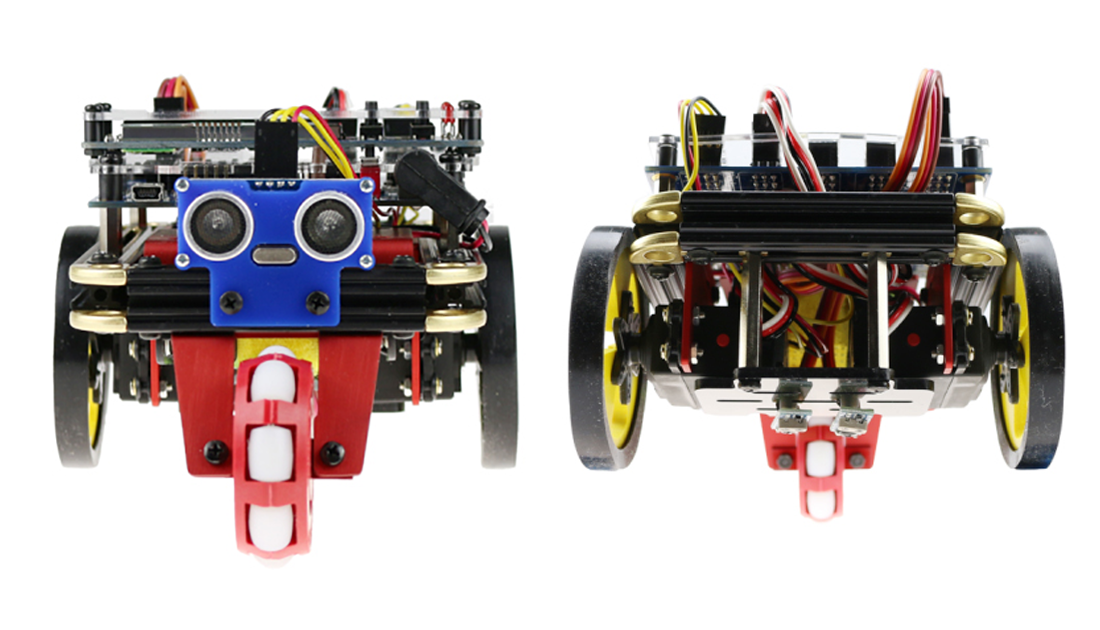
We’re excited to welcome Croatian startup Inovatic ICT and its EMoRo Kit to our AtHeart program!
EMoRo (Educational Mobile Robot) is an Arduino-compatible robot designed to encourage logical thinking and technical curiosity in a fun, engaging way. The solder-free DIY kit consists of a robust aluminum chassis along with easy-to-connect components like servos, sensors, and relays. It also supports other construction sets like LEGO Technic, Eitech, and Fischertechnik.
Based an ATmega250 board, EMoRo can be programmed using the Arduino IDE and upgraded with the addition of interchangeable modules, such as Bluetooth for Android device control, an LCD display, push buttons, and an accelerometer, gyroscope and compass for navigation. Built-in safety features include step-down regulators, thermal shutdowns, under-voltage lockouts, and cycle-by-cycle over-current protections–all of which make the EMoRo rugged enough for beginners, yet versatile enough for advanced Makers.
According to Boris Jakov Anic-Kurko, Inovatic ICT Managing Director:
EMoRo originated as a result of our vision to create a tool that would introduce the world of robotics to children and spark their interest in technology and programming. With that vision in mind, we have decided to use the programming platform Arduino, as the world’s most used and popular programming platform when it comes to programming small educational robots.
Interested in EMoRo for your next robotics competitions or as a tool in your STEAM class? You can now buy a kit here!
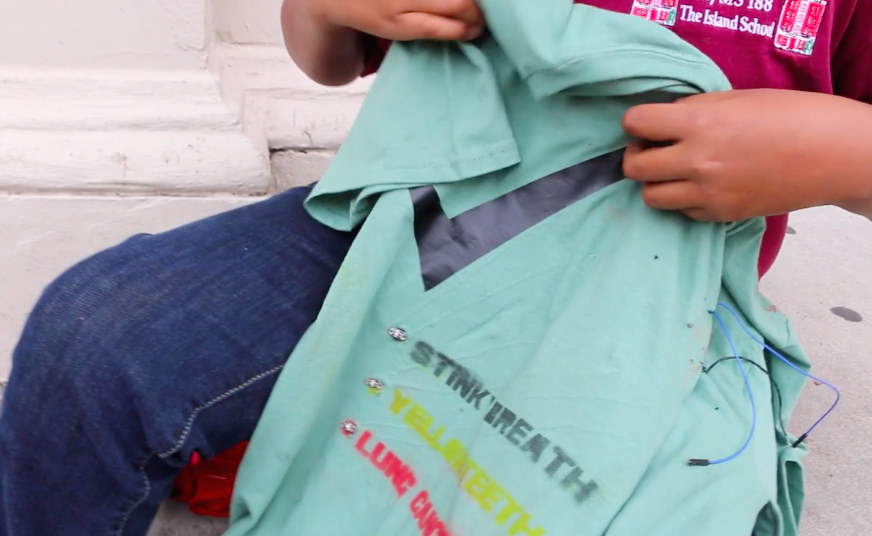
You’ve heard it before, smoking is bad for your health. However, despite the countless warnings, millions of people continue to use cigarettes–including 7th grade student Petter’s dad. Mindful of this, the young Maker came up with a new way to shame smokers into quitting.
The aptly named “Cigarette Smoke Detecting Shirt” consists of an Arduino LilyPad, a smoke sensor, and three LED sequins, all sewn into the t-shirt using conductive thread. When cigarette smoke is sensed, one of three different lights illuminate alongside a message to embarrass the wearer such as “stinky breath,” “yellow teeth,” or “lung cancer.”
In the future, Petter hopes to finish the prototype and start making more shirts to sell on Etsy. Whether or not this idea takes off, it’s pretty cool nonetheless. As Adafruit puts it, “This is such a fine example of a project that works on an issue and gets students excited about STEM.”
Planet Arduino is, or at the moment is wishing to become, an aggregation of public weblogs from around the world written by people who develop, play, think on Arduino platform and his son. The opinions expressed in those weblogs and hence this aggregation are those of the original authors. Entries on this page are owned by their authors. We do not edit, endorse or vouch for the contents of individual posts. For more information about Arduino please visit www.arduino.cc
You are currently browsing the archives for the stem category.