Posts | Comments

Planet Arduino

Archive for the ‘remote control’ Category

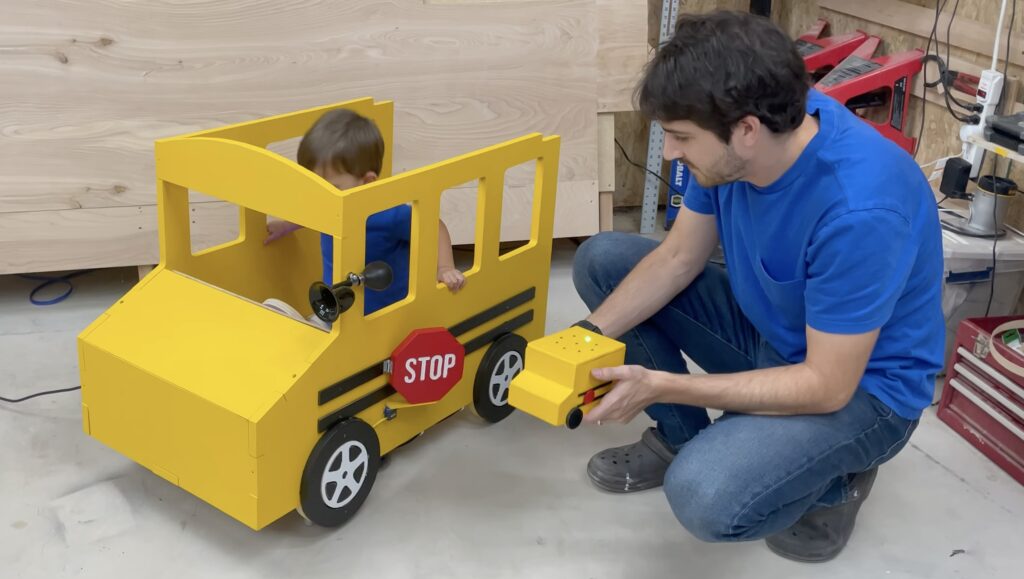
We all know that a child’s love can be bought. But how can working class parents compete with the lavish gifts that wealthy parents can afford? The answer is simple: by building toys that aren’t purchasable. Not only will a DIY gift have far more meaning, but it will impart a sense of superiority that comes from the knowledge that other parents can’t simply outspend you. That motivated Firth Fabrications to construct this school bus ride for his toddler.

This resembles one of those coin-operated rides that we used to see in front of every grocery store. The bright yellow wood school bus is big enough for a toddler to sit comfortably inside. When powered on, it begins rocking around on linear actuators. A dashboard inside the school bus gives the “driver” buttons and switches to play with, but they don’t actually move the vehicle. Instead, the linear actuators move according to commands sent by a remote control unit.

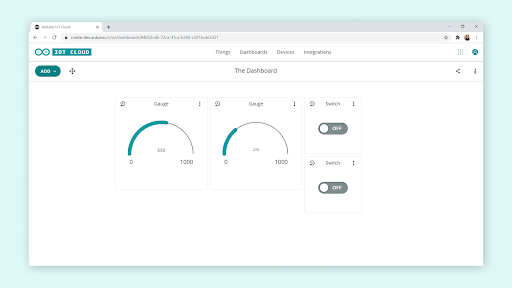
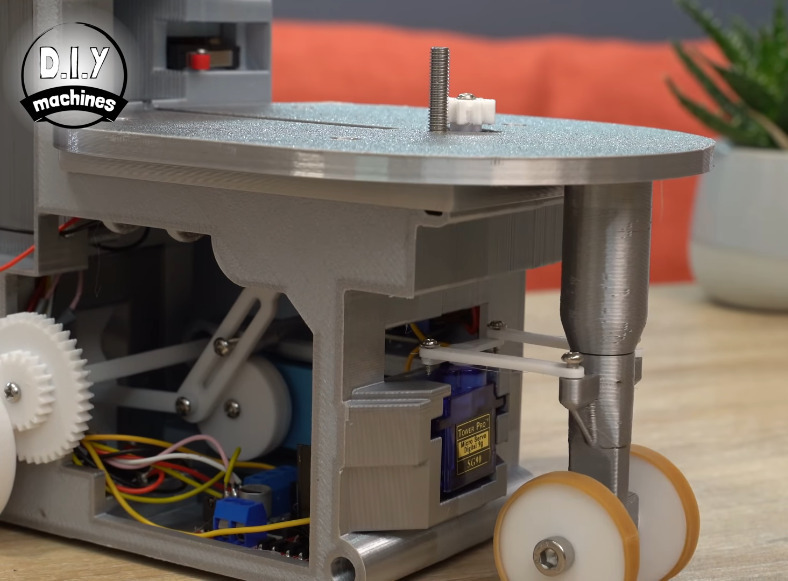
The remote looks like a small version of the school bus, which hints at its operation. It monitors its own orientation, then tells the linear actuators to move so that the ride matches. The remote unit contains an Arduino Nano board and an IMU module. It communicates with the Arduino Mega 2560 in the school bus via RF modules. Another Nano handles the dashboard functions, including swinging out the stop sign with a servo motor.

We have to assume that this gained Firth Fabrications far more love from his toddler than could ever be purchased with an off-the-shelf toy.

The post Building a school bus ride to buy a toddler’s love appeared first on Arduino Blog.

DSM (digital spectrum modulation) is a relatively new radio control technology that is ideal for long-range applications. It uses two methods, FHSS (frequency hopping spread spectrum) and DSSS (direct sequence spread spectrum), to transmit data, with the latter being especially resilient to interference and therefore suitable for transmission over long distances. If you want to take advantage of DSM for your robotics projects, James Bruton designed an open source transmitter that you can builds.

Bruton makes a lot of remotely operated robots, so he had a strong need for a good remote. His previous designs, while full of great features, didn’t have the kind of range that he wanted. So he created this new remote that incorporates DSM transmission technology. It contains two DSM transmitters to harness 20 individual channels. It uses those channels for four joysticks (each with three axes), four toggle switches, and four momentary push buttons. Together, those are enough to control even the most complicated robots.

Inside the remote’s 3D-printed enclosure is an Arduino Mega 2560 board. It monitors the various controls and outputs the data to a pair of OrangeRX 2.4GHz DSMX transmitters. It also outputs the battery voltage to a small three-digit, seven-segment display. Power comes from four 18650 lithium battery cells. This remote will work with any compatible DSM receiver, which are affordable and easy to integrate into a project, as they operate like a standard RC receiver.

The post An awesome new open source long-range RC transmitter appeared first on Arduino Blog.

IR Remote tester in use, showing a remote control lighting up an LED and screenshots of the Arduino serial terminal

Even though some devices now use WiFi and Bluetooth, so much of our home entertainment equipment still relies on its own proprietary infrared remote control. By and large (when you can find them) they work fine, but what happens when they stop working?  First port of call is to change the batteries, of course, but once you’ve tried that what do you do next? [Hulk] has your back with this simple but effective IR Remote Tester / Decoder.

IR remote tester schematic showing arduino, receiver, LED and resistor
How to connect the TSOP4838 to an Arduino to read the transmitted codes

By using a cheap integrated IR receiver/decoder device (the venerable TSOP4838), most of the hard work is done for you! For a quick visual check that your remote is sending codes, it can easily drive a visible LED with just a resistor for a current-limit, and a capacitor to make the flickering easier to see.

For an encore, [Hulk] shows how to connect this up to an Arduino and how to use the “IRremote” library to see the actual data being transmitted when the buttons are pressed.

It’s not much of a leap to imagine what else you might be able to do with this information once you’ve received it – controlling your own projects, cloning the IR remote codes, automating remote control sequences etc..

It’s a great way to make the invisible visible and add some helpful debug information into the mix.

We recently covered a more complex IR cloner, and if you need  to put together a truly universal remote control, then this project may be just what you need.

All too often, people run into the issue of having many remotely controlled devices scattered around their house, with each requiring its own unique controller. The idea behind how they operate is simple: a single action corresponds to a number and pressing a button on the controller causes that number, along with some extra data, to be modulated via an infrared LED which reaches the device’s receiver. Finally, this value is decoded and the action is executed. 

In order to combine all of these differing code patterns into a single place, YouTuber Endpoint101 decided to use an Arduino Nano plus an infrared receiver and separate emitter to act as a translator for an Amazon Fire TV remote, creating a truly universal remote control. Whenever a new device is being added, he must first press the button on the target device’s controller, which can be anything from a direction, media playback, or a volume adjustment, where it’s then read by the Nano and stored. The last step is essentially creating a map between the already known codes from the Fire TV remote and setting them equal to the desired code. 

With this system, Endpoint101 can now activate any device he wants with just a single remote controller rather than having to search endlessly for the right one. To see more about this project, watch the video below!

The post Controlling any IR device with a remote and some hacking appeared first on Arduino Blog.

Modern television remote controls have a massive number of buttons compared to their more primitive predecessors, and because of this, seniors can struggle with knowing which button to press and when as well as having difficulties seeing the small text. This problem inspired Instructables user omerrv to create a device that he calls the Sababox, which contains just a few large, easily-pressable buttons for simple use.

The Sababox is equipped with an Arduino Nano at its core, which is connected to a grid of 14 momentary pushbutton switches. A separate circuit was also made from a Nano and IR receiver module that can read incoming infrared pulses from a remote and record them for later use. For instance, a volume up command contains a series of values which are then placed into the code for the Sababox’s Nano. When a user goes to press the larger “VOL +” button, that same command is relayed to the target device. One other nice feature of the Sababox is that it can be used to control more than one device, and omerrv currently has TV, radio, and air conditioner commands for his. 

After the electronic circuit and programming had been completed, the whole assembly was placed into a large 3D-printed enclosure along with the necessary buttons and labels.

After the electronic circuit and programming had been completed, the whole assembly was placed into a large 3D-printed enclosure along with the necessary buttons and labels. To read more about how the Sababox was built, you can view its write-up here on Instructables.

The post Sababox is an easy-to-use remote for the elderly appeared first on Arduino Blog.

If you are lucky, you’ve never experienced the heartbreak of watching a loved one lose their ability to do simple tasks. However, as hackers, we have the ability to customize solutions to make everyday tasks more accessible. That’s what [omerrv] did by creating a very specific function remote control. The idea is to provide an easy-to-use interface for the most common remote functions.

This is one of those projects where the technology puzzle is now pretty easy to solve: IR remotes are well-understood and there are plenty of libraries for recording and playing back signals. The real work is to understand the user’s challenges and come up with a workable compromise between something useful and something too complex for the user to deal with.

Fortunately, with all the prototyping tools readily available now, it is easy to experiment with different setups to see what would work best. Larger keys? Color coding? A different arrangement of buttons? All of those things are easy to experiment with and, of course, what works for one person might not work for another. Even given time, it is possible that different configurations will work better or worse for the same person.

It isn’t likely that you’d duplicate [omerrv’s] remote directly. It may not work for your purpose. But it is a good inspiration on how we can use our ability to create customized hardware to improve the quality of life for those who need help.

We’ve seen similar projects — each one is a bit different. We wonder if old-fashioned remotes with their natural limitations would be a bit easier for people to handle?

What’s this? Another fabulous creation from [Niklas Roy] and [Kati Hyyppä] that combines art and electronics with our zeitgeist and a lot of recycled bits and bobs? You got it. Their workshop in eastern Berlin used to be a retail shop and has a large display window as a result. This seems perfect for a pair of artists in a pandemic, because they can communicate with the community through the things they display in the window. Most recently, it was this interactive cyborg baby we are choosing to call Cybaby.

You might recognize Cybaby as one of the very hackable Robosapien robots, but with a baby doll head. (It also has a single red eye that really pulls its look together.) In the window, Cybaby comes alive and toddles around against a backdrop that grew and evolved over several weeks this spring and summer. Passersby were able to join the network and control Cybaby from outside with their smartphone to make it walk around, press various buttons that change its environment, and trigger a few sensors here and there. Robosapien has been around for about 20 years, so there is already Arduino code out there that essentially simulates its R/C signals. [Niklas] and [Kati] used a NodeMCU (ESP12-E) to send pulses to the IR input of the robot.

Back on the zany zeitgeist front, there’s a hair salon, a convenience store, and a nightclub for dancing that requires a successful trip through the testing center first (naturally). Oh, and there’s a lab next door to the nightclub that can’t be accessed by Cybaby no matter what it tries or how it cries. Check it out after the break.

There’s a dearth of Robosapien posts for some reason, so here’s what [Niklas] and [Kati] had in their window before the World of Cybaby — a really cool pen plotter that prints out messages sent by people walking by.

The TV-B-Gone is a well known piece of kit in hacker circles: just point it at a noisy TV in a public space, hit the button, and one of the hundreds of IR remote codes for “Power Off” that it blinks out in rapid succession is more than likely to get the intended response. Unfortunately, while a neat conversation starter, its practical use is limited to a single function. But not so with this programmable IR development board that creator [Djordje Mandic] describes as a “TV-B-Gone on steroids”.

Sure you can point it at a random TV and turn it off with a single button press, but you can also plug the board into your computer and control it directly through the serial connection provided by its CP2104 chip. Using a simple plain-text control protocol, the user can modify the behavior of the device and monitor its status. [Djordje] imagines this feature being used in conjunction with a smartphone application for covert applications. To that end, the device’s support for an onboard battery should keep it from draining the phone during extended operations.

Of course you could do something else entirely with it simply by firing up the Arduino IDE and writing some new code for the device’s ATmega328P microcontroller. As with the IR-enabled ESP8266 development board we looked at a few months ago, there are plenty of applications for an all-in-one board that allows you to communicate with the wide world of IR devices.

There’s a brand new device-to-device communication feature available now in the Arduino IoT Cloud. It’s something we’ve been working on for a long time. So we’re excited to see how it’ll add a whole new connected dimension to your Arduino projects.

Arduino IoT Cloud thing to thing communication

What is “Device-to-Device”? Communication?

Internally we’ve been looking at this feature as “device-to-device” communication. It will allow your Arduino devices to send wireless messages to each other, without writing a single line of code or spending time with radio modules and network protocols.

Using this feature you can link variables of the same data type between two or more cloud-enabled devices. For example, one button could set three smart bulbs to the same color. Or you could turn on a heater when temperature sensors in your room or outside in your weather station drop below a certain level. Being able to sync variables gives you an intelligent way to control multiple devices very easily.

Whether you use an Oplà IoT Kit, a MKR WiFi 1010, a Nano 33 IoT or an (upcoming!) Nano RP2040 Connect, you can configure everything from the web interface. After configuration, any changes you make to variables on one device will be reflected promptly on the other(s). This creates a seamless, powerful and secure two-way communication with almost no effort on your part, and no code required. The Arduino IoT Cloud handles authentication, security, network disruptions and any other tricky parts. 

What Does This Mean For Your Projects and Devices?

It means there are lots of options with thing-to-thing communication (also known as variable synchronization):

  • Collect sensor readings from remote devices.
  • Actuate devices remotely. For instance, pressing a button on one Arduino turns on an LED or motor on another.
  • Create a distributed algorithm where multiple devices collaborate with each other.

Are you thinking about home automation? Interactive installations? Monitoring and controlling machines from a wireless panel? This powerful new feature makes all those things easy to achieve for makers of all abilities.

Arduino Cloud thing to thing dashboard.

Combined with IoT Cloud’s dashboards this delivers a powerful new way to build incredible automations with minimal (if any) changes. Furthermore, it gives you smartphone control of your connected boards via the existing Arduino IoT Remote iOS and Android apps.

If you want to be one of the first to try it out, grab an Arduino IoT Cloud subscription. After that, just make sure you’re signed up to the Arduino newsletter to hear about other new features.

The post It’s easier than ever to add two-way communication to Arduino devices appeared first on Arduino Blog.

Oh, dominoes — the fun of knocking them down is inversely proportional to the pain of setting them all up again. [DIY Machines] is saving loads of time by automating the boring part with a remote control domino-laying machine. If only it could pick them back up.

This machine can be driven directly over Bluetooth like an R/C car, or programmed to follow a predetermined path via Arduino code. Here’s how it works: an Arduino Uno drives two servos and one motor. The 1:90 geared motor drives the robot around using a 180° servo to steer. A continuous servo turns the carousel, which holds nearly 140 dominoes. We love that the carousel is designed to be hot-swappable, so you can keep a spare ready to go.

[DIY Machines] really thought of everything. Every dozen or so dominoes, the machine leaves a gap in case one of the dominoes is tipped prematurely. There are also a couple of accessories for it, like a speedy domino loading stick and a fun little staircase bridge to add to your domino creations. Though all the machine files are freely available, [DIY Machines] requests a small donation for the accessories files. Check out the complete build video after the break, followed by a bonus video that focuses on upgrading the machine with an HM10 Bluetooth module for controlling it directly with a phone.

This certainly isn’t the first domino-laying device we’ve seen, though it might be the most accessorized. [Matthias Wandel]’s version uses only one motor to move and deal the dominoes.


  • Newsletter

    Sign up for the PlanetArduino Newsletter, which delivers the most popular articles via e-mail to your inbox every week. Just fill in the information below and submit.

  • Like Us on Facebook