Posts | Comments

Planet Arduino

Archive for the ‘program’ Category

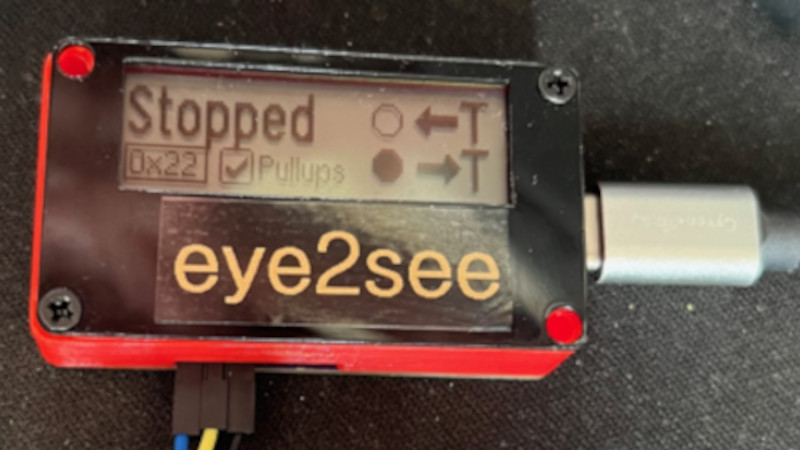
For as popular as the Arduino platform is, it’s not without its problems. Among those is the fact that most practical debugging is often done by placing various print statements throughout the code and watching for them in the serial monitor. There’s not really a great way of placing breakpoints or stepping through code, either. But this project, known as eye2see, hopes to change that by using the i2c bus found in most Arduinos to provide a more robust set of debugging tools.

The eye2see software is set up to run on an Arduino or other compatible microcontroller, called the “probe”, which is connected to the i2c bus on another Arduino whose code needs to be debugged. Code running on this Arduino, which is part of the eye2see library, allows it to send debugging information to the eye2see probe. With a screen, the probe can act as a much more powerful debugger than would otherwise typically be available, being able to keep track of variables in the main program, setting up breakpoints, and outputting various messages on its screen.

The tool is not without its downsides, though. The library that needs to run on the host Arduino slows down the original program significantly. But for more complex programs, the tradeoff with powerful debugging tools may be worth it until these pieces of code can be removed and the program allowed to run unencumbered. If you’d like to skip needing to use a second Arduino, we’ve seen some other tools available for debugging Arduino code that can run straight from a connected PC instead.

Evil geniuses usually have the help of some anonymous henchmen or other accomplices, but for the rest of us these resources are usually out of reach. [Evan], on the other hand, is on his way to a helpful army of minions that will do his bidding: he recently built a USB-powered minion that turns a regular PS/2 mouse and keyboard into a Bluetooth mouse and keyboard.

[Evan] found his minion at a McDonald’s and took out essentially everything inside of it, using the minion as a case for all of the interesting bits. First he scavenged a PS/2 port from an old motherboard. An Arduino Nano is wired to an HC-05 Bluetooth chip to translate the signals from the PS/2 peripherals into Bluetooth. The HC-05 chip is a cheaper alternative to most other Bluetooth chips at around $3 vs. $40 for more traditional ones. The programming here is worth mentioning: [Evan] wrote a non-interrupt based and non-blocking PS/2 library for the Arduino that he open sourced which is the real jewel of this project.

Once all the wiring and programming is done [Evan] can turn essentially any old keyboard and mouse into something that’ll work on any modern device. He also put an NFC tag into the minion’s head so that all he has to do to connect the keyboard and mouse is to swipe his tablet or phone past the minion.

If you’re looking for an interesting case for your next project, this McDonald’s Minion toy seems to be pretty popular. PS/2 keyboards are apparently still everywhere, too, despite their obsolescence due to USB. But there are lots of other ways to get more use out of those, too.


Filed under: Arduino Hacks
Sep
25

Automatic Bluetooth Module Programmer

arduino hacks, bluetooth, hc-05, jy-mcu, program, wireless hacks Comments Off on Automatic Bluetooth Module Programmer 

automatic-bluetooth-programming

Before we dive in don’t be confused by the title. This doesn’t flash firmware to the device. But it does automate the process of setting up the Bluetooth to serial module for use in your projects.

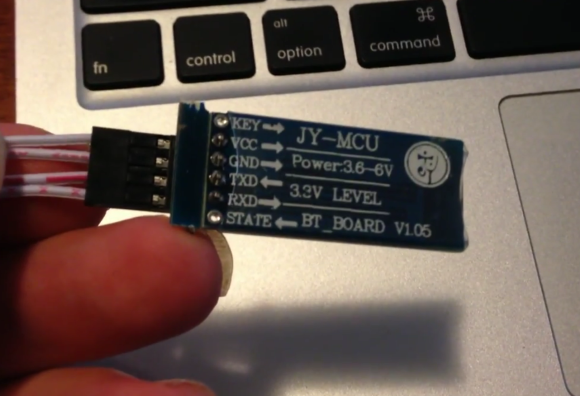
We’re often confused by the lack of a standard way of describing these inexpensive modules. We would look at this can call it an HC-05, but we’re not sure if that’s right or not. [James Daniel] calls it a JY-MCU board. If you have a handle on the differences (or lack of) please let us know in the comments. Either way we know that these boards can be frustrating to work with. They can be found with a wide variety of different firmwares, which can make the configuration process a bit different for each.

[James'] solution connects the device to an Arduino running a sketch that he wrote. Connect the device, launch the terminal monitor in the Arduino IDE, then give it your desired settings. The sketch will poll the Bluetooth module to see what speed it is set to run at. It will then establish which firmware version the board is running, displaying this info in the terminal. It then uses that information to program the board with your desired settings.

In this case [James] is using one of the modules to drive his 3D printer without being tethered to his laptop.

http://www.youtube.com/watch?v=WtPqC1PASQY


Filed under: Arduino Hacks, wireless hacks


  • Newsletter

    Sign up for the PlanetArduino Newsletter, which delivers the most popular articles via e-mail to your inbox every week. Just fill in the information below and submit.

  • Like Us on Facebook